Canva
Print-Ready File Creation: Canva
Checklist
- Create a design
- Input Custom Dimensions
- Add Bleed / Show Guides
- Warnings
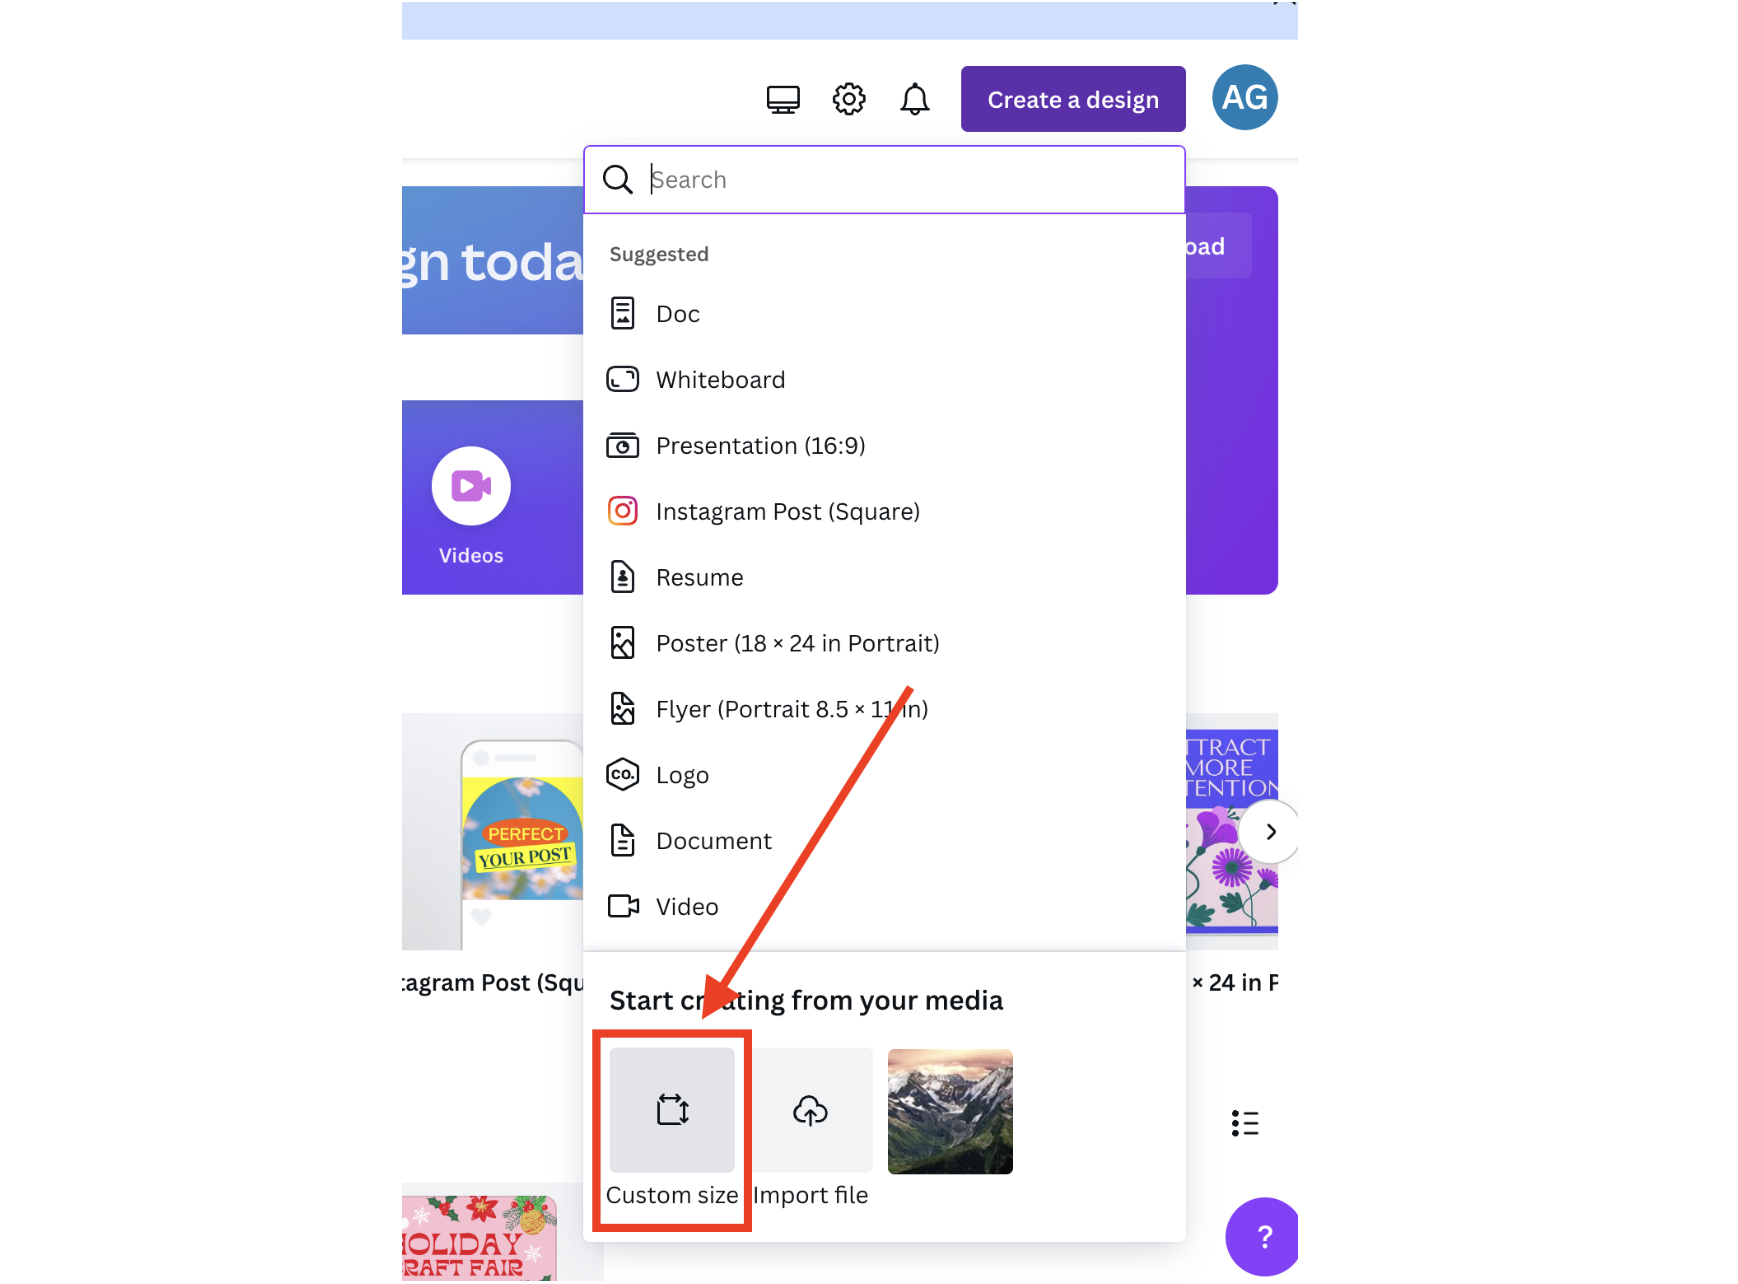
1. Create a design
Click “Create a design” in the top right corner.

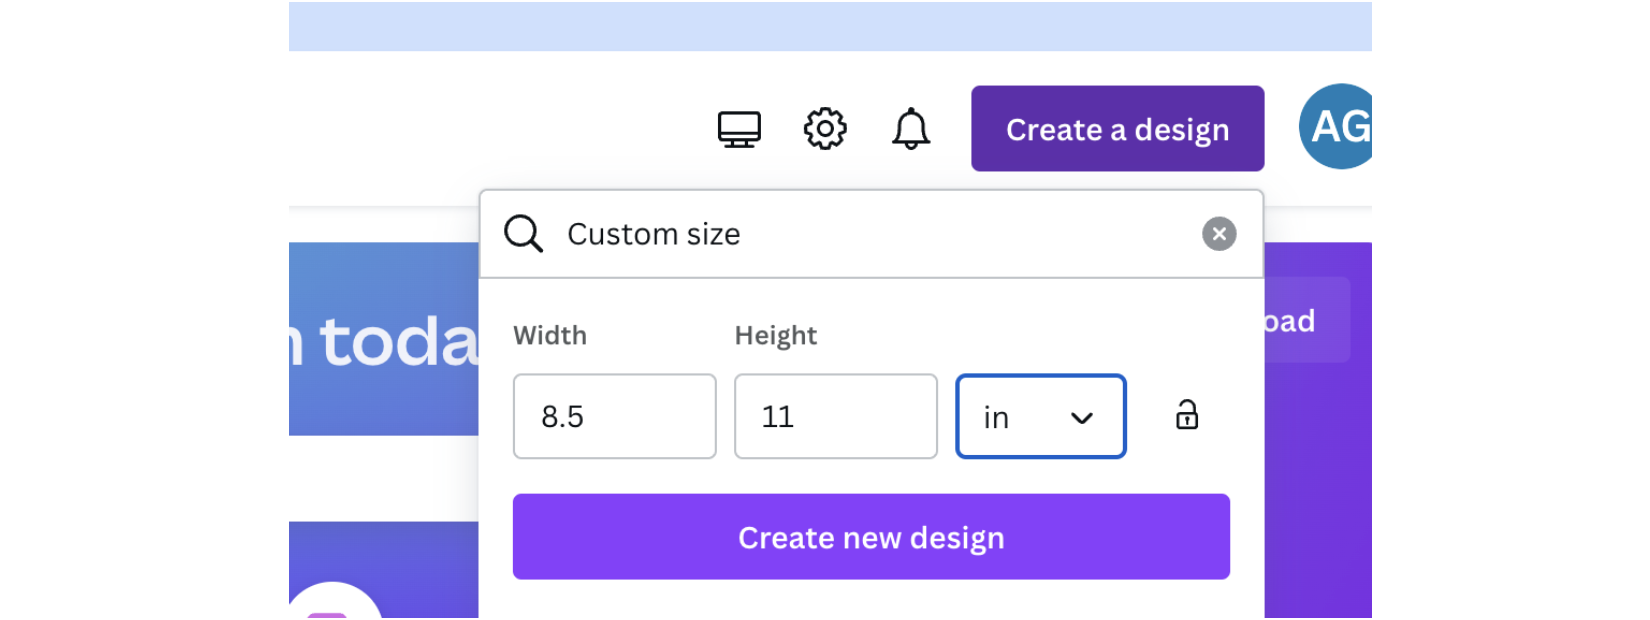
2. Input Custom Dimensions
Choose “Custom Size at the bottom of the dropdown.
Input the width and height of your desired size in inches (make sure your order matches this size) and click “Create new design”.
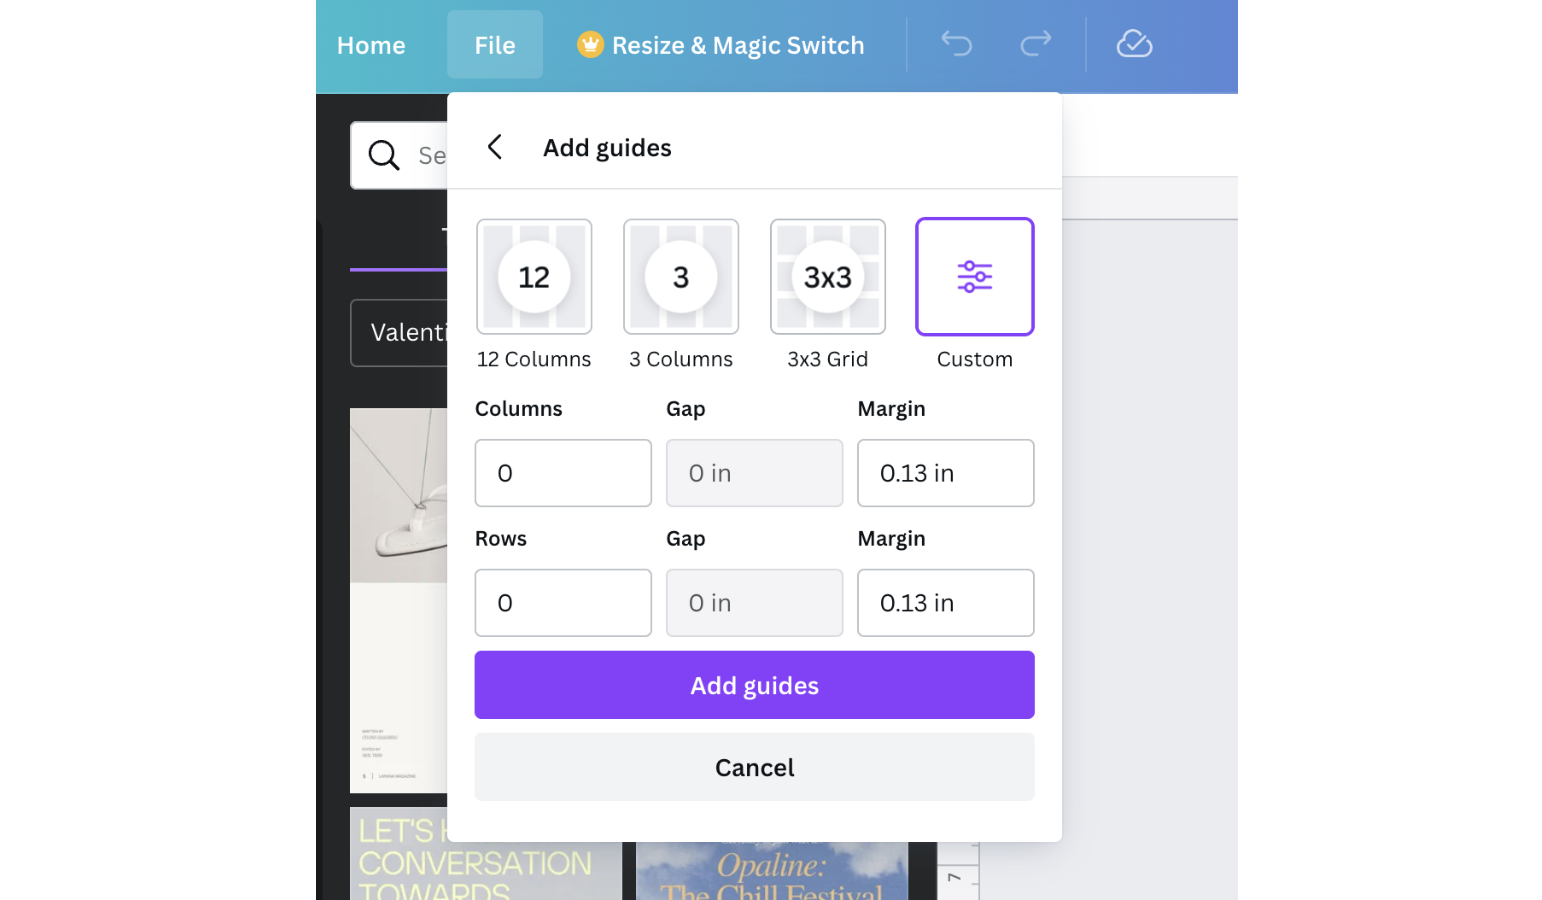
3. Add Bleed / Show Guides
On this page, before you begin designing, click “File” at the top left side of the screen. Click “View settings” and ensure the following options have a checkmark next to them: “Show rulers and guides”, and “Show print bleed”.

After this, click on File > View settings > “Add guides”.
In the next screen (shown below), under the “Margin” boxes, enter “0.13” for both boxes. Make sure the “Columns”, “Rows” AND “Gap” are all set to 0.
Click “Add guides”.
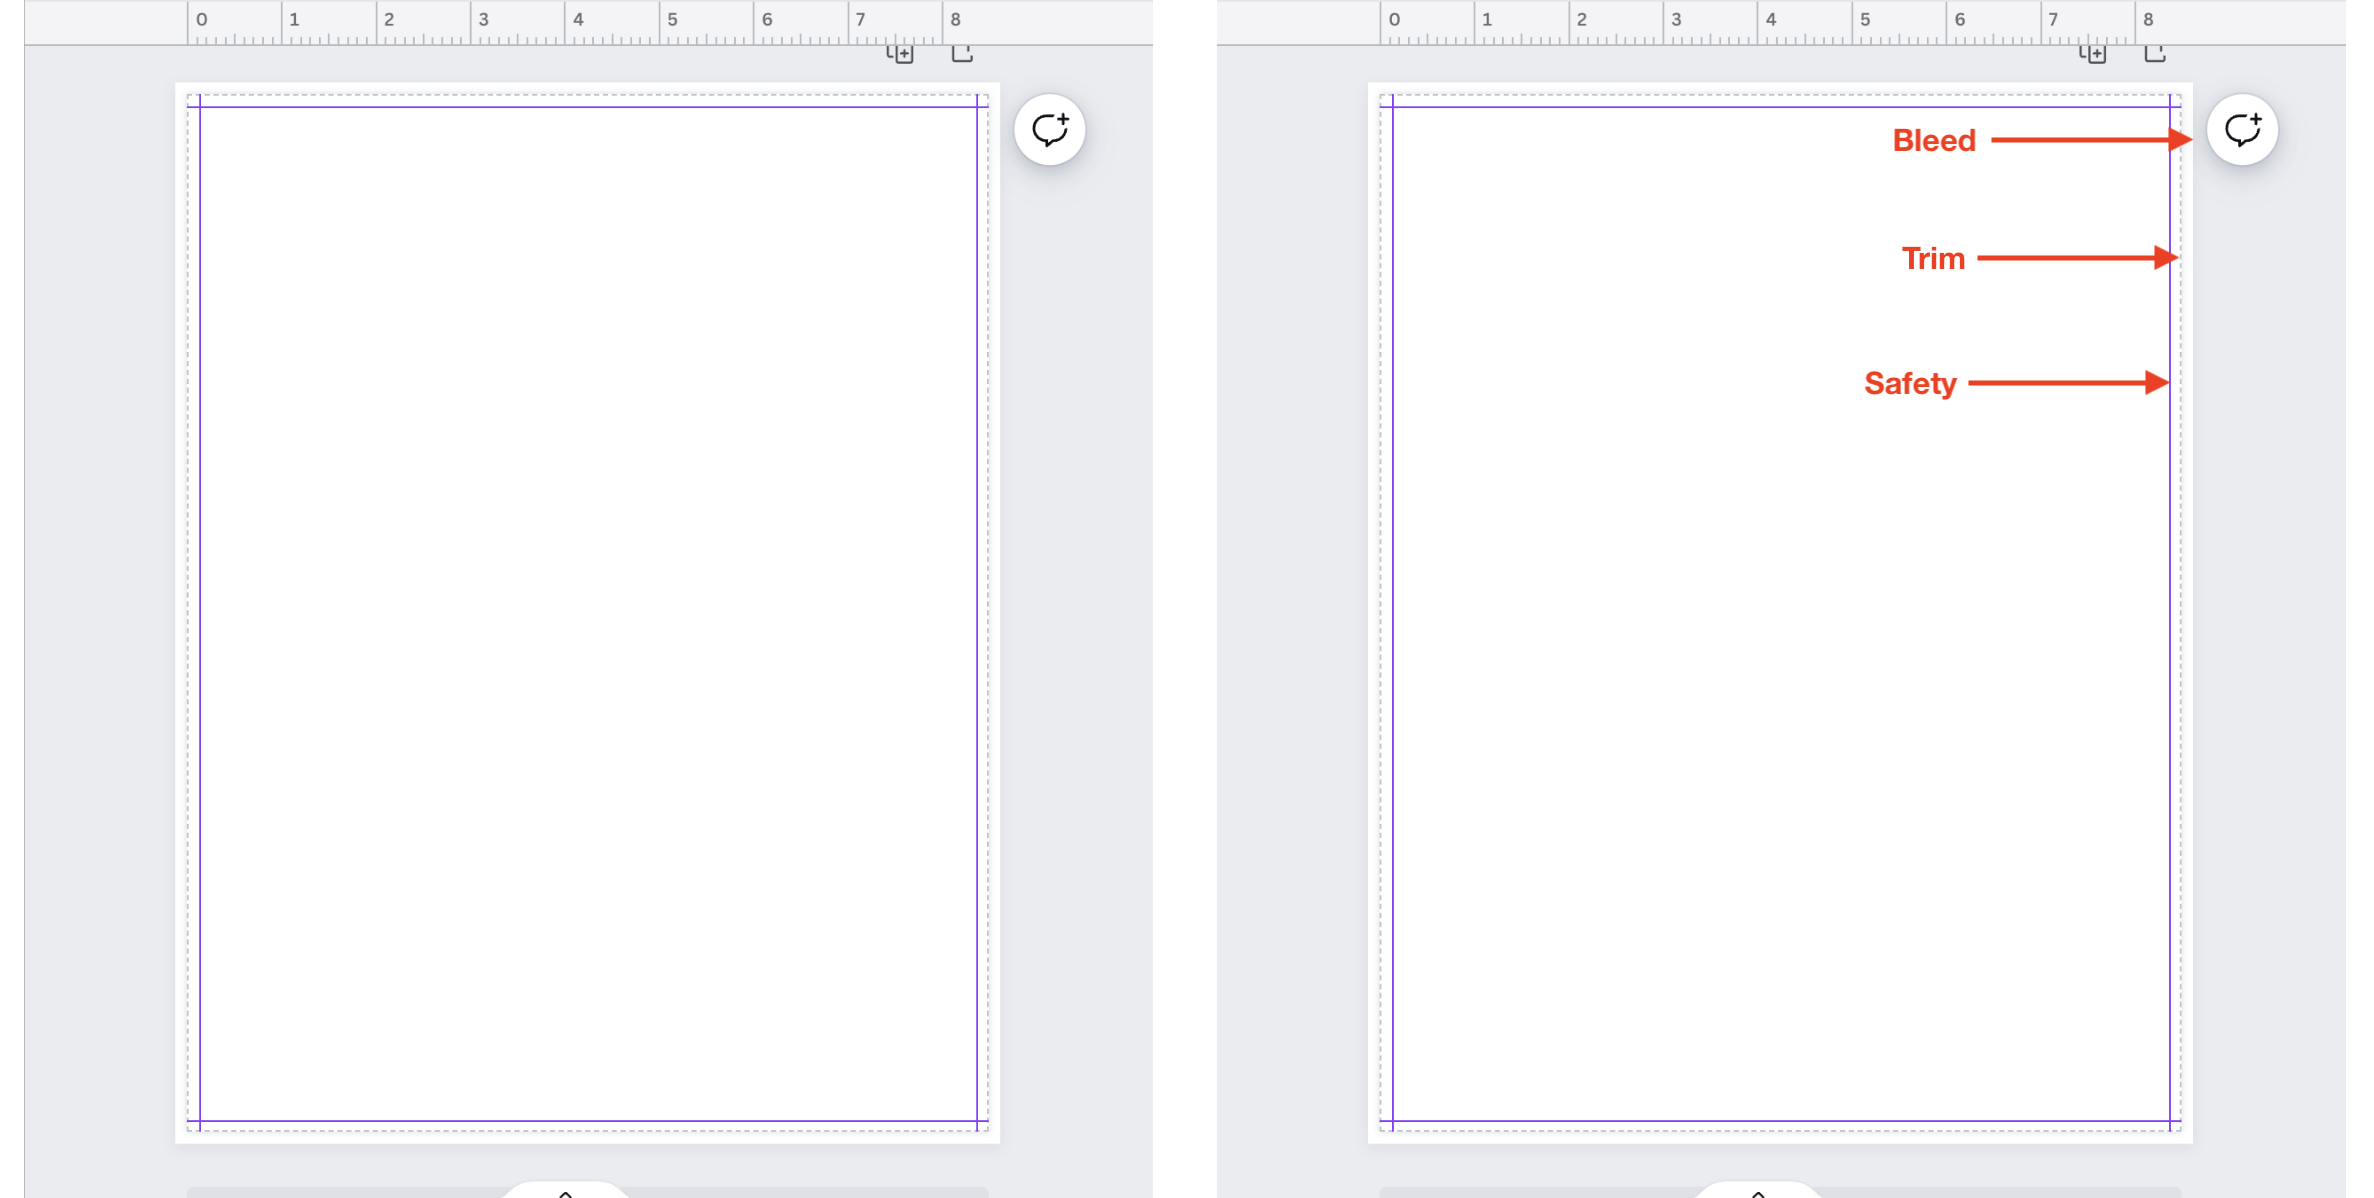
Your page should look similar to this:
4. Warnings
Since Canva is an online design tool that is not necessarily a program designed to create print-ready files, there are a few caveats to using this tool that you should be aware of.
- Margins: The margins are un-editable in Canva. The default size of these margins are much more than PrintingCenterUSA’s recommended 0.125 in. to mark your safety line. You do not need to keep all of your content within these margins. Do your best to keep in mind that the safe zone is the same size of the bleed, just within the document.
- Color: Canva does not provide a CMYK color option. All documents will automatically save as RGB. This may cause inconsistencies between your design and the printed product. Our prepress department will have to convert your RGB file to our CMYK printing profile. This may cause our prepress department to have to spend more time on your file.
- Crop Marks: PrintingCenterUSA does not recommend saving your PDF file with crop marks. However, Canva requires you to include crop marks if you want to include the bleed in your document. This may cause our prepress department to have to spend more time on your file.
- The more issues with your PDF, the longer our prepress department will spend on your file. You will be charged for the excess time spent fixing your files.
Now you’re ready to begin designing your product for print in Canva!
Please refer to our File Saving section for a tutorial on saving your project once you are done.