Illustrator
Print Ready File Creation: Illustrator
Checklist
- Download & Install Color Profile
- File > New
- Name
- Size
- Pages (Artboards)
- Bleeds
- Color Mode
- Safety Line
1. Download & Install PrintingCenterUSA Color Profile
First, download our color profile here. You will be downloading a .zip folder. Double click the file to unzip the folder.
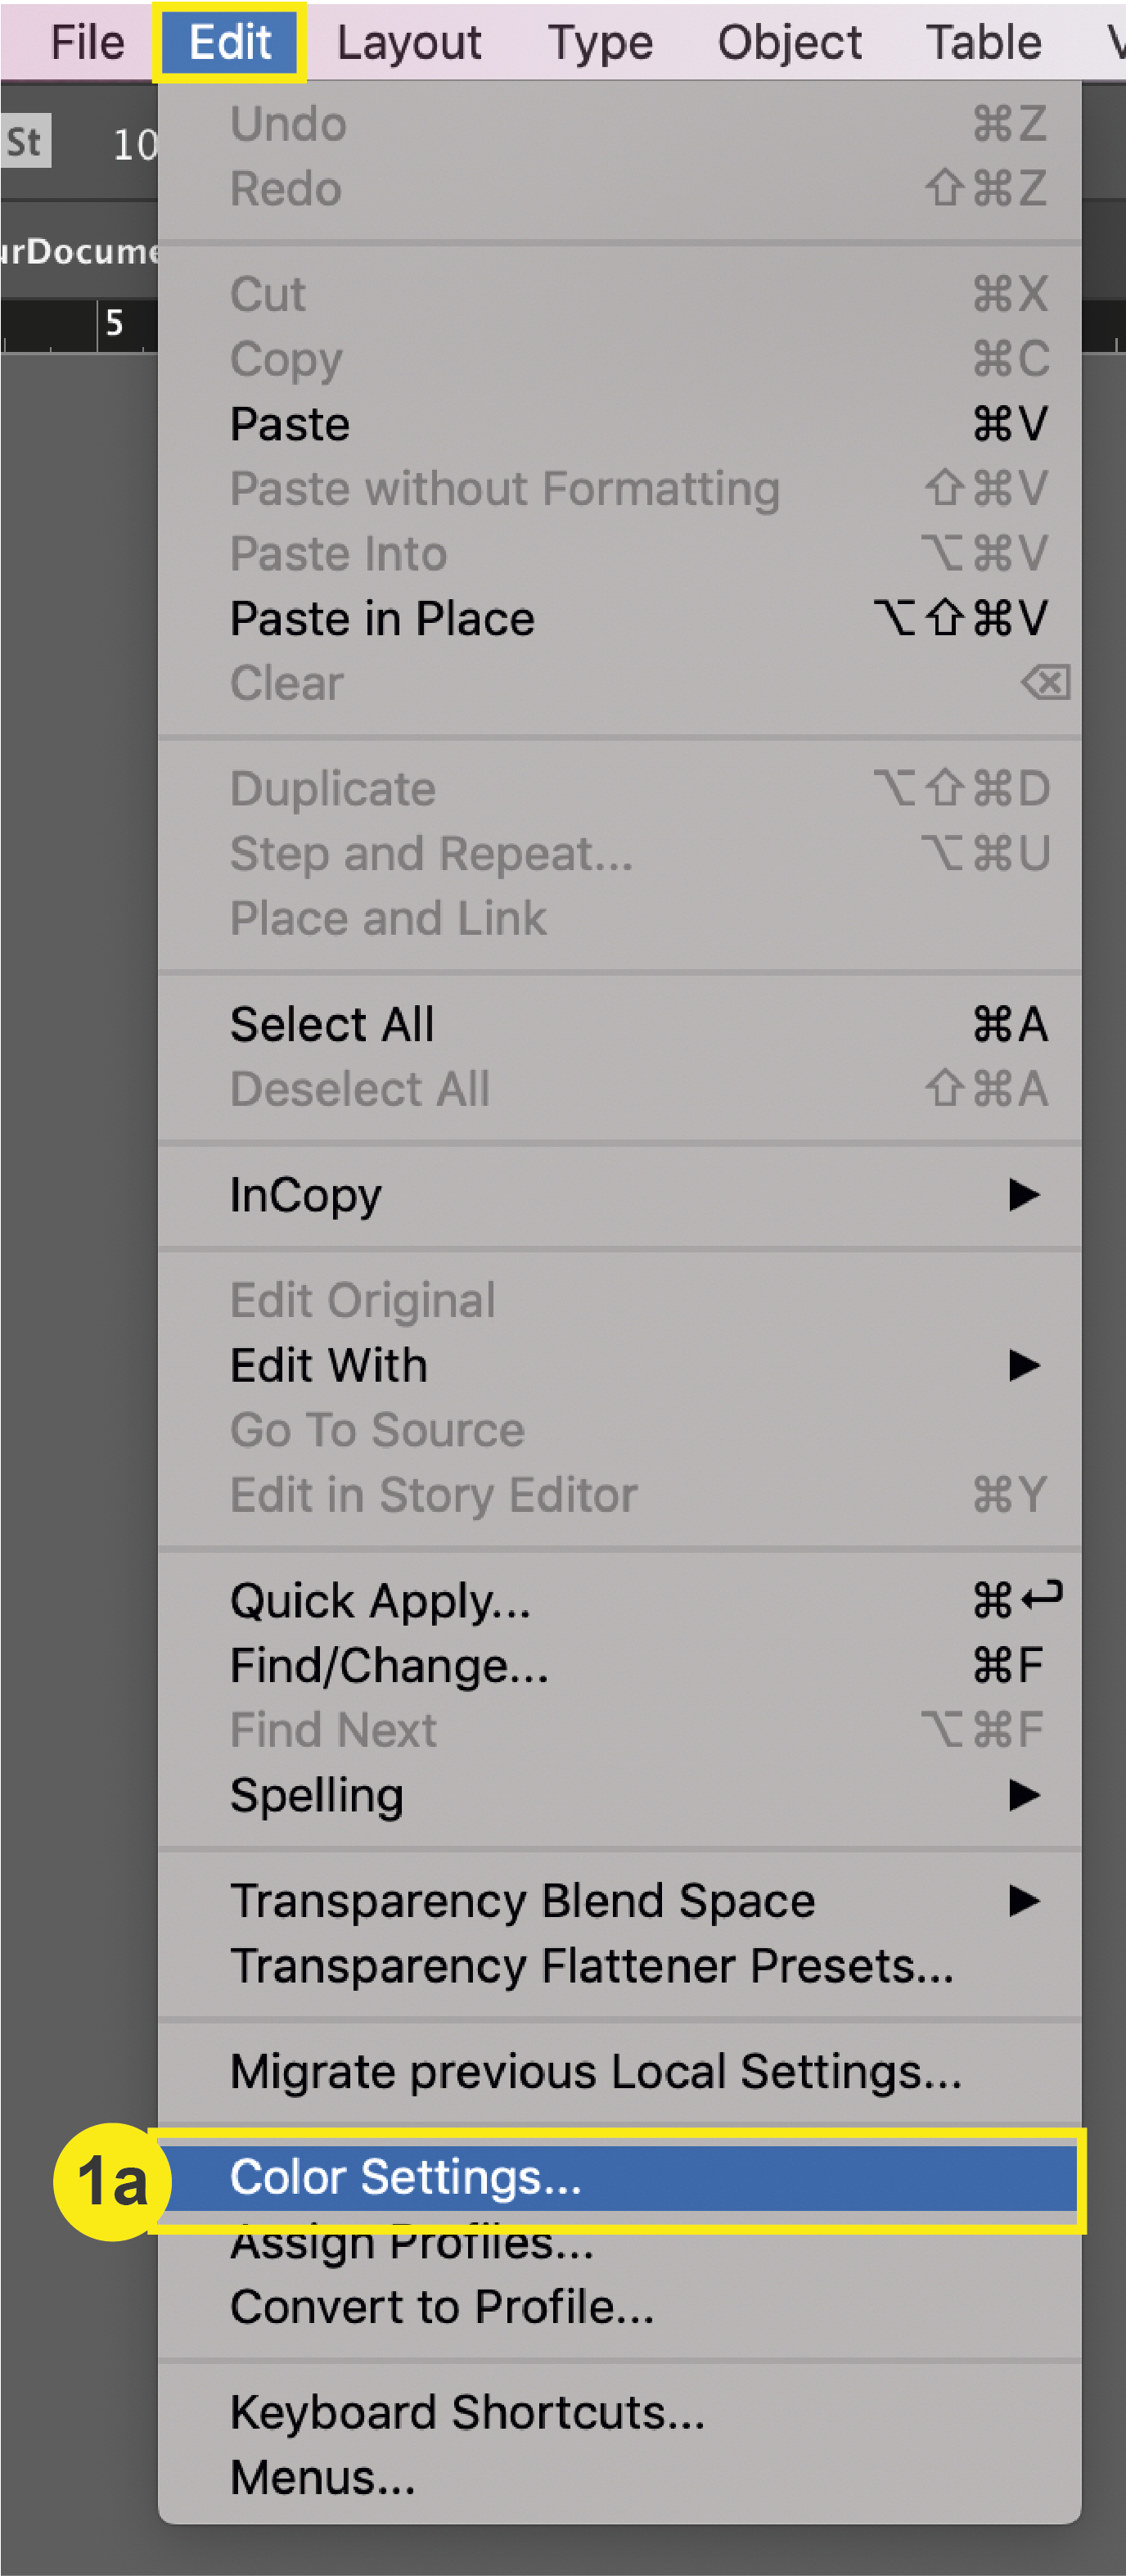
a. In Illustrator, go to Edit > Color Settings
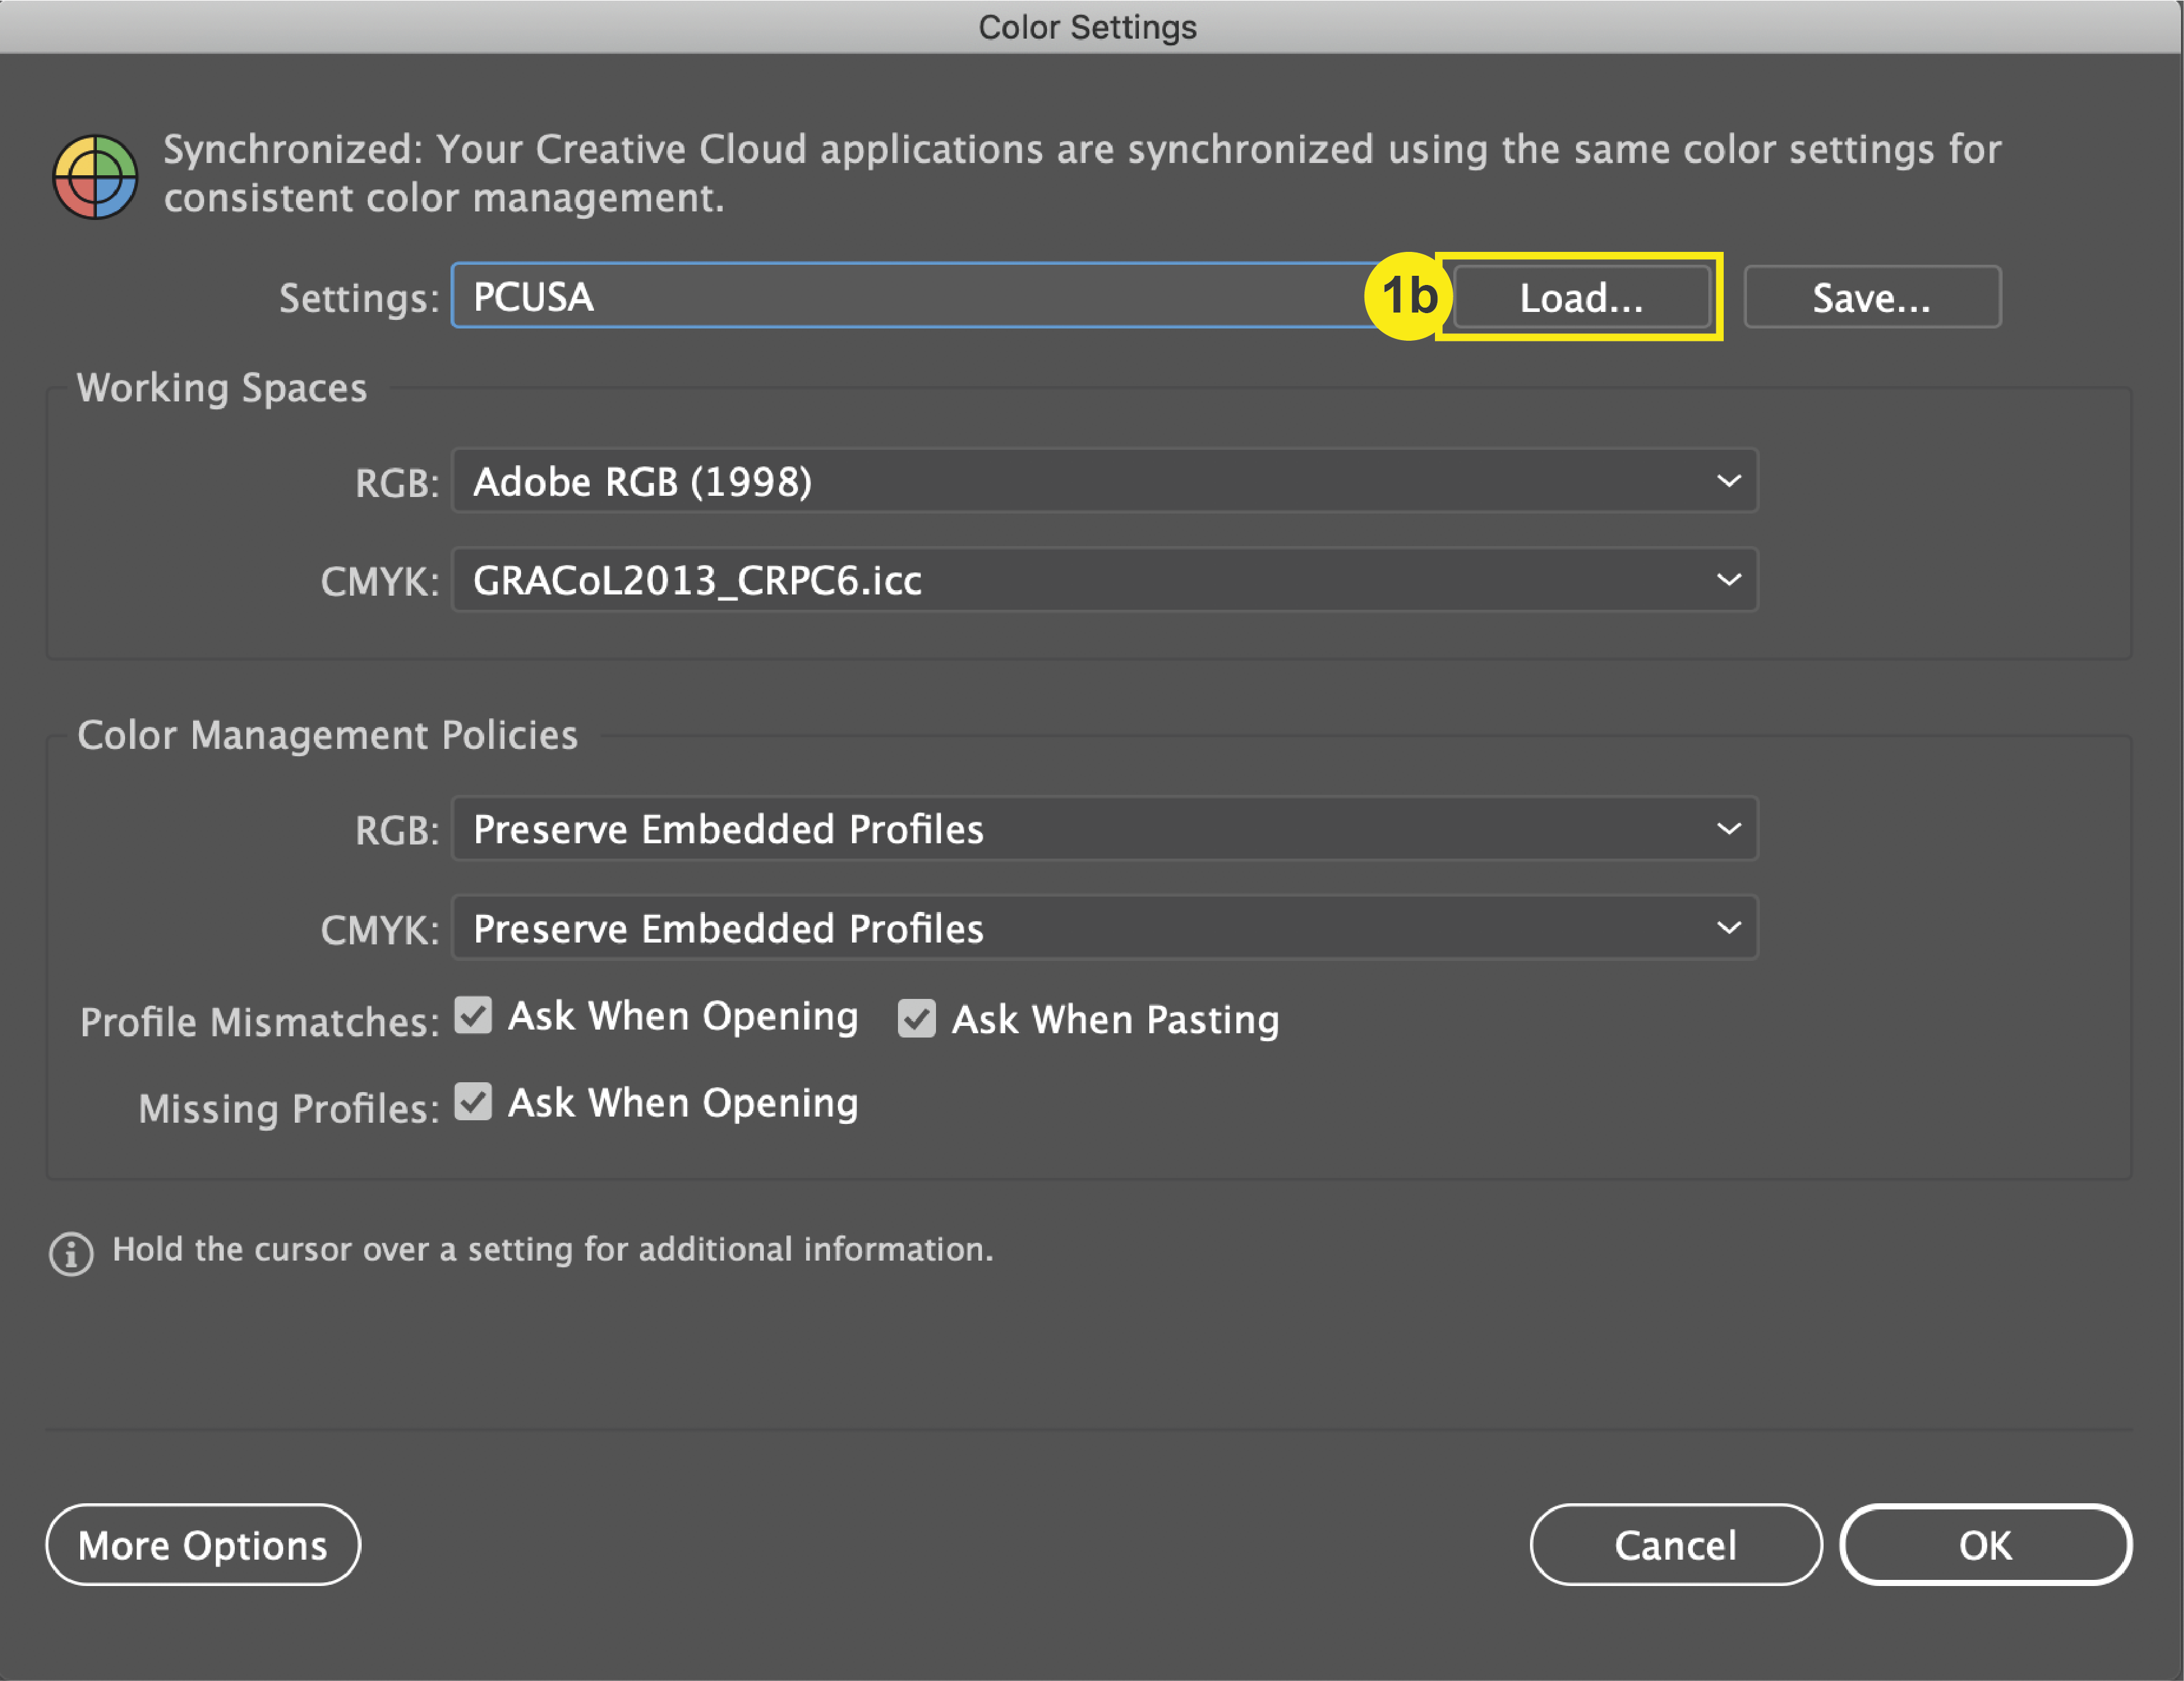
b. In the Color Settings window, select “Load” and choose “PCUSA-load into color settings.csf” Click Save.
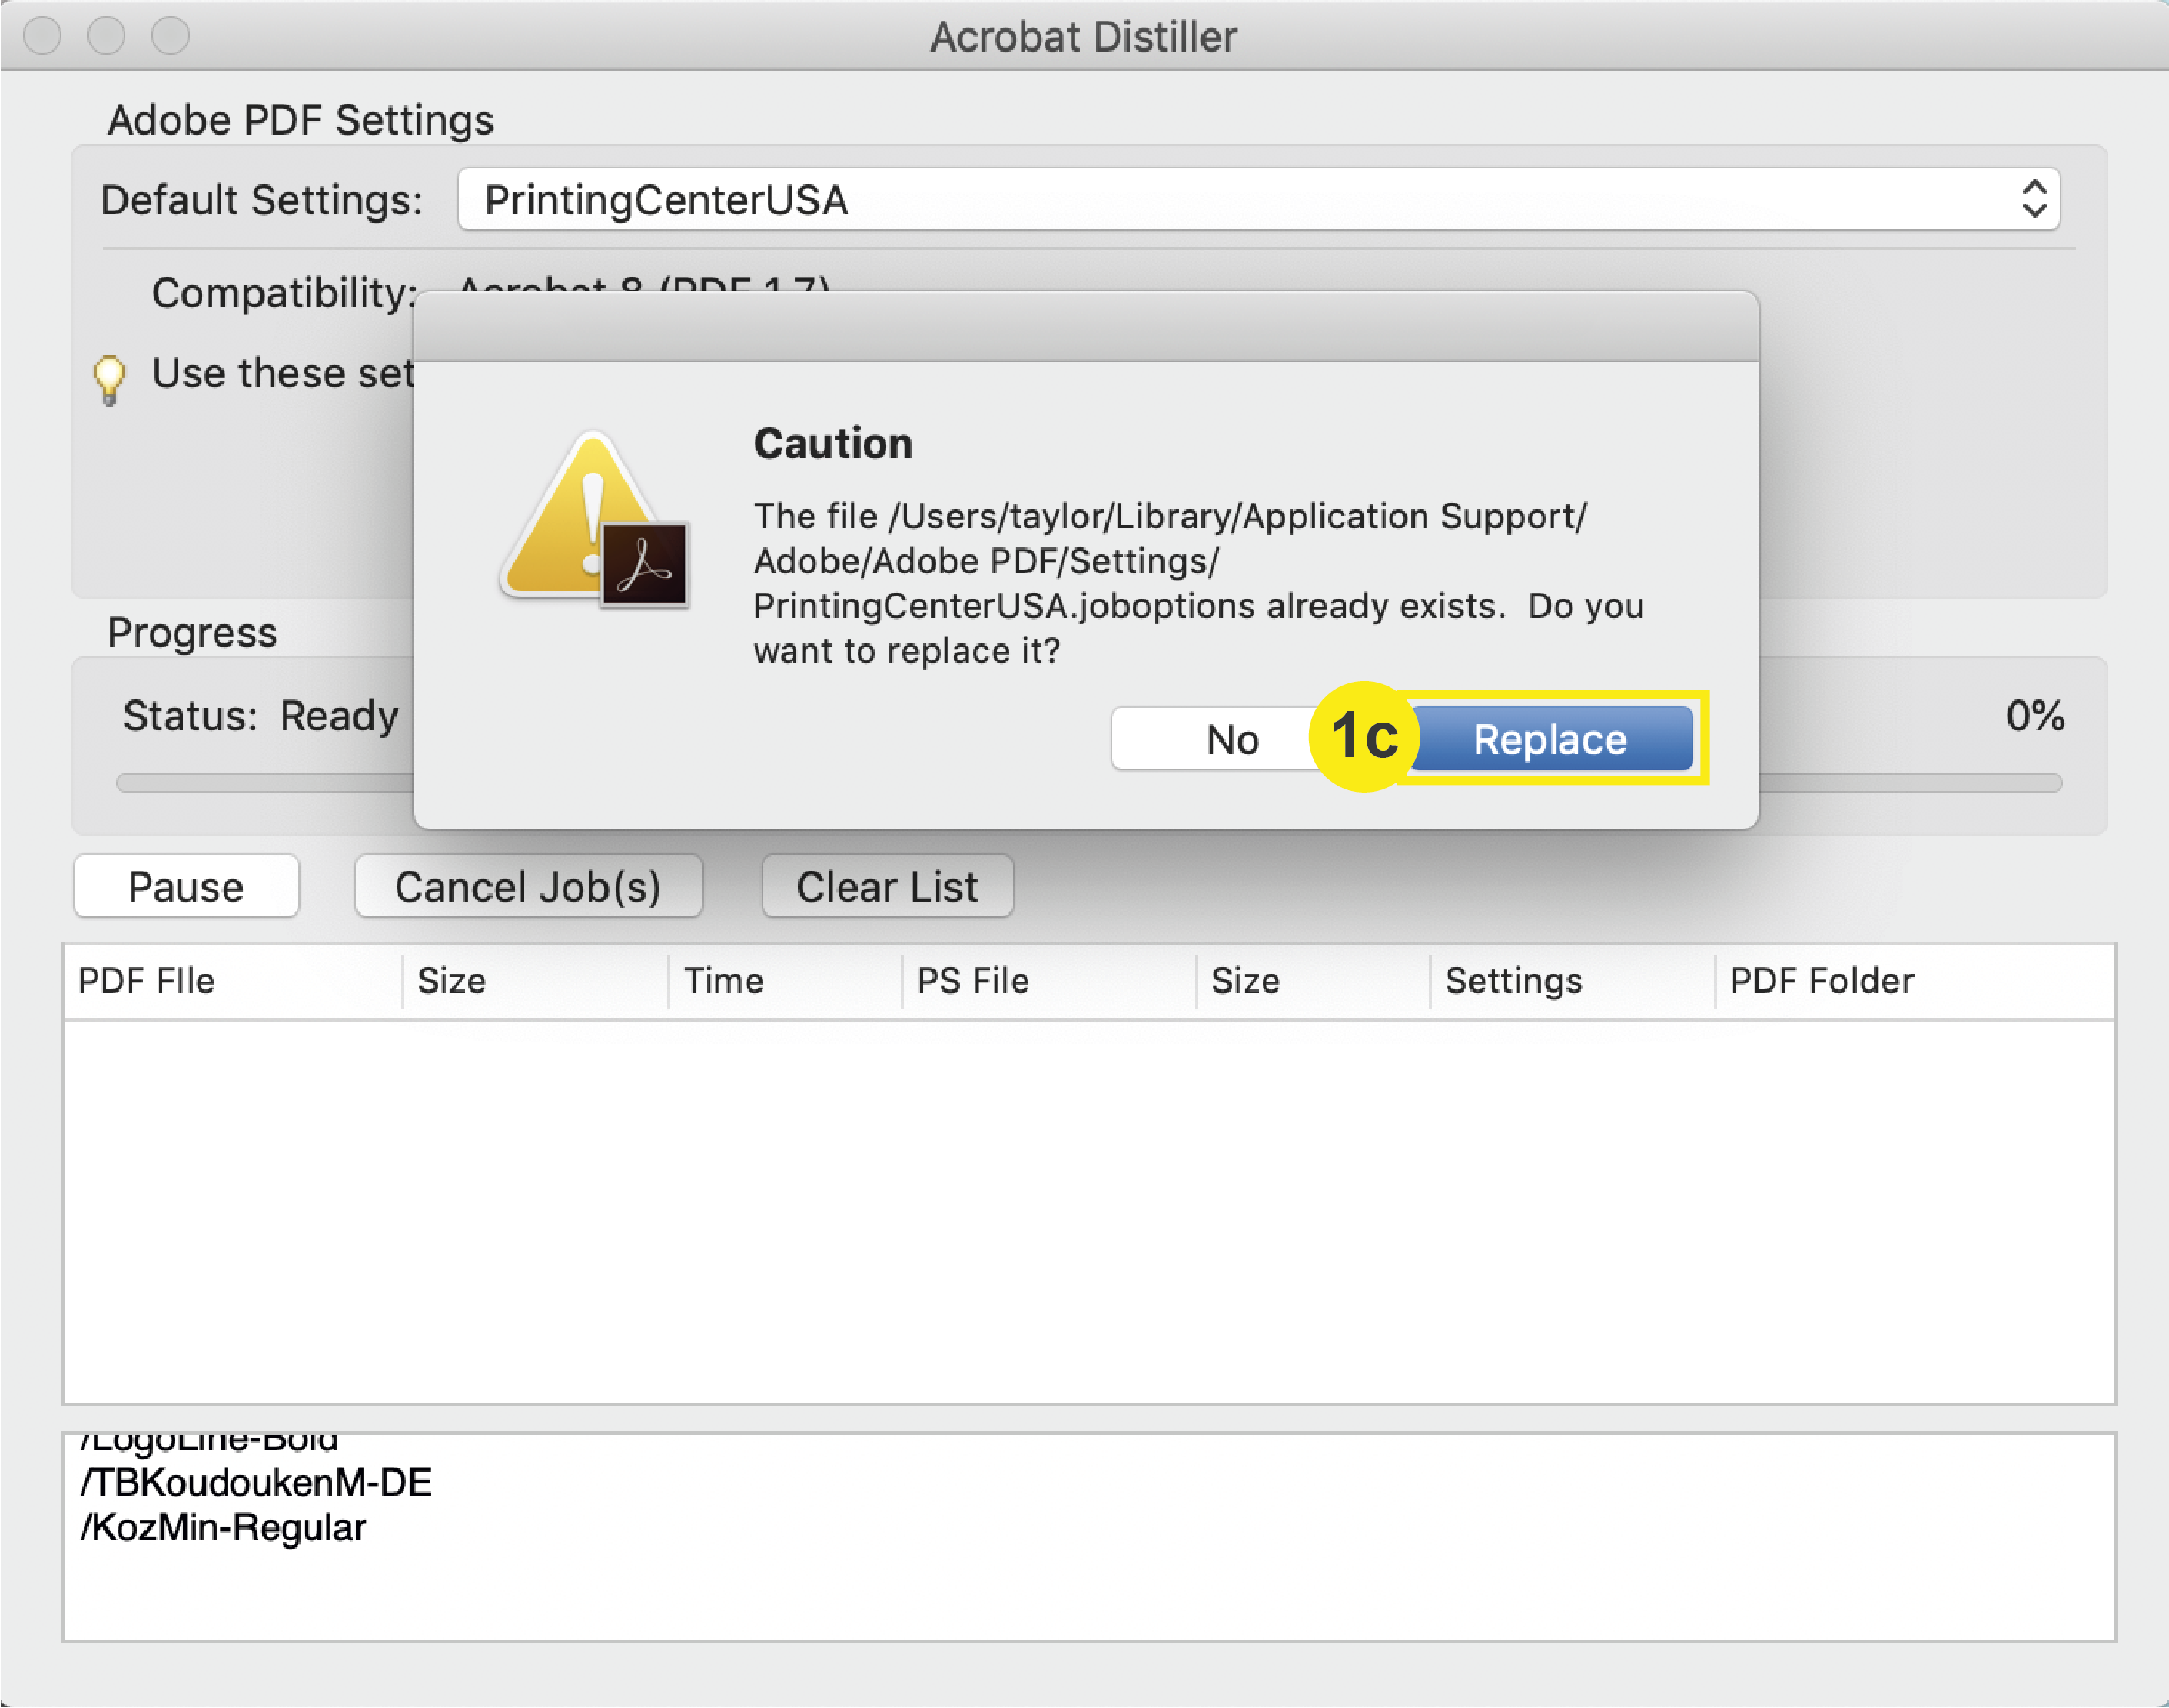
c. In the zip folder, double click PrintingCenterUSA.joboptions. Click “replace” if a caution window comes up. Click exit.
Note: To learn how to load PrintingCenterUSA’s PDF Preset for file saving, click here.
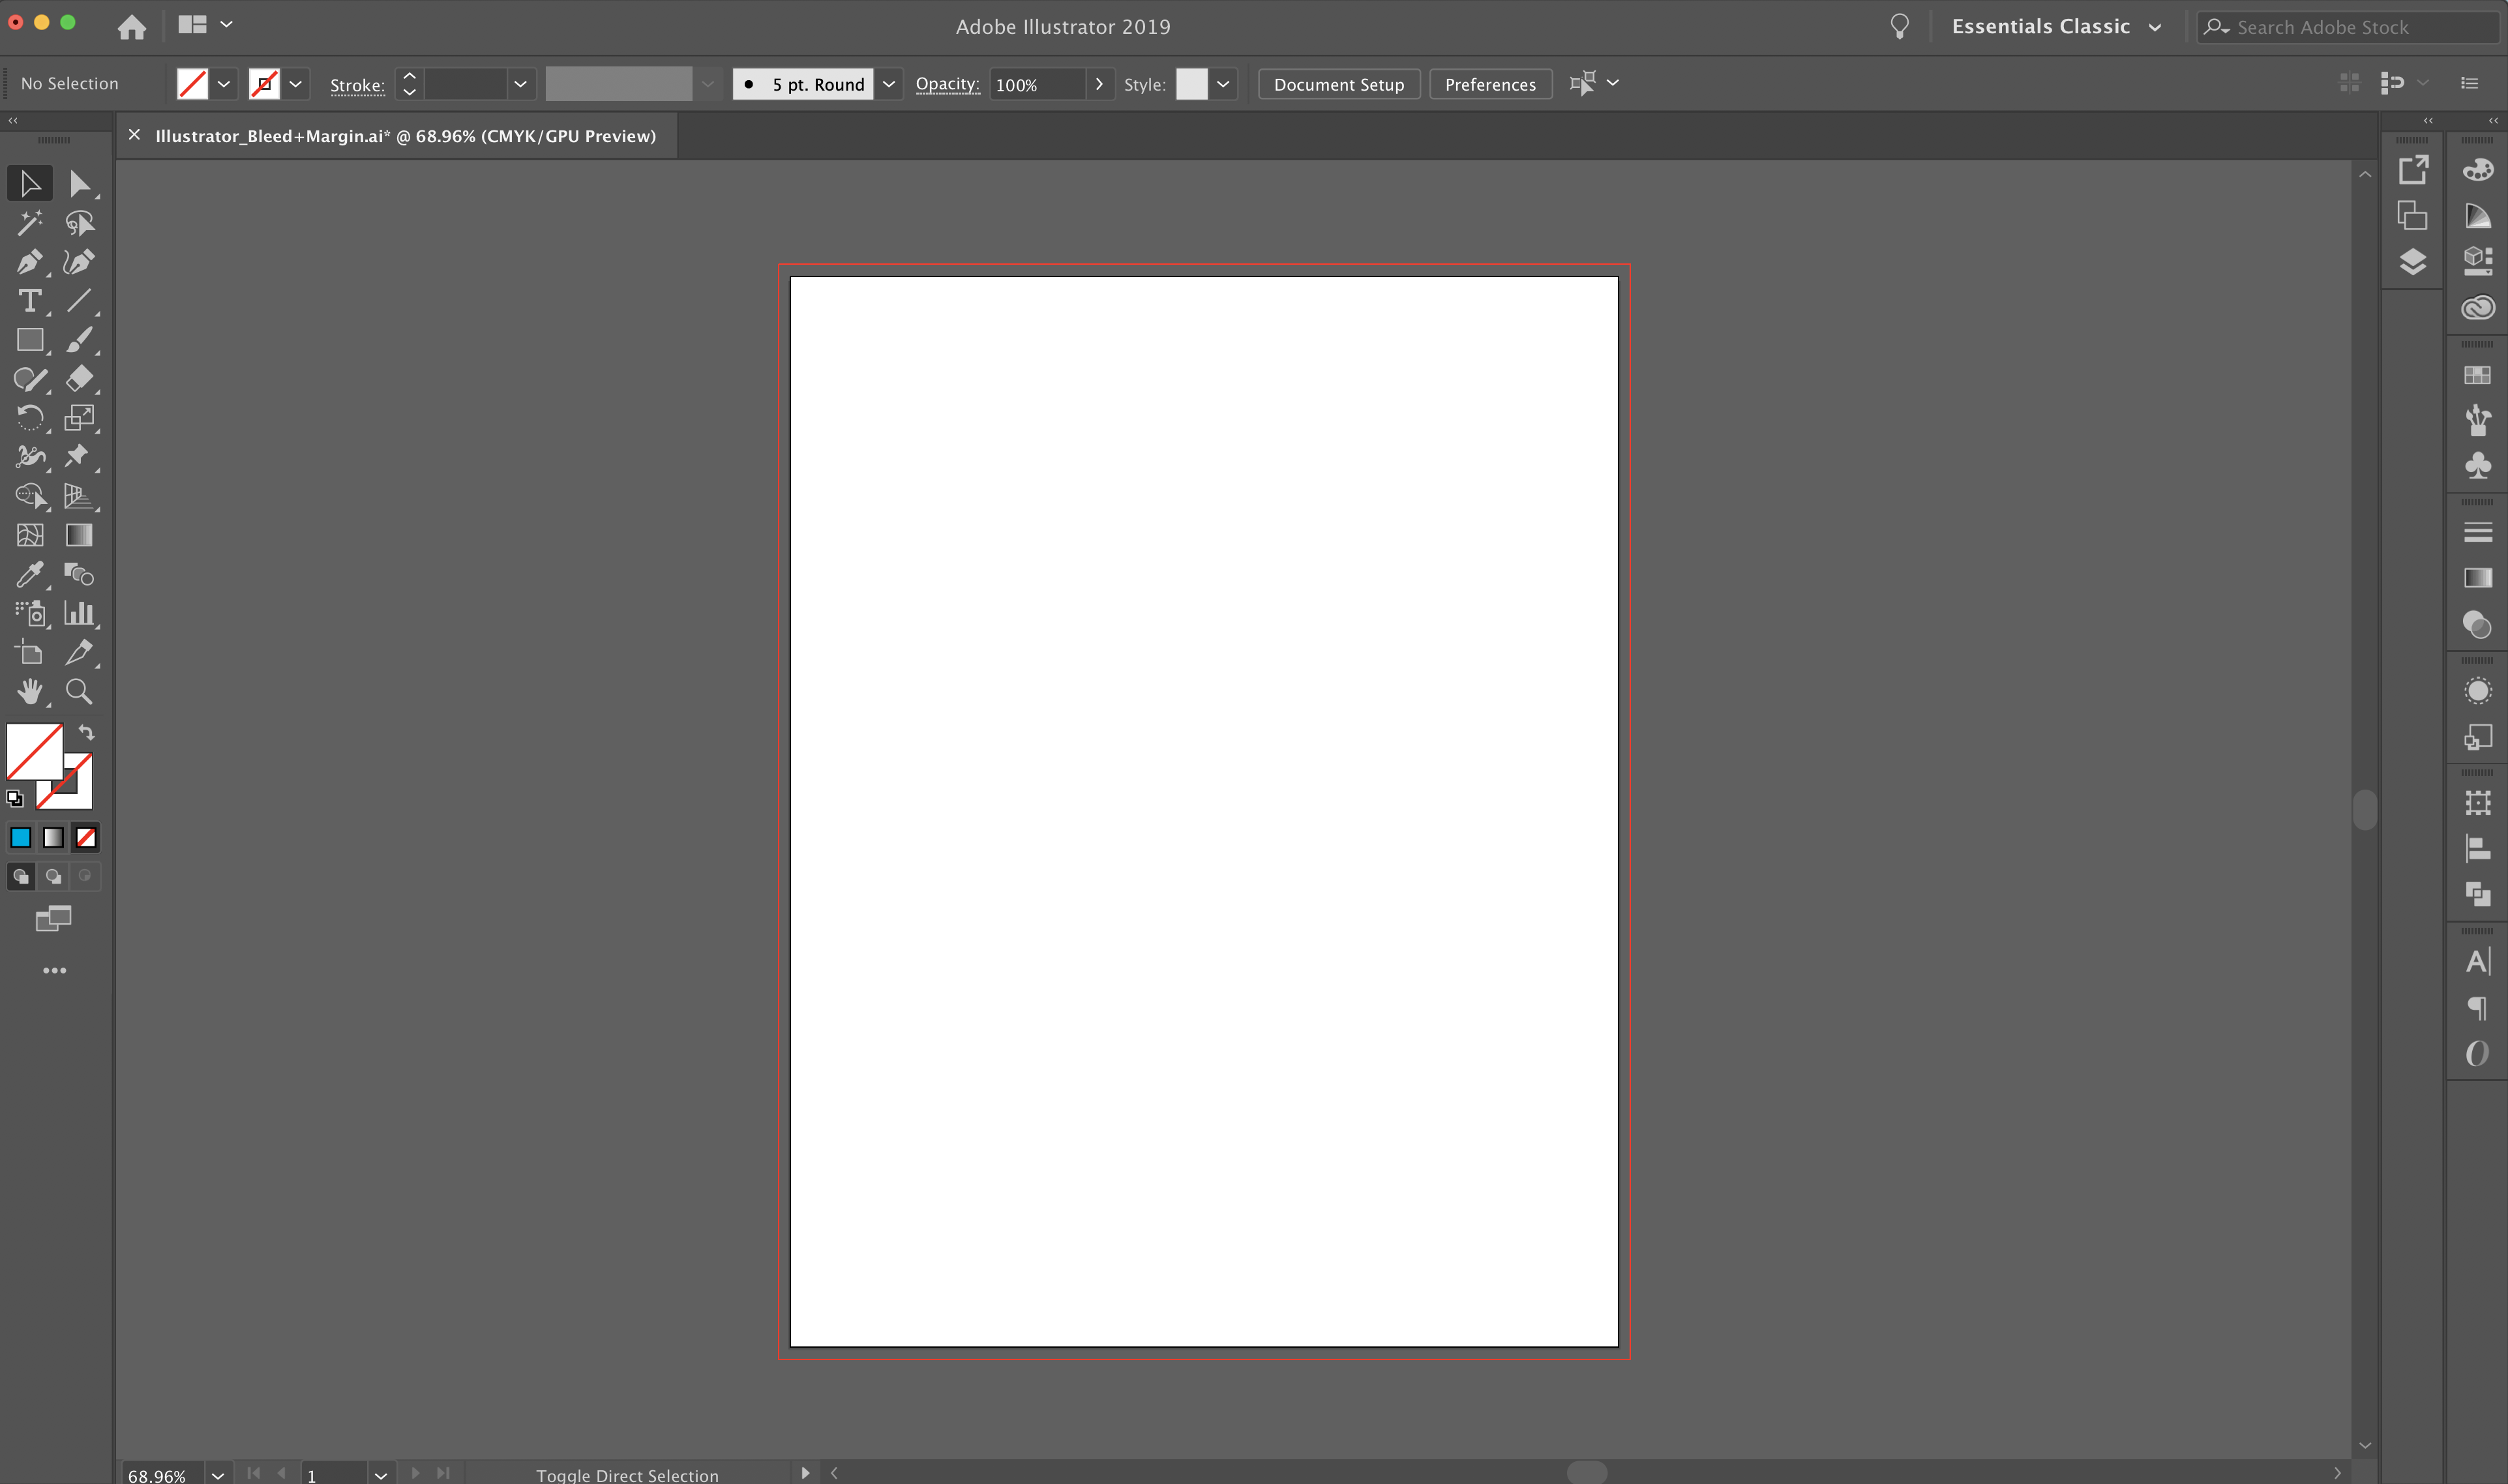
2. File > New
Once you have opened Illustrator, go to the top menu to select File > New. This will prompt a “New Document” window to open where you will define your document settings.

3. Name
First, you should always name your project in the name field.
4. Size
Input the size of your document (the final trim size) in inches.
5. Pages (Artboards)
Input the number of pages (artboards) for your project. Note: Illustrator will begin to run slowly if you end up with too many pages on your artboard.
6. Bleeds
Set your bleeds to 0.125 in. on each side (top, bottom, left, right) of your document.
7. Color Mode
Set your color mode to CMYK. This is Illustrator’s default, but it doesn’t hurt to double check. When finished with steps 2-7, click “Create.”
8. Raster Effects
Set your raster effects to High (300 ppi) so your designs will not save pixelated later.
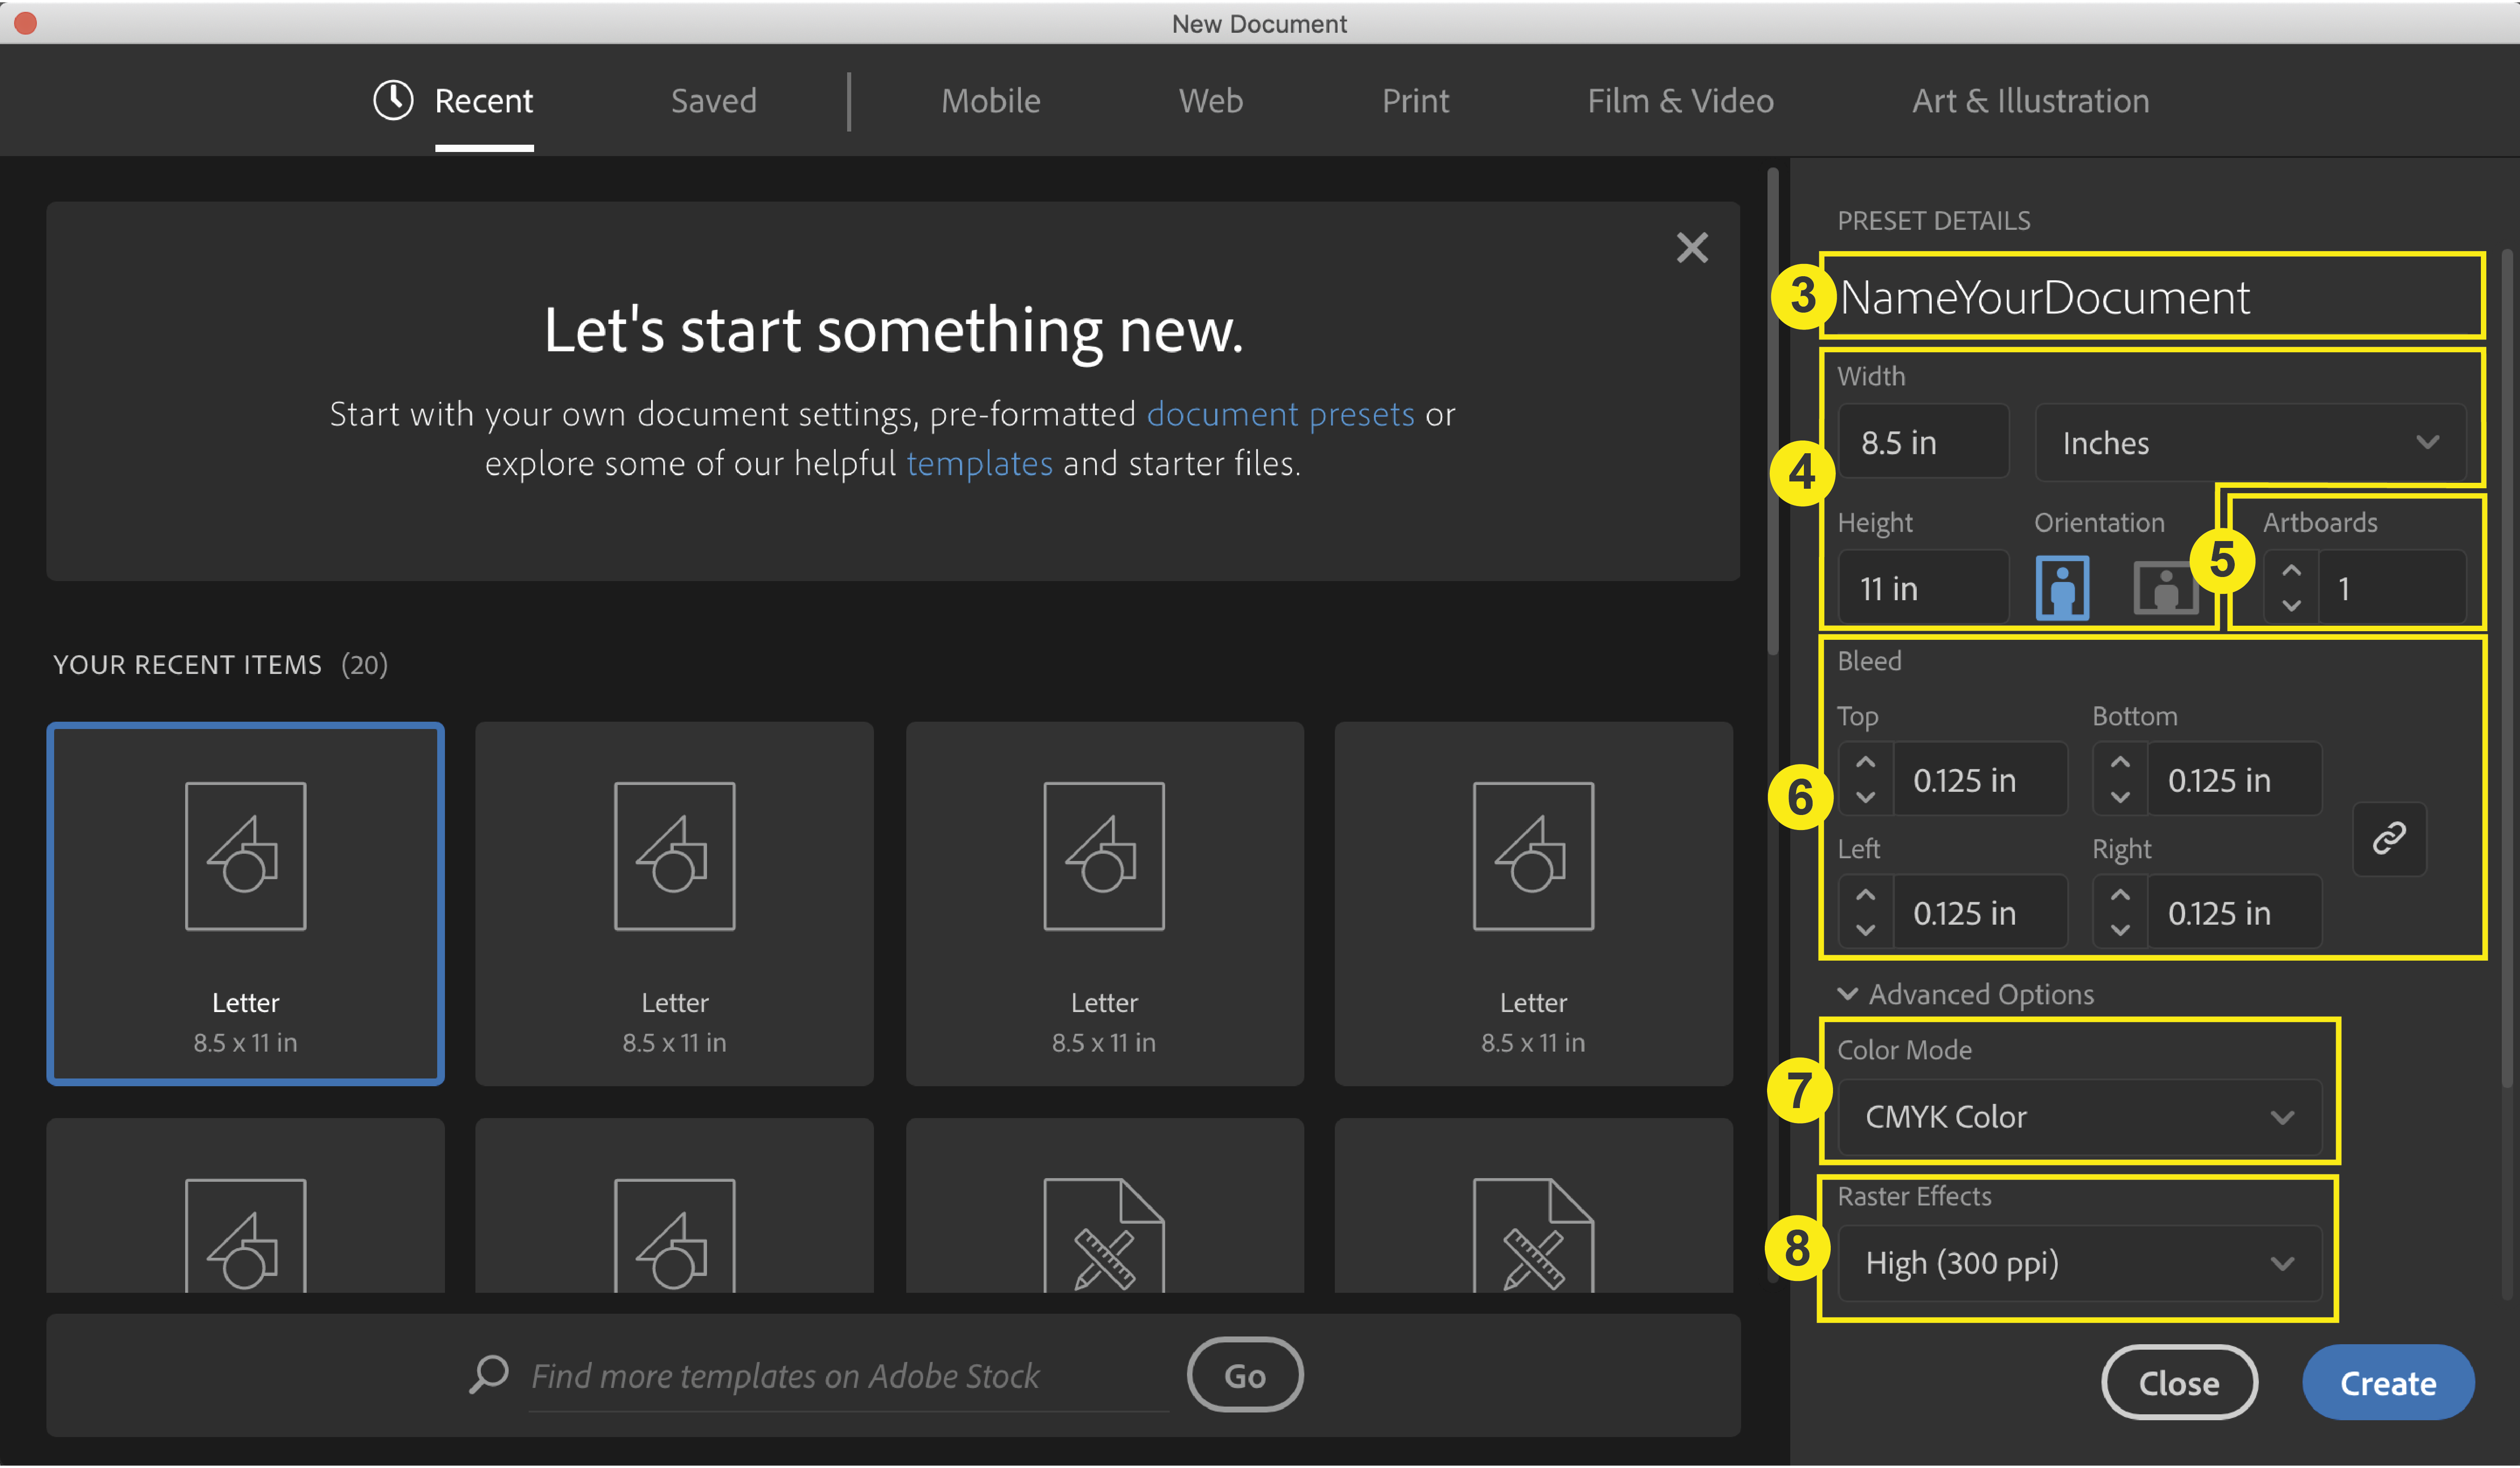
After completing steps 3-8, click “Create.” Your new document will open.
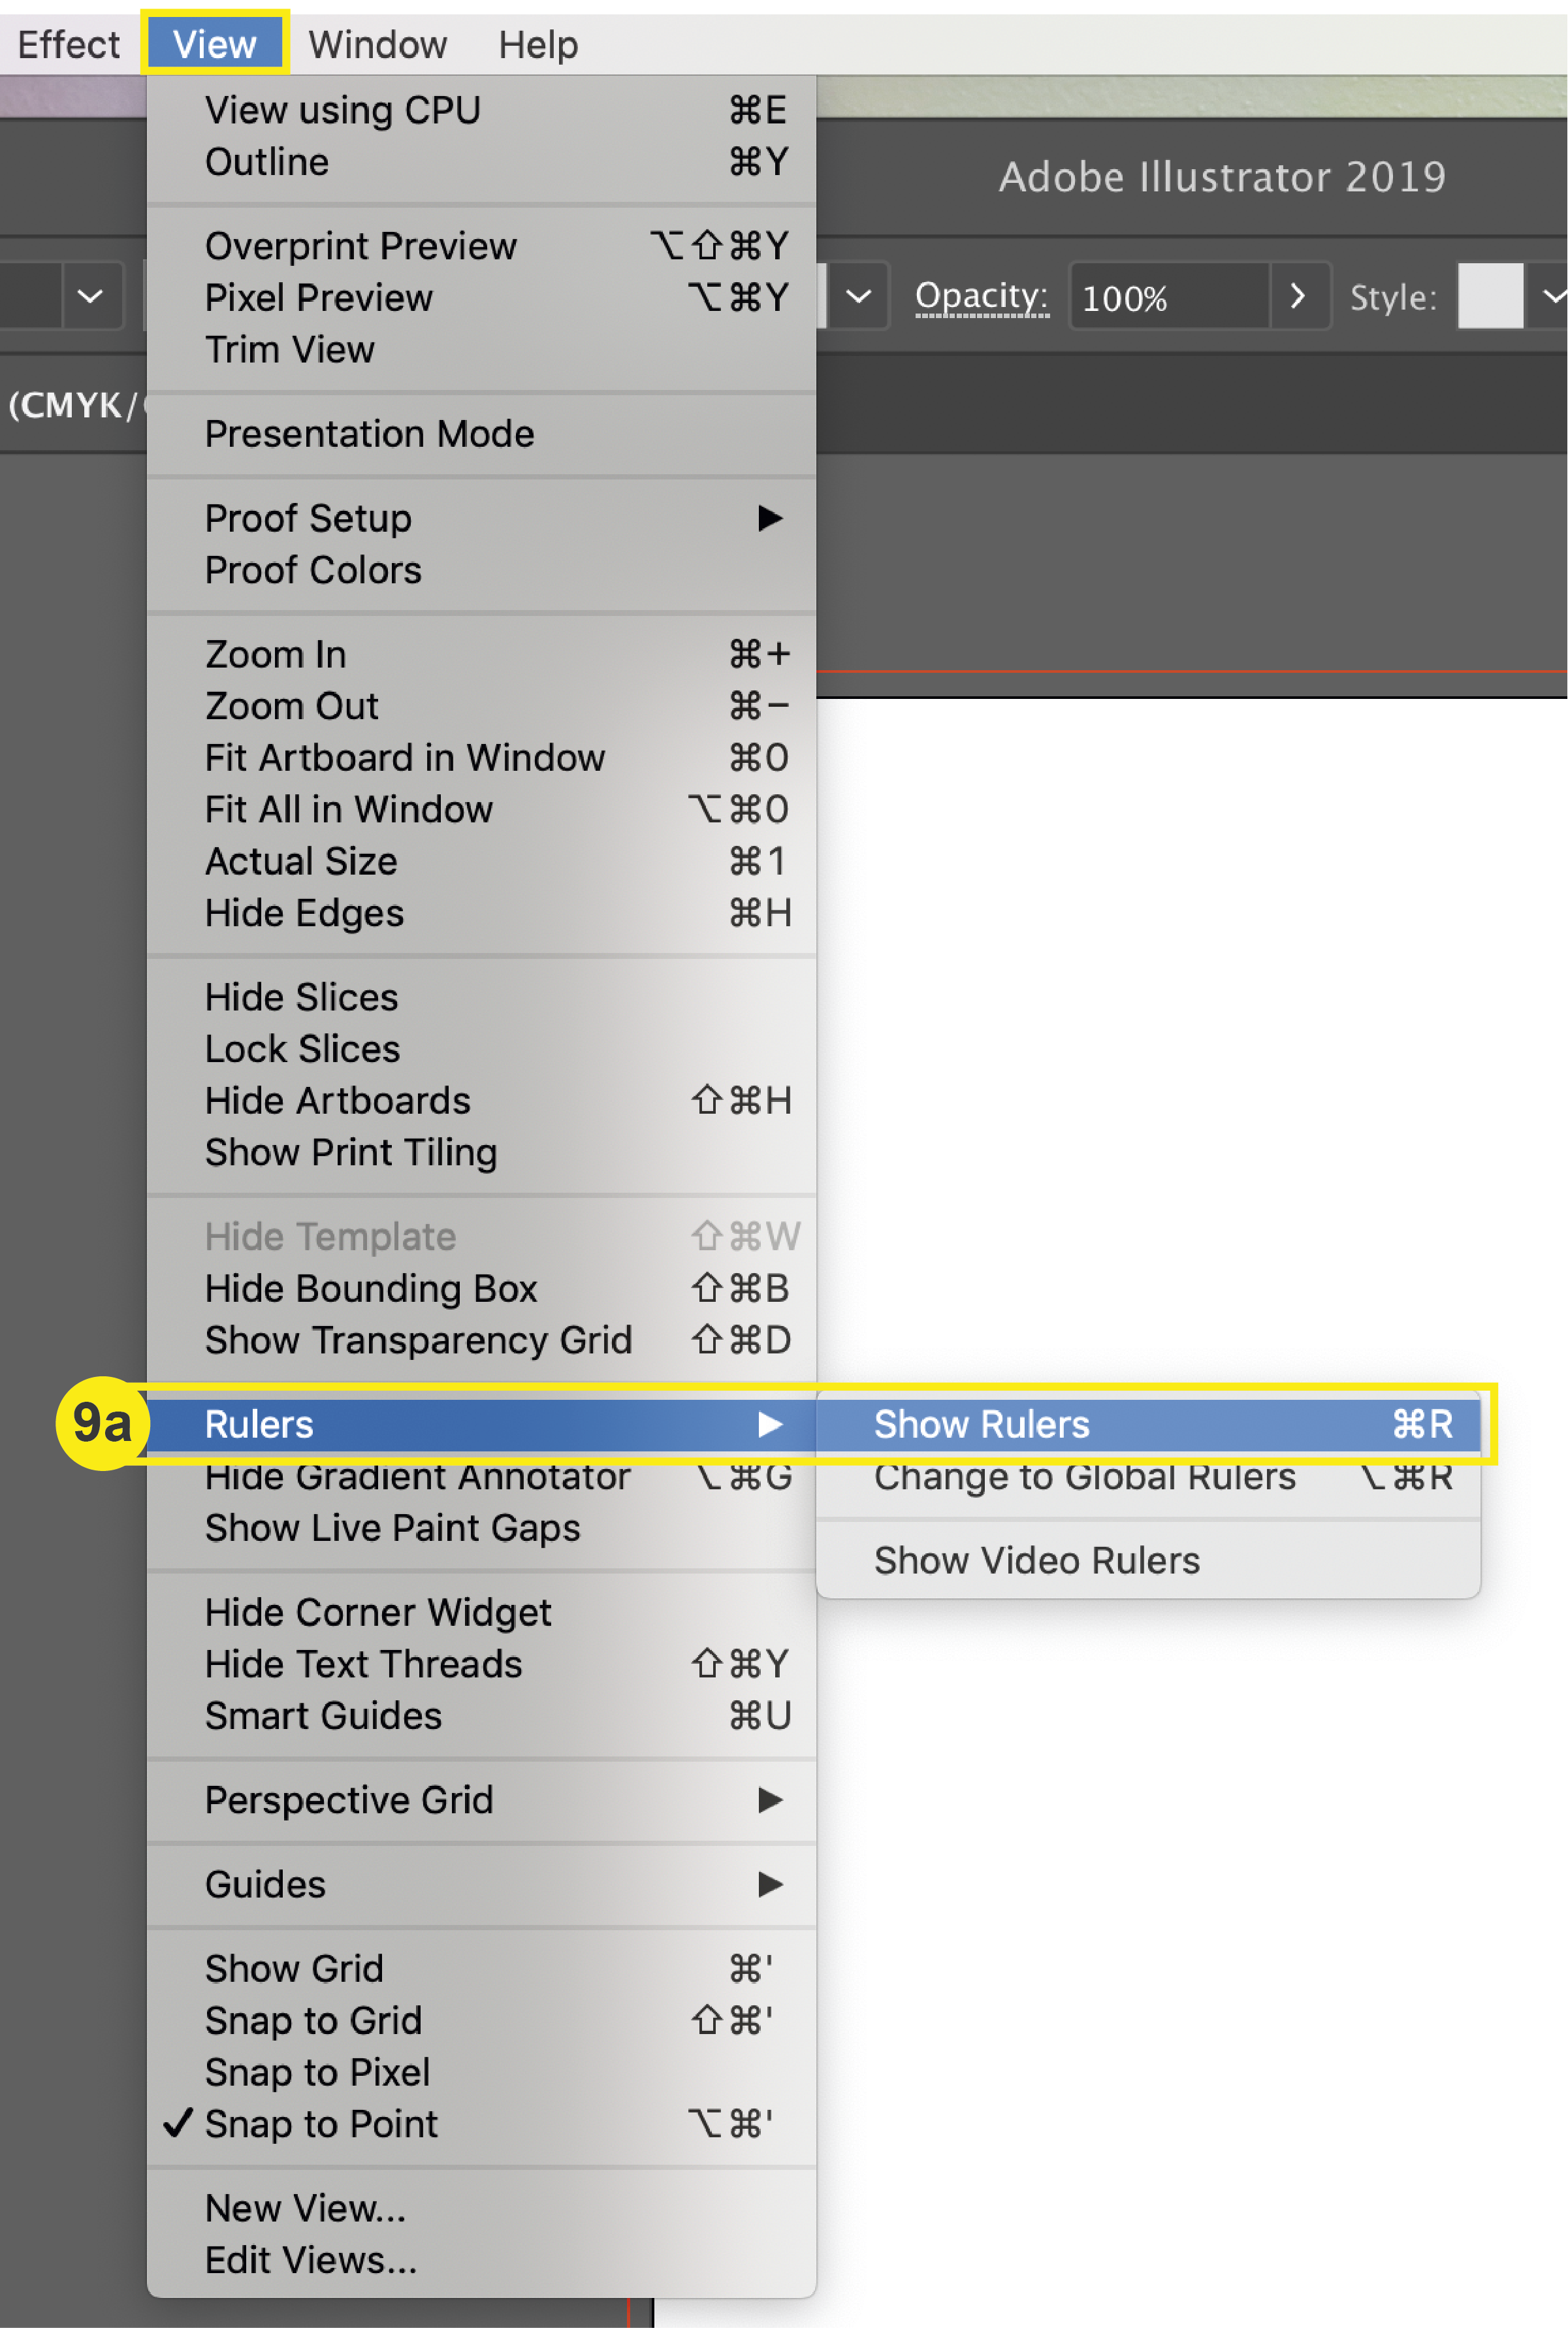
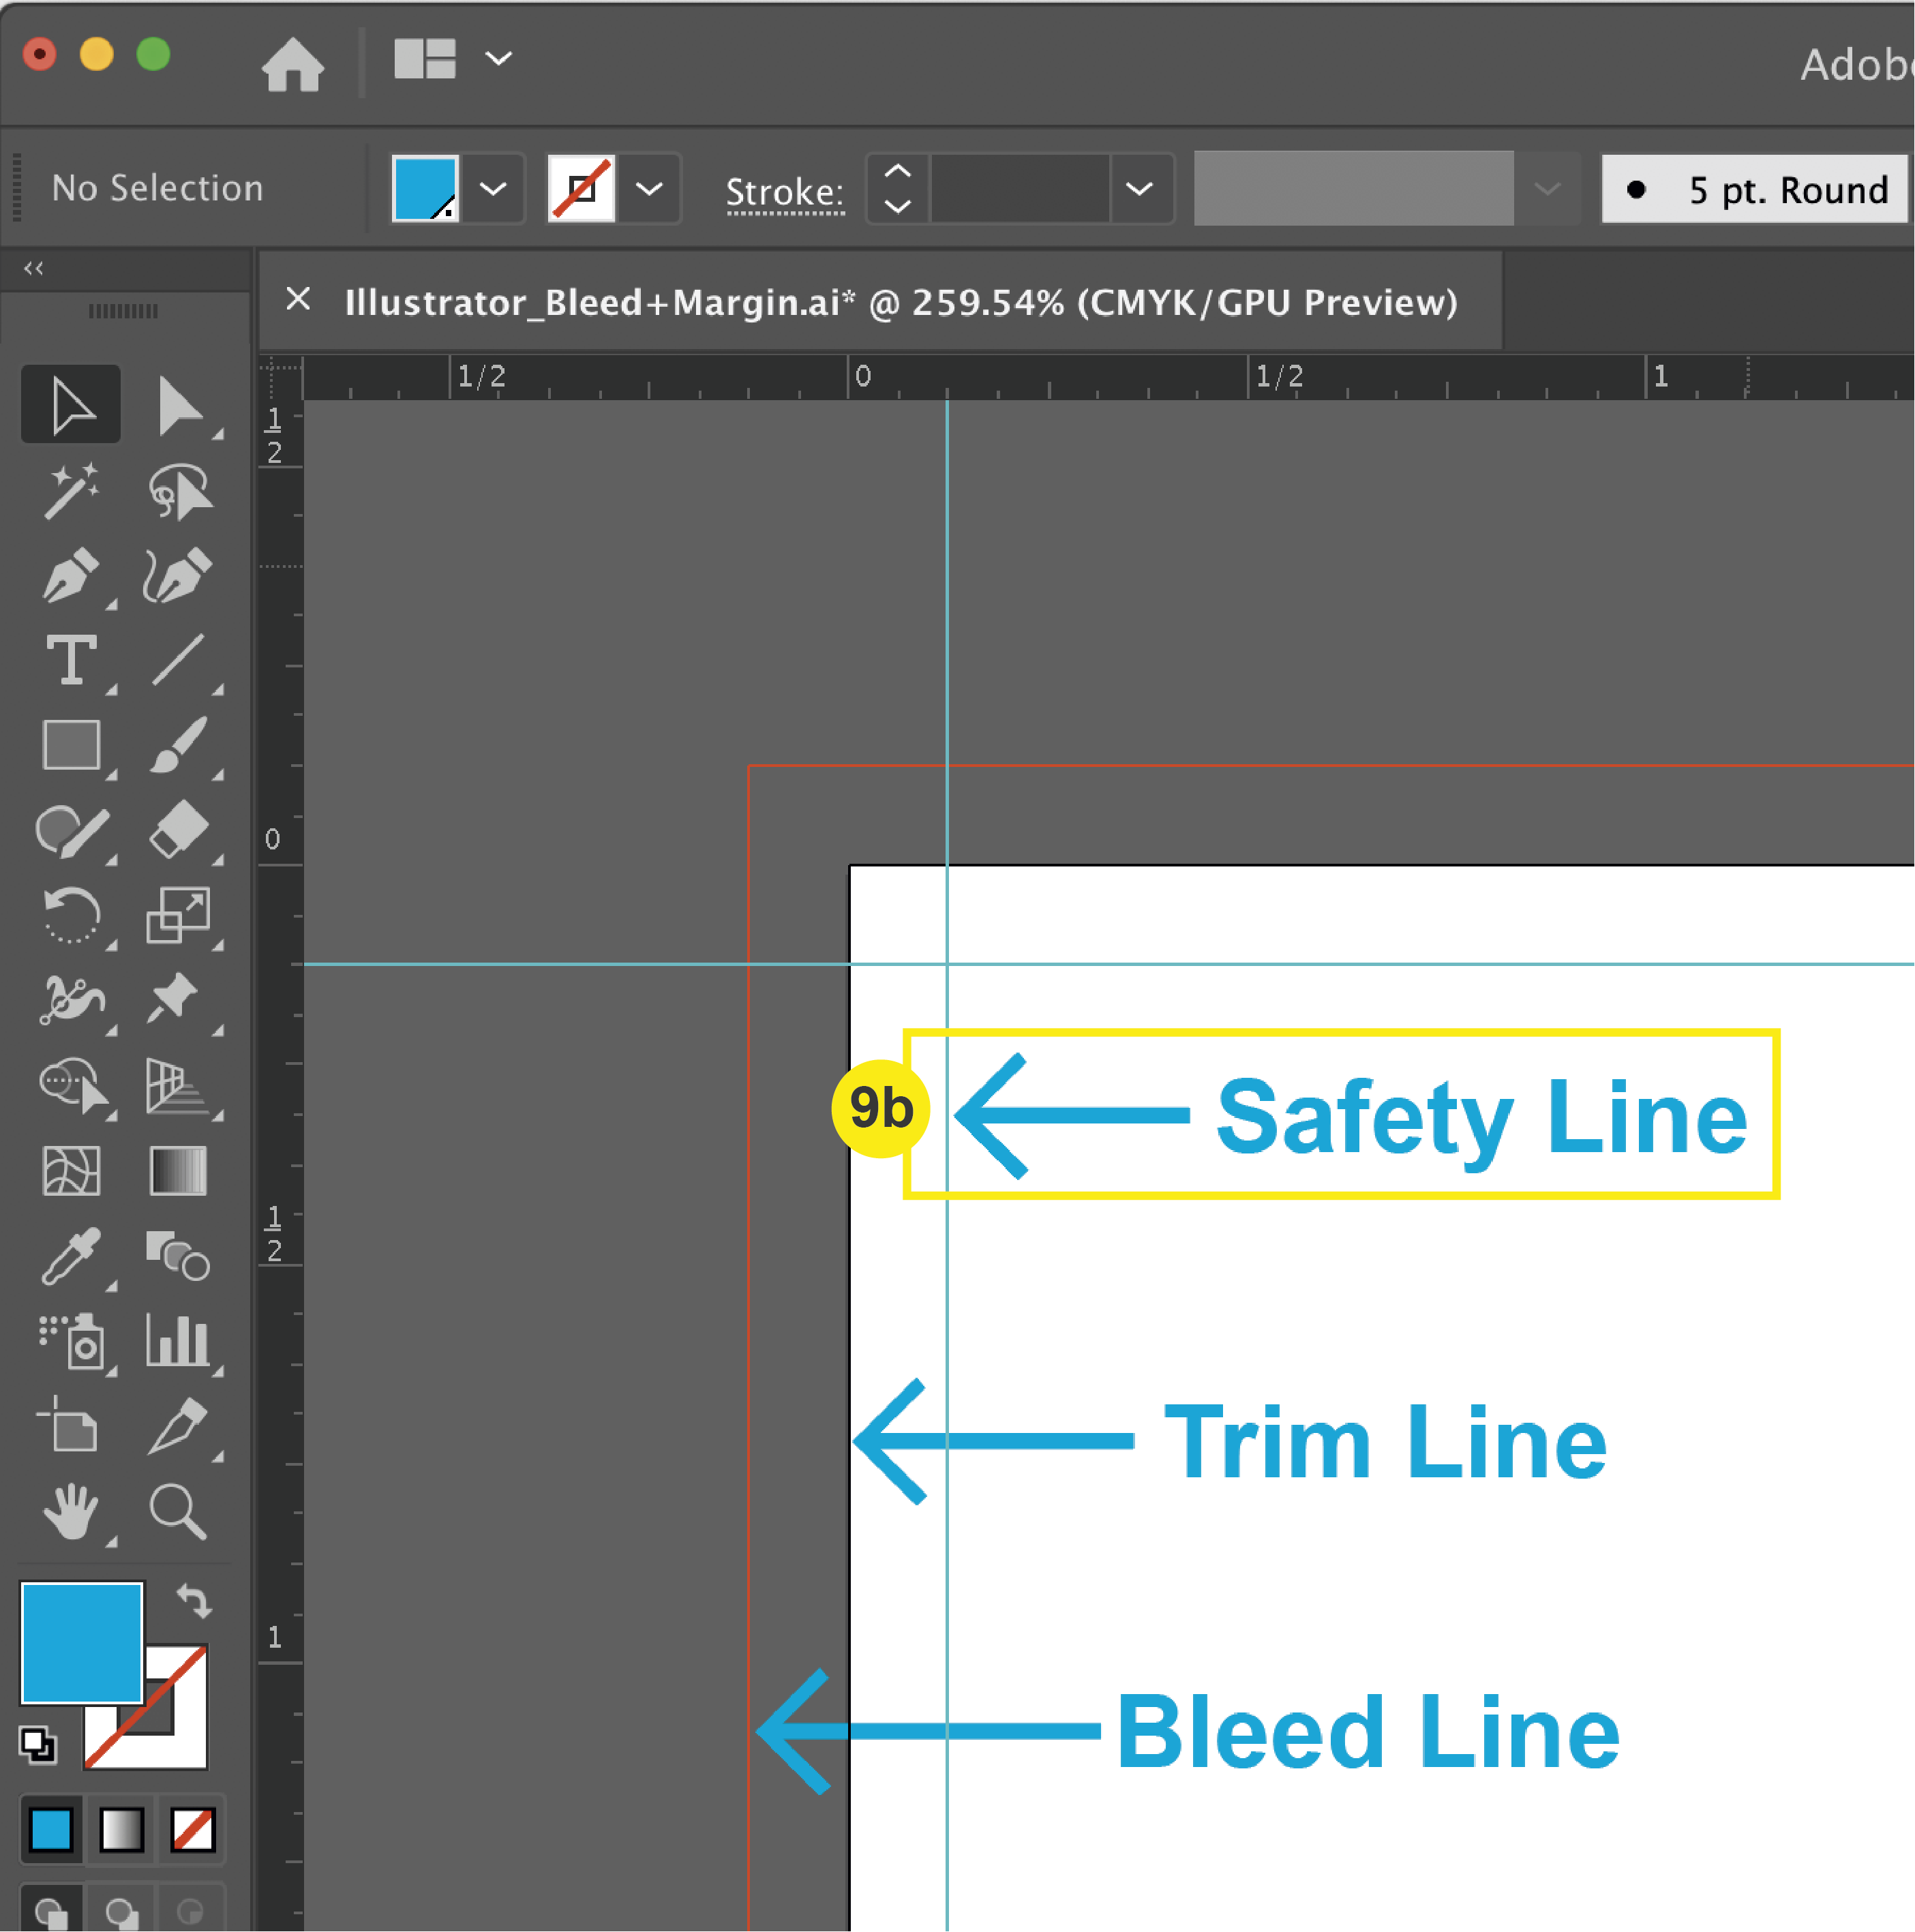
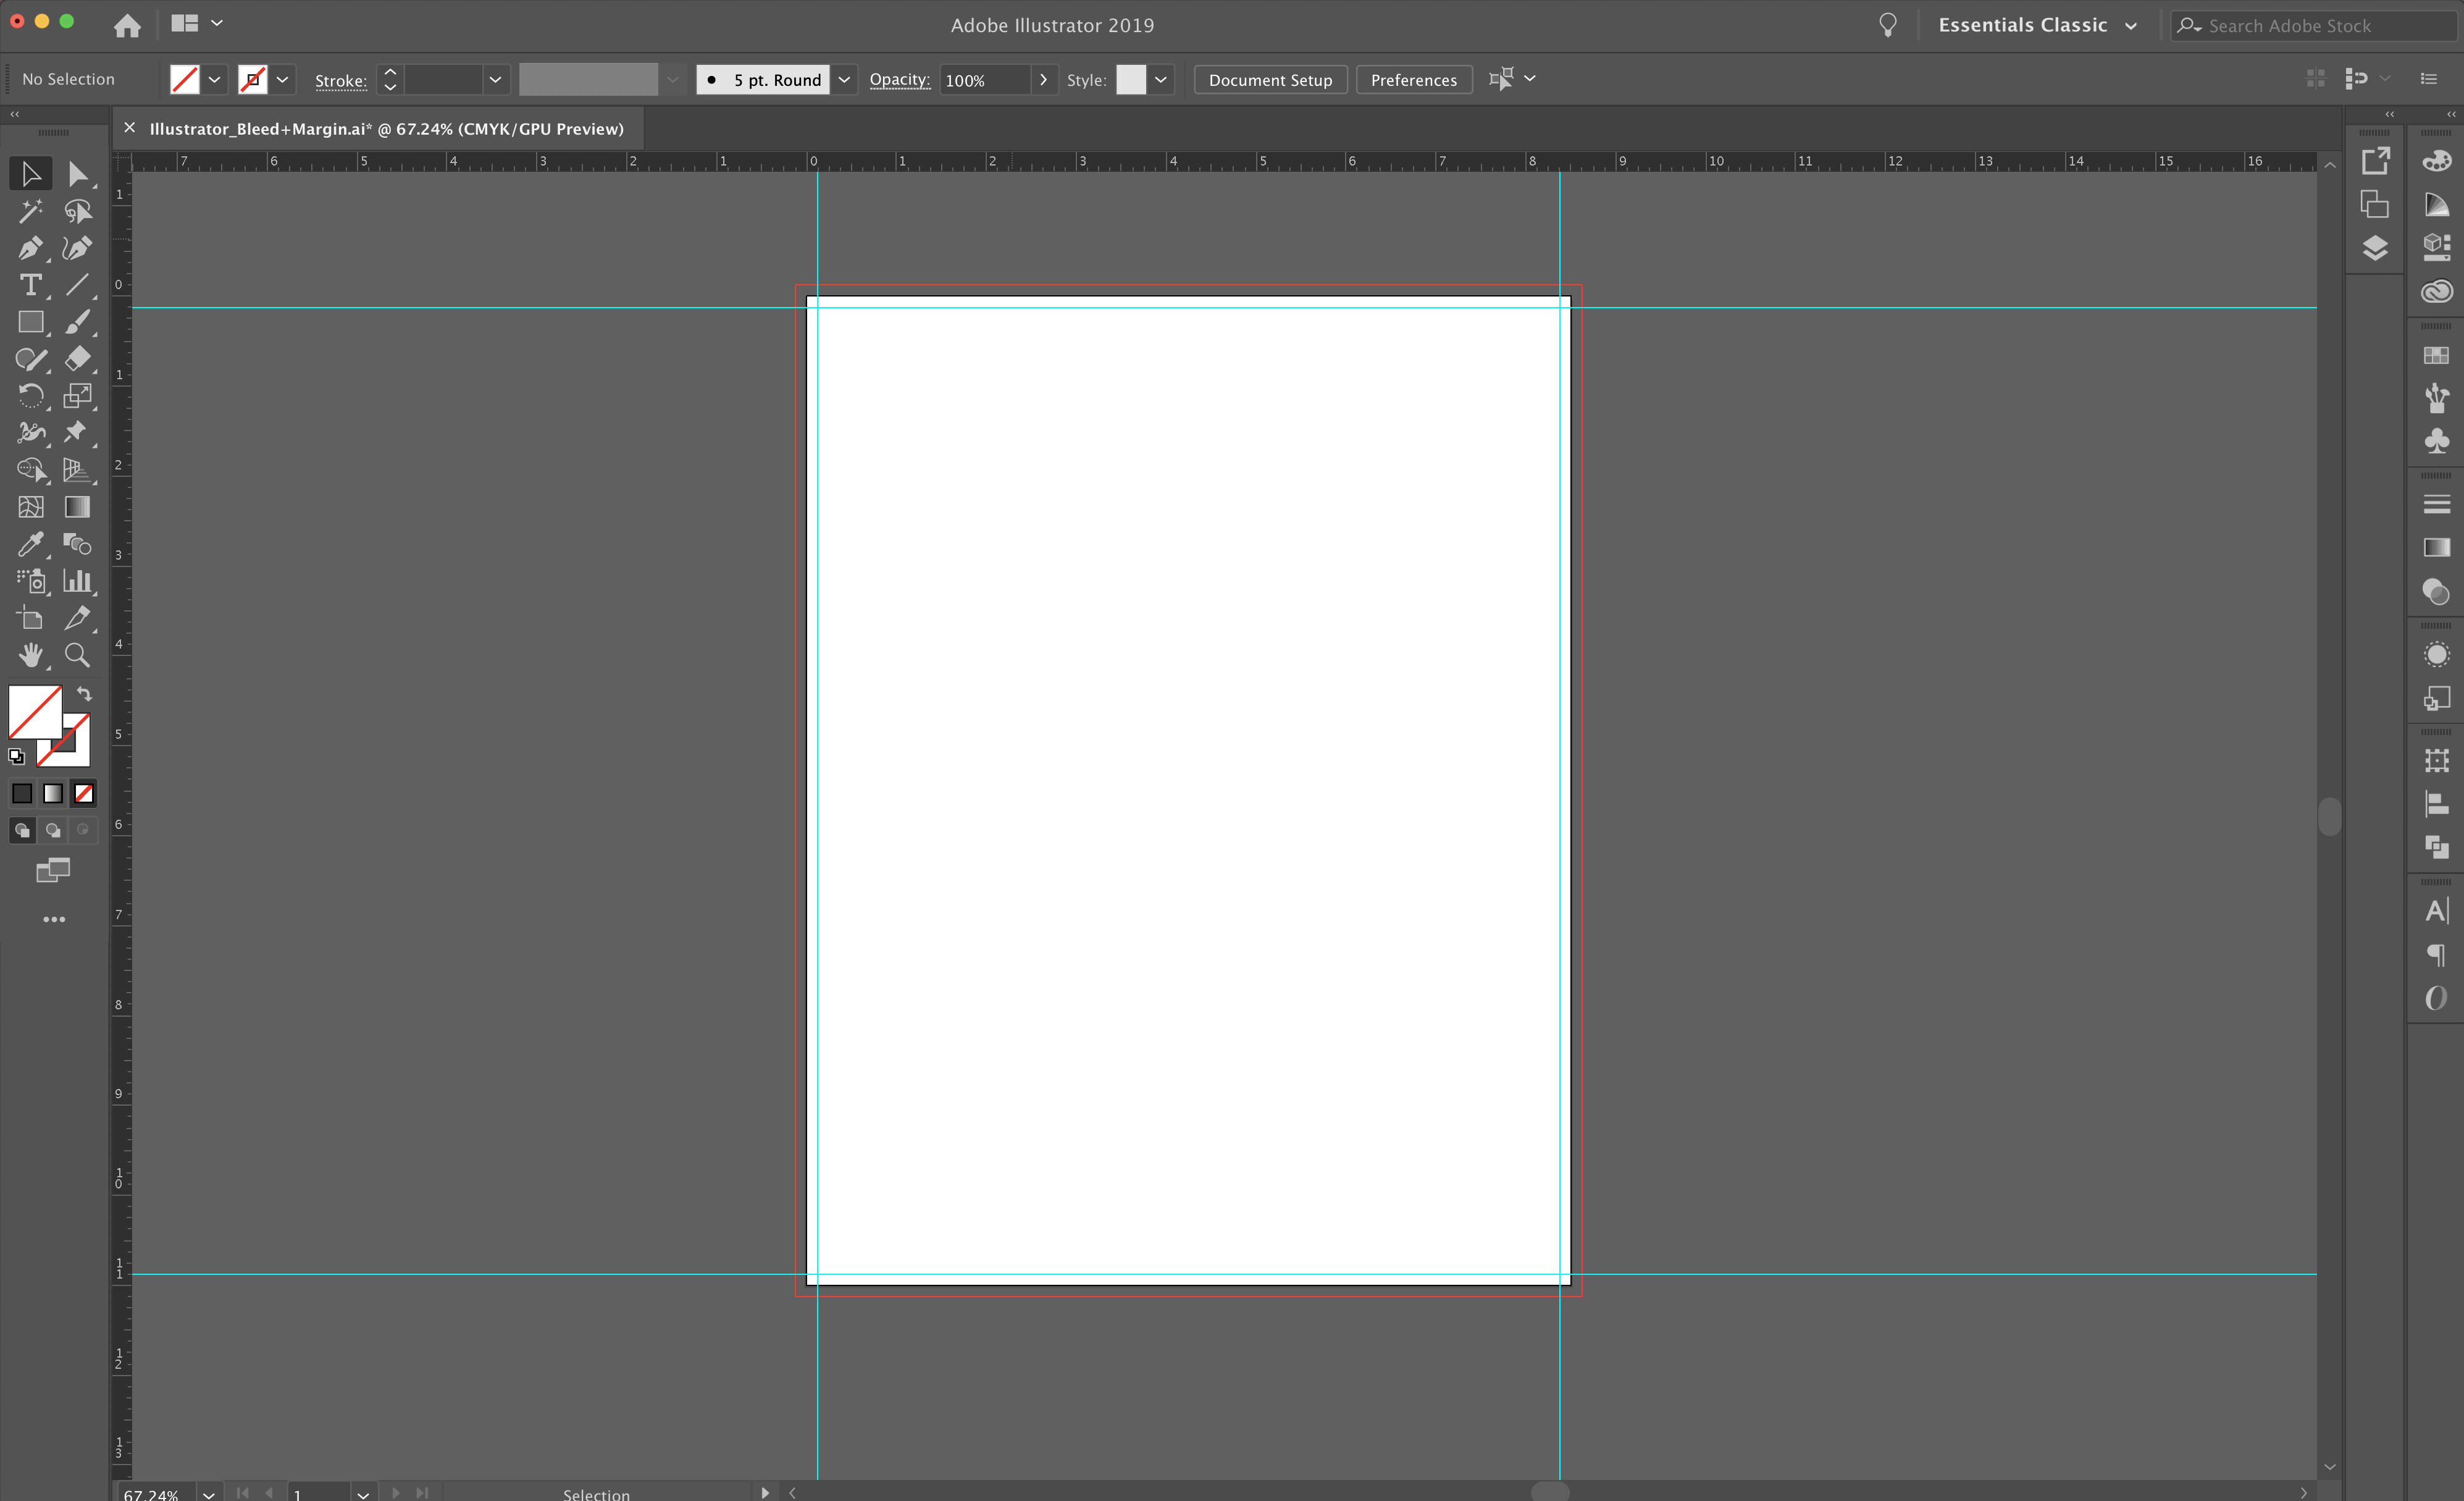
9. Safety Line
Now you are almost ready to design! To ensure that you are designing with your bleed, trim line, and safety line in mind, it is important to set guides for yourself.
a. Go to View > Rulers > Show Rulers to turn on your rulers.
b. Click + Drag from the rulers to create a safety line .125 in. away from each edge of your document.
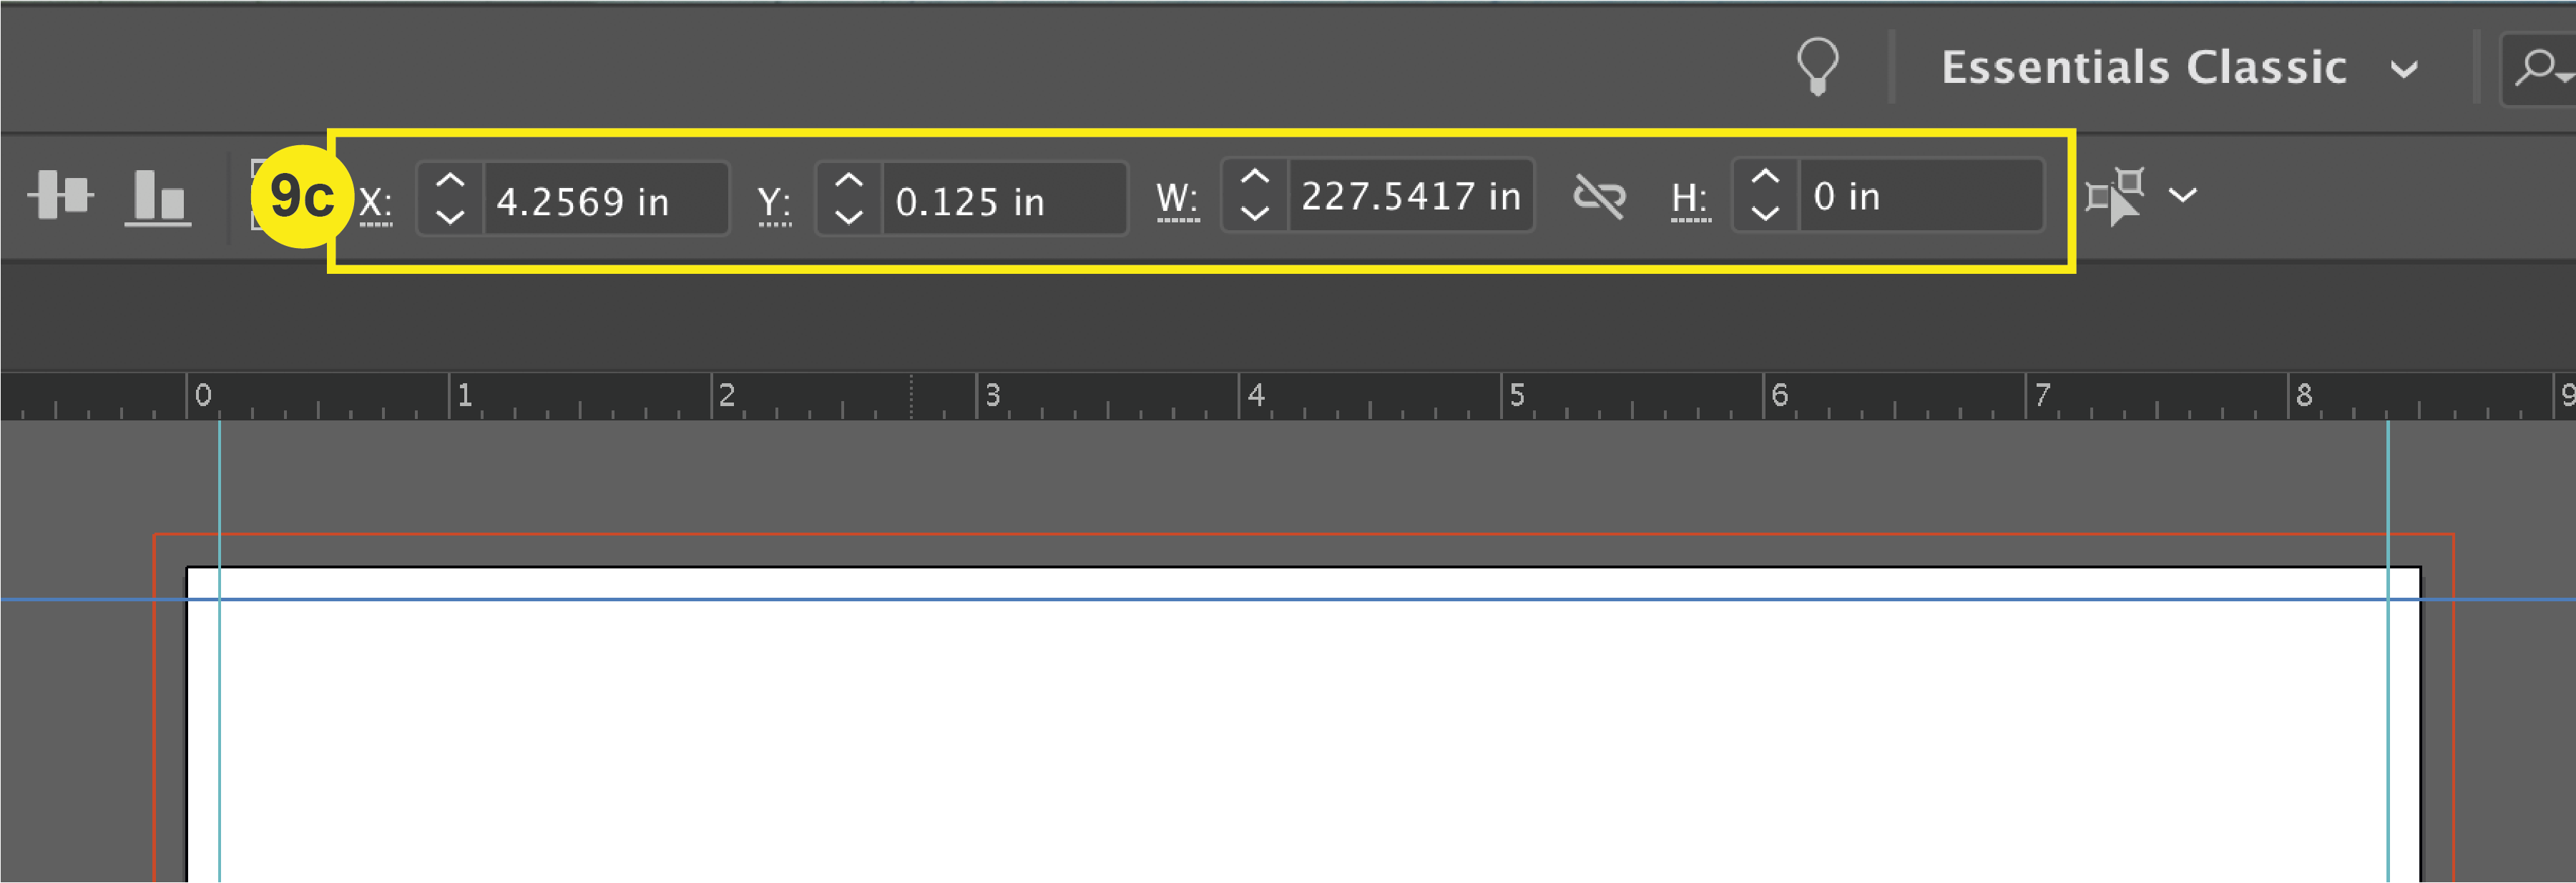
c. To make these safety lines exact, you can manually edit the numbers at the top of your Illustrator page.
After completing step 9, your document will look like this:
Now you’re ready to begin designing your product for print!
Please refer to our File Saving section for a tutorial on saving your project once you are finished.