Publisher
Print-Ready File Creation: Publisher
Checklist
- Open a New Blank Document
- Open Page Setup
- Add Bleeds and Margins (Safety Lines)
- Use Rulers to Create a Trim Guide
1. Open a New Blank Document
Once you have opened Publisher, click New > Blank 8.5” x 11.” If this is not your desired document size, you can look through more standard sizes in “More Blank Page Sizes,” but you can always adjust the size of the document within the Page Setup.
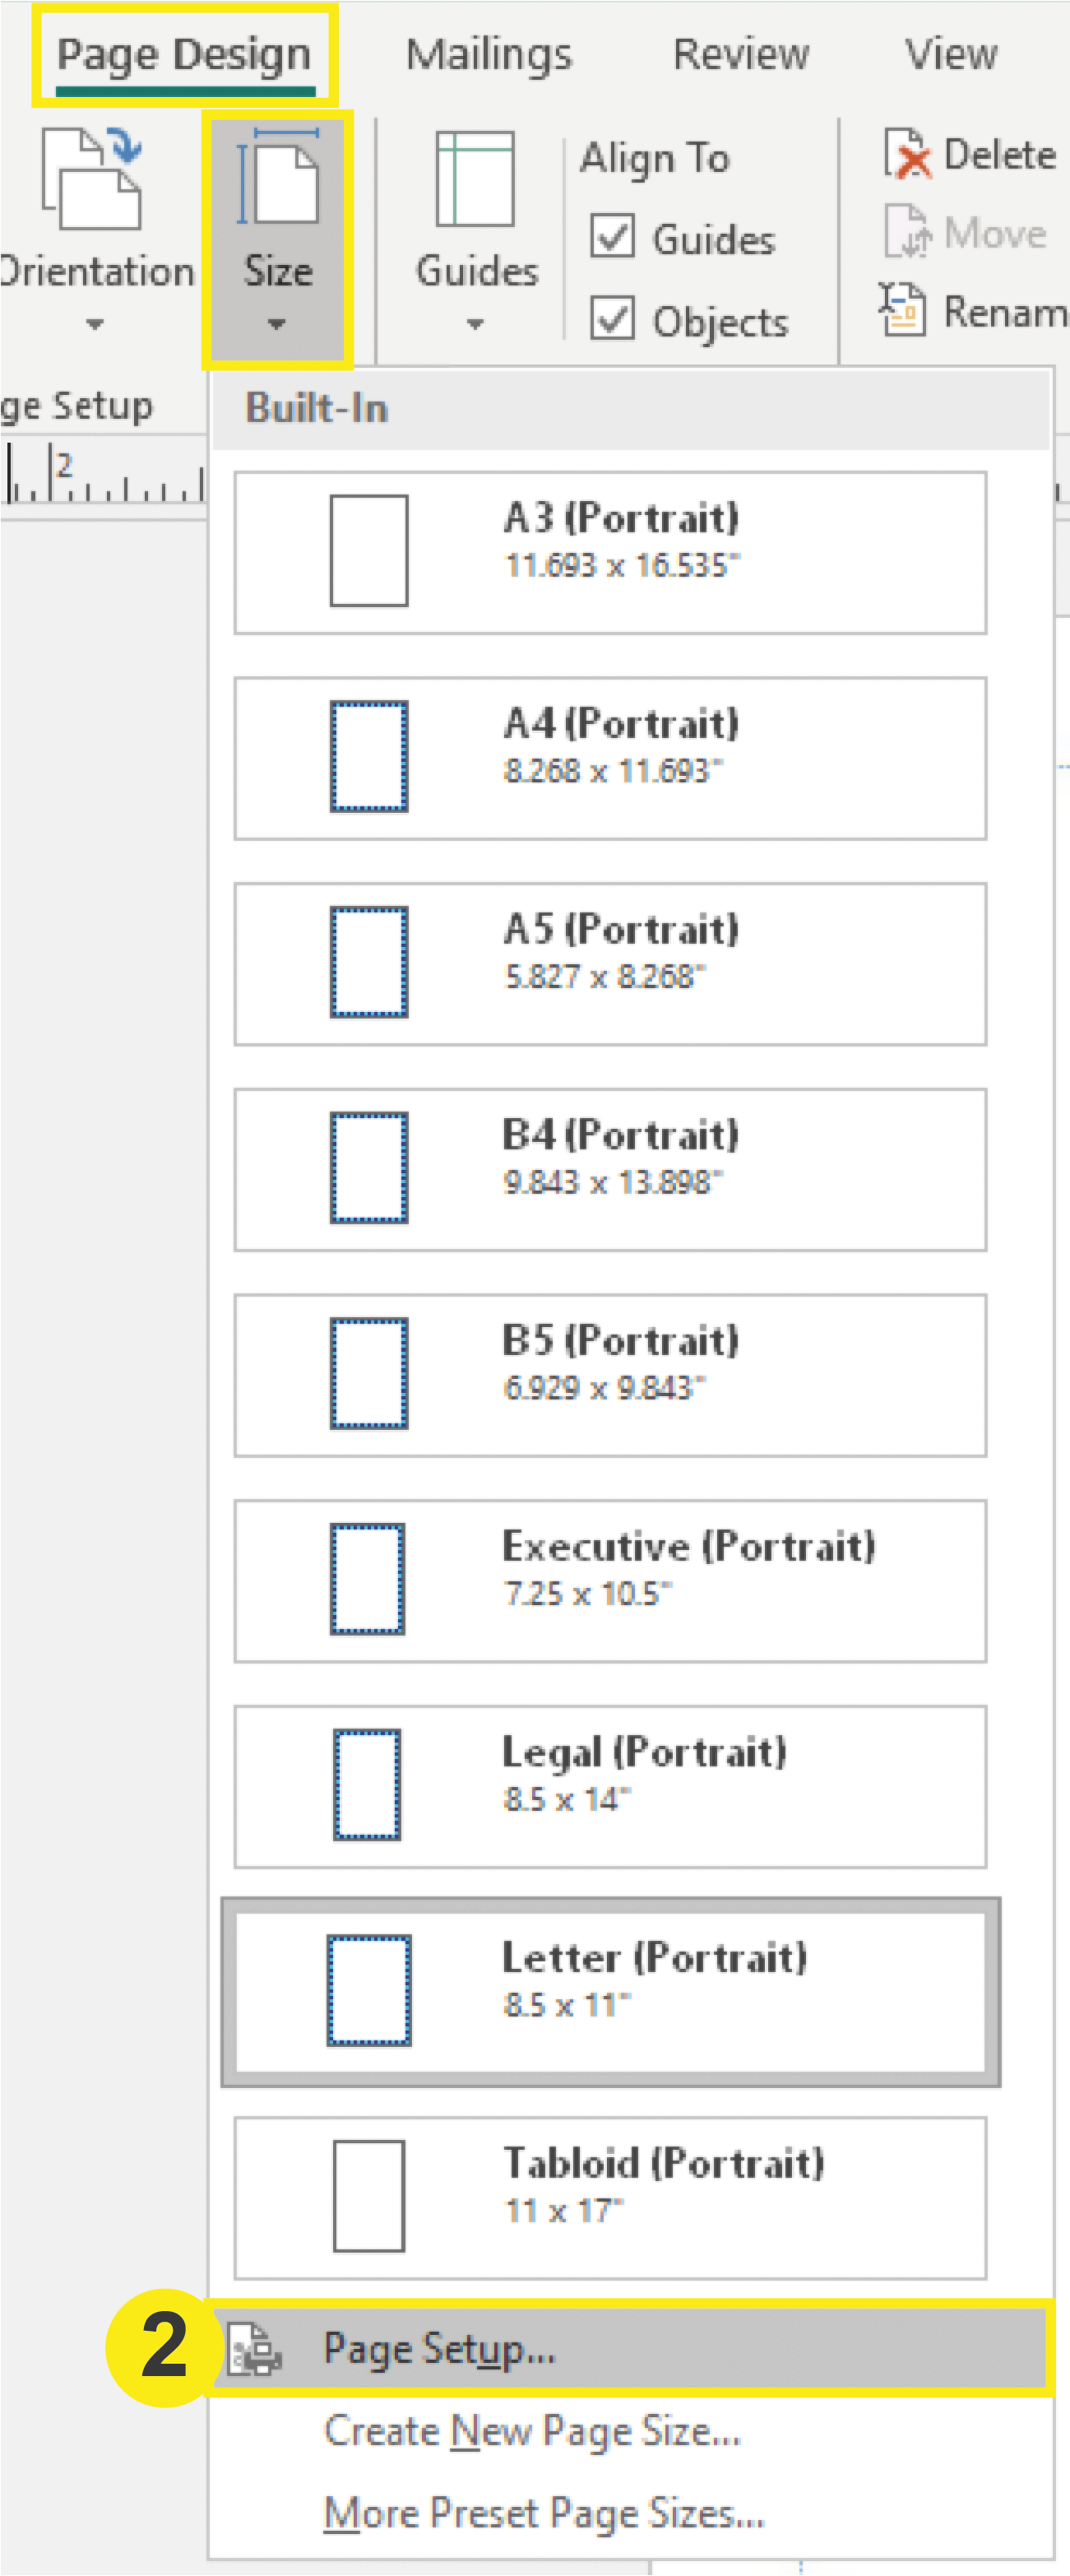
2. Open Page Setup
In the top menu, navigate to Page Design > Size > Page Setup. This will prompt the Page Setup window to open where you will input your document settings.
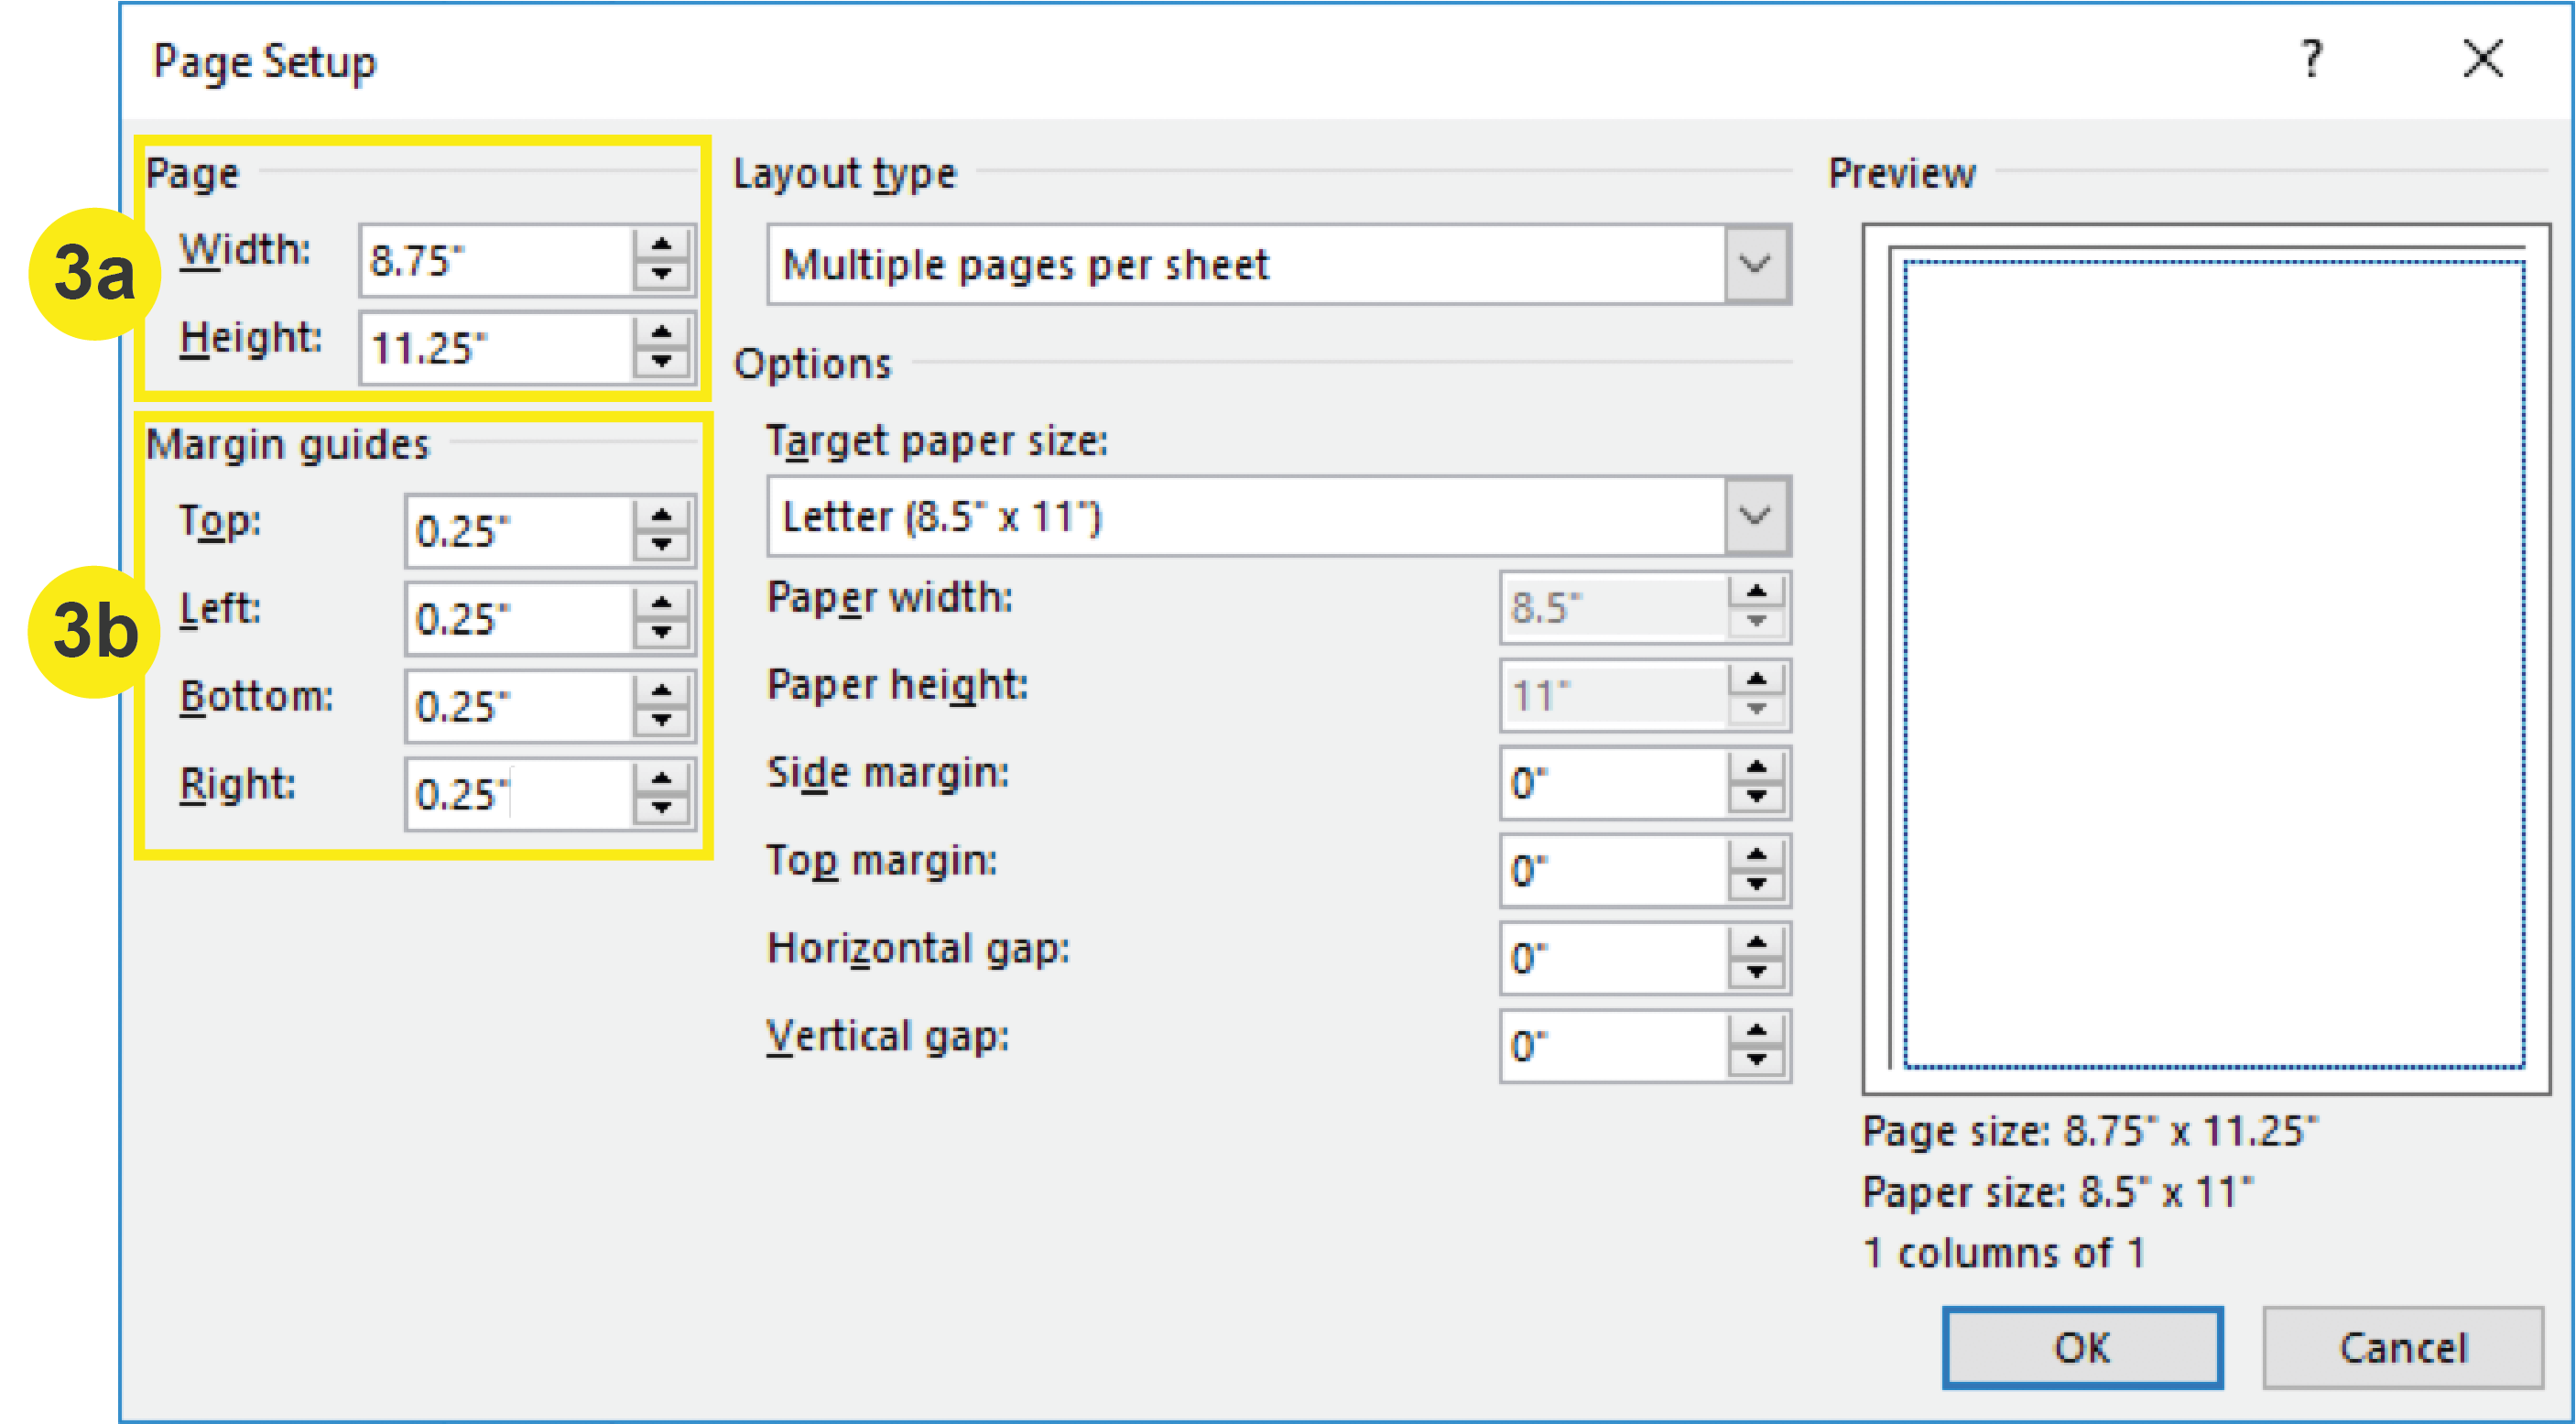
3. Add Bleeds and Margins (Safety Lines)
- In the “Page” section, input the bleed size of your document. To determine the bleed size, add .25 inches to both the width and height. For Example: An 8.5” x 11” Letterhead plus bleed would be 8.75” x 11.25”
- In the “Margin guides” section, change the value to .25 inches for each side (top, left, bottom, right). Click OK. Note: Note that your Target Paper Size (Final Trim Size) remains 8.5” x 11”
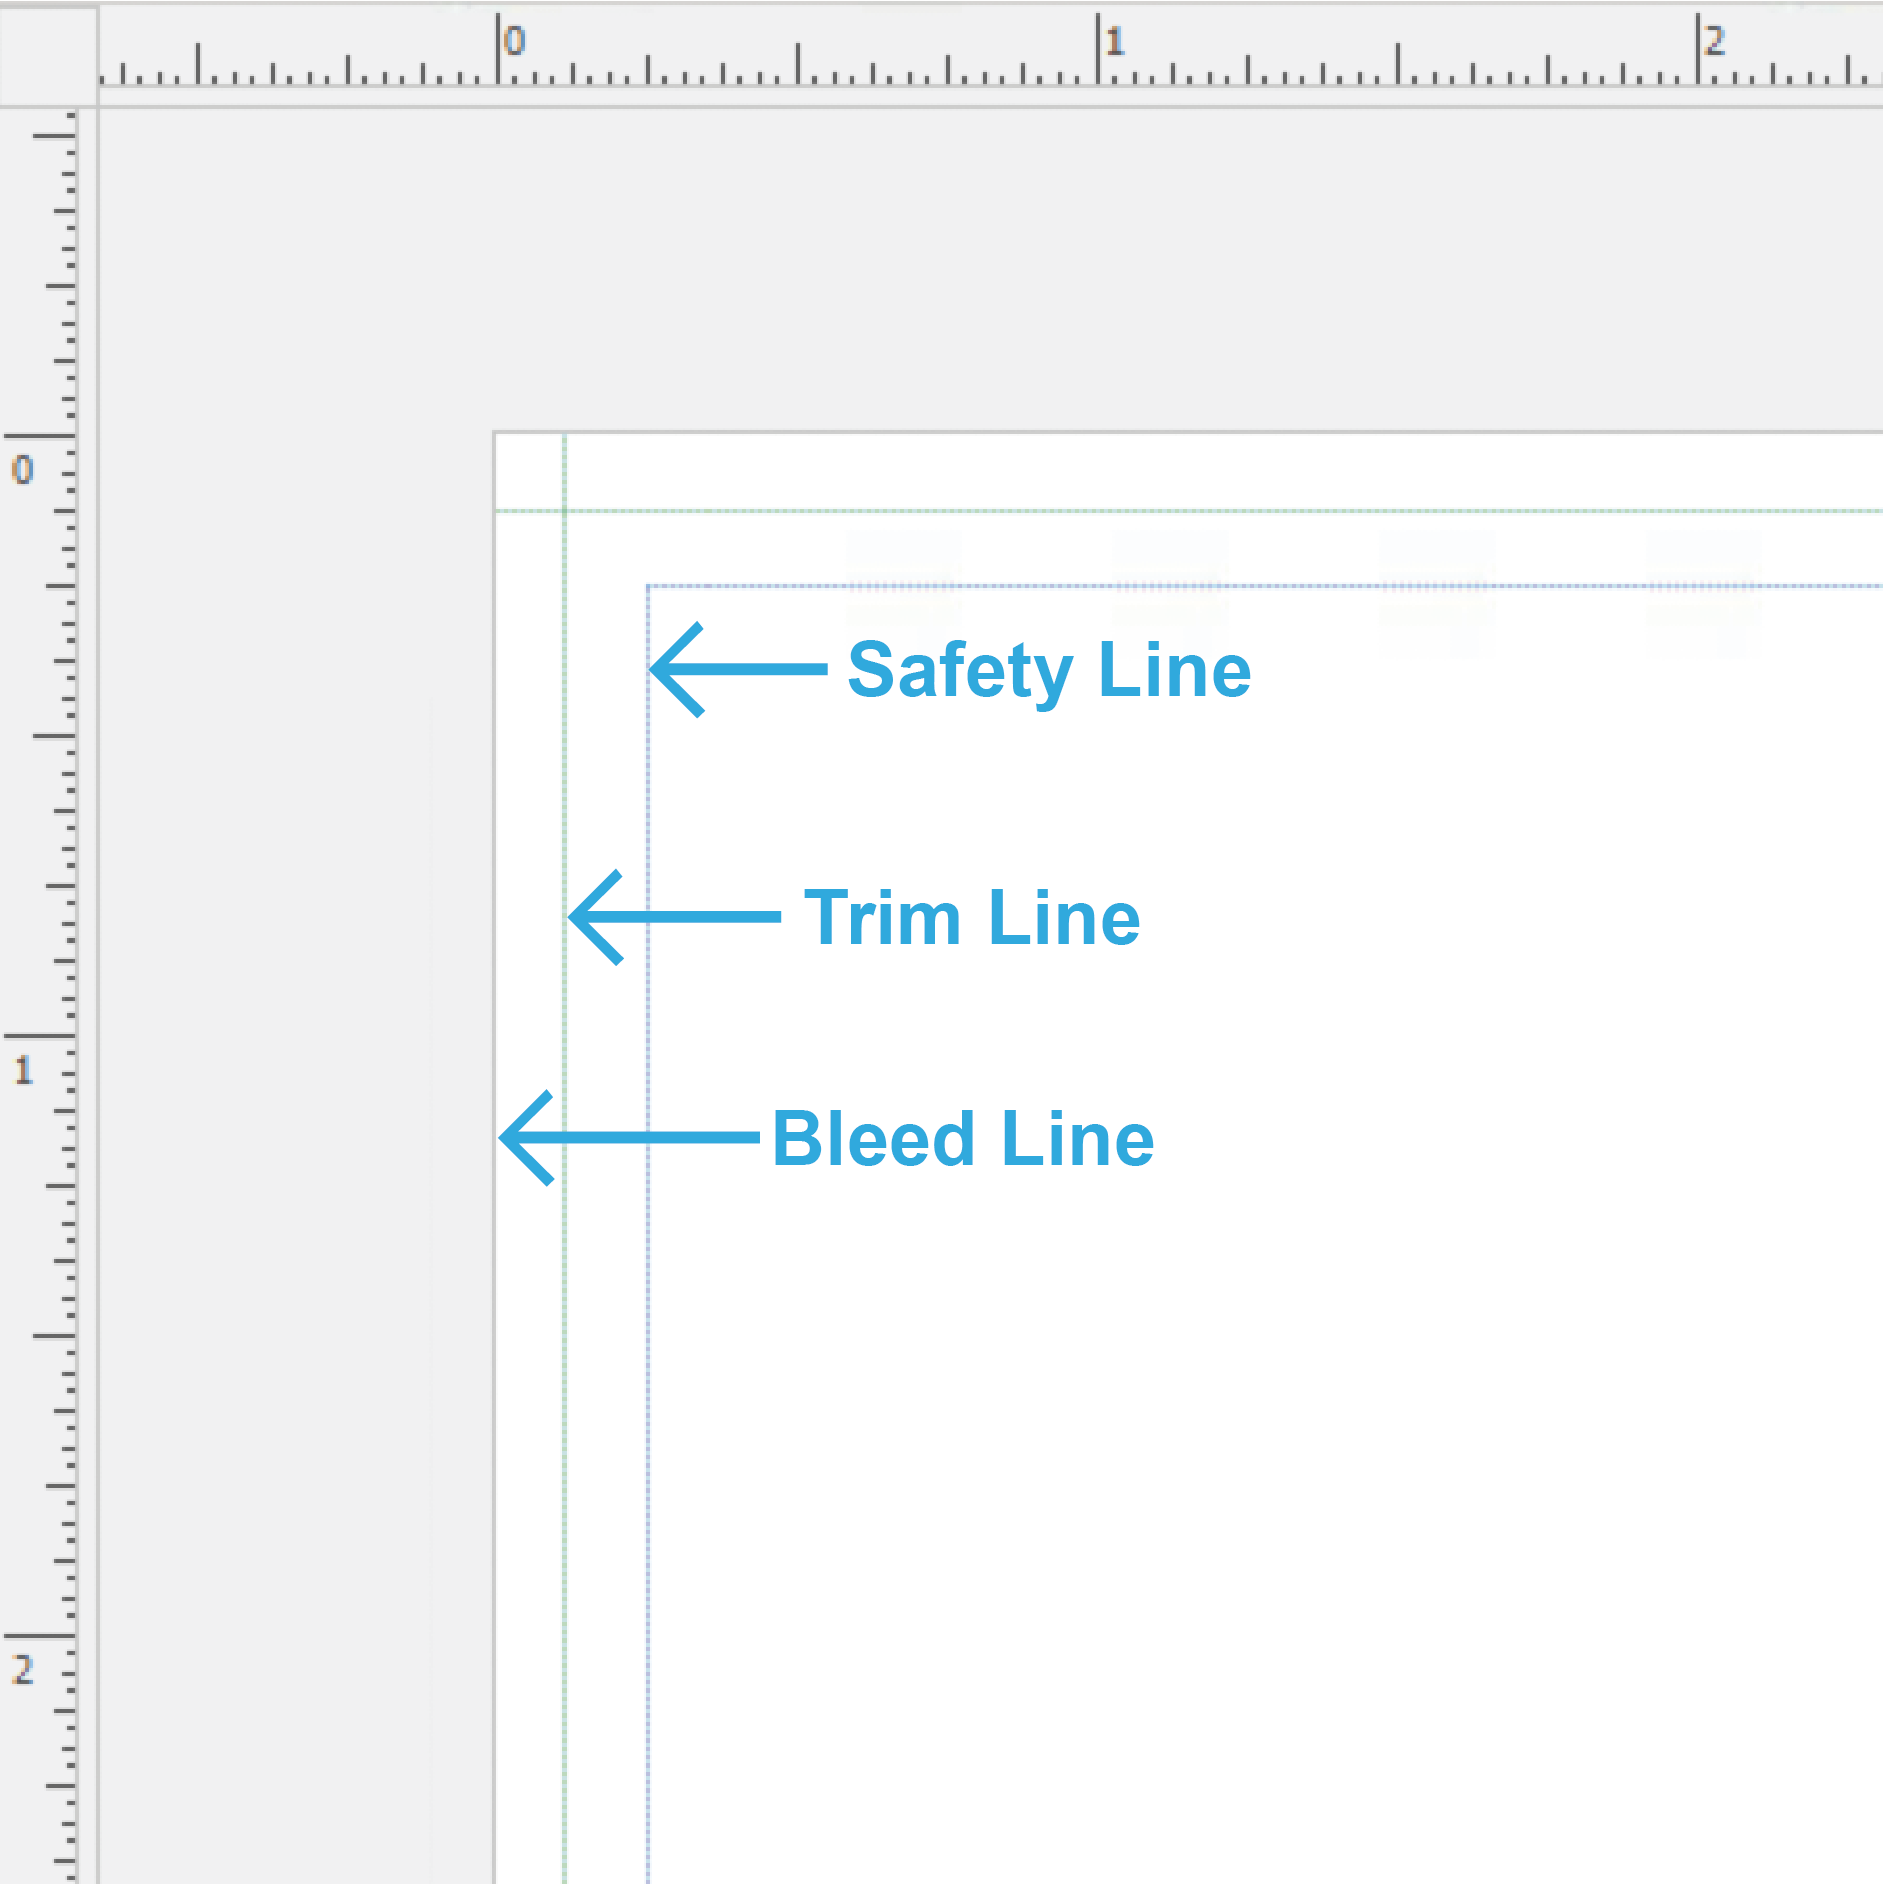
4. Use Rulers to Add a Trim Guide
After adding bleed to and margins (safety lines) to your document, you still will not be able to see where your trim line will be. To add a Trim Guide to your document, Click + Drag your mouse from the rulers to create a .125 inch guide within the document. This should fall directly between the edge of the document and the innermost margins (safety lines).
Once you are complete with steps 1-4, your document with bleeds, trim line, and safety lines set up will look similar to this:
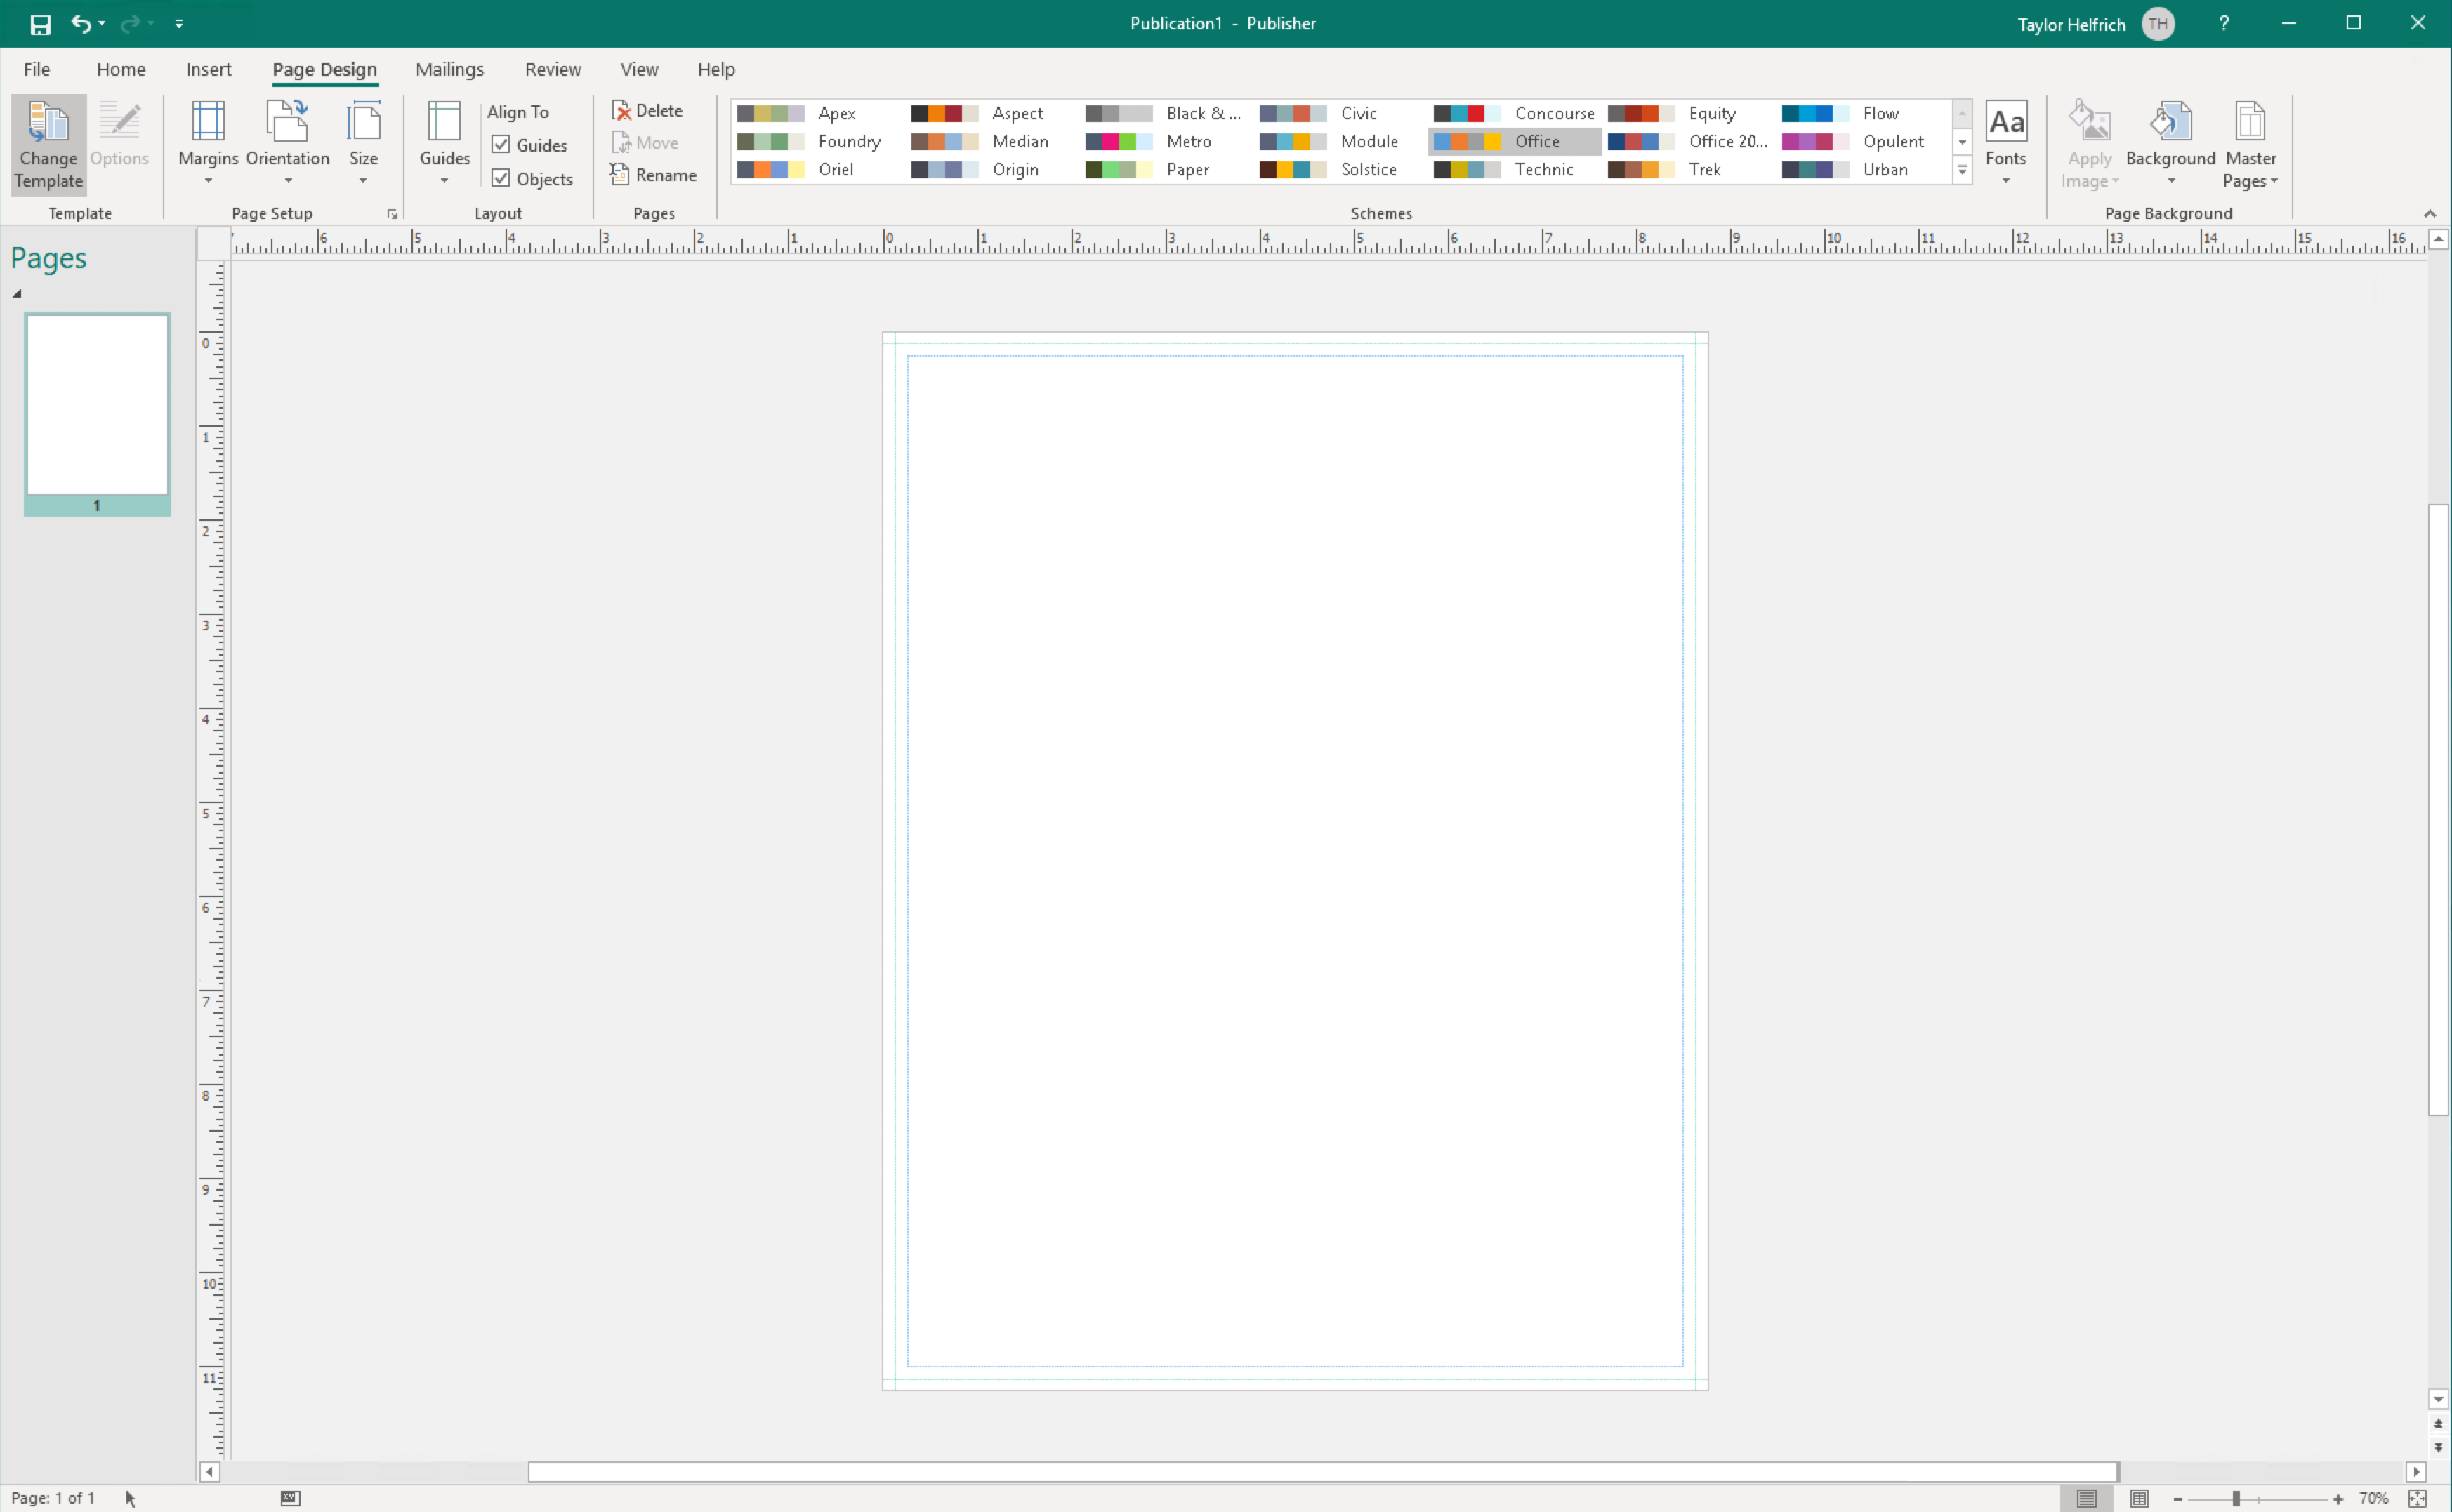
Now you’re ready to begin designing your product for print in Publisher!
Please refer to our File Saving section for a tutorial on saving your project once you are done.