


How to Add Bleed and Margins in Canva
Need to know how to properly add bleed and safety margins in Canva? It’s an important step you can’t afford to miss. Proper bleed and safety margins ensure your images and colors extend to the edge of the page, avoiding any white borders when cut.
Let’s learn how to do this in Canva!
Step-by-Step Instructions for Bleed & Safety Margins in Canva
Adding bleed and safety margins to your Canva designs is easy! Here’s a quick guide to get print-ready results. For a visual walkthrough, check out our YouTube tutorial at the bottom.
- Start Your Project: From the Canva homepage, either create a new project or open an existing design.
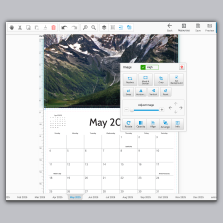
- File Settings: Click the “File” button in the top left corner & select “View settings” from the dropdown.
- Enable Guides and Bleed: Find the following options and click to enable them:
- “Show rulers and guides”
- “Show print bleed”
- Set Safety Margins: Click “Add guides” and adjust the following settings:
- Gap: 0 pixels
- Columns: 0 pixels
- Rows: 0 pixels
- Ideally, aim for a margin size of 10 pixels (or 0.13 inches).
- Upload Your Image: Click the “Upload” tab and select your image file. Once uploaded, drag it onto your design. Ensure any elements you want to extend to the edge reach out into the bleed area.
- Save Your Print-Ready File:
- Click “Share” in the top right corner.
- Select “Download”.
- Choose “PDF Print” as your file type.
- Under additional options, make sure to check “Crop marks and bleed”.
- Click “Download” to save your file.
You now have a print-ready file with perfect bleed and safety margins!
See footer for definitions of terms: bleed, safety, margin.
Watch the Video Tutorial
To watch our tutorial on these steps, check out our YouTube video here:
Still can’t picture your final print? Use our free file review tool to get a better idea! Need help turning your design vision into a reality? PrintingCenterUSA offers a variety of printing and design services for any print project.
Quick Definitions:
Bleed:
- Definition: The area of your design that extends slightly beyond the intended final cut line (trim line) of the printed product.
- Purpose: Provides a buffer during the printing and cutting process. Ensures that background colors and images fully extend to the edge of the page, preventing unintended white borders.
Safety Margin:
- Definition: The area within the trim line where important text and visual elements are placed.
- Purpose: Creates a comfortable visual buffer, ensuring key content isn’t accidentally cut off due to slight variations during printing and trimming.
Margin:
- Definition: The general term for the space between your design elements and the edge of the page.
- Purpose: Improves readability and makes your design look balanced and professional.