Word
Bleeds: Setting Up Bleeds in Microsoft Word for Mac: A Step-by-Step Guide
Use this guide for Mac, for PC version head over to our blog here.
Bleeds are extra space added around the edges of your design that get trimmed off after printing. They ensure your colors or images go all the way to the paper’s edge without leaving white borders.
Don’t worry, it’s easier than it sounds! Let’s get started.
Here’s how to set up bleeds in Microsoft Word, whether you’re starting a new document or working with an existing one:
Open Your Document: Start with either a new blank page or your existing 8.5×11 document.
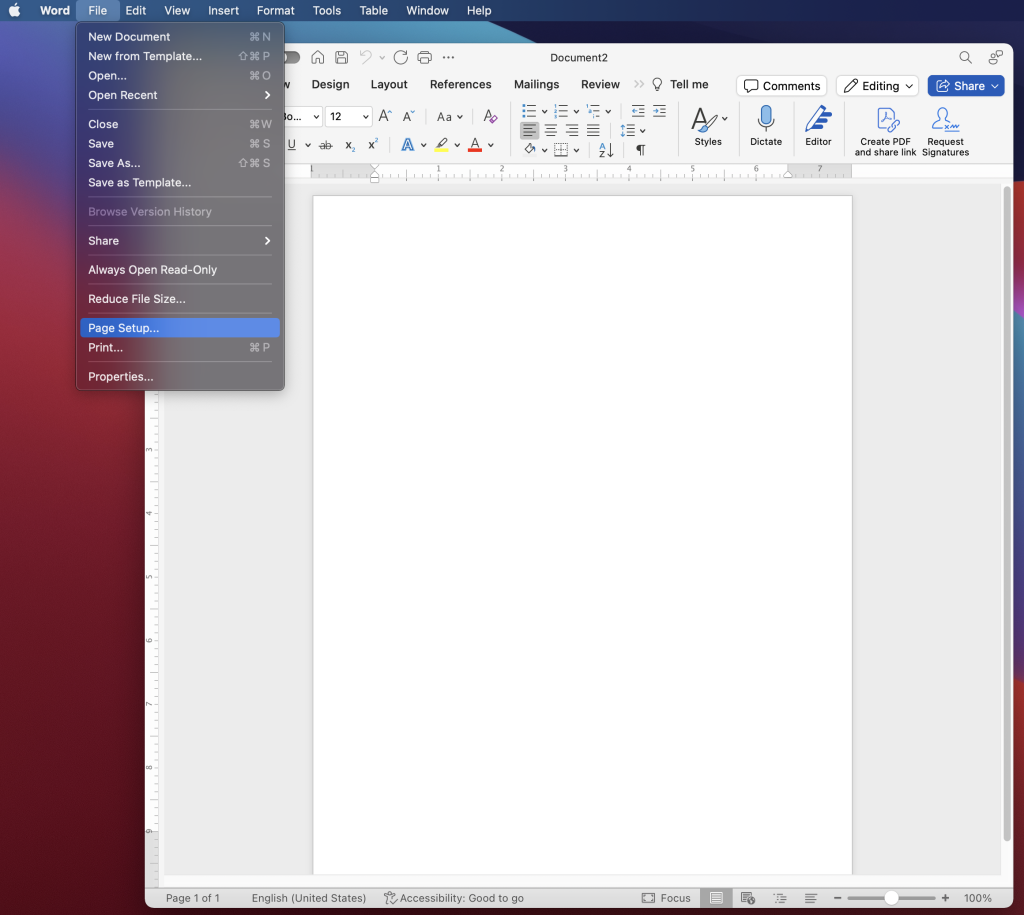
Go to “File” > “Page Setup.”
Under “Paper Size,” select “Manage Custom Sizes.” if you’re creating a new document, or click the arrow next to the paper size to open the dropdown menu if it’s an existing document.
Click the “+” button to add a new size.
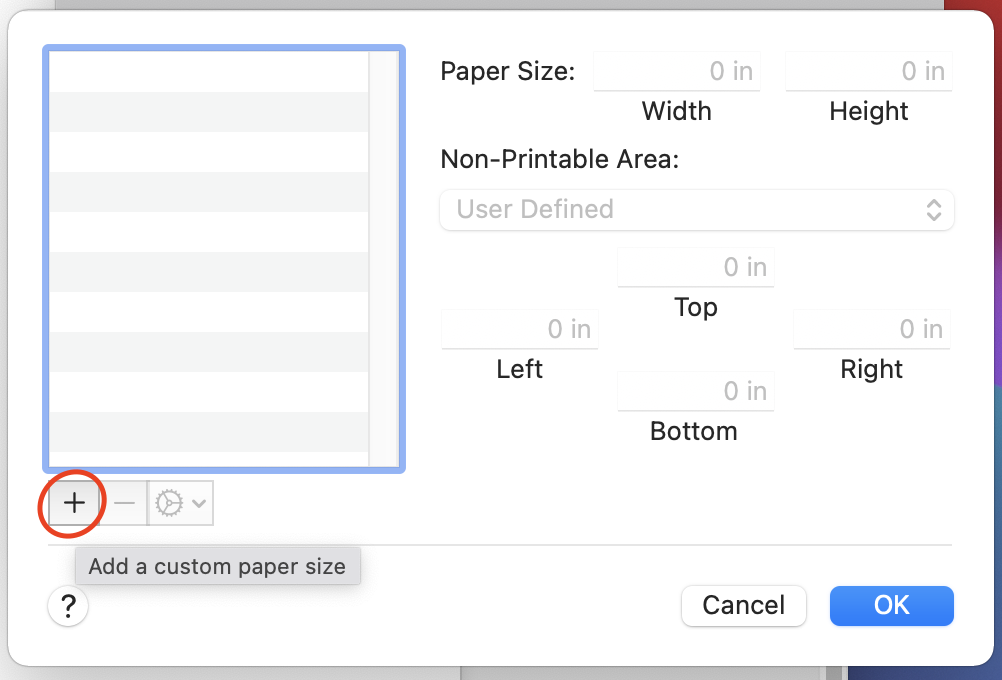
Name it descriptively (e.g., “My Project with Bleeds”).
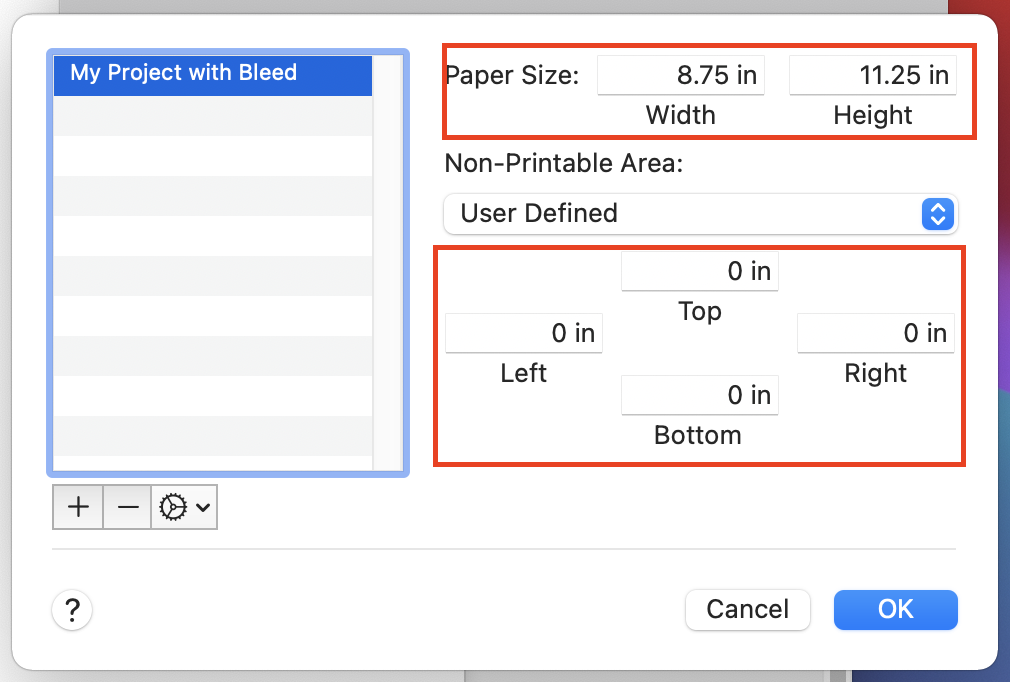
To your intended final size, add 0.25 inches to both width and height.
Example: For an 8.5 x 11 inch flyer, set the custom size to 8.75 x 11.25 inches.
In “Non-Printable Area” (margins), set all values to “0.”
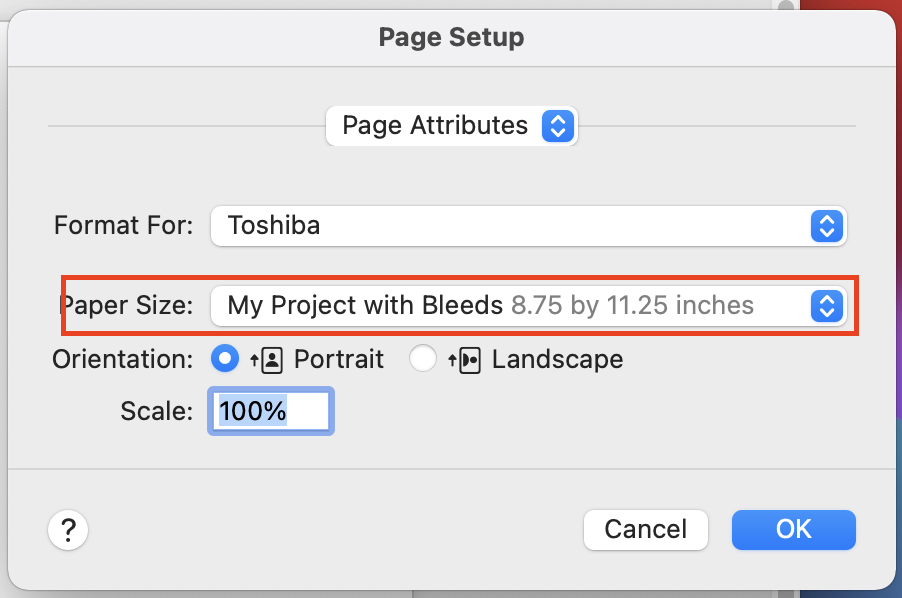
Click “OK.”
If it’s an existing document, repeat the same process and adjust layout and items as needed.
Setting Bleeds and Safety Margins:
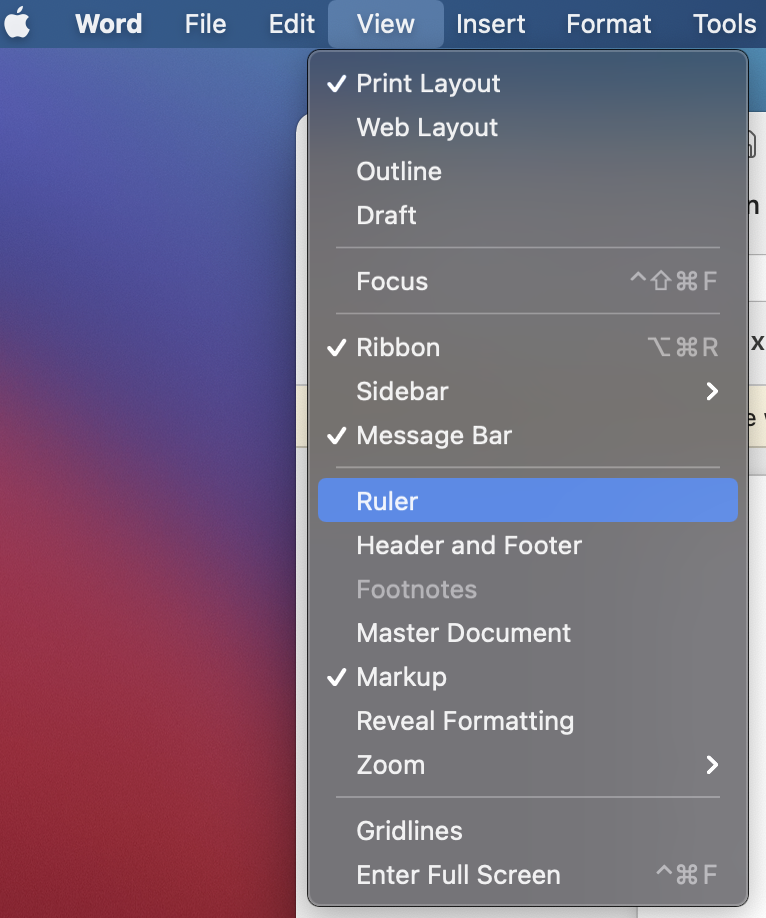
Ruler: Go to “View” and select or check “Ruler” if it’s not already visible.
Page Indent: On the ruler, drag the left and right indent markers to 0.25 inches from each edge of the page.
This creates a visual buffer for both the bleed (0.125 inches) and the safety margin (0.125 inches).

Visual Aid: (Optional) Insert a rectangle shape that fills the entire page. Change the fill color to a light color (e.g., light blue). This box represents your document’s final size after trimming, and the space between the box and the edge of the page is your bleed area. Anything important (text, logos, etc.) should stay inside the box (the safety margin) to avoid getting cut off.
Note: Make sure to remove your colored boxes before exporting your PDF!
Bleed Marks: (Optional)
Go to “File” > “Print.”
Click on the drop-down menu to select your printer.
Click “Printer Properties” (or a similar option depending on your printer).
Look for a tab related to “Marks and Bleeds” or “Advanced.”
Check the box to enable “Crop Marks” (sometimes called “Trim Marks”).
Important Note: Remember that these are just visual guides within Word. When saving your file for printing, be sure to choose PDF format and include bleed settings in your print dialog box to ensure the bleed area is printed correctly.