


How to Arrange Pages for Booklet Printing (Step-by-Step Guide)
If you have ever stared at your PDF wondering whether your pages are in the right order for booklet printing, you are not alone. It is one of the most common questions we get, and the answer is simpler than most people expect. This guide covers everything you need to know, from file setup to page count rules for every binding type, so you can submit your file with confidence and get exactly what you designed.
Upload your booklet as single pages in consecutive order. That is it.
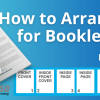
Front cover, inside front cover, all interior pages, inside back cover, back cover. One page at a time, in order, from start to finish. You do not need to arrange pages into spreads, pair them manually, or figure out how they will fold. That is our job. Your job is to hand us a clean, single-page PDF in the right order and we handle everything else. Start your project today!
Single Pages vs Spreads: What Is the Difference?
This is where most people run into trouble. A spread is when two pages sit side by side in the same file, the way an open book looks. A single page is exactly what it sounds like, one page at a time.
PrintingCenterUSA requires single pages, not spreads. If you upload a file with pages paired side by side, it will cause layout issues when we go to print. The quick way to check your file is to open your PDF in Acrobat and scroll through it. If you see one page at a time stacked on top of each other as you scroll, you are good to go. If you see two pages sitting next to each other, you need to re-export.
Do Not Forget the Inside Covers
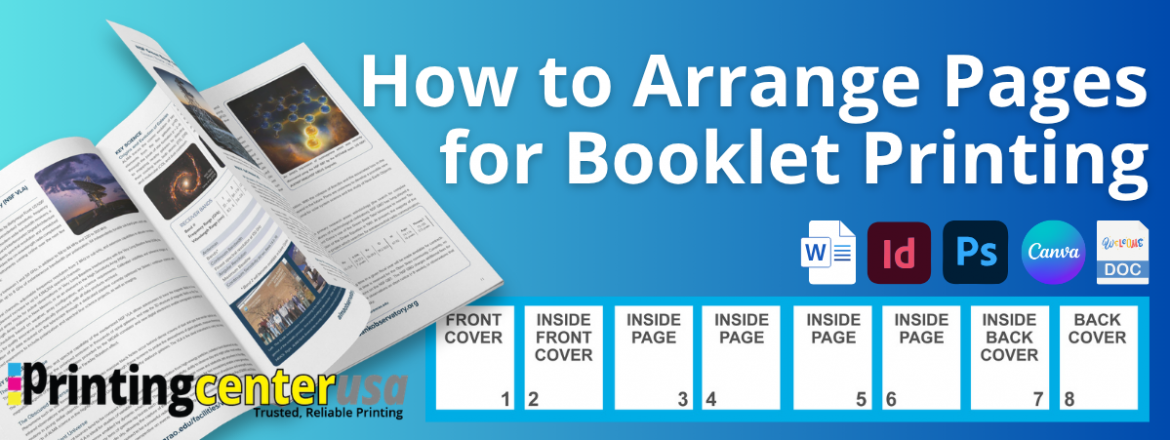
Your PDF needs to include every page of your booklet, even the ones you want left blank. That means your file should always contain these pages in this order:
Page 1: Front cover
Page 2: Inside front cover
Pages 3 through the second to last: All interior pages
Second to last page: Inside back cover
Last page: Back cover

If you want the inside covers unprinted, include them as blank pages in your PDF. Leaving them out throws off the entire page order.
How to Set Up Your File by Program
The goal is the same no matter what software you use: export single pages in the correct order. Here is how to do it in the most common tools.
How to Set Up Your File in Adobe InDesign and Illustrator
Set your document to single pages rather than spreads and design each page individually. When you are ready to export, make sure the spreads checkbox is turned off in your export settings. InDesign users especially need to watch for this because the default export setting can sneak spreads in without you realizing it. Export as a print-ready PDF and scroll through it in Acrobat to confirm pages appear one at a time.
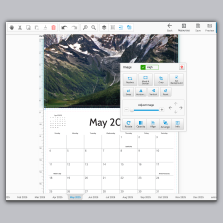
How to Set Up Your File in Canva
Canva is one of the most beginner-friendly options for booklet design because each page in your Canva document automatically becomes one page in your PDF. Design your pages in order, then download as a PDF Print file. Canva keeps everything in the correct order by default, so as long as you are not combining pages manually, you are set.
How to Set Up Your File in Microsoft Word
Set your document up as standard pages and add them in order from beginning to end. Export as a PDF when you are finished. The most important thing to avoid in Word is the book fold layout setting. It sounds helpful but it rearranges your pages and will cause printing issues. Stick to standard page setup and export straight to PDF.
How to Set Up Your File in Google Docs
Create your document in normal page order with each page separate and download as a PDF. Like Word, avoid any temptation to manually arrange pages into booklet format. Keep it simple, keep it in order, and let us handle the rest.
Page Count Rules by Binding Type
This is where booklet setup gets specific. Each binding type has its own page count requirements, and submitting a file with the wrong page count is one of the most common reasons orders get delayed. Here is what you need to know for each.
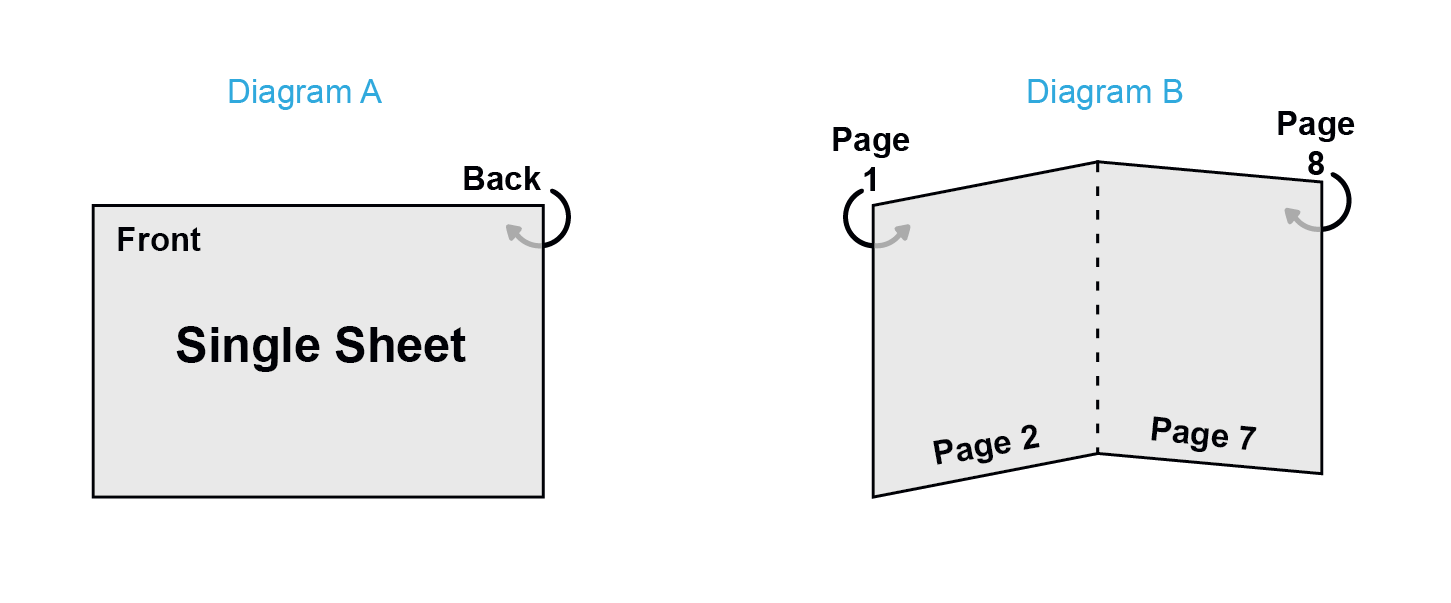
Saddle Stitch
Saddle stitching is the most popular booklet binding. Sheets of paper are folded in half and stitched along the spine, which means every sheet produces four numbered pages. Because of that fold, your total page count must always be a multiple of four.
Minimum page count: 8 pages
Maximum page count: 92 pages
Page count increments: multiples of 4 (8, 12, 16, 20, and so on) If your content lands at an odd number like 10 or 14 pages, you need to add blank pages to bring it up to the next multiple of four.
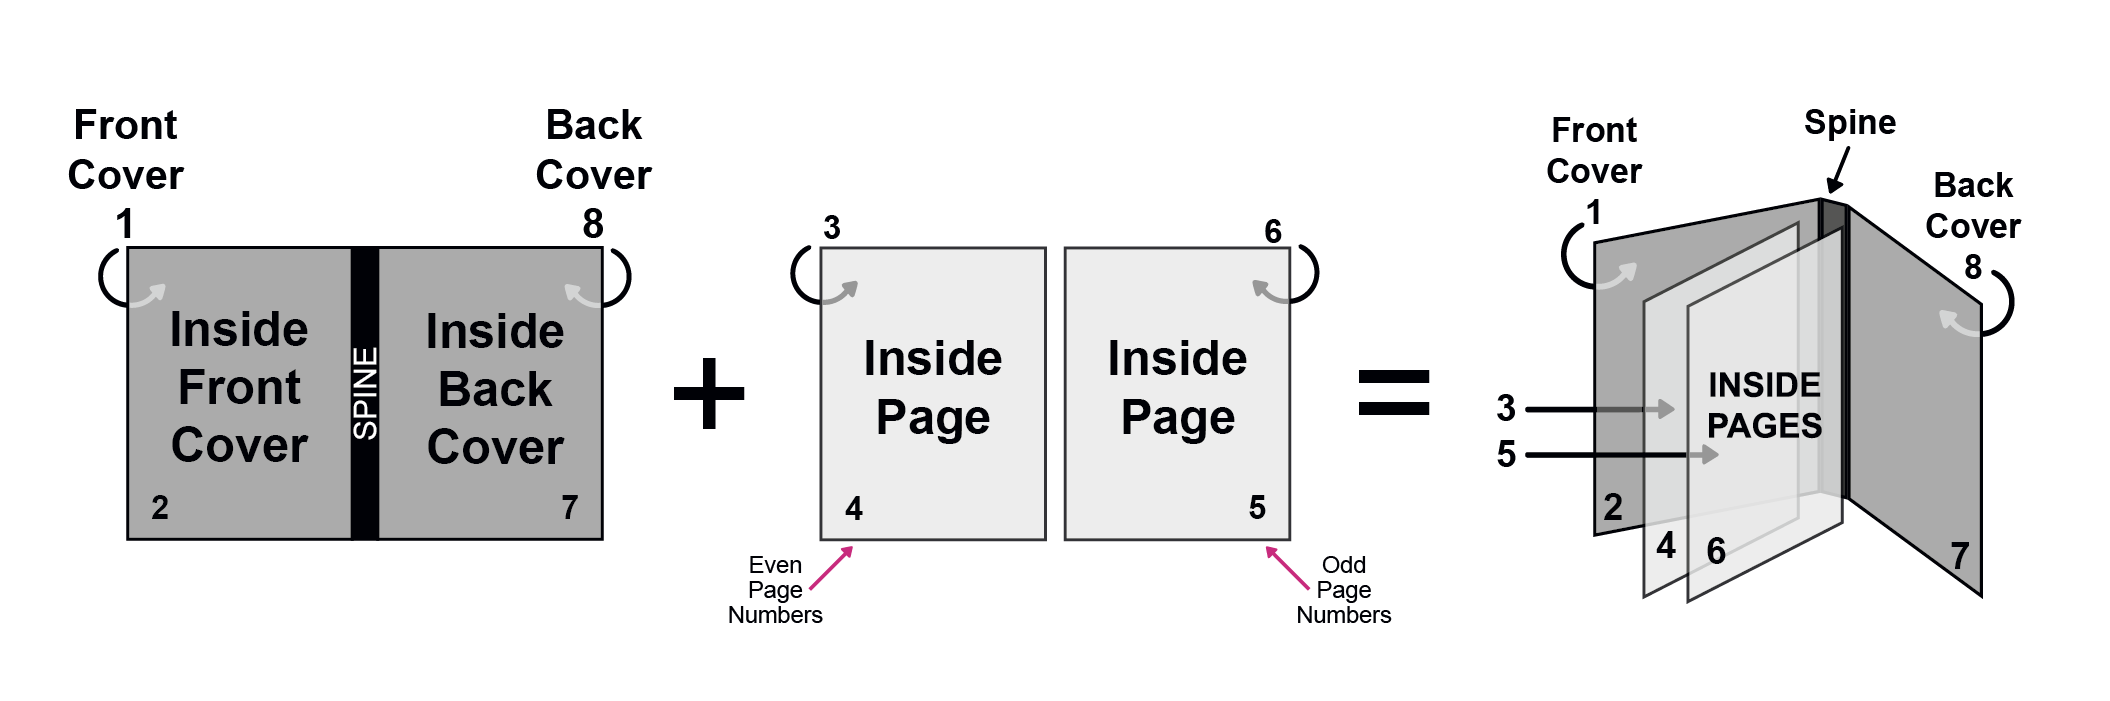
Perfect Binding
Perfect binding produces a square spine, the kind you see on paperback books and professional catalogs. Interior sheets are stacked, the binding edge is ground down, and a softcover is wrapped and glued around them. Because pages are not folded, your count only needs to be a multiple of two.
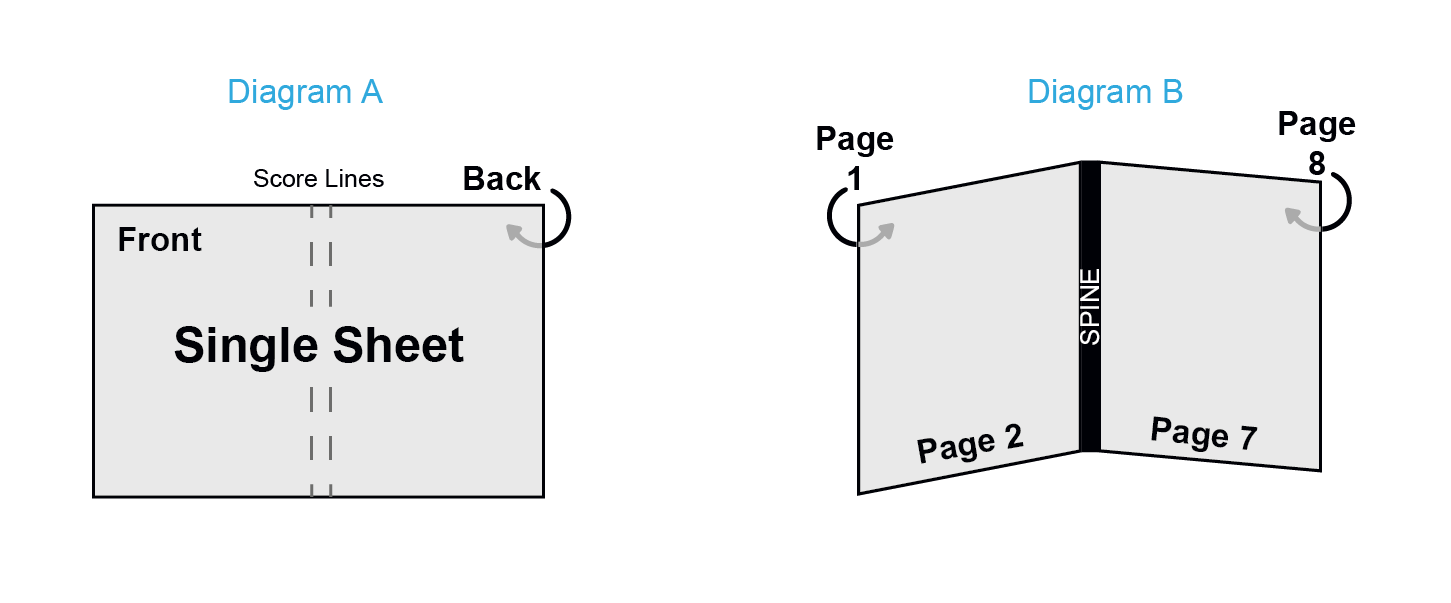
Perfect binding is when single sheets of text weight paper are printed on both sides and collated in page number order, one on top of the other. The sheets are cut down to your trim size and then the edges are ground down. The softcover is wrapped around the inside pages and glued to the edge of them, which is why you have a square spine that you can print on.
Minimum page count: 28 pages
Maximum thickness: up to 2 inches
Page count increments: multiples of 2
Spiral Binding
Spiral binding uses a durable coil threaded through hole-punched pages. It allows the booklet to lay completely flat when open, which makes it a popular choice for manuals, cookbooks, and workbooks. Because the spine is the coil itself, you cannot print on it.
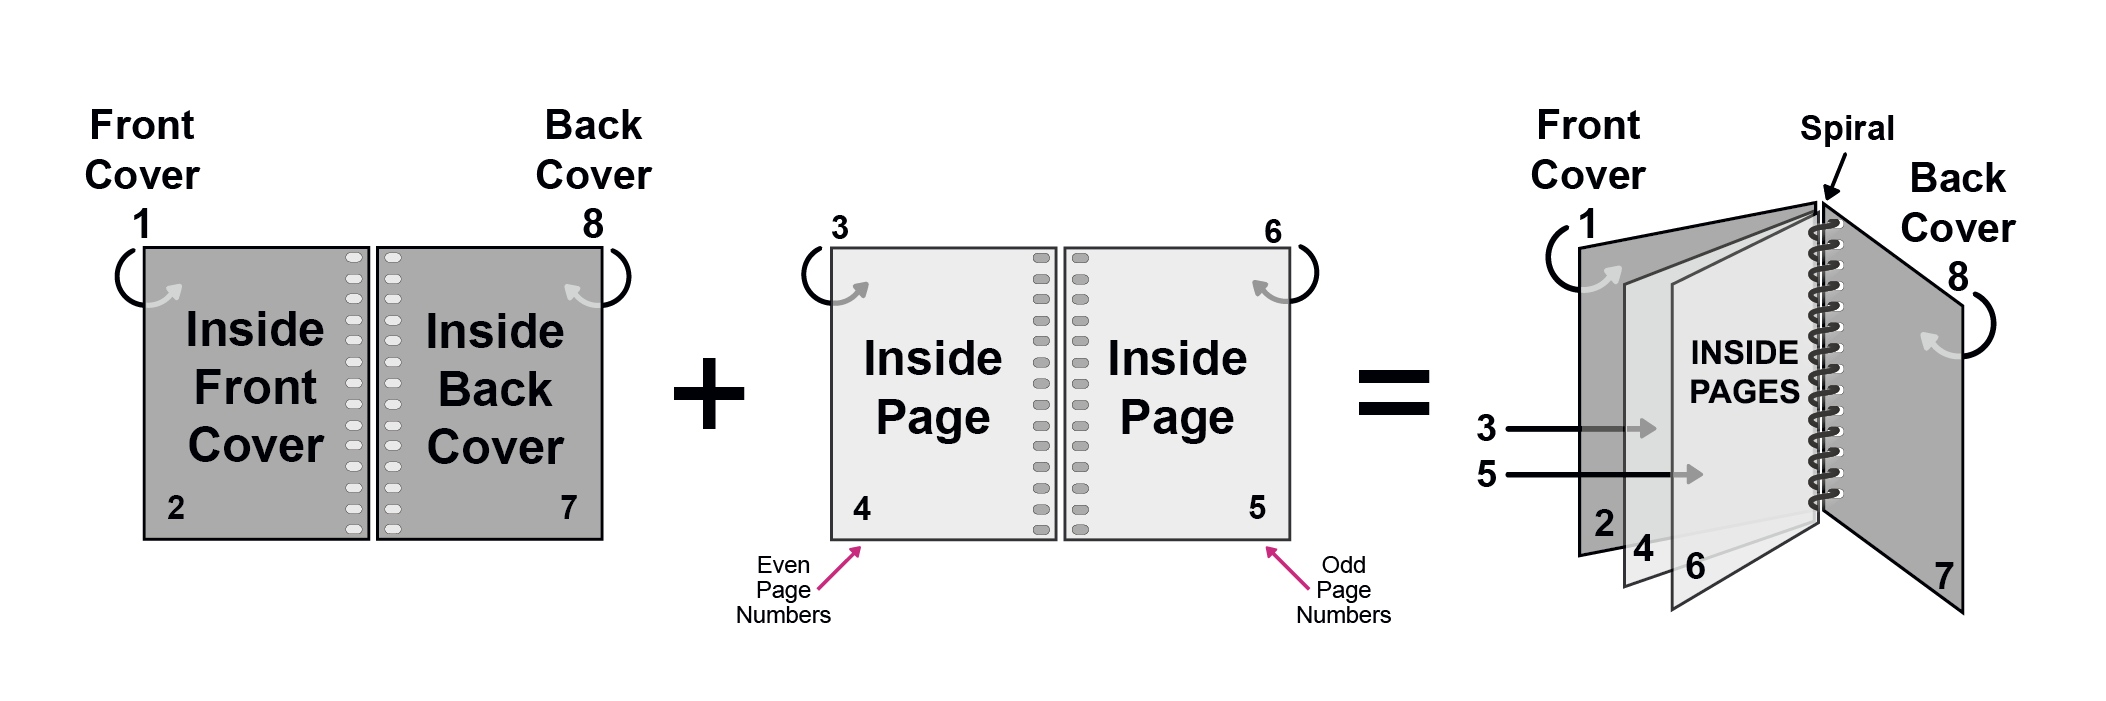
Minimum page count: 8 pages
Maximum thickness: up to 2¾ inches
Page count increments: multiples of 2
Wire-O Binding
Wire-O binding works similarly to spiral but uses a professional metal wire instead of a plastic coil. It has a cleaner, more polished look and also allows pages to lay flat. Like spiral, the spine cannot be printed on.
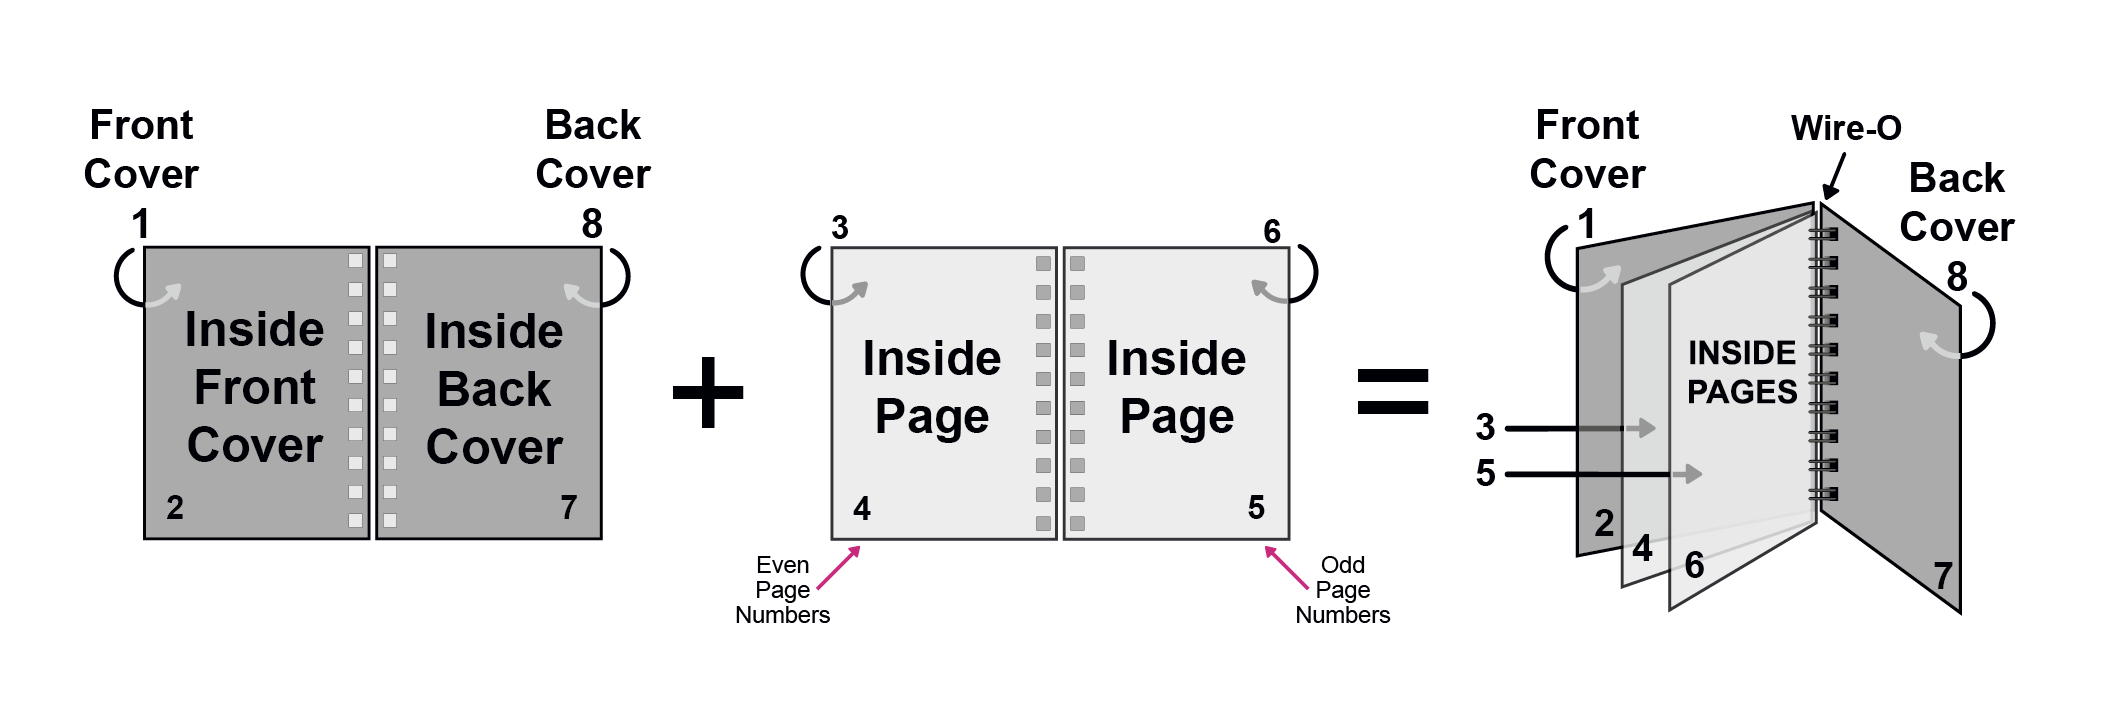
Minimum page count: 8 pages
Maximum thickness: up to 1¼ inches
Page count increments: multiples of 2
Hardcover Binding
Hardcover binding (also called case binding) is the most durable and premium option. Pages are sewn or glued together and attached to a rigid cover, creating a long-lasting, high-quality book. This binding is ideal for projects meant to be kept, displayed, or used frequently.
Minimum page count: 28 pages to 400 pages
Page count increments: multiples of 2
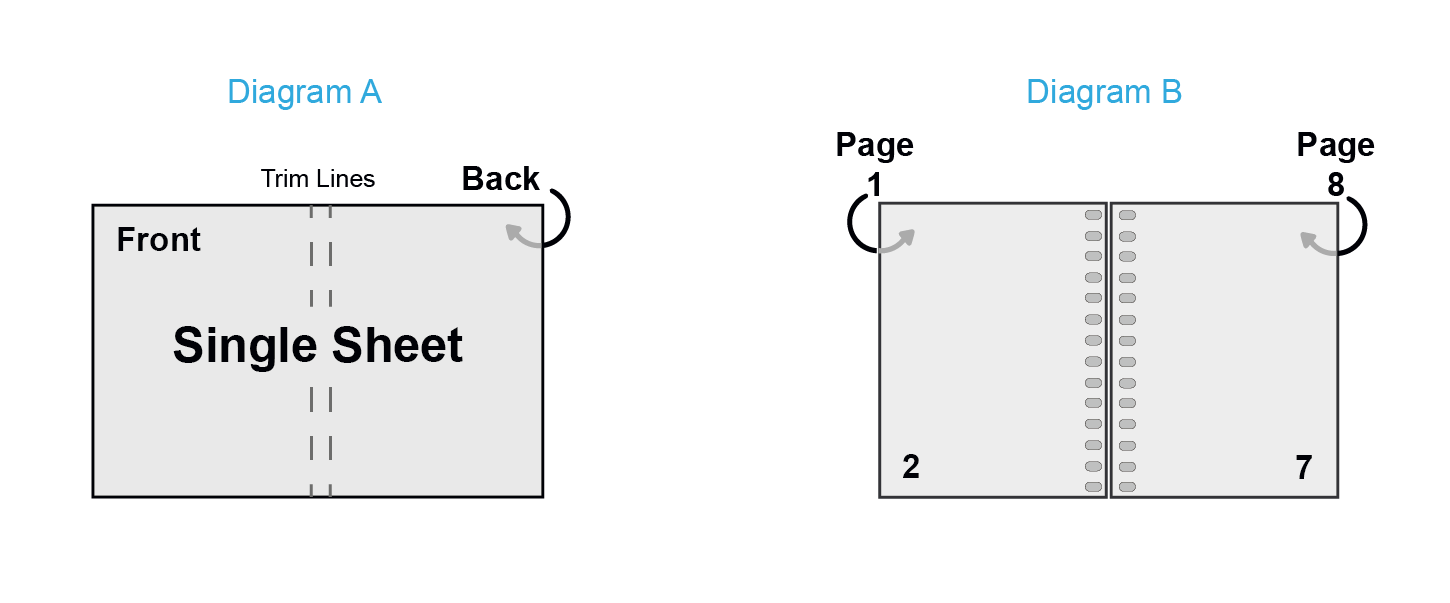
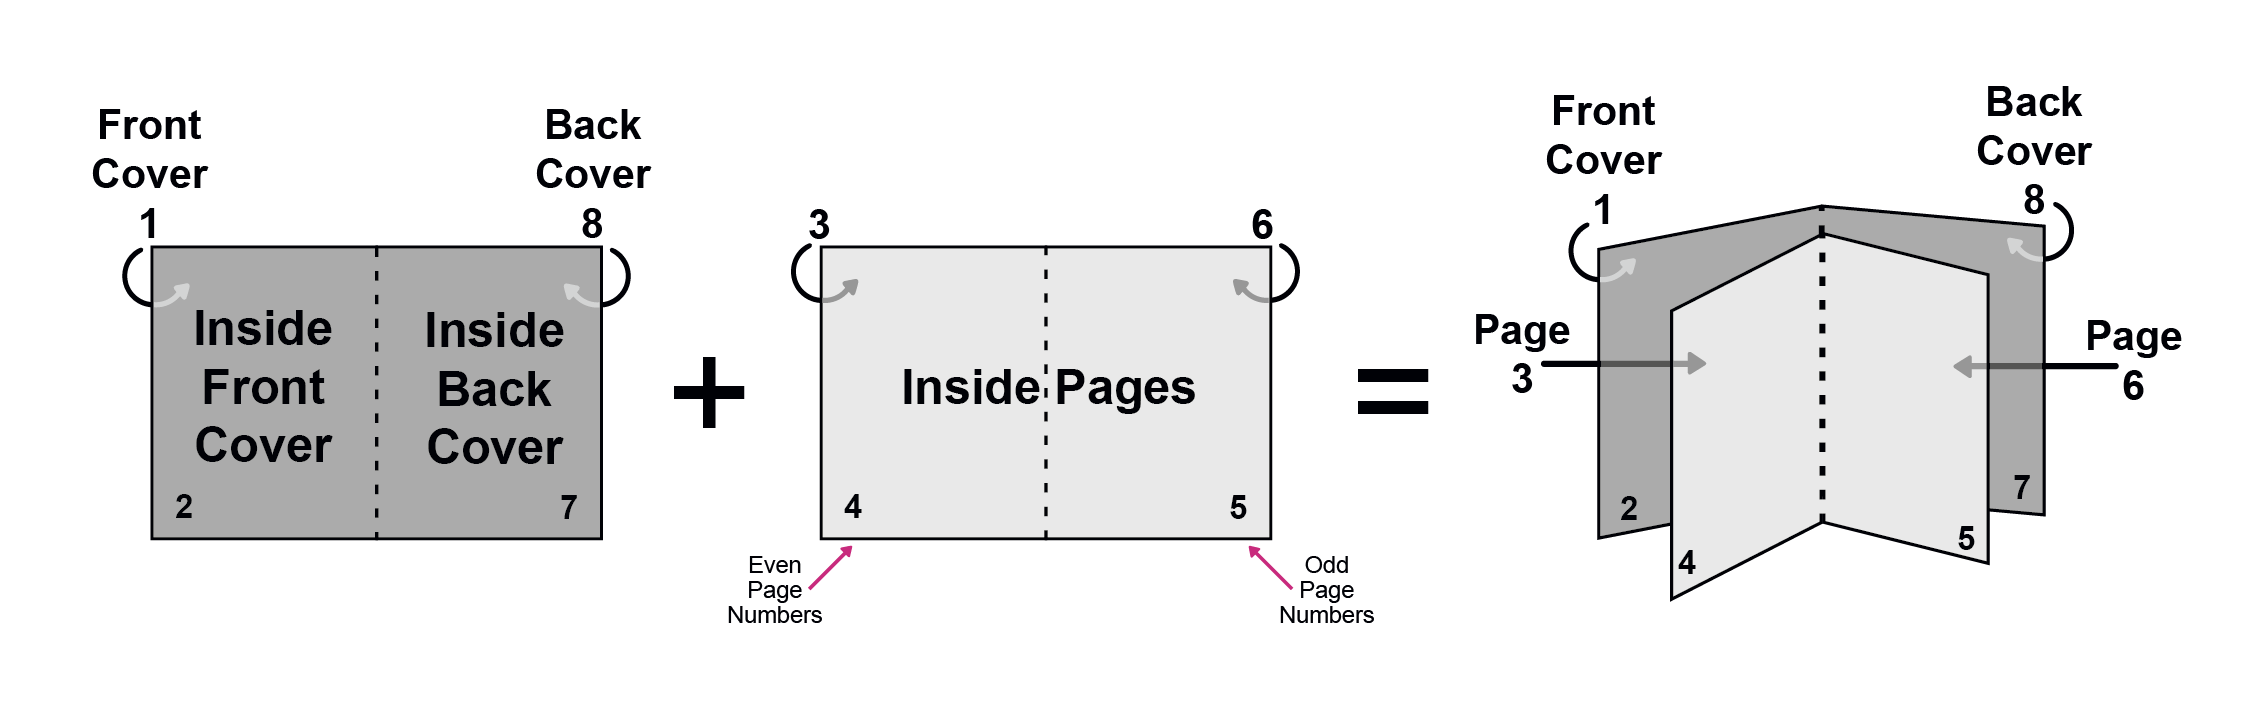
How to Number Your Inside Pages
Page numbering in a booklet follows a simple rule: even numbers go on the left, odd numbers go on the right. Start your numbering from the first inside page, which is page 3 in your PDF since the front cover is page 1 and the inside front cover is page 2.
One thing worth noting: your inside page numbers do not need to match the page numbers in your PDF. Your PDF might show page 3 as the third file in the document, but you can choose to display it as page 1 in your design. Just make sure the even-left, odd-right rule stays consistent throughout.
Common Mistakes to Avoid
Uploading spreads instead of single pages is the most frequent file issue we see. The second most common is leaving out inside covers, which throws off the entire page order. The third is submitting a page count that does not match the requirements for your chosen binding type. All three are easy to avoid if you check your file before uploading.
Pro Tips:
Putting your even page numbers on the left and the odd page numbers on the right is an effective tool only if you start counting your pages on the first inside page (or page 3 in the image below).
Your inside-page numbering does not correlate to the number of pages contained in your print-ready PDF.
Frequently Asked Questions
Do I need to arrange booklet pages into spreads myself?
No. Upload your pages in consecutive order as single pages and we will arrange them correctly for printing. Trying to do this yourself is where most file problems start.
Why do booklet pages print in a different order than my PDF?
Because during the printing process, pages are physically rearranged so that when the sheets are folded and bound, everything ends up in the right reading order. You do not need to account for this in your file.
What happens if my page count is wrong for saddle stitching?
If your page count is not a multiple of four, your file will need to be adjusted before we can print it. Our free file review catches this before it becomes a problem.
Can I use any page count I want with perfect binding?
As long as your count is a multiple of two and you meet the 28-page minimum, yes. There is no hard maximum page count, just a maximum thickness of 2 inches.
What if I want blank pages inside my booklet?
Include them in your PDF as blank pages in the correct position. Do not skip them. Blank pages still count toward your total page count and are necessary to keep the rest of your pages in the right order.
Can I print on the spine of my booklet?
It depends on your binding type. Perfect binding gives you a square spine that can be printed on. Saddle stitch, spiral, and wire-o bindings do not have a printable spine.
Is there a minimum page count for all binding types?
Saddle stitch and spiral and wire-o all have an 8-page minimum. Perfect binding has a 28-page minimum due to the way the spine is constructed.
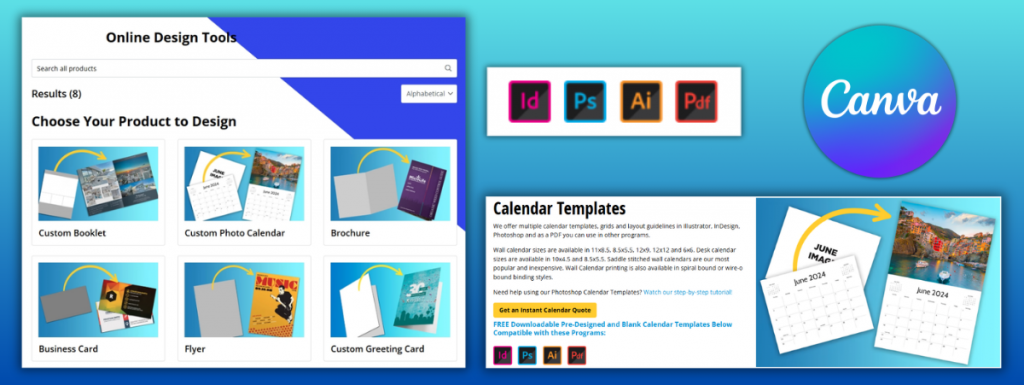
Tools That Make This Easier
Not sure how to get your file print-ready? PrintingCenterUSA has you covered before you even place your order. Use our free online design tool, download a free Adobe template, submit your file for a free file review, connect with a professional through our Find a Designer service or try out a Canva template. However you like to work, we have an option that fits.
Start Your Booklet Project the Right Way
Now that you know exactly how to set up your pages, you can move forward without second-guessing your file. If you want to be sure everything is correct before you order, our free file review catches issues before they become problems. Start your book project today!