Canva
Bleeds: Canva
Checklist
- Turn on Bleeds and Margins (Safety Lines)
- How your page setup should look
- Using the Margins (Safety Lines)
1. Turn on Bleeds and Margins (Safety Lines)
In your design, click “File” at the top left side of the screen.
Click “View settings” and ensure the following options have a checkmark next to them: “Show rulers and guides”, and “Show print bleed”.

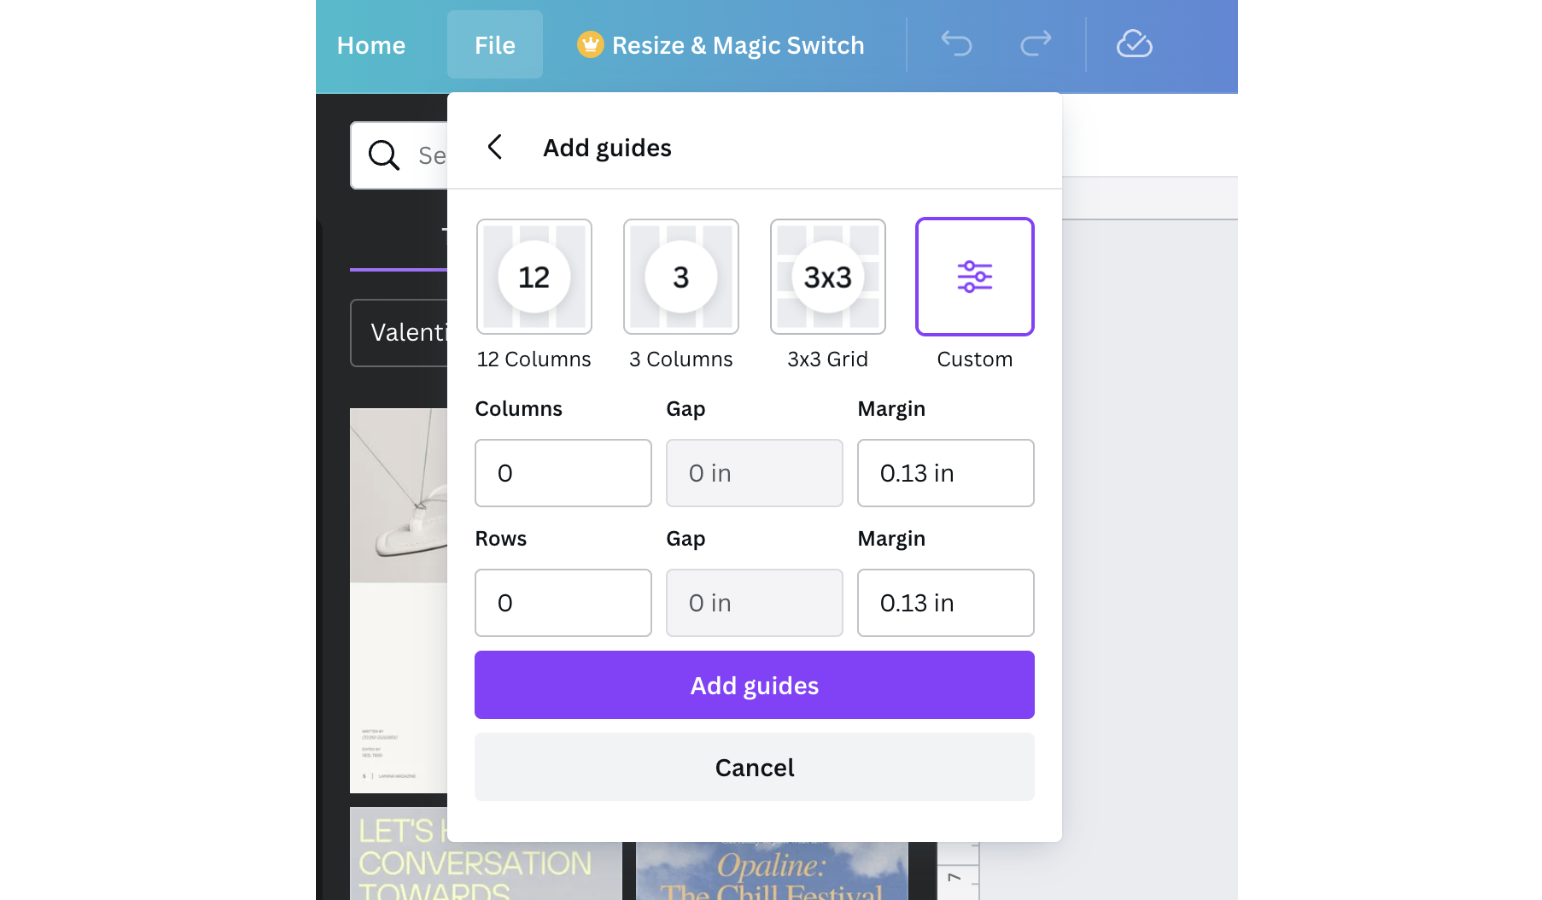
After this, Go to File > View Settings > Add guides. Choose the “Custom” option.
Under the “Margin” boxes, enter “0.13” for both boxes. Make sure the “Columns”, “Rows” and “Gap” are all set to 0. Click “Add guides”.
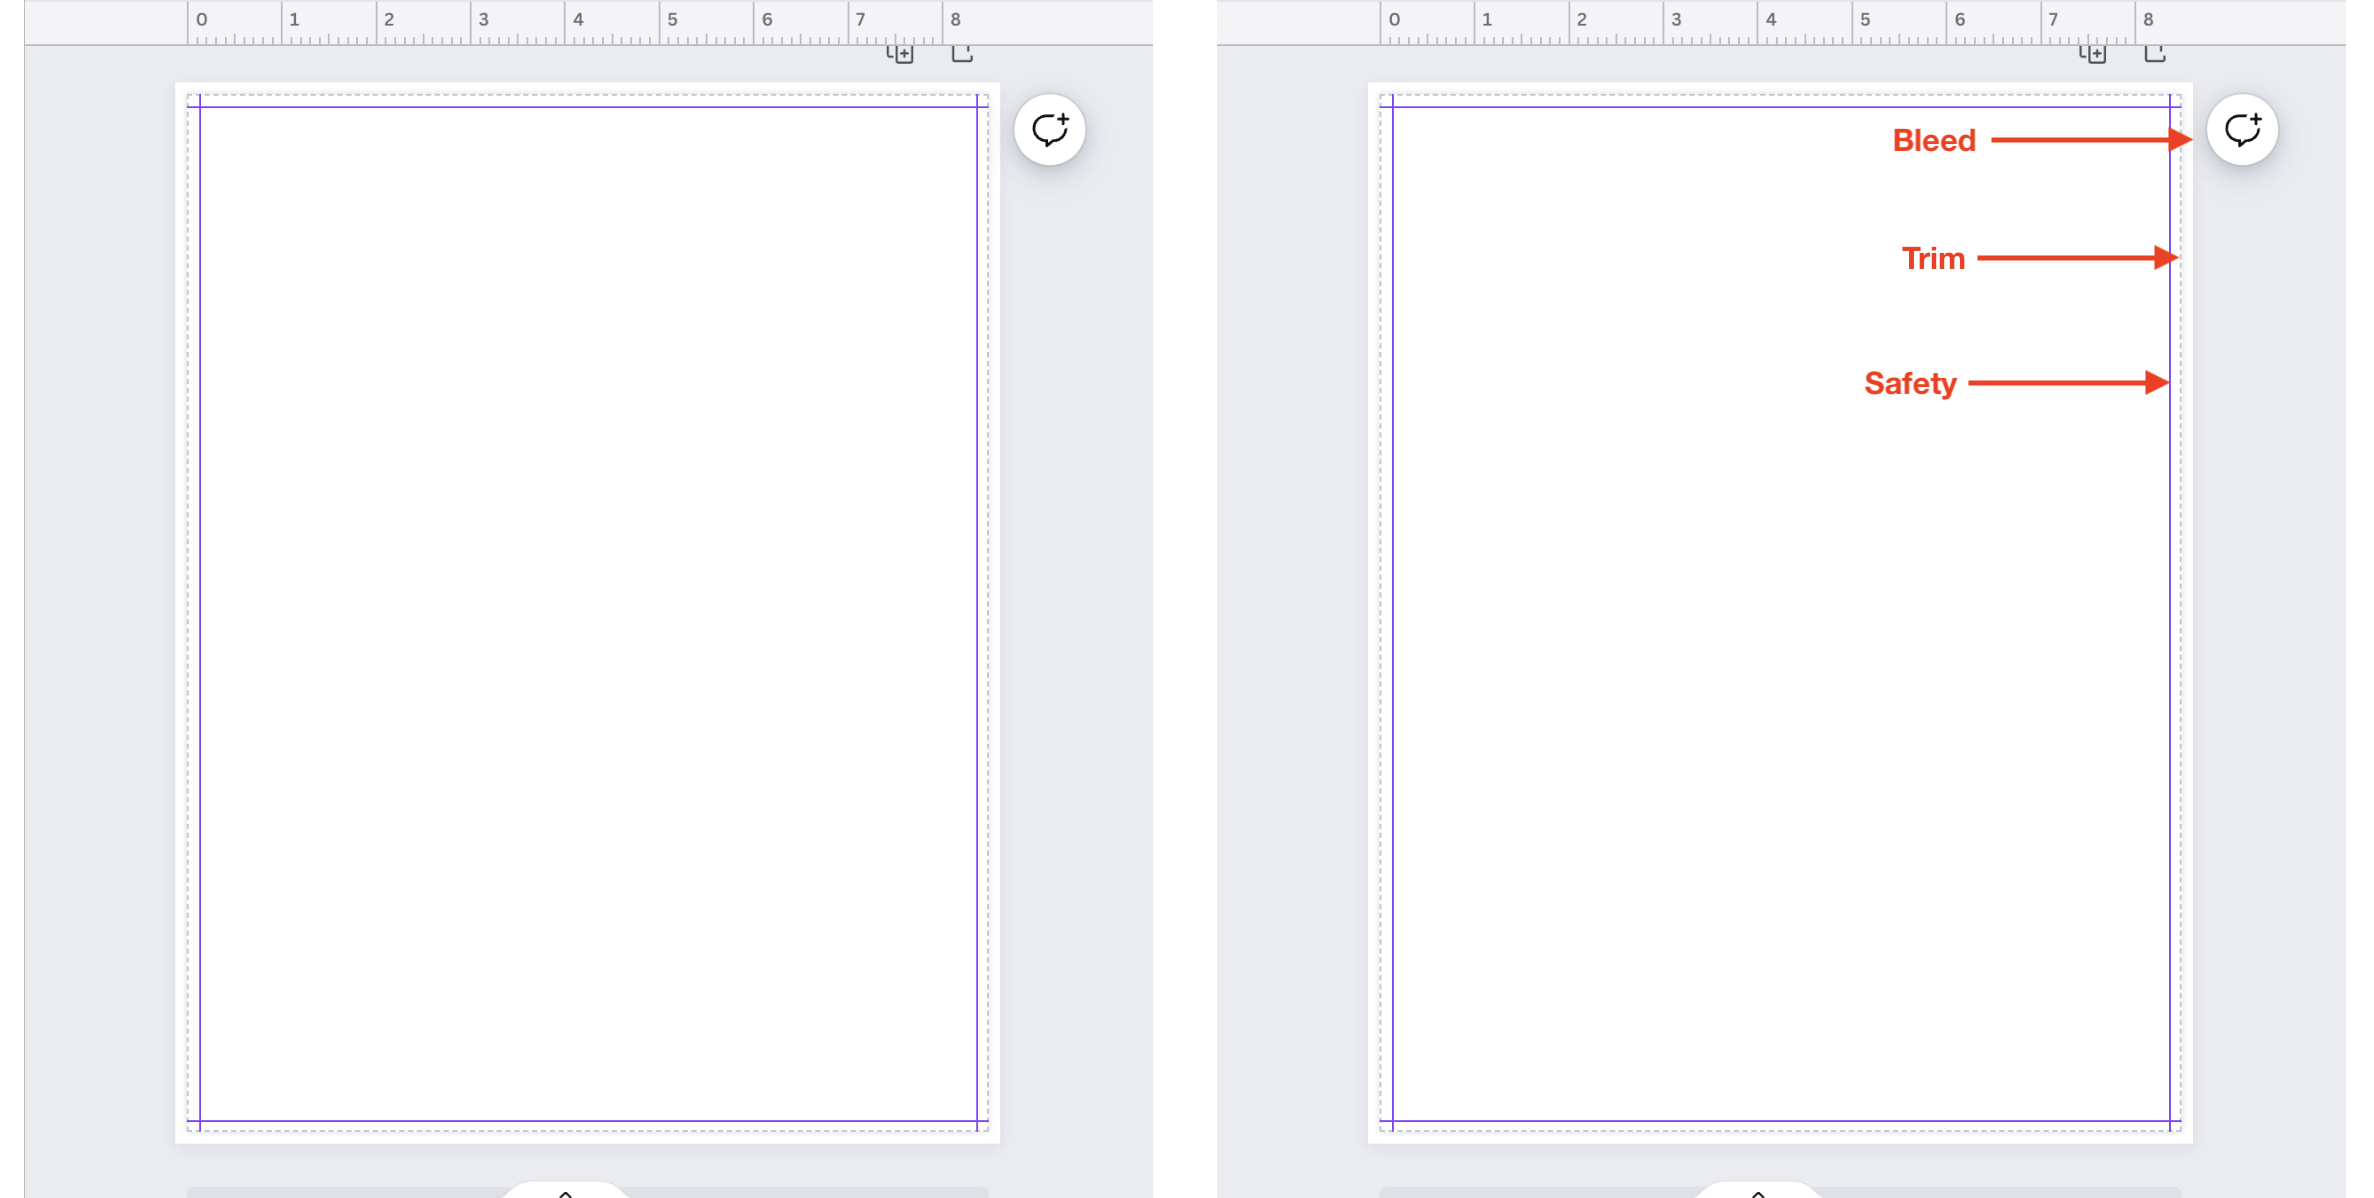
2. Your page should look similar to this:
3. Utilizing the Safety Line
Ensure all important elements are within the Safety and make sure your page goes fully out to the bleed lines to ensure no white slivers appear on your final product.
- Trim line: You will want to ensure that none of your images/graphics line up with the trim line. This will create uneven cuts in your final product.
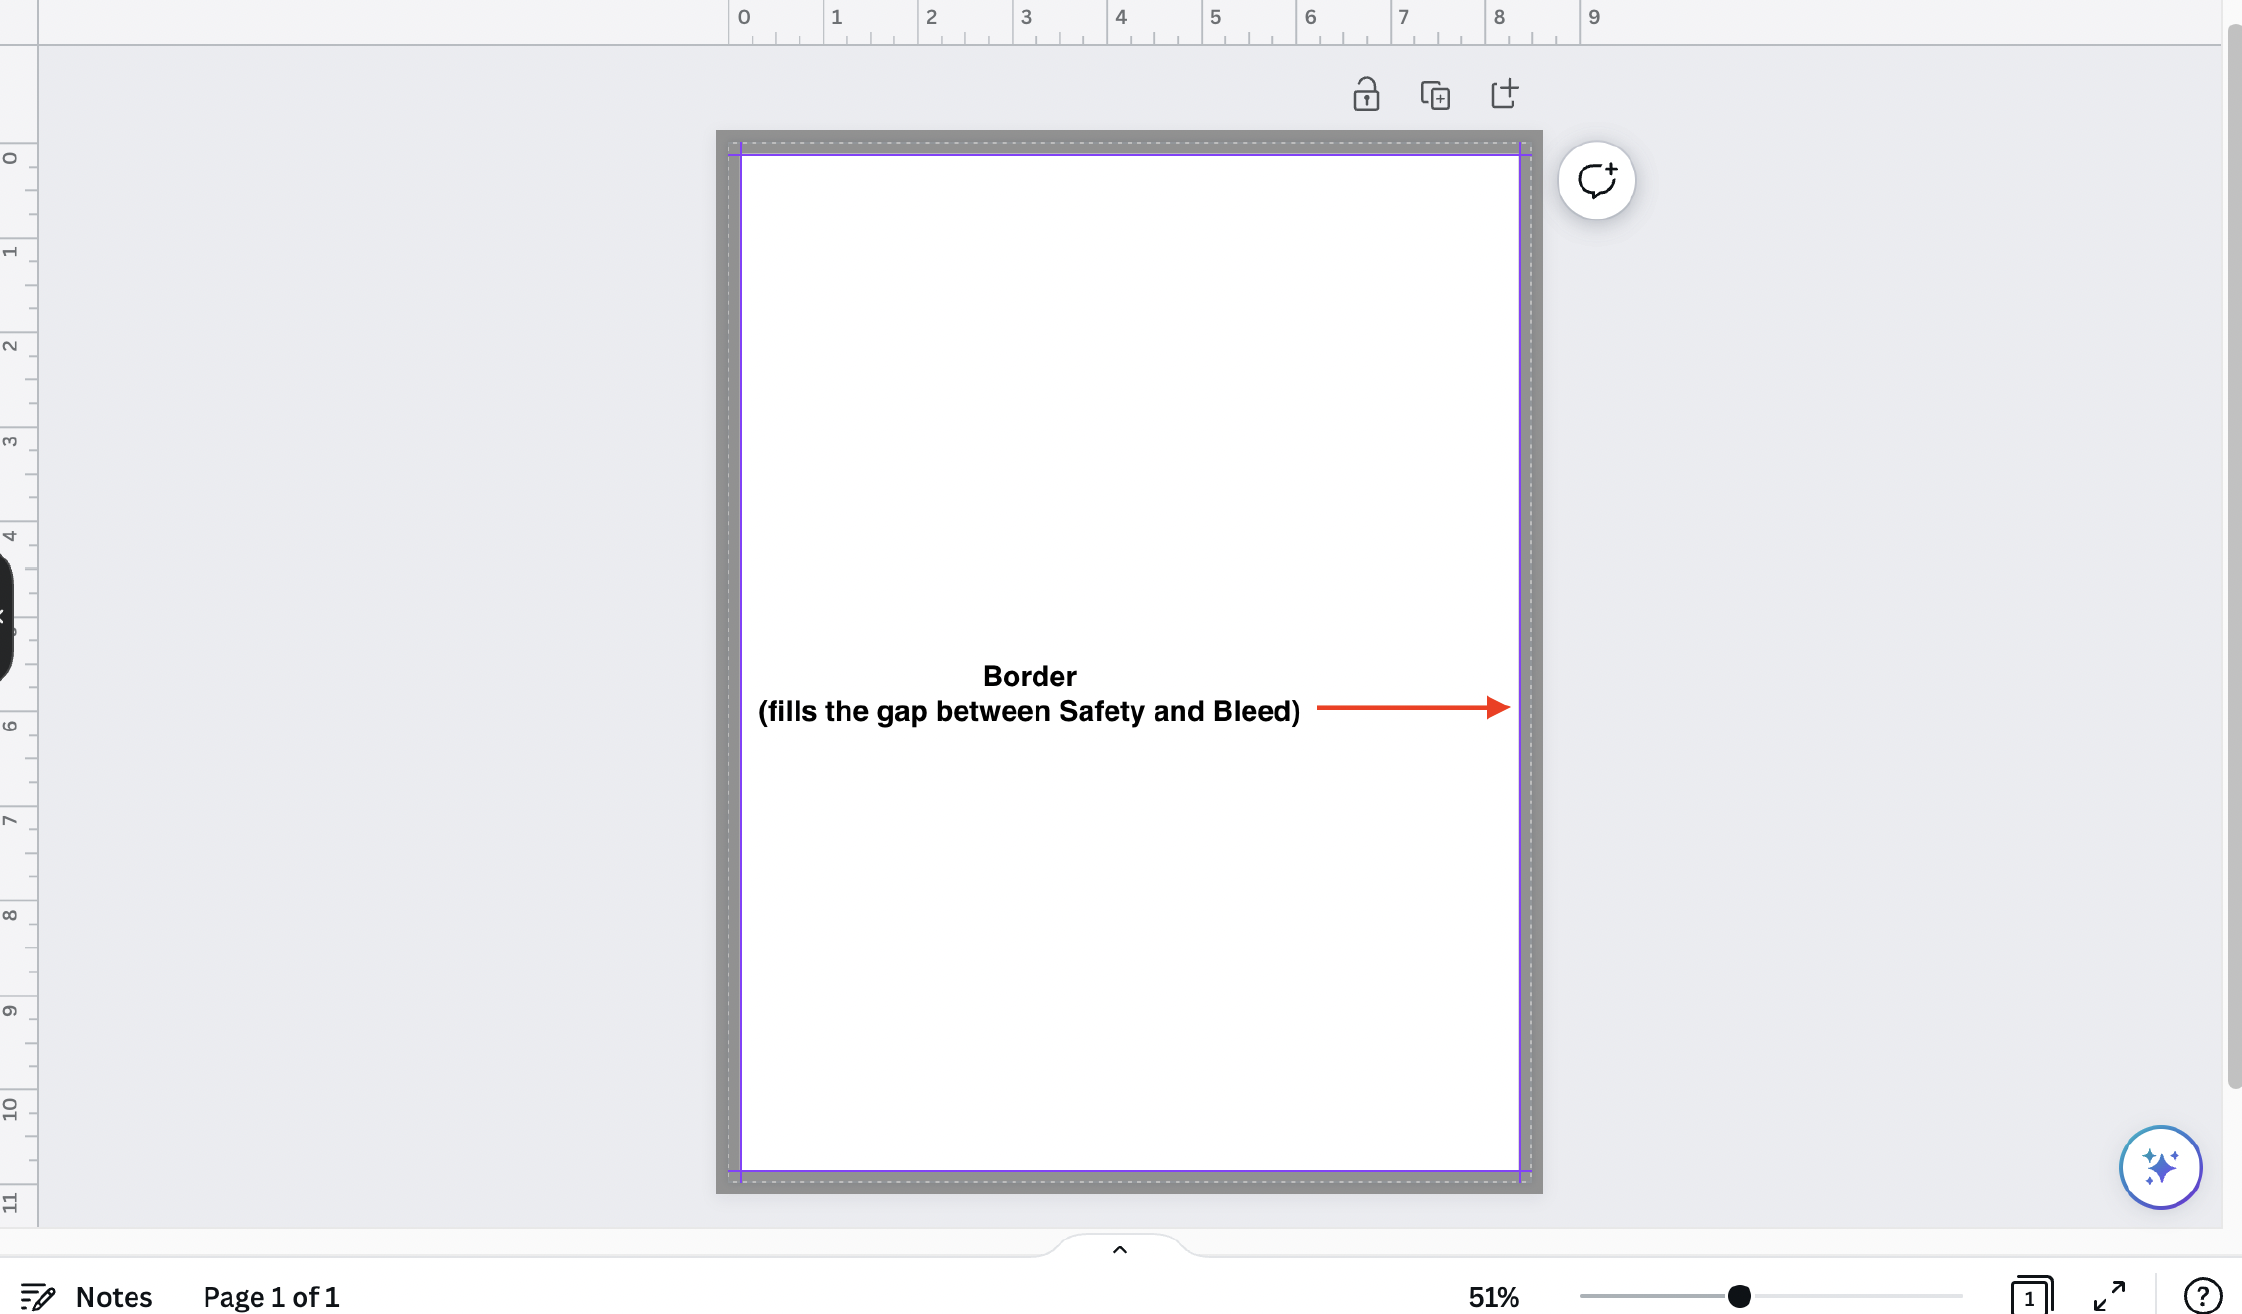
- Borders: If you desire to have a border around your page, ensure that the border extends at least to the safe area line. (If you want a thicker border, you can adjust it to fill further into the safe area)