InDesign
Bleeds in InDesign: A Step-by-Step Guide
Bleeds are your design’s safety net, ensuring that colors and images extend past the edge of the page after trimming.
Here’s how to set them up in InDesign, whether you’re starting a new document or working with an existing one:
1. Open Document Setup
Go to File > Document Setup (or use the keyboard shortcut Cmd/Ctrl + Alt/Opt + P).
This will open the Document Setup window where you will add your bleed and safety margins.
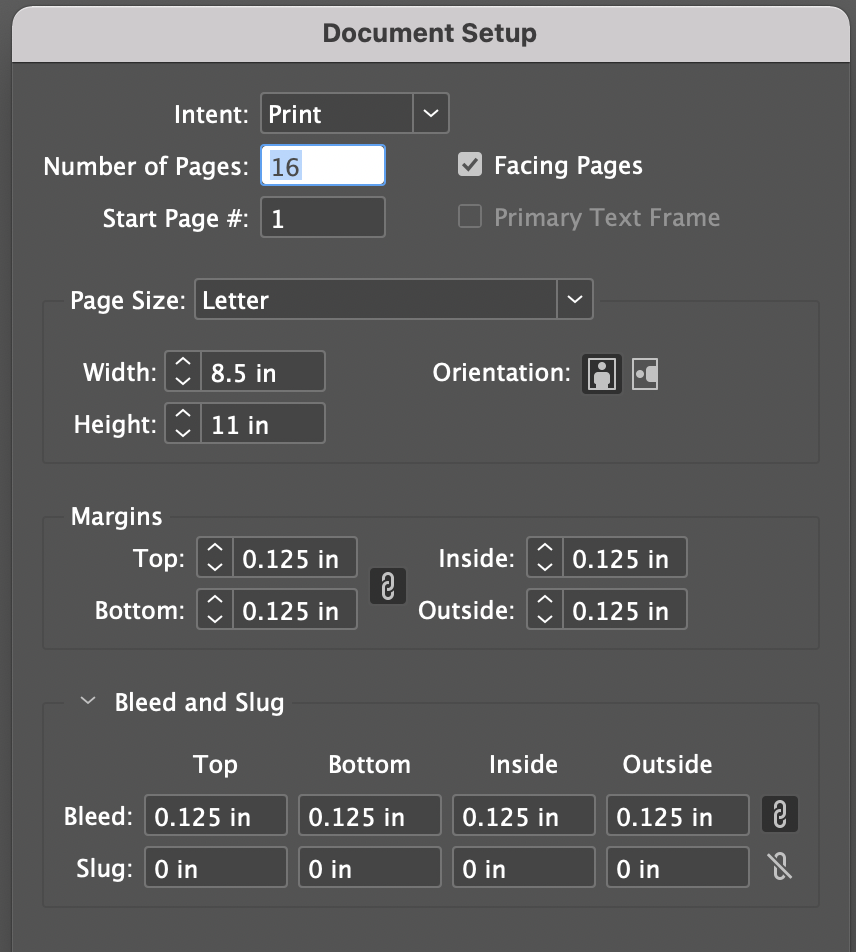
2. Add Bleed and Margins
Margins: In the “Margins” section, enter 0.125 inches for all sides. These will be your safety margins.
Bleed: In the “Bleed and Slug” section, enter 0.125 inches for all sides. Leave “Slug” at 0.
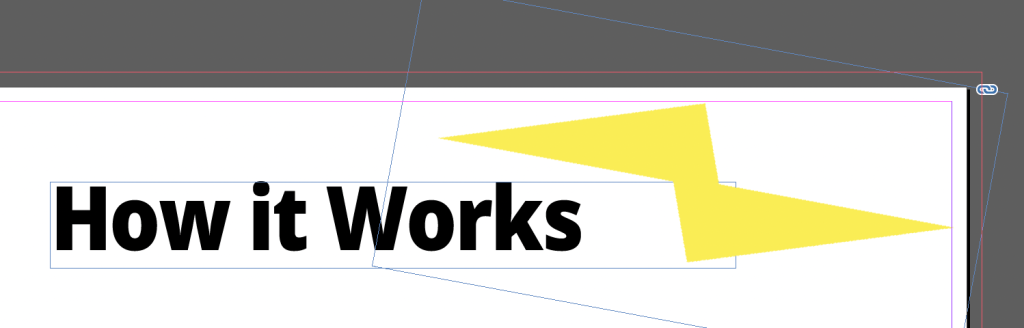
3. Design to the Bleed Line
Any elements intended to reach the edge of your final product should extend all the way to the red bleed line.

4. Keep Content Safe
Place text, logos, and other critical information inside the purple margin lines (your safety zone) to ensure they aren’t trimmed off.
Key Points:
- Bleed vs. Margin: The bleed is the area that gets trimmed off, while the margin is the safe zone for your content.
- PDF Export: When saving your design as a PDF, make sure to include bleed settings in the export options.