Photoshop
Bleeds in Photoshop: A Step-by-Step Guide
Bleeds are essential for ensuring your designs print correctly. They extend your artwork beyond the final trim size, preventing white edges from appearing when your project is cut.
Unlike some design software, Photoshop doesn’t have a built-in bleed setting, so you’ll need to manually adjust your canvas size and add guides to create bleed and safety areas.
Here’s how to set up and utilize bleeds in Photoshop, whether you’re starting a new document or working with an existing one:
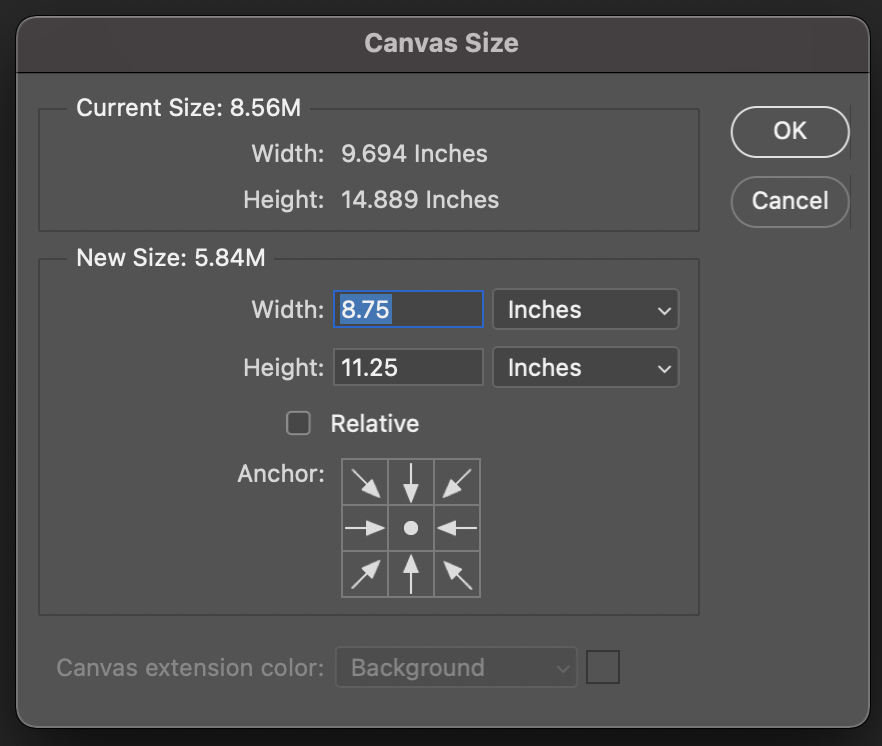
1. Open the Canvas Size Dialog
Go to Image > Canvas Size in the top menu.
2. Adjust Canvas Size for Bleeds
Add 0.25 inches to both the width and height of your document’s final trim size. This allows for a 0.125-inch bleed on all sides.
Example: For an 8.5″ x 11″ letterhead, your canvas size should be 8.75″ x 11.25″.
3. Enable Rulers
Go to View > Rulers in the top menu.
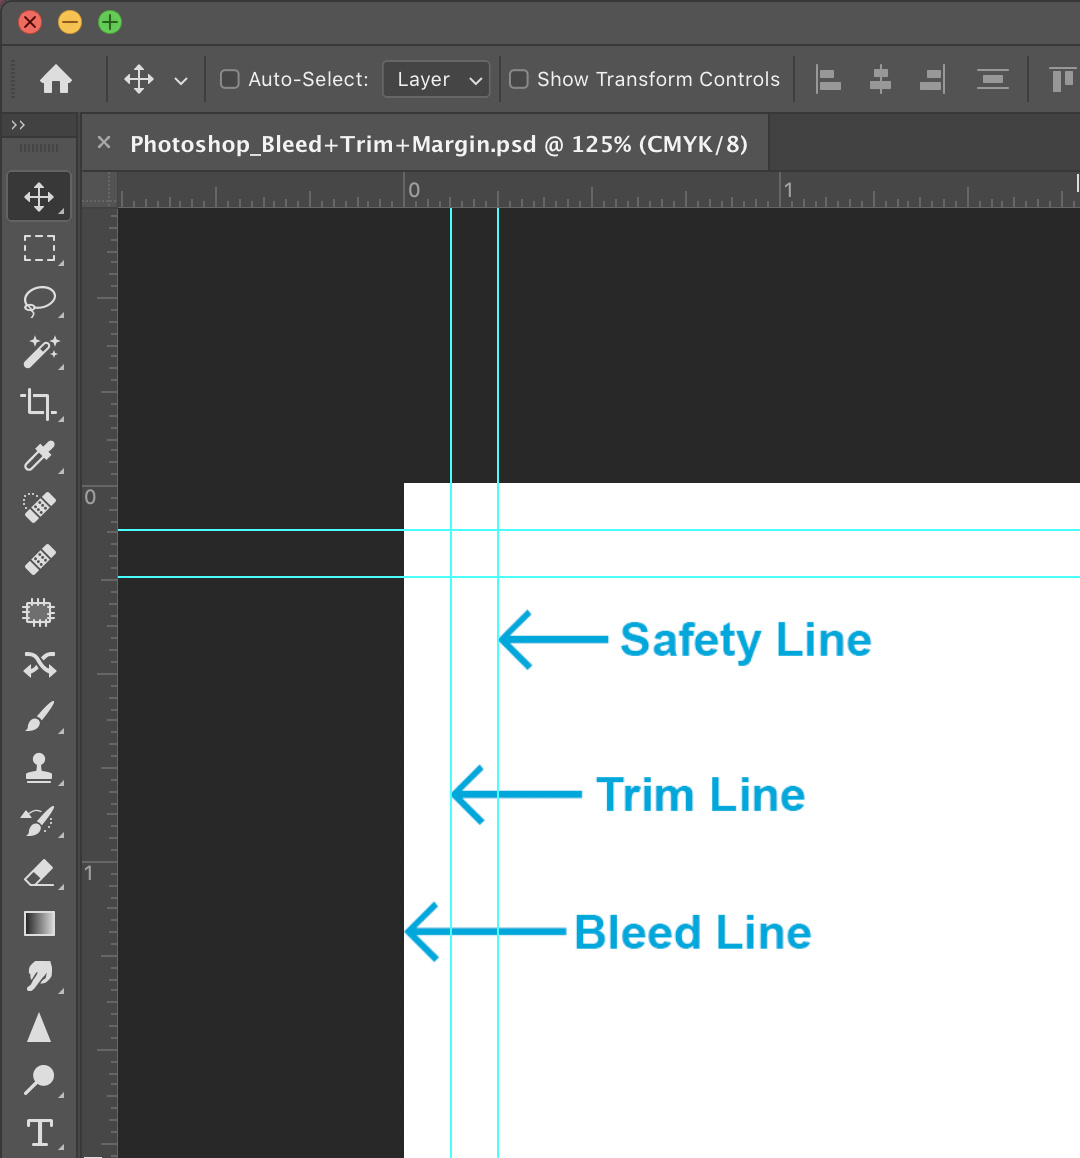
4. Create Safety Lines (Margins)
Click and drag from the horizontal and vertical rulers to create guidelines at 0.125 inches from each edge of your document.
Zoom in for precise placement of your guidelines.
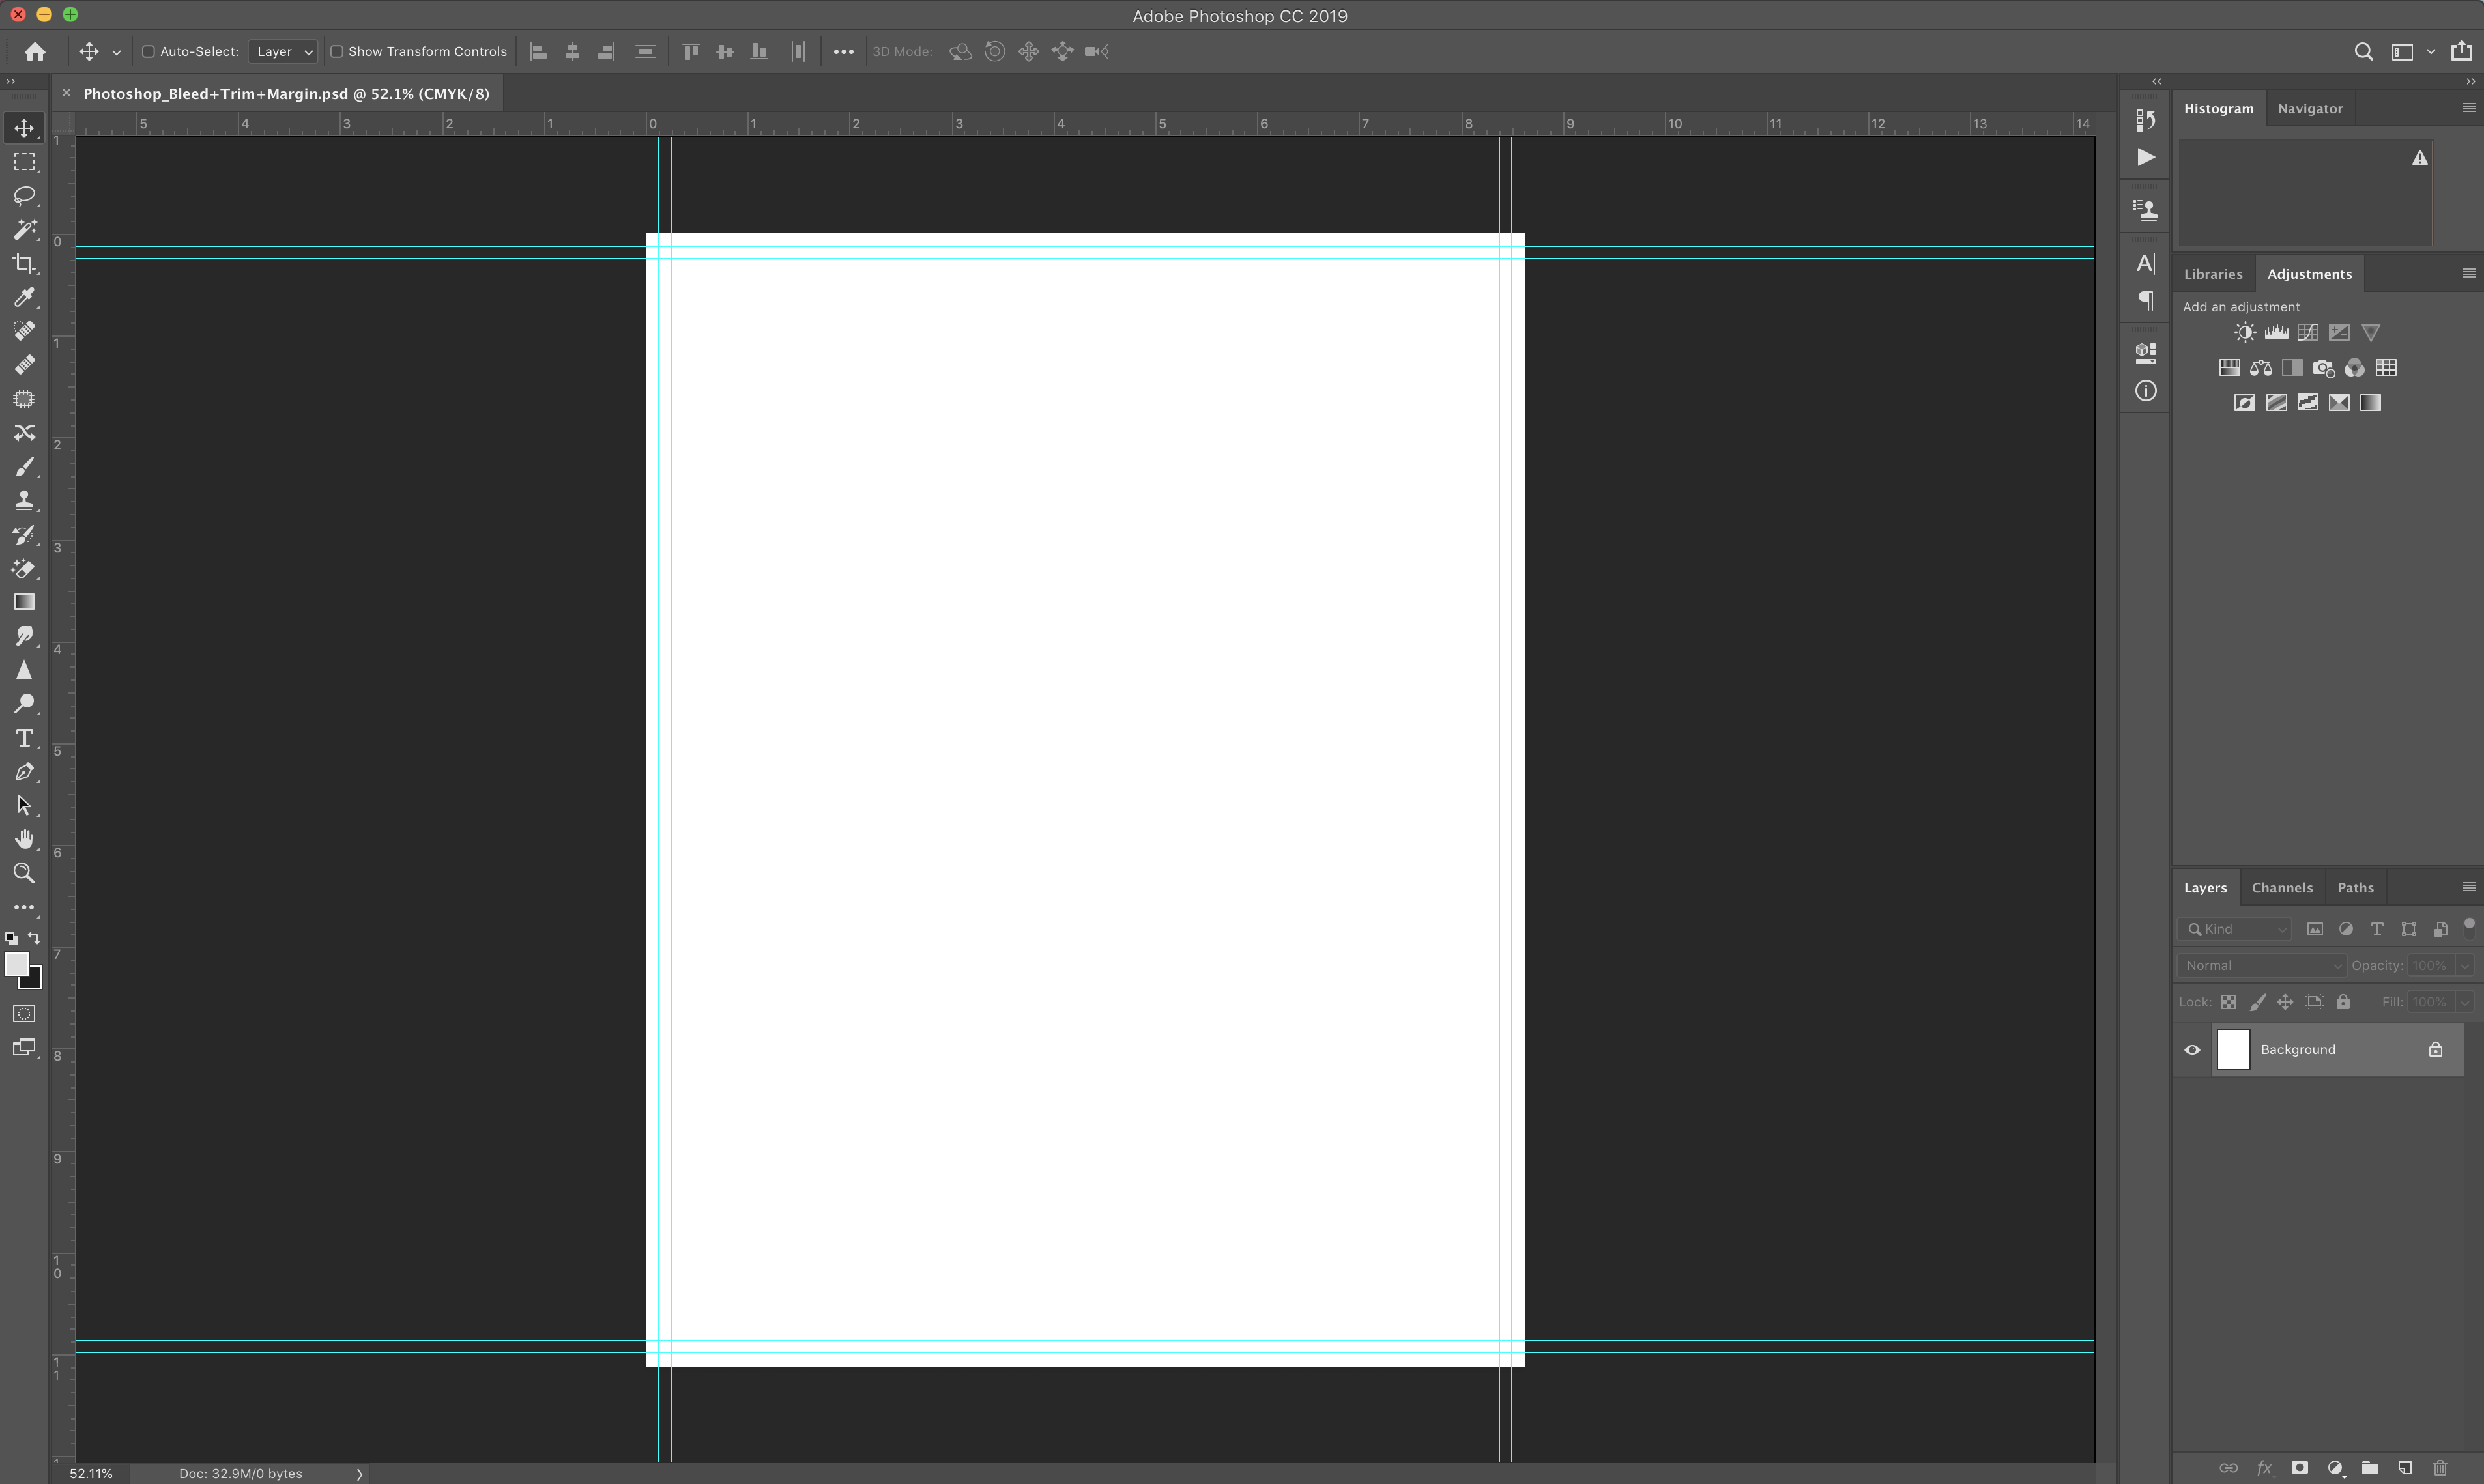
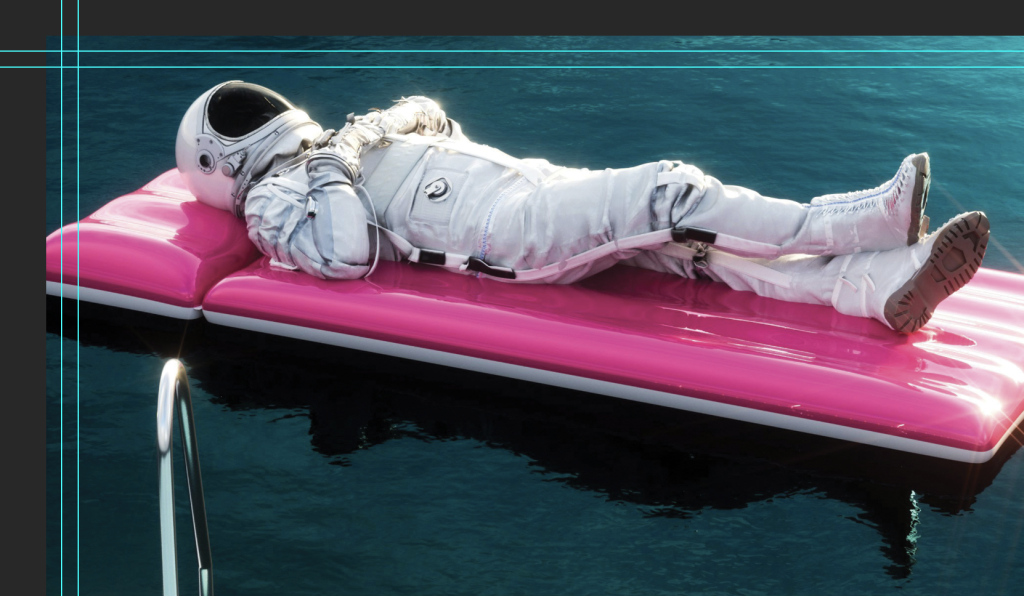
Now that your document is set up properly with bleeds and safety lines, it should look similar to this:
5. Extend to the Bleed line
Any elements you want to print to the edge of your final product (background colors, images, etc.) should be extended to the bleed line.
6. Keep Important Content Within the Safety Line
Text, logos, and other critical elements should be kept within the safety lines to ensure they are not cut off during trimming.