Photoshop
Print Ready File Creation: Photoshop
Checklist
- Download & Install Color Profile
- File > New
- Name
- Size + .25 for Bleeds
- Resolution
- Color Mode
- Background Contents
- Color Profile
- Trim + Safety
1. Download & Install PrintingCenterUSA Color Profile
First, download our color profile here. You will be downloading a .zip folder. Double click the file to unzip the folder.
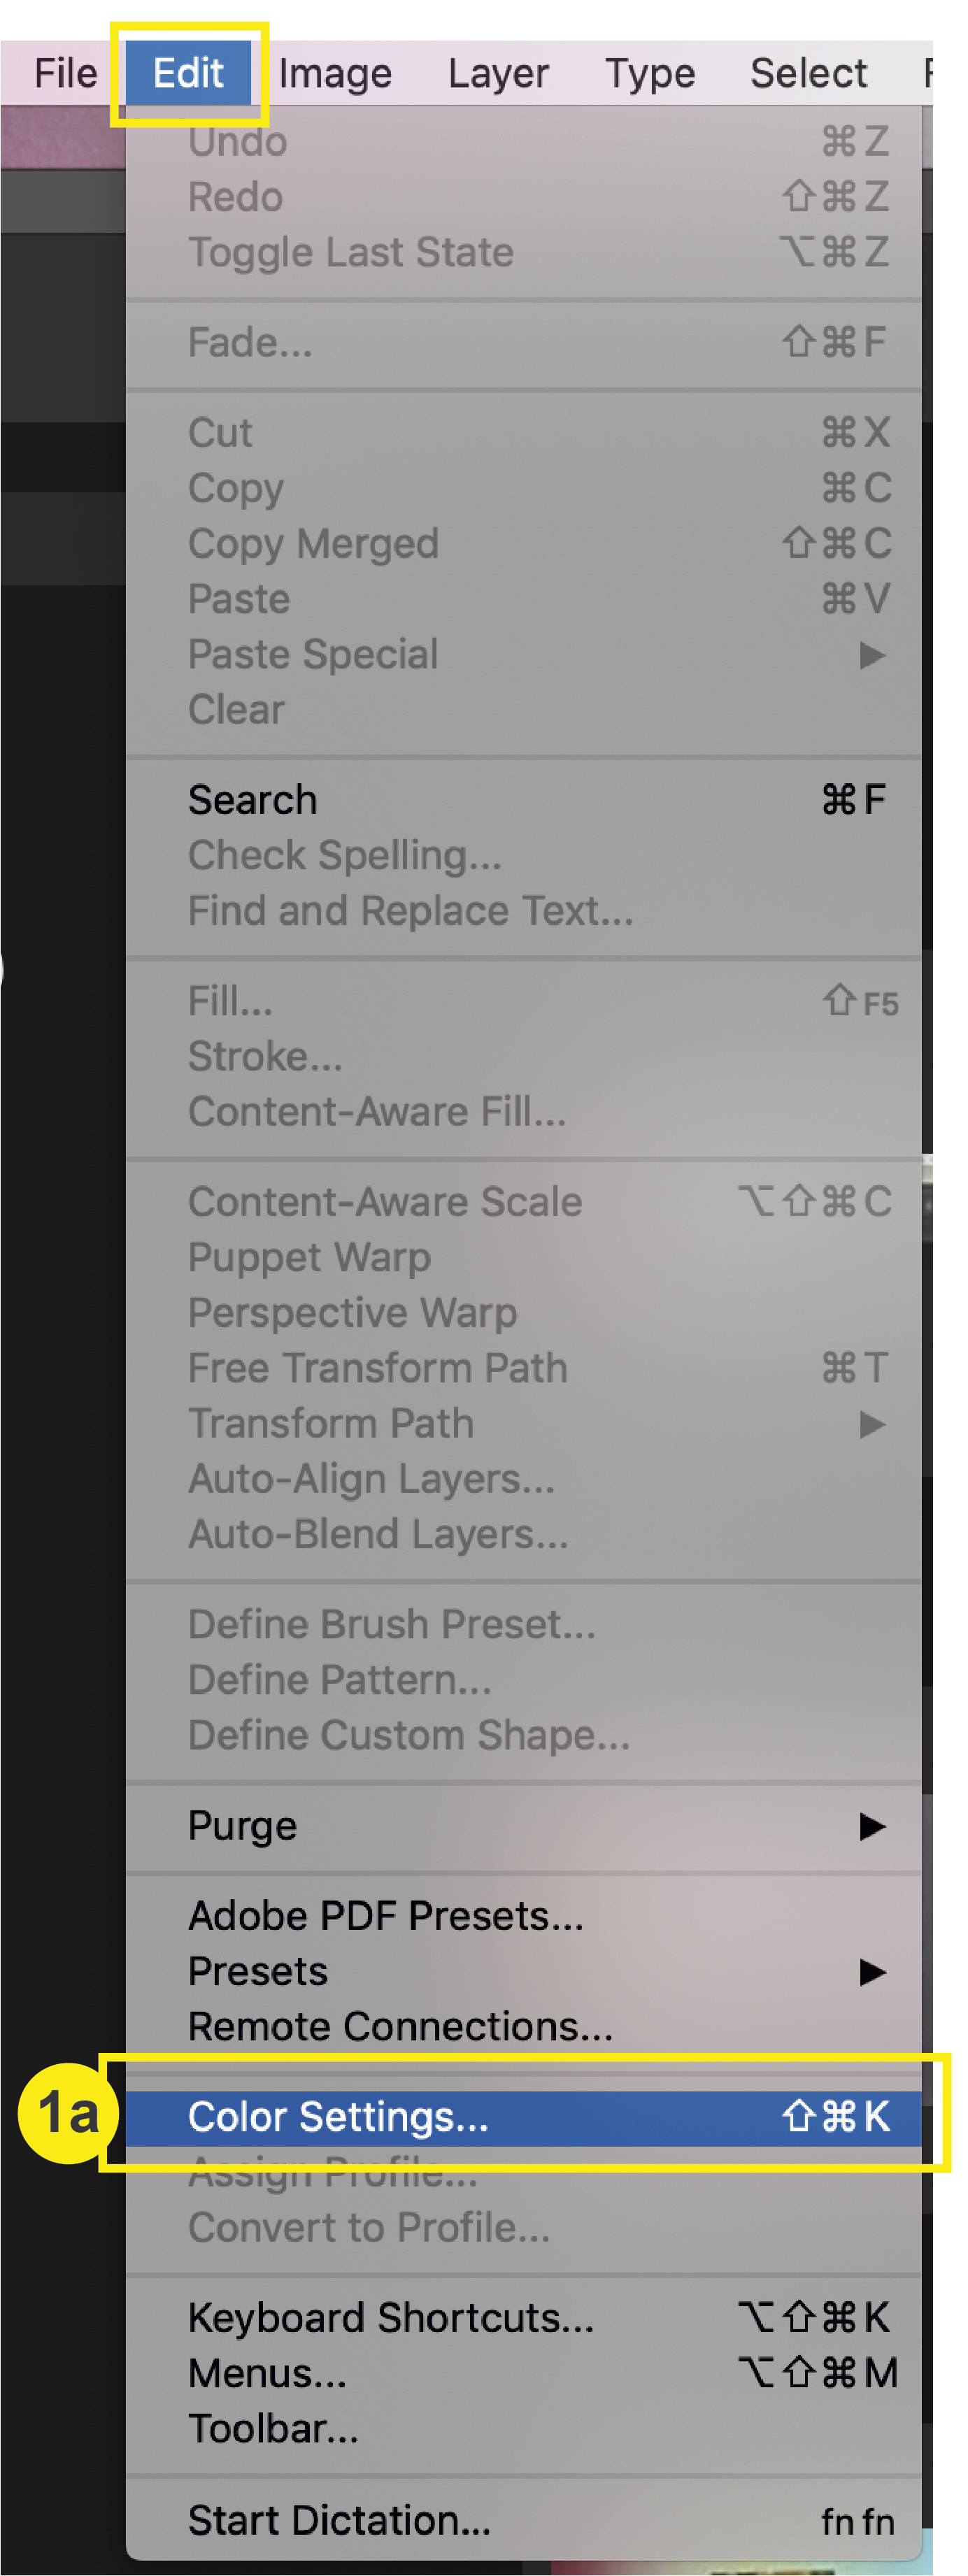
a. In Photoshop, go to Edit > Color Settings
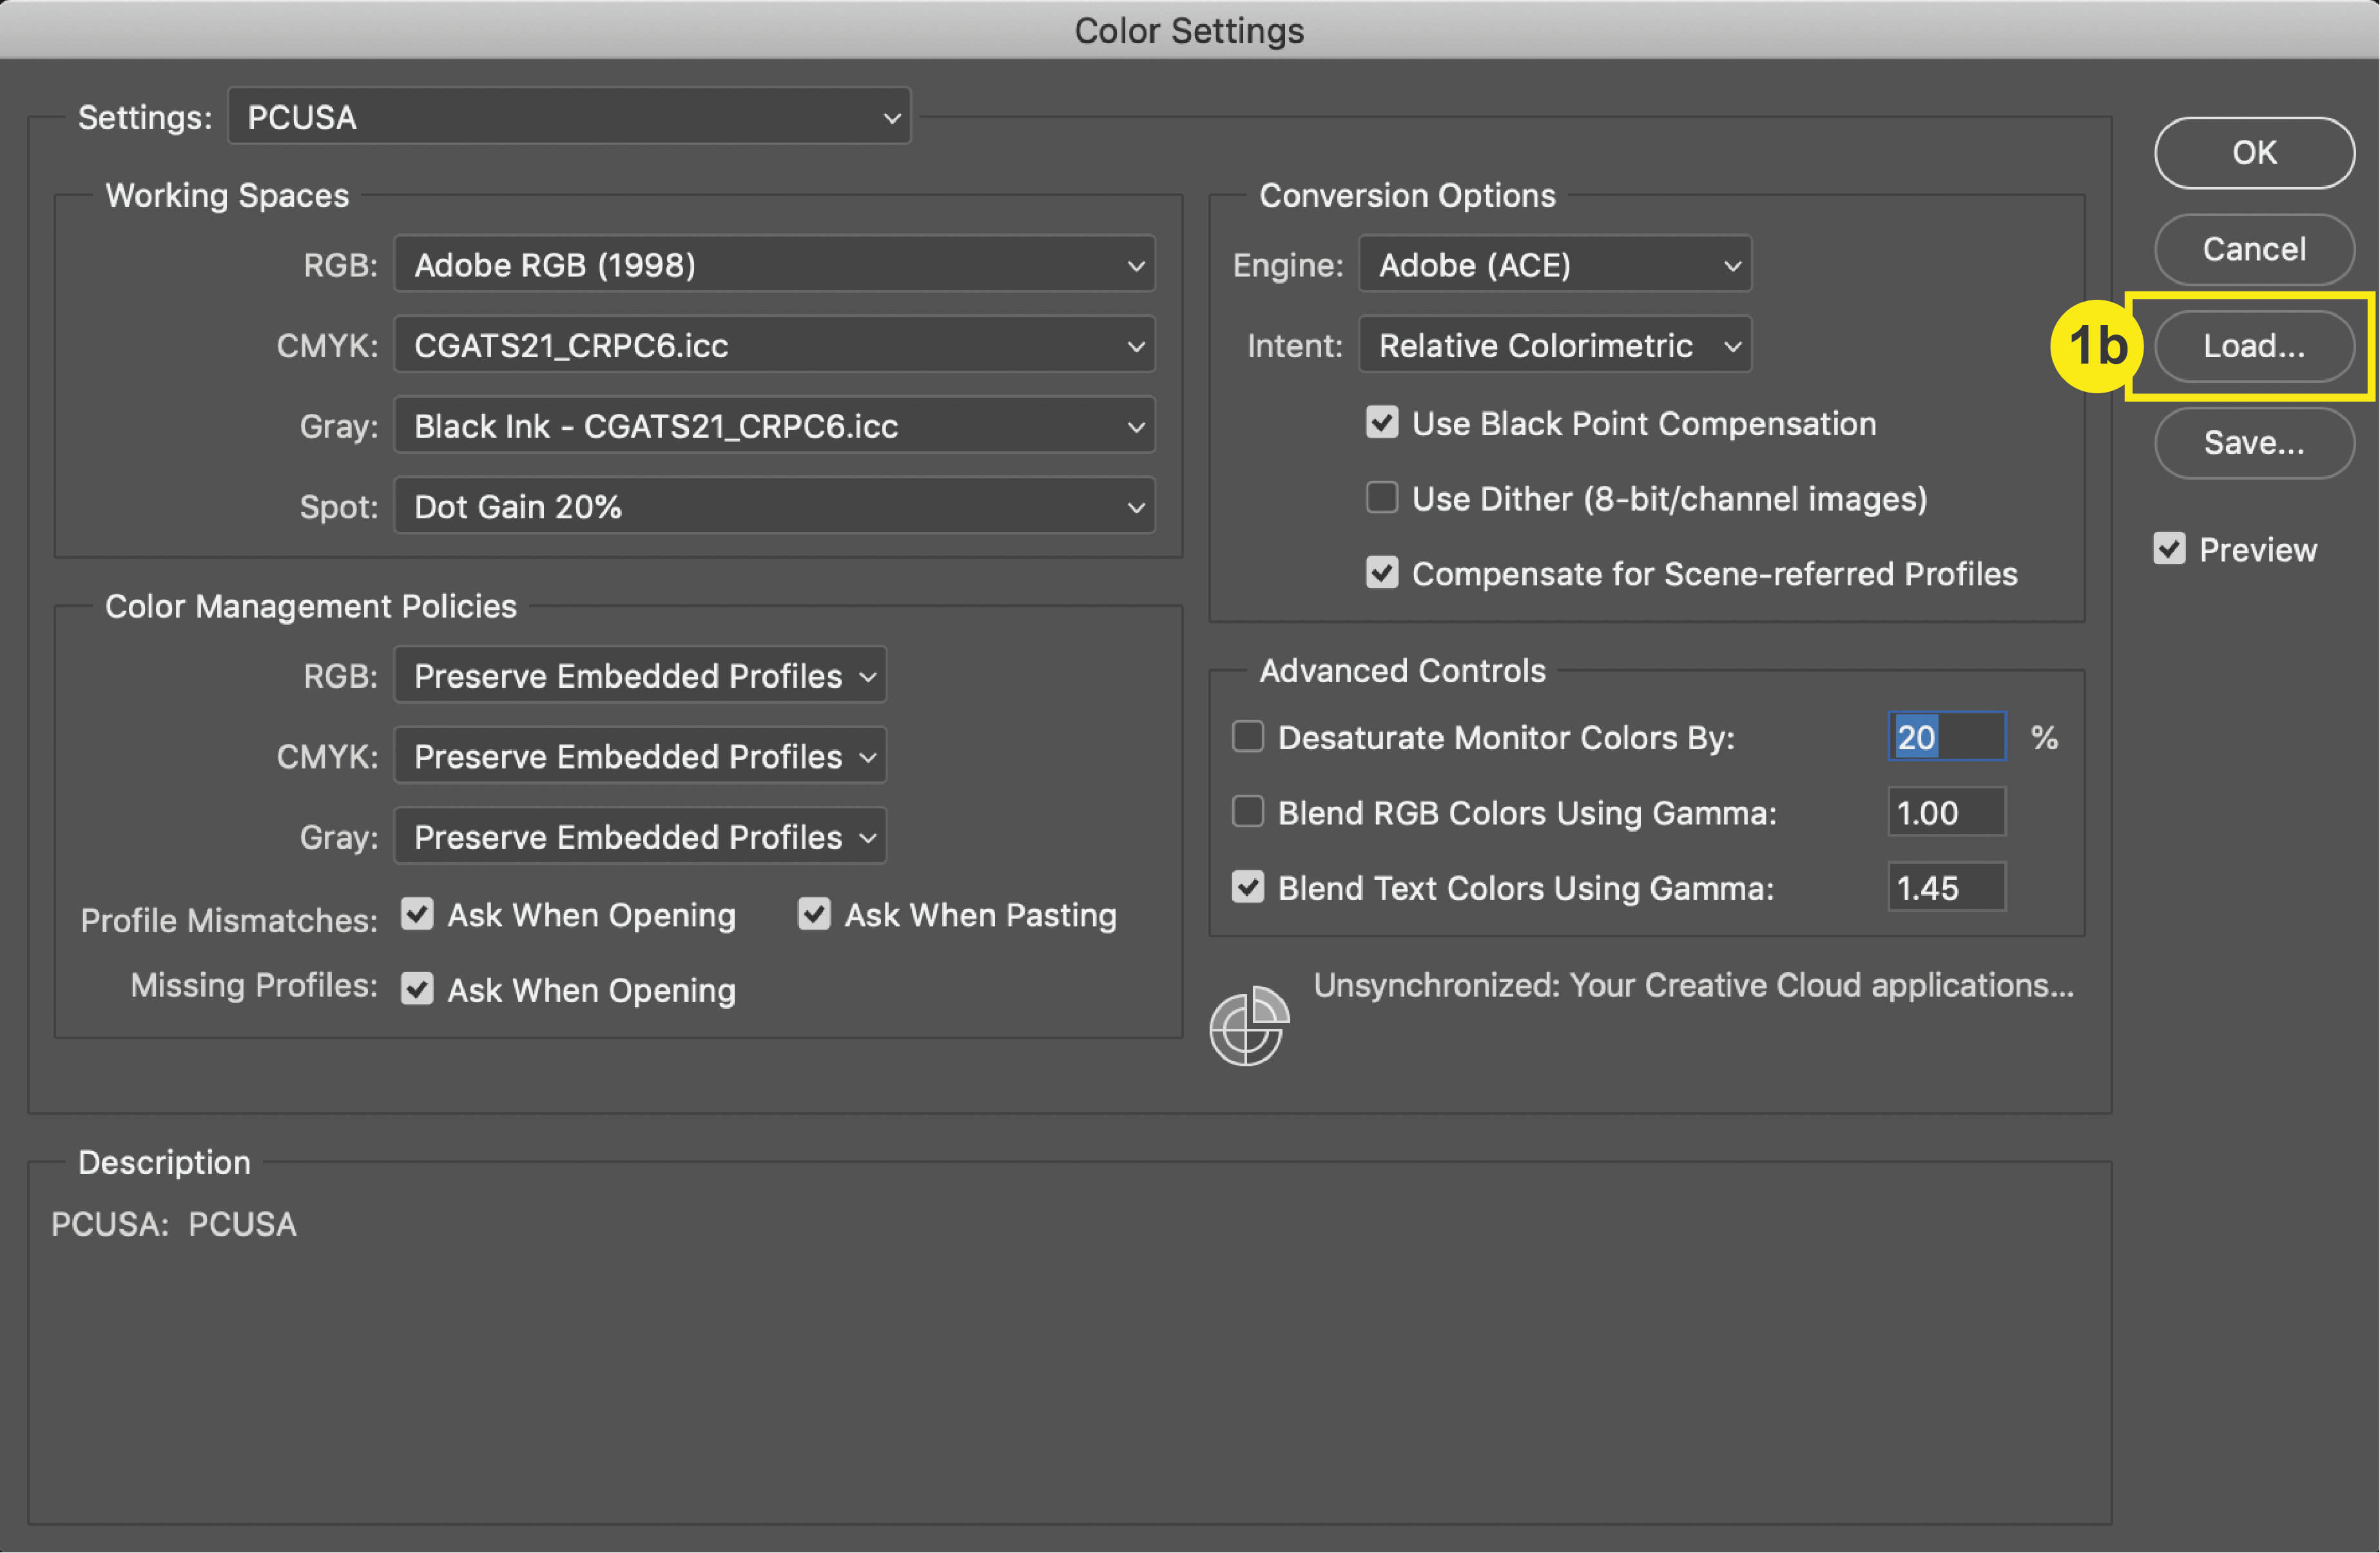
b. In the Color Settings window, select “Load” and select “PCUSA- load into color settings.csf” Click Save.
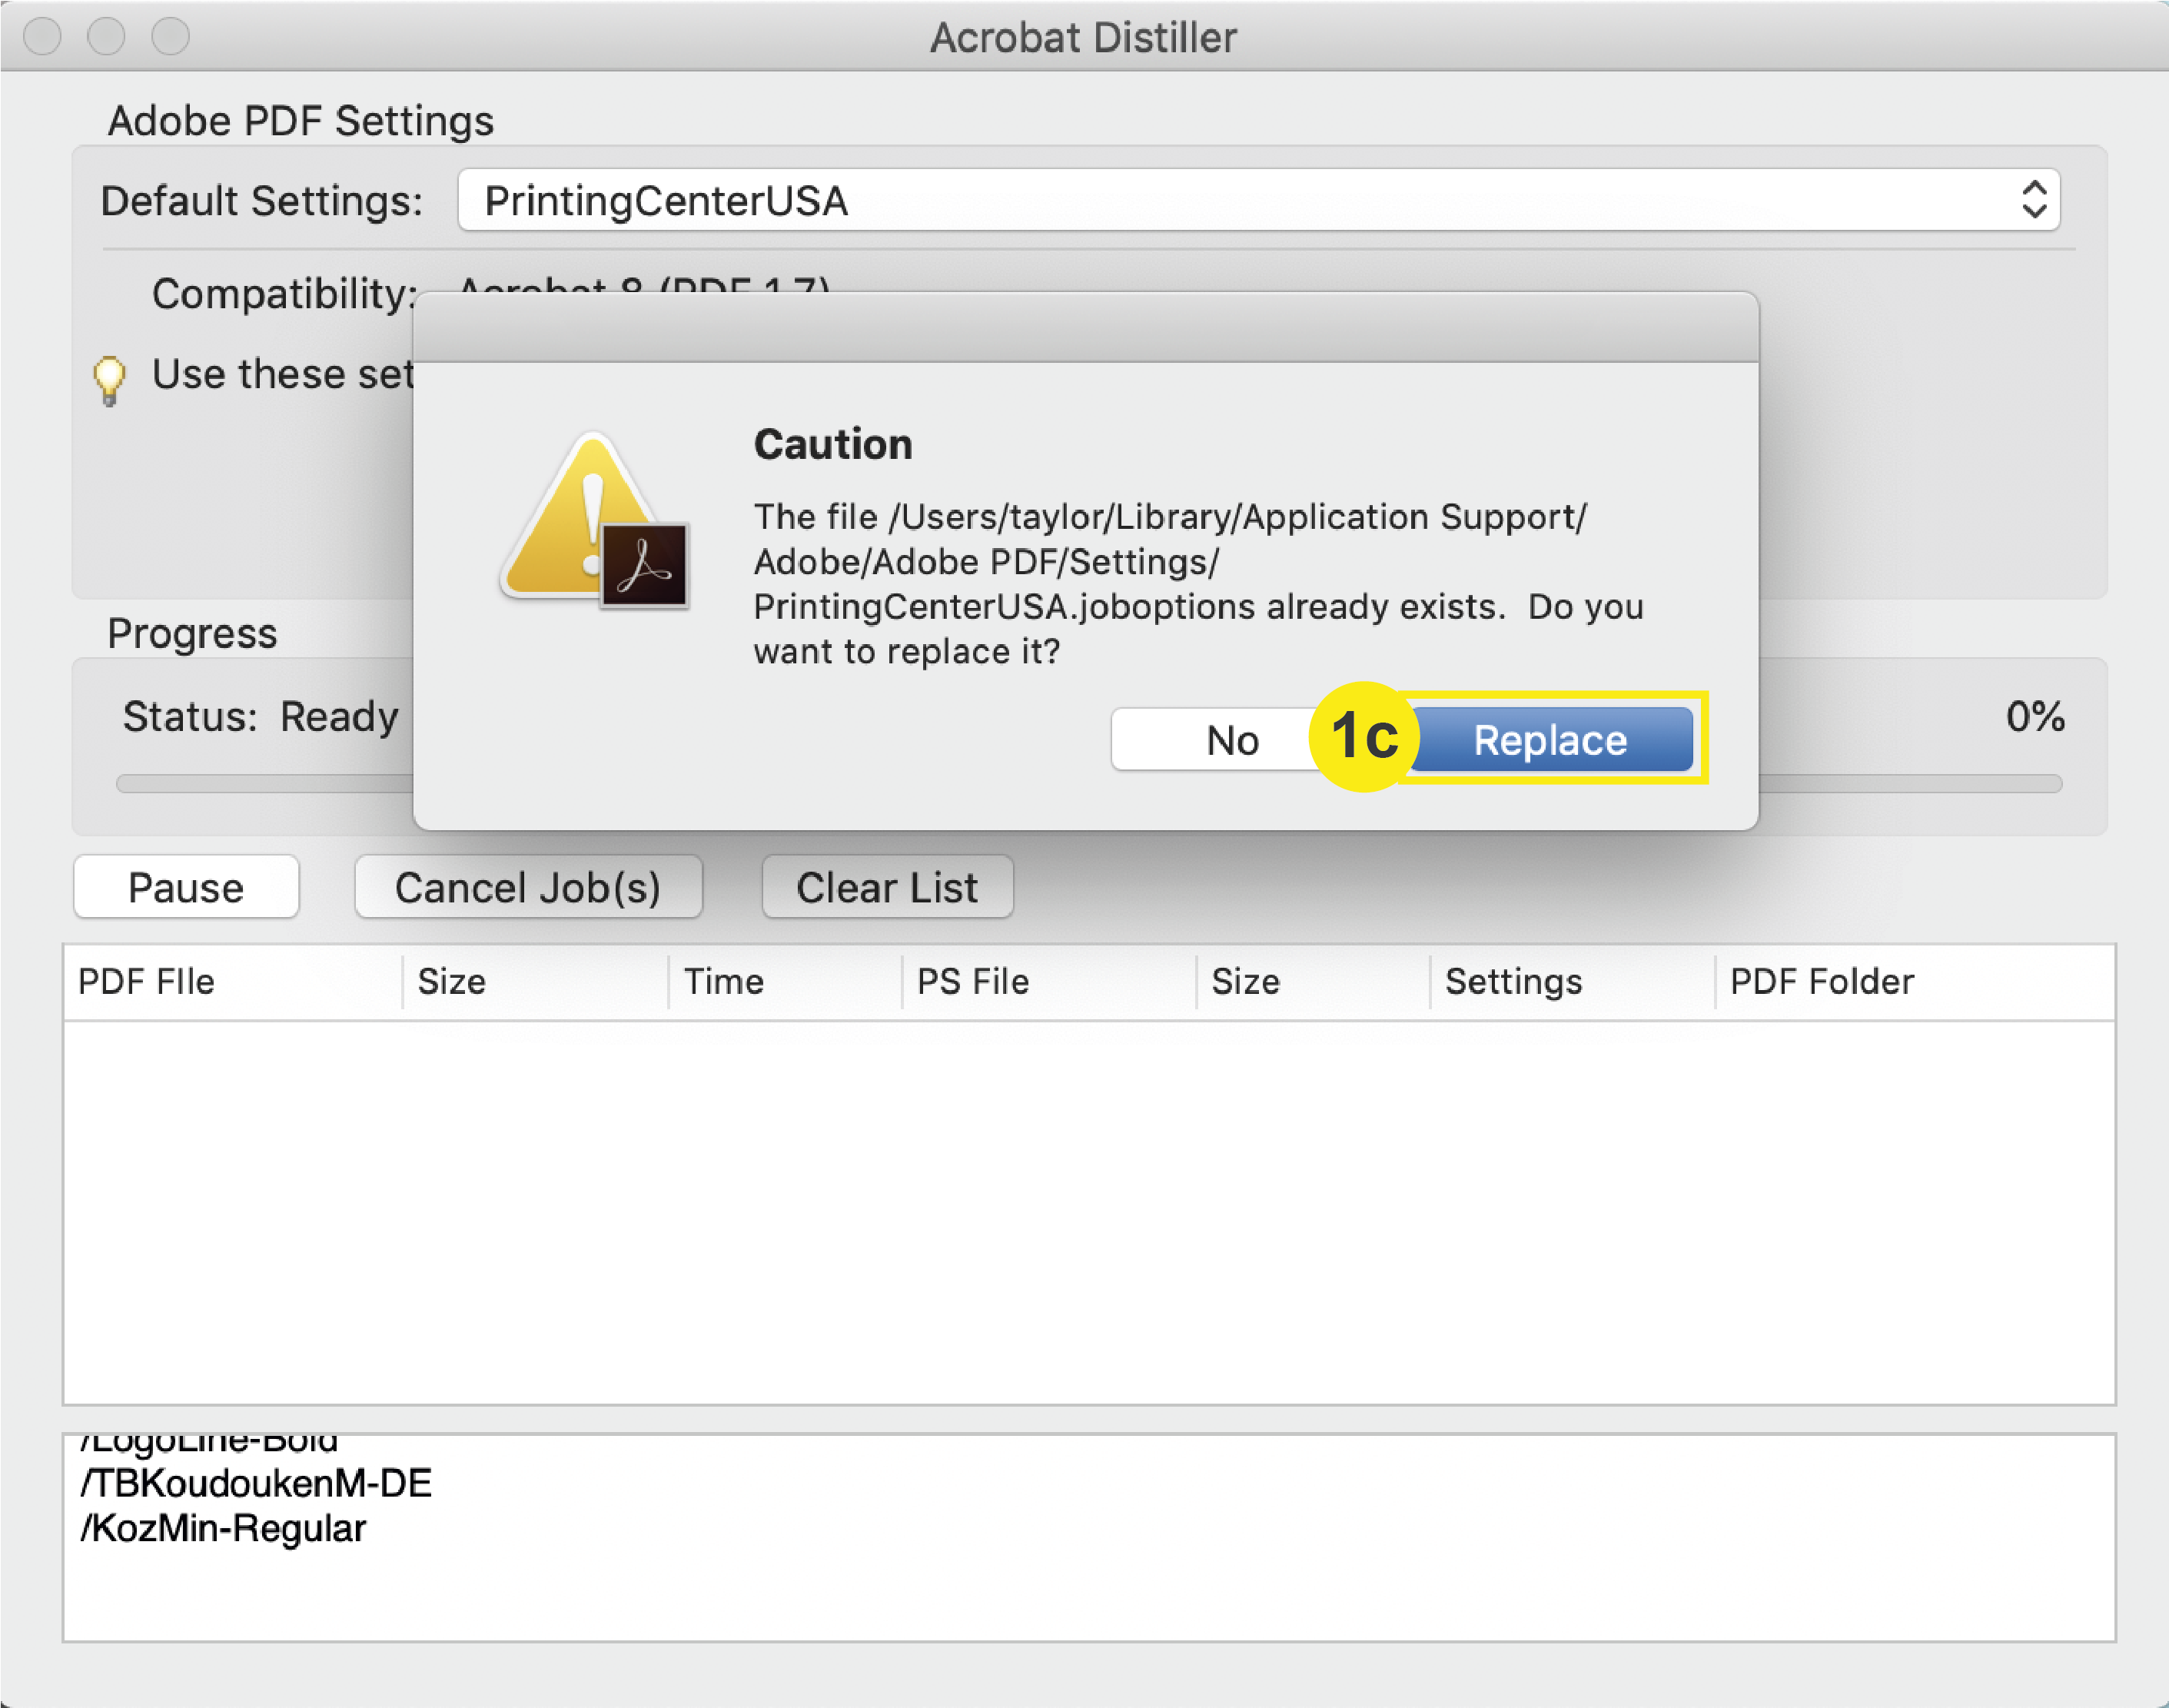
c. In the zip folder, double click PrintingCenterUSA.joboptions. Click “replace” if a caution window comes up. Click exit.
Note: To learn how to load PrintingCenterUSA’s PDF Preset for file saving, click here.
Once completed, continue with steps 2-9.
2. File > New
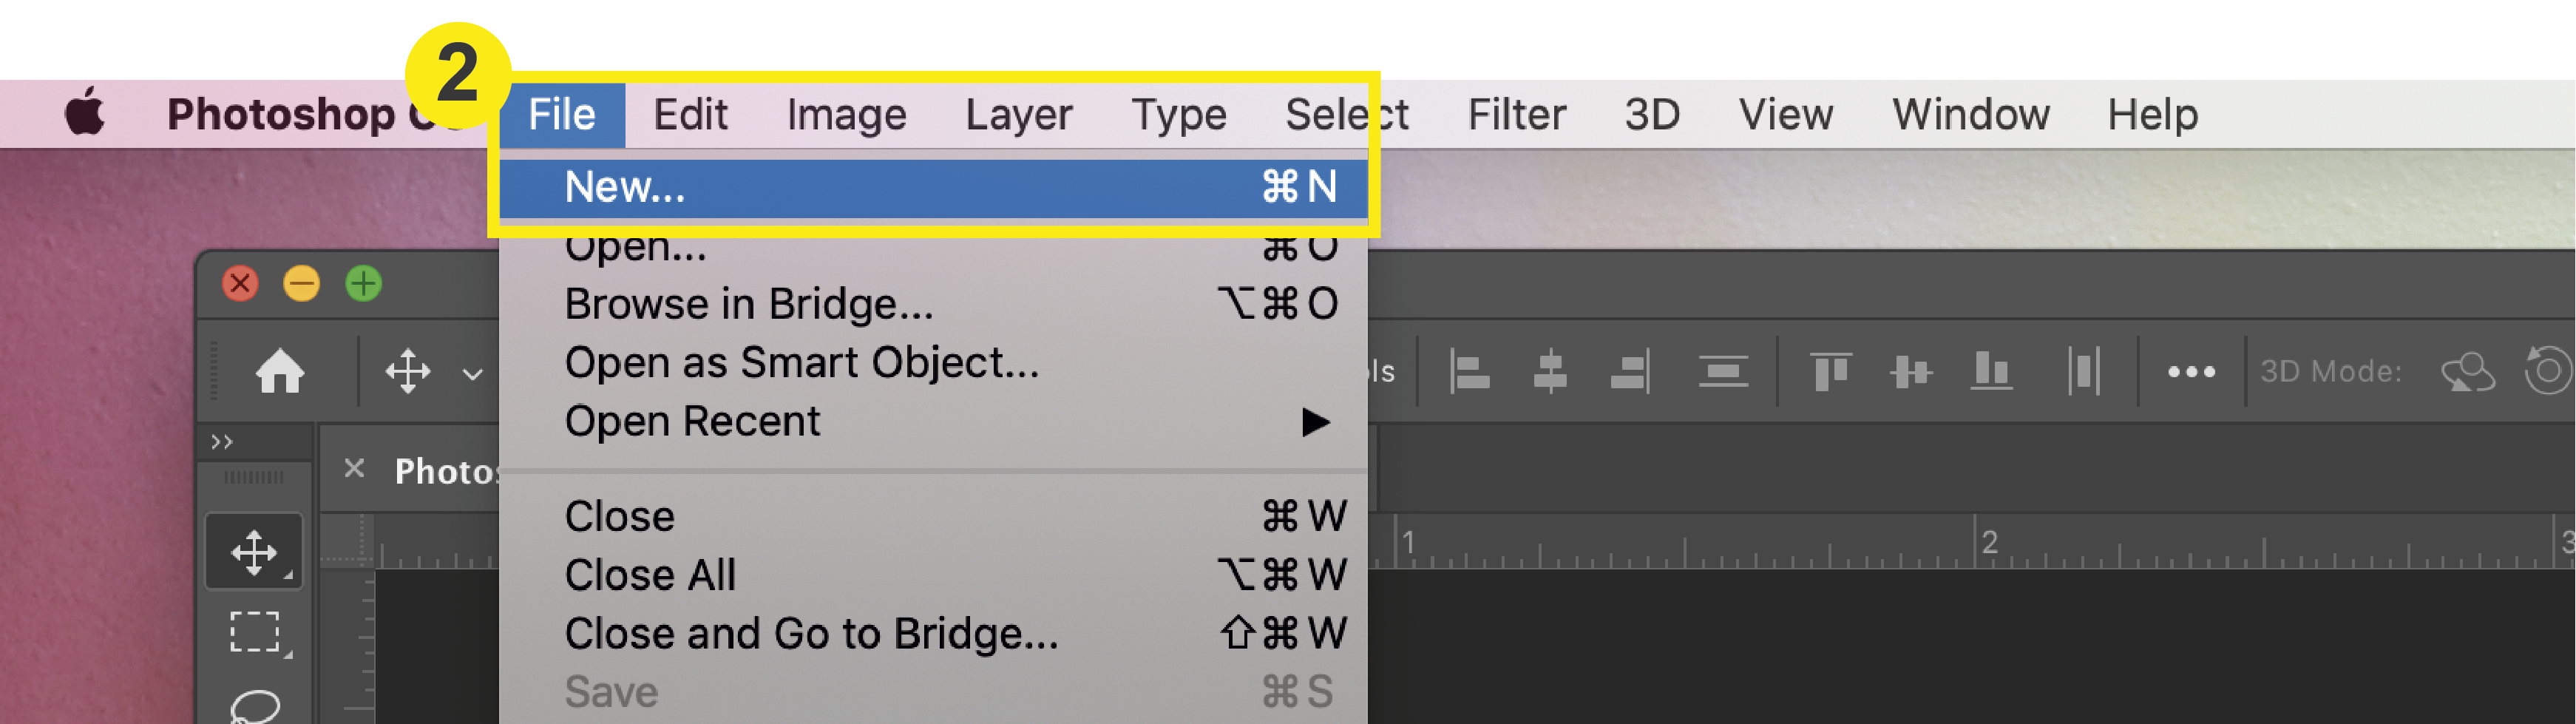
Once you have opened Photoshop, go to the top menu to select File > New. This will prompt a “New Document” window to open where you will define your document settings.
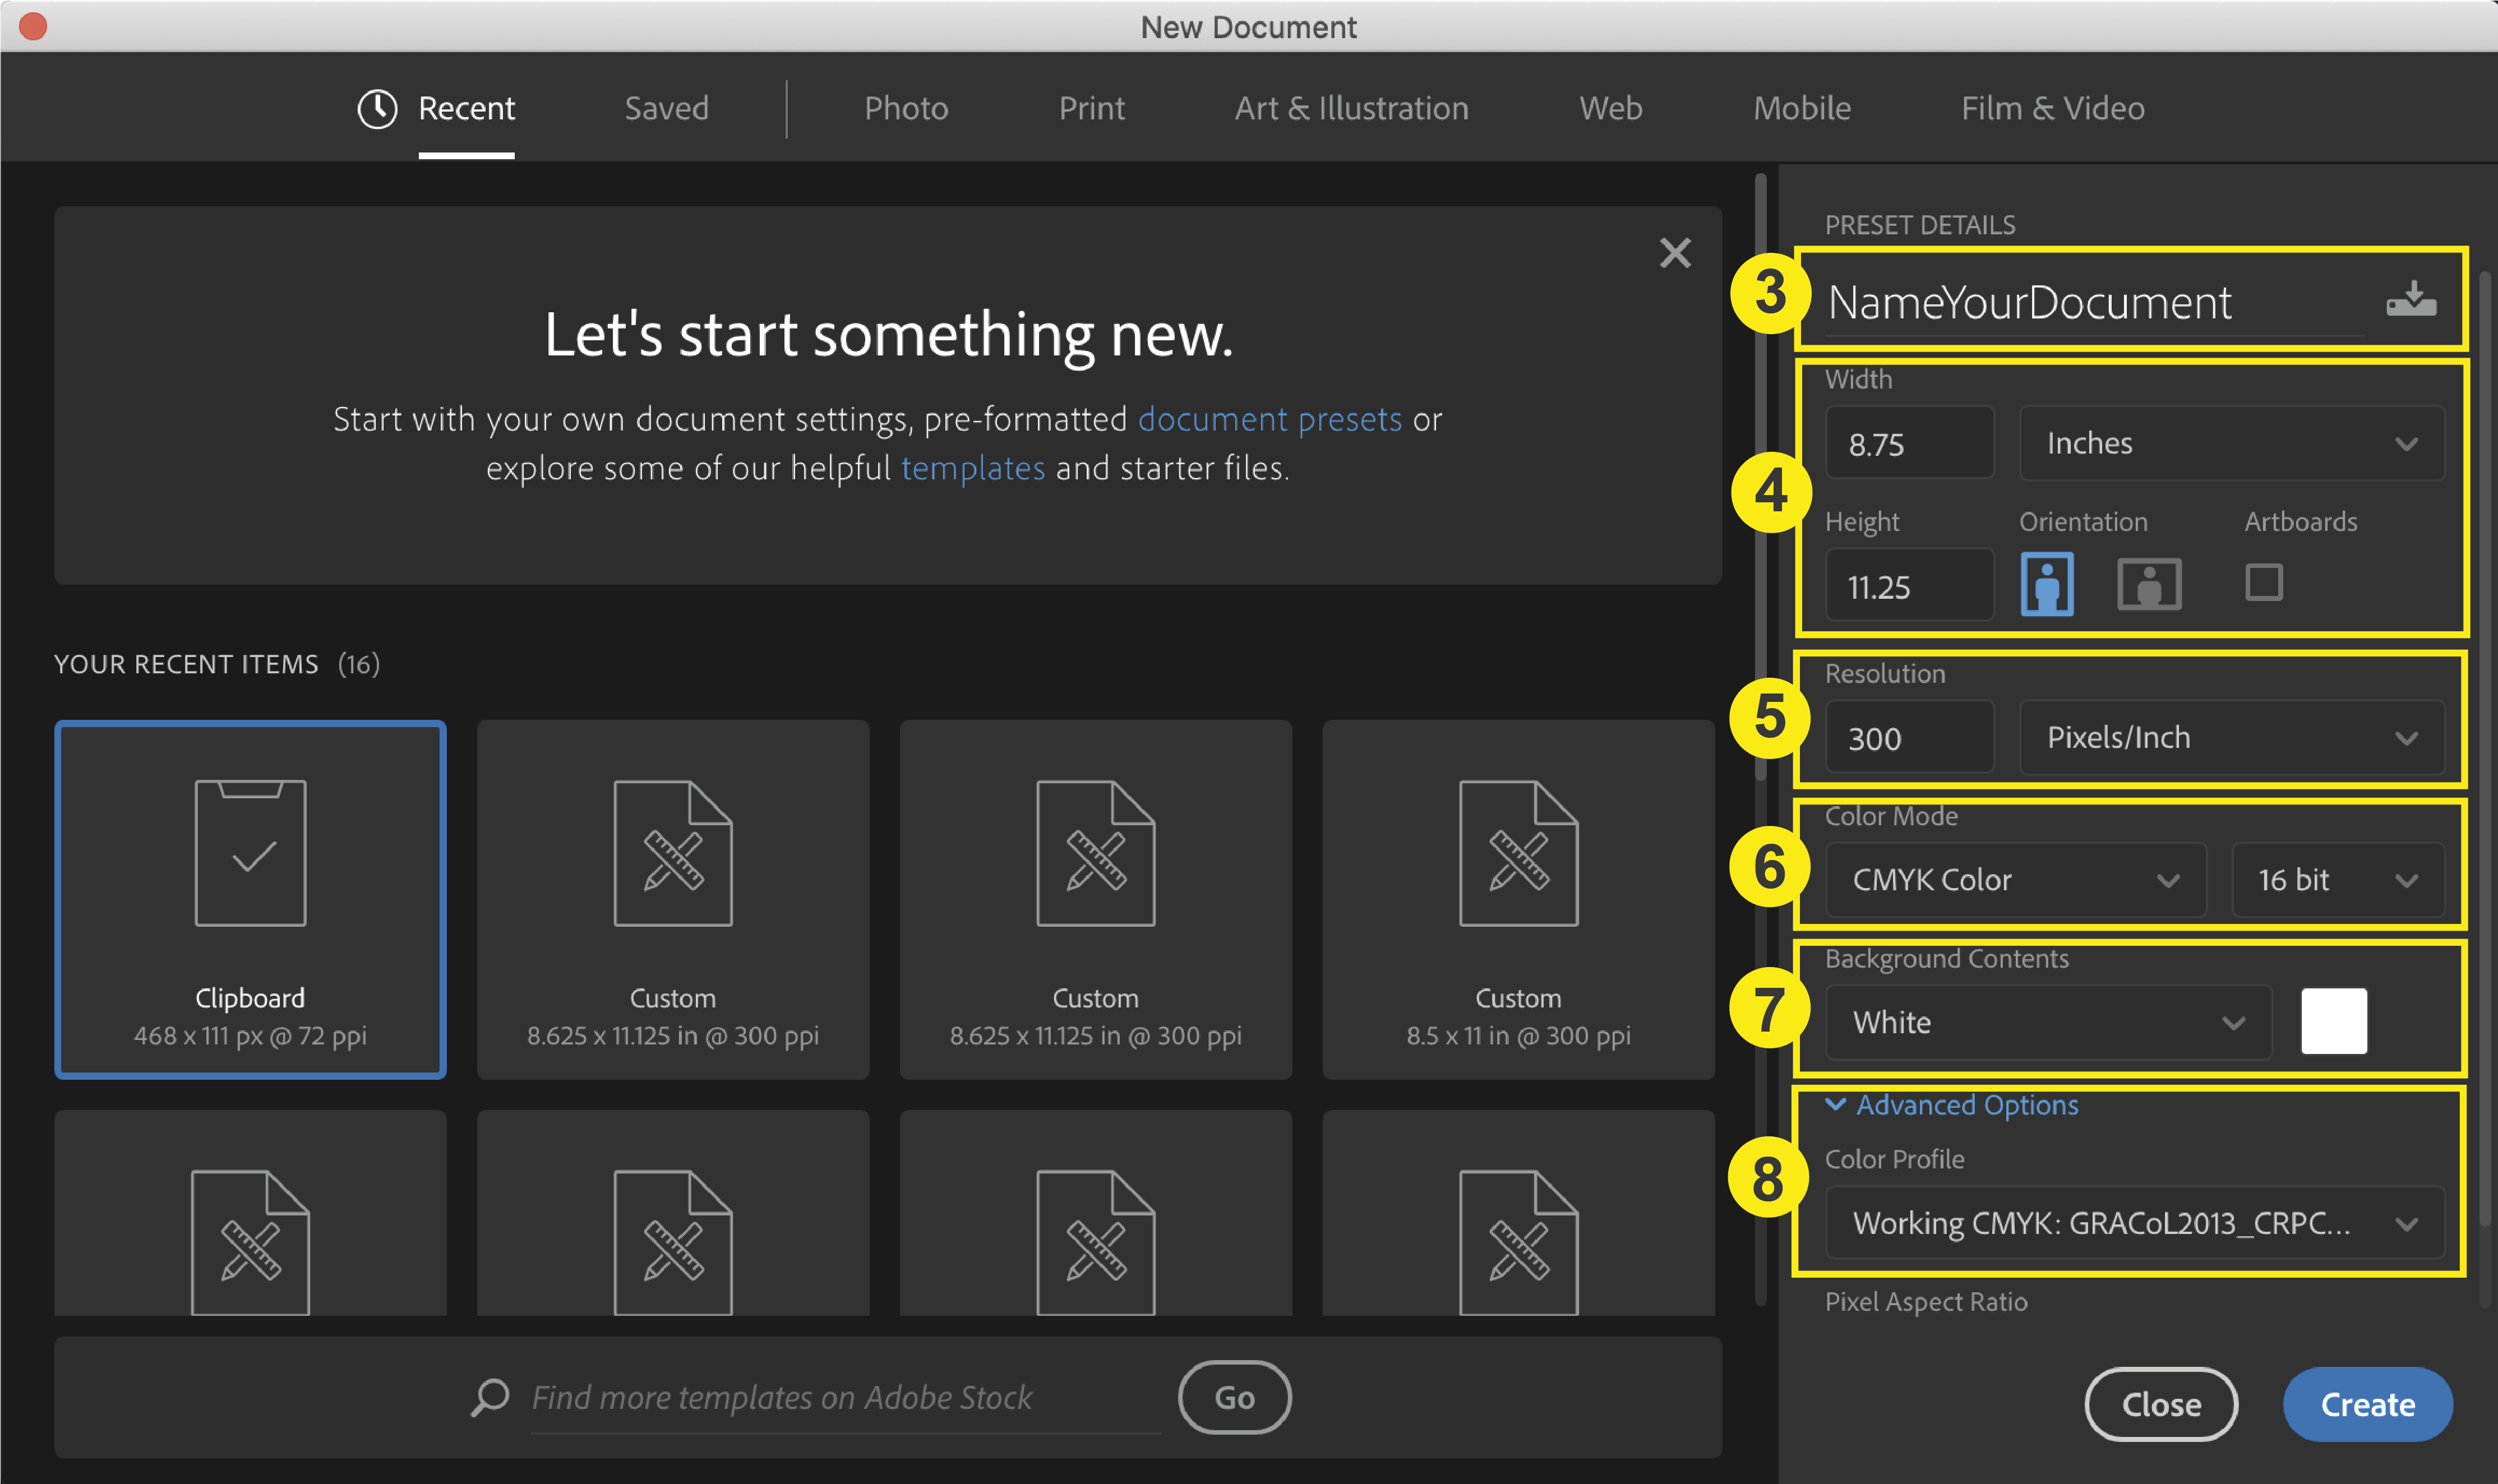
3. Name
First, you should always name your project in the name field.
4. Size
There is no section in Photoshop’s document setup to set your bleeds. You must add bleeds by adding .25 inches to both your width and height of the final trim size of your document. This is how you make room on your canvas for .125 inch bleeds on each side.
Example: For an 8.5” x 11” Letterhead, your document size should be 8.75” x 11.25”
5. Resolution
Input your resolution to 300 dpi to ensure your document and images will not be pixelated after printing.
6. Color Mode
Set the color mode to CMYK and ensure 8-bit is selected (not 16-bit).
7. Background Contents
Set your background contents to white.
8. Color Profile
Select the GRACoL2013_CRPC6.icc. If you have not already downloaded our color profile, click here to download and install after creating your Photoshop Document.
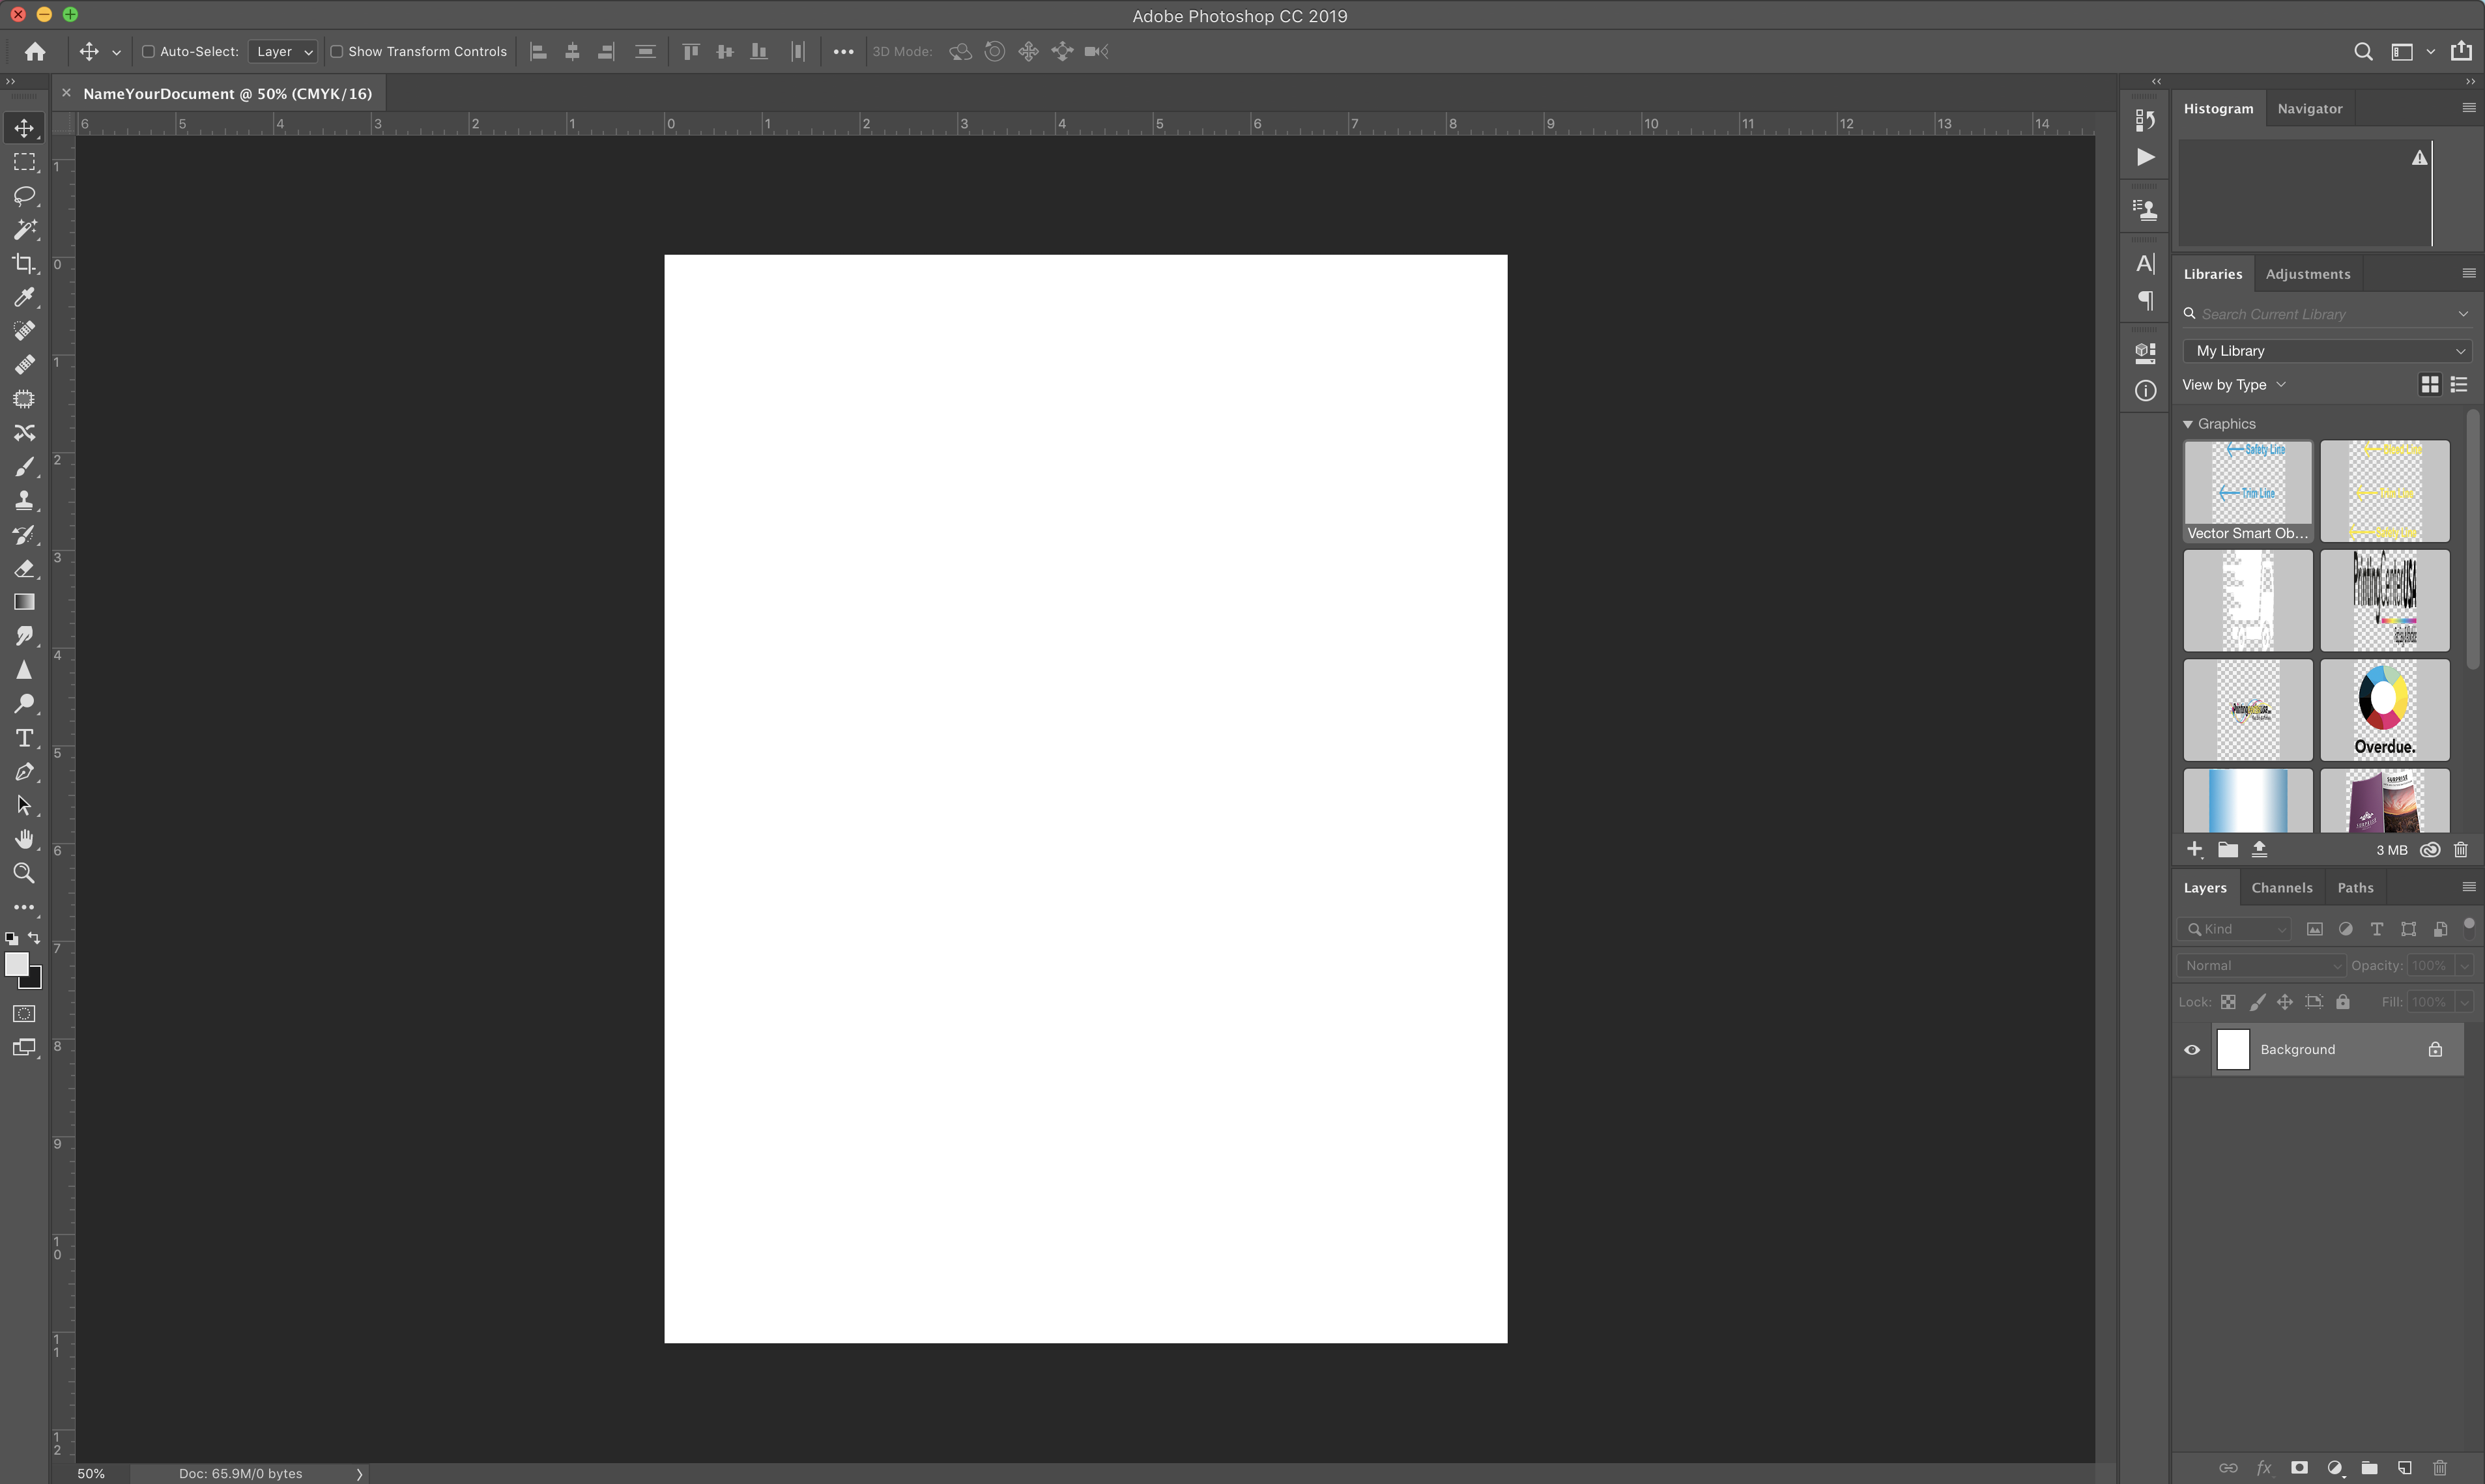
Once you have double checked steps 2-8, click “Create” and your Document will open.
After clicking “Create,” your document with bleeds and your safety line set up will appear.
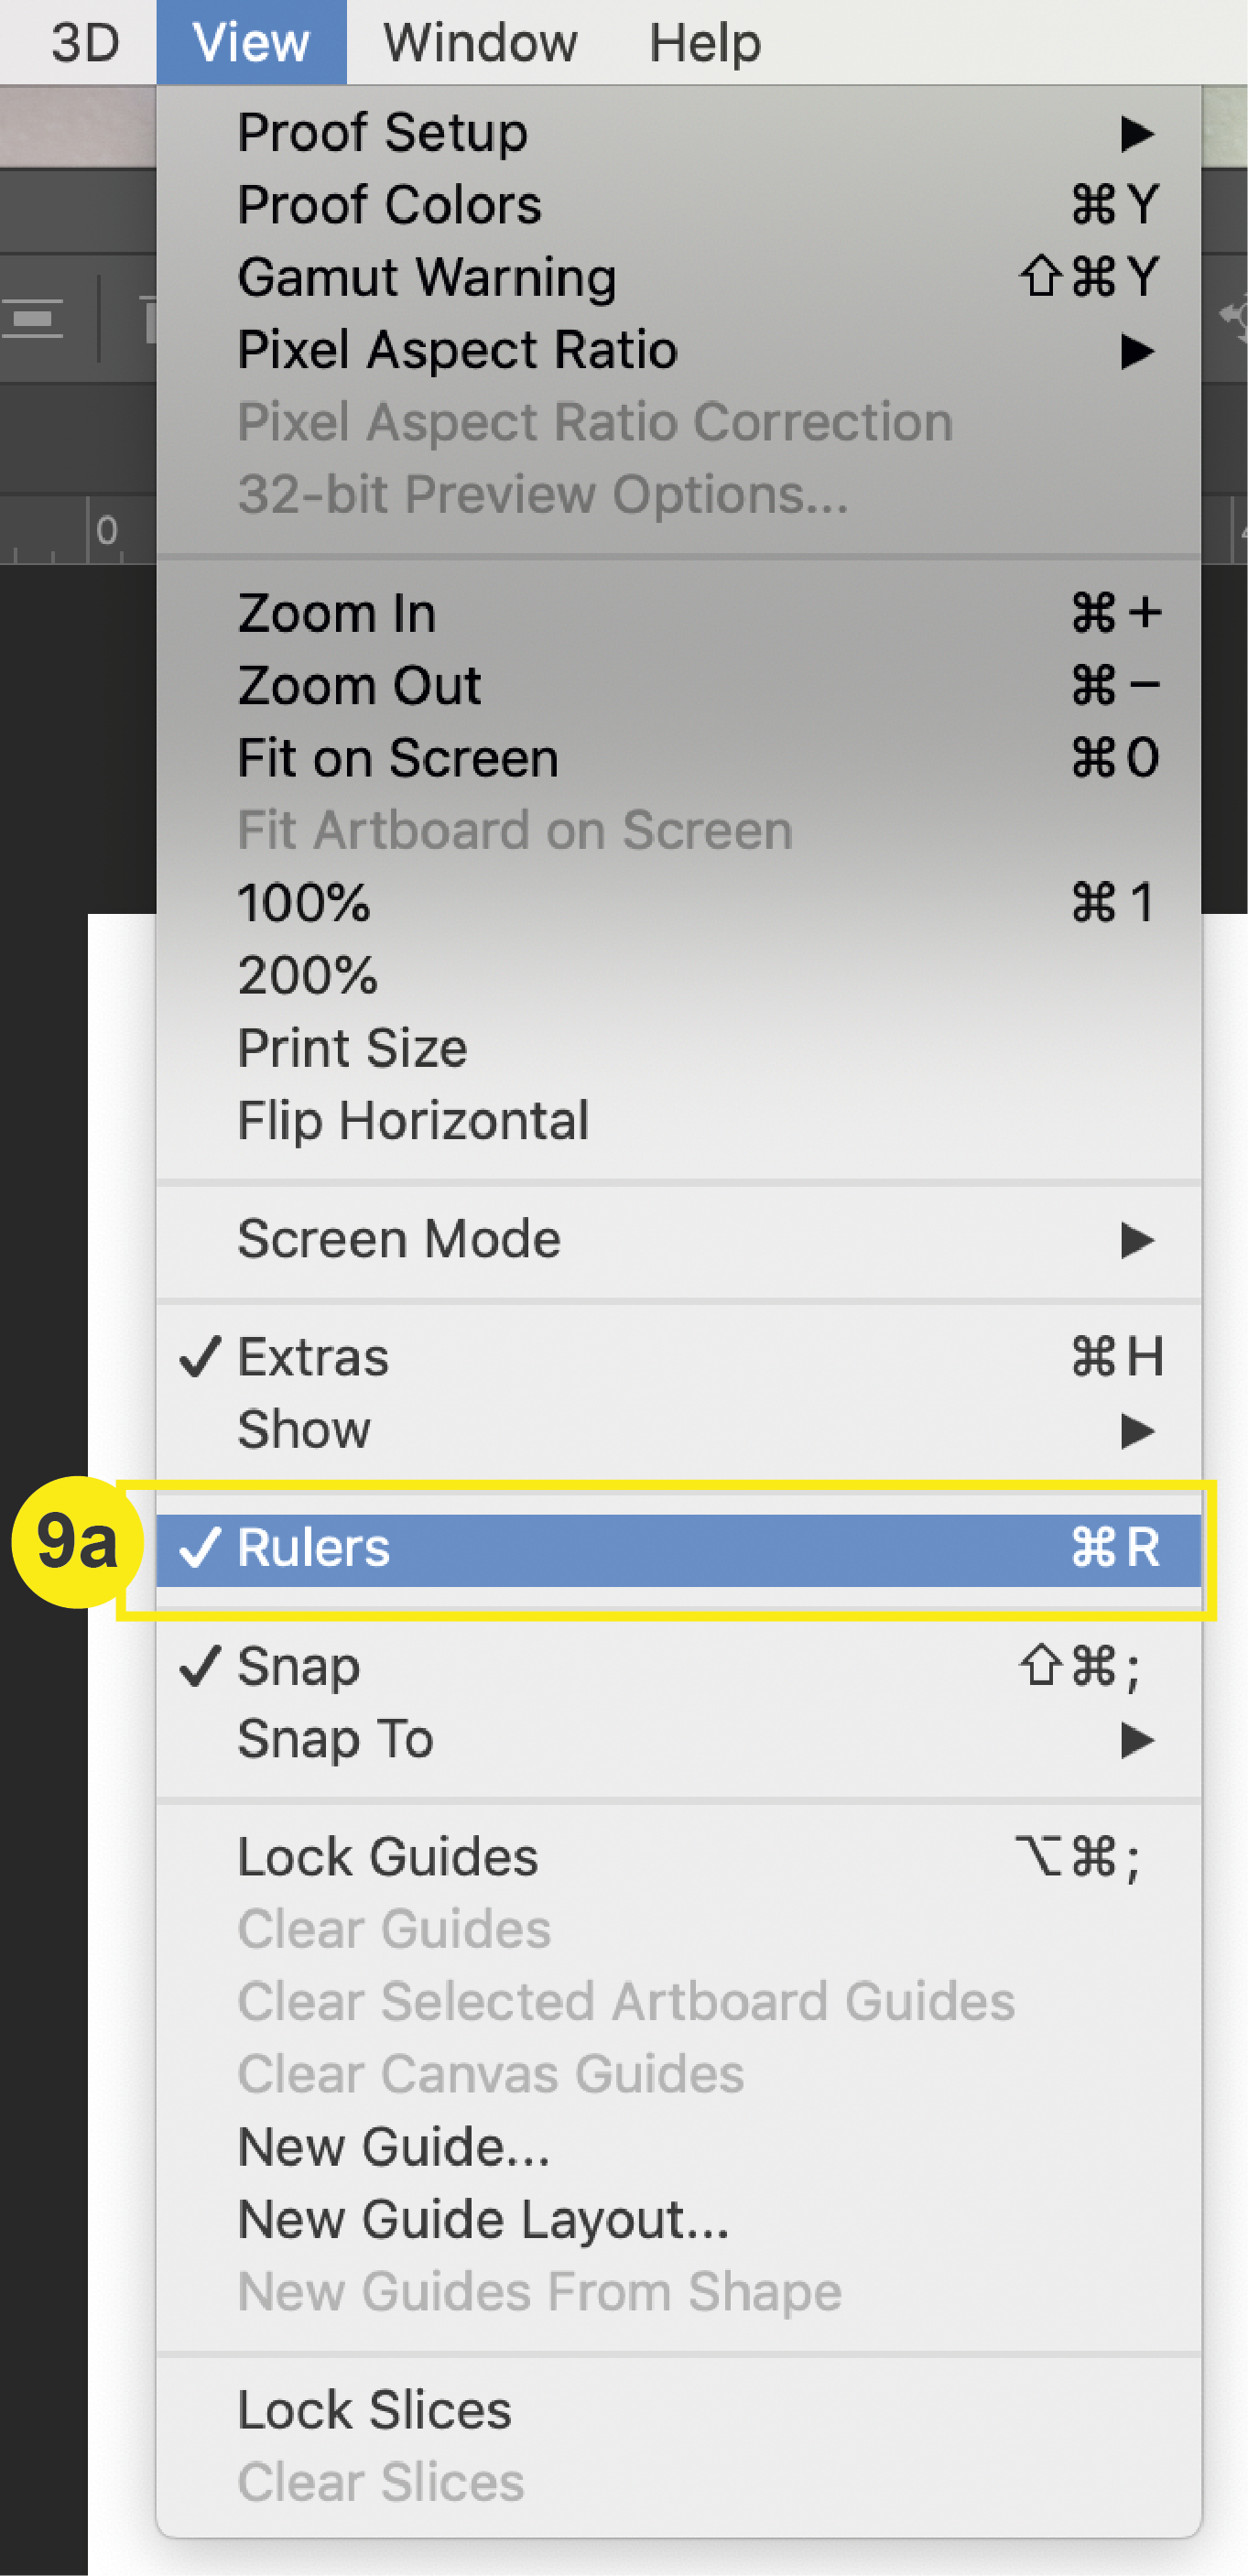
9. Trim + Safety
Now you are almost ready to design! To ensure you are designing with your bleed, trim line, and safety line in mind, it is important to set guides for yourself.
a. Go to View > Rulers to turn on your rulers.
b. Then, click + drag your mouse from the rulers to create a trim line that is .125″ from each edge of the document.
c. Repeat this step to create the safety line, but set it .25″ from each edge of your document.
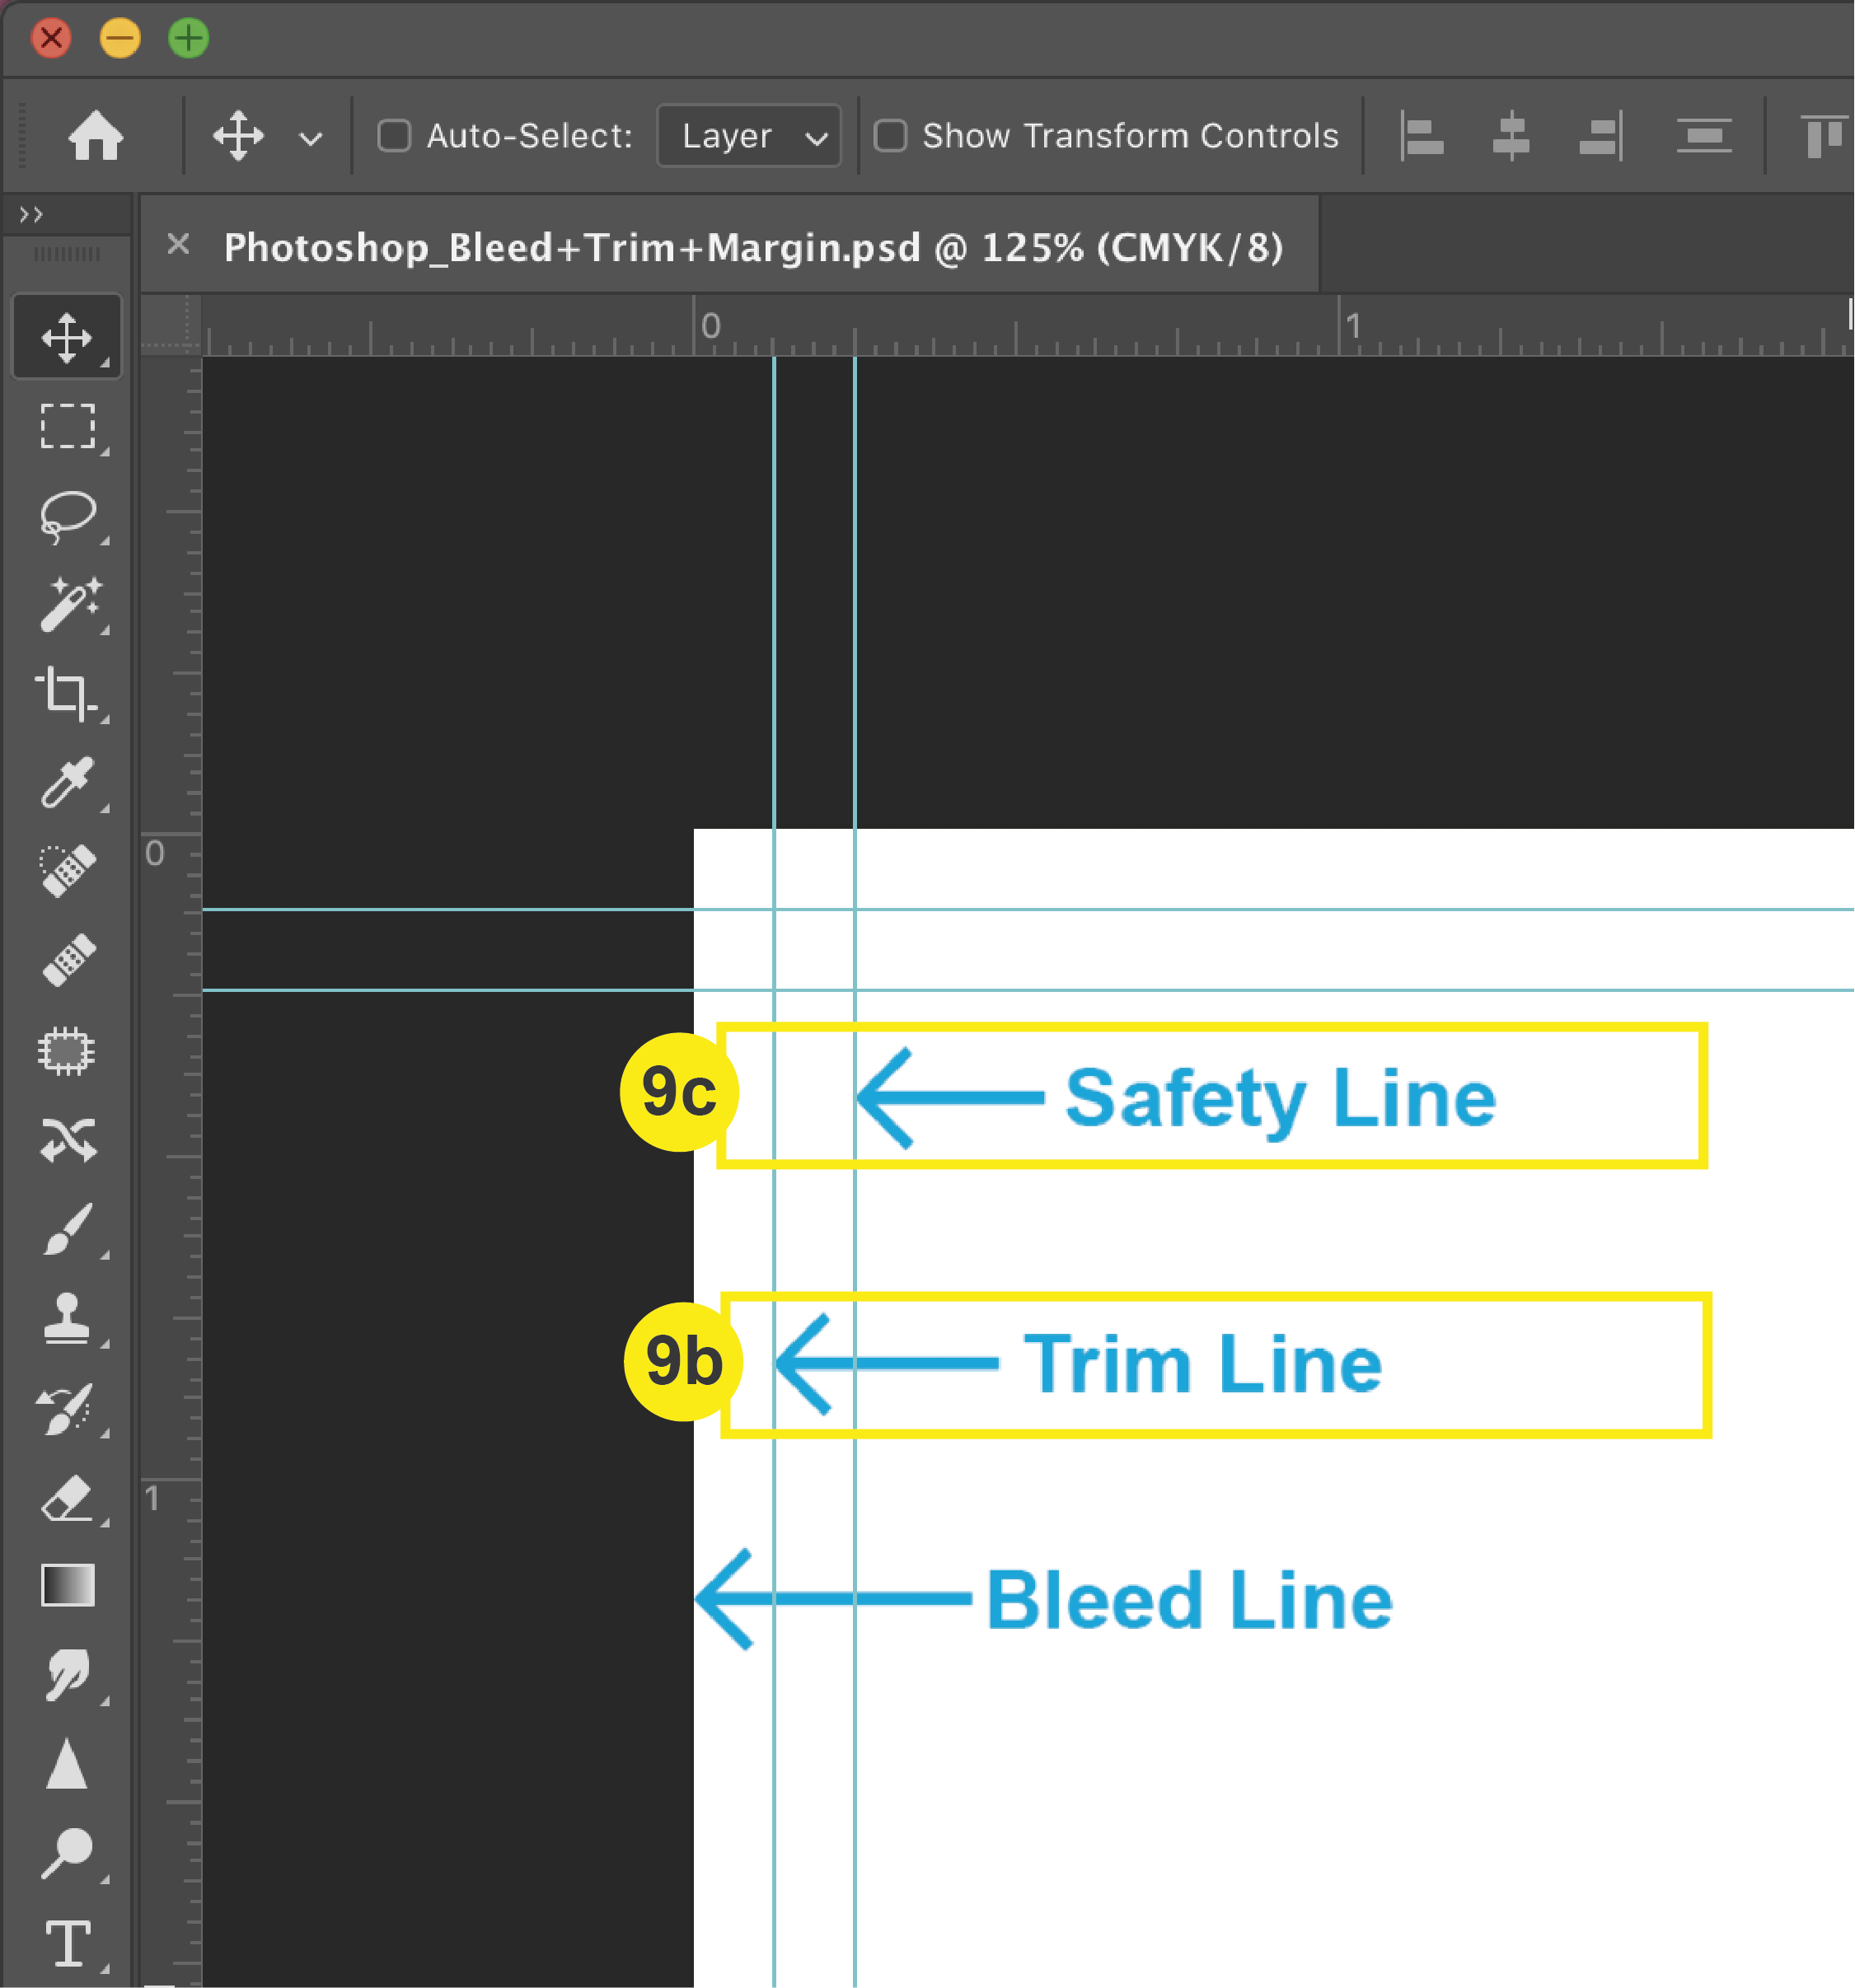
When you are done, your document should look similar to this:

Now you’re ready to begin designing your product for print!
Please refer to our File Saving section for a tutorial on saving your project once you are finished.