Word
Size: Word
To ensure your price quote and design accuracy, it is crucial that the size you order matches the size of your PDF. Follow the steps below to check the size of your design in Word.
Checklist
- Open Page Setup
- Check the Dimensions of your Document
- Compare to Chosen Size in Pricing Tool
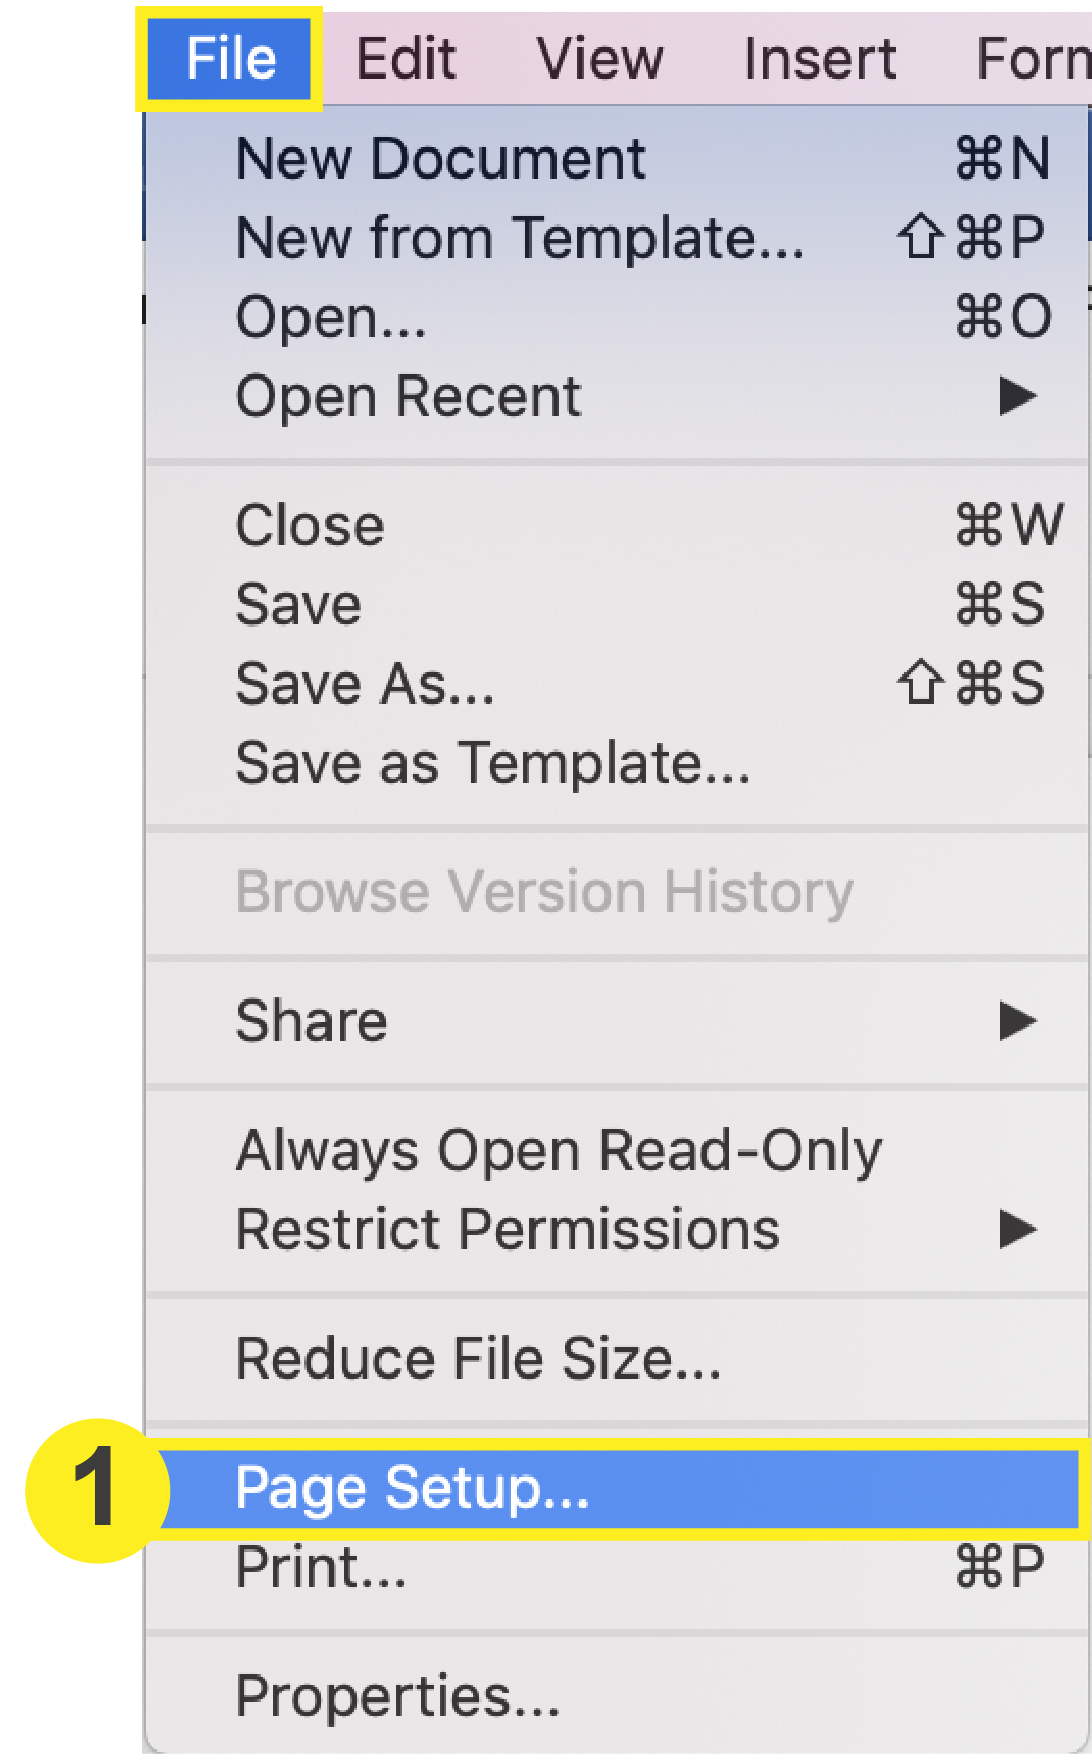
1. Open Page Setup
Open your document in Word. In the top menu, click: File > Page Setup. This will prompt the Page Setup window to open where you will check the dimensions of your document.
2. Check the Dimensions of your Document
a. In the Page Setup Window, Select “Manage Custom Sizes” in in the “Paper Size” dropdown.

b. Once in the Manage Custom Sizes window, select your custom size on the left. Then check the dimensions of the page. Your Paper size should be .25 inches (width and height) larger than your final trim size (the size you will select to order in the pricing tool).
For example: If your Letterhead is 8.5” x 11” then your paper size here would be 8.75” x 11.25.” This extra .25 inches accommodates for the bleed.

3. Compare to Chosen Size in Pricing Tool
Once you have checked the size of your document, compare it to your chosen size on PrintingCenterUSA’s pricing tool. The page size in Word should be .25 inches larger (for width and height) than the price shown in the pricing tool. If your sizes are the same, then you probably just need to adjust your document size/design to accommodate for bleed.
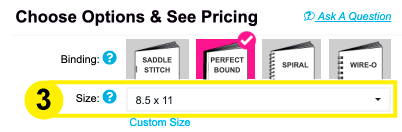
Note: Changing the size of your product on the pricing tool may affect the price.