Skip to content Skip to main navigation Skip to footer

Uncategorized

How do I add a text box?

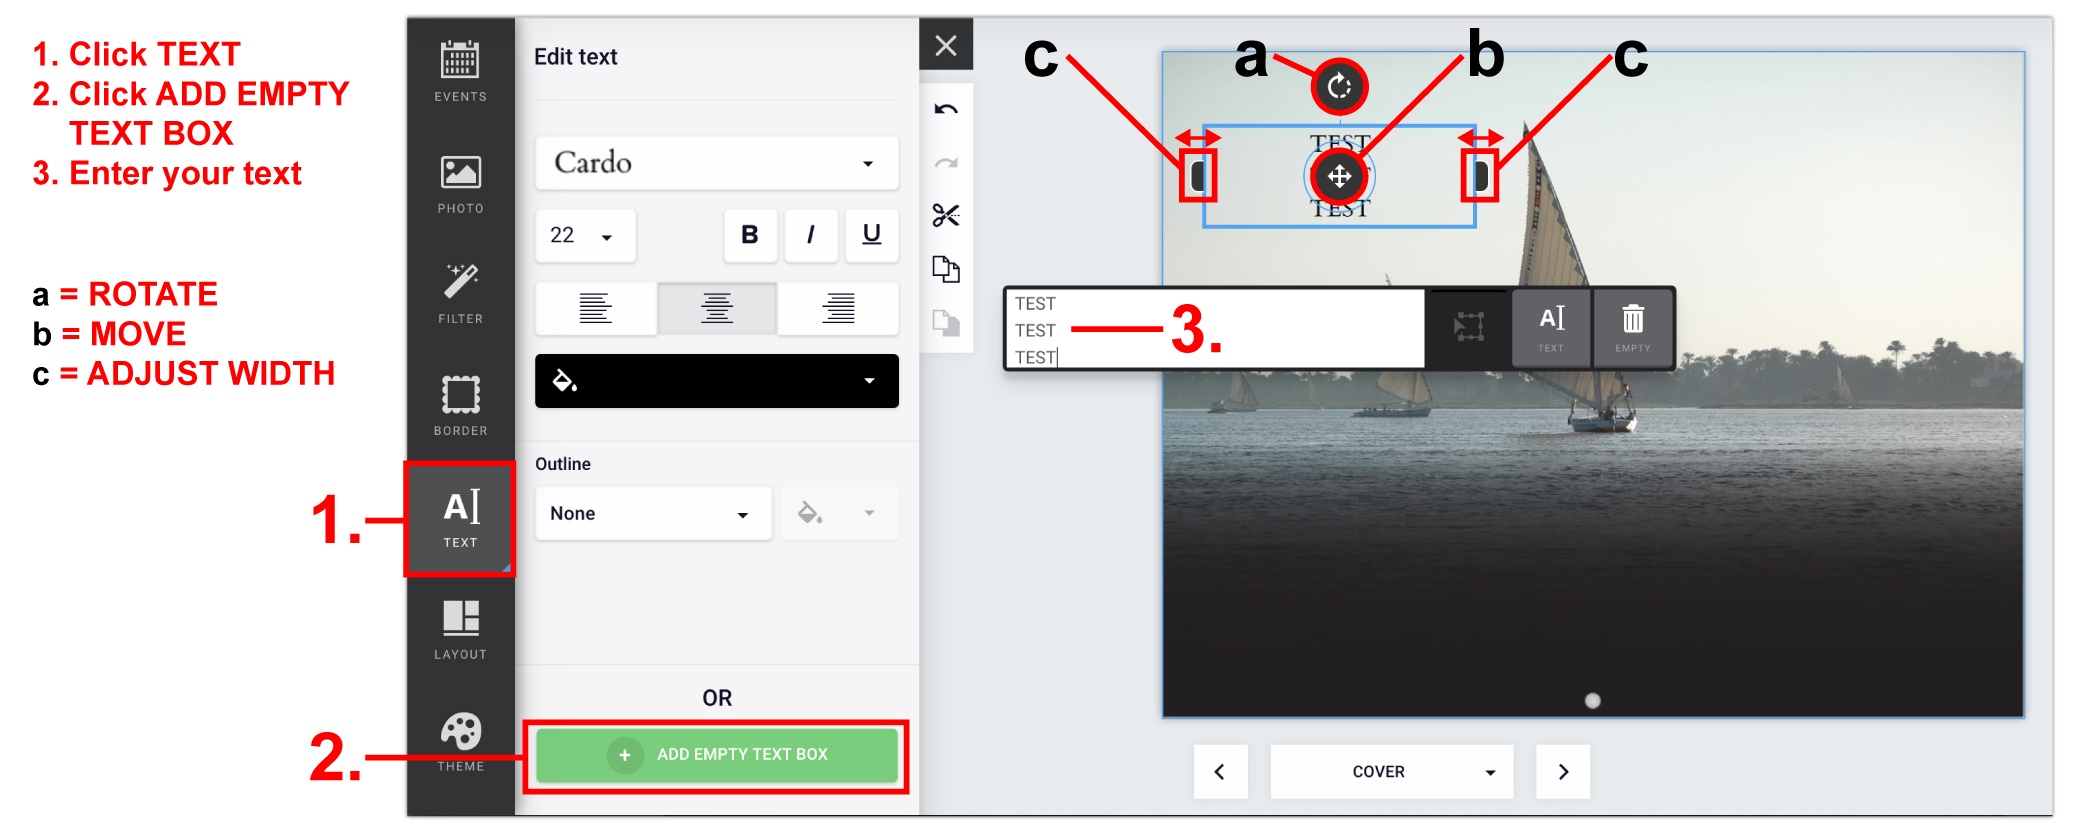
Click TEXT > Click ADD EMPTY TEXT BOX button at the bottom > Enter your text into the white text box that says “Add text (optional).”

  • Move a text box around by clicking and holding the 4 arrow icon while dragging.
  • Rotate a text box by clicking and holding the rotate arrow while moving your mouse.
  • Change the width of a text box by clicking and holding either side of the text box and moving it outwards.
add text box

How do I create, edit or delete holidays and events?

Create an Event:

  • Click EVENTS > Scroll down to the month you want to add the event/holiday to > click ADD NEW EVENT and choose the day.

Edit an Event:

  • Click EVENTS > Find the holiday/event you want to edit and click the pencil icon > Make your edits > Click DONE (top right corner).

Delete an Event:

  • Click EVENTS > Find the holiday/event you want to delete > Click the trash can icon.

How do I add photo boxes?

To Collage Pages:

  • Photo Layouts: Select your page > Click LAYOUT > choose between a Page layout and Spread layout > select the photo layout you want to use and it will fill the page(s).
  • Single Photo Box: Select your page > Click PHOTO > ADD EMPTY PHOTO BOX
add photo boxes

To Monthly Grid dates:
You can only add images to individual dates on the grids. You cannot add images to the previous/ next month’s dates.

  • Click EVENTS > Scroll down to the month you want to add the image to > click ADD NEW EVENT and choose the day of the month > Click PHOTO > click on (or drag & drop) the image you’d like into the photo placeholder (and add text if you’d like ) > Click DONE
monthly grid dates

How do I upload my photos?

From My Device:

  • Click PHOTO > At the top of the Choose photo window, click the UPLOAD button > Either drag and drop your image(s) or click on the box to search your device. Once your image(s) are uploaded, click DONE. You can find all your previously uploaded images under My Uploads > Recent uploads.
upload my photos

From Facebook:

  • Click PHOTO > Click “Connect to Facebook” > Login to your Facebook account > now you will have access to all your Facebook profile’s photo albums.
upload from facebook

What size should my images be if I’m editing them beforehand?

If you are sizing and editing your top month images before placing them into the design tool, design them to be these sizes (or dimensions) so they fit correctly and include enough for the bleed.

  • 11″ x 8.5″ Calendars: 3375 x 2625 pixels (11.25″ x 8.75″ at 300 dpi)
  • 8.5″ x 5.5″ Calendars: 2625 x 1725 pixels (8.75″ x 5.75″ at 300 dpi)
  • 12″ x 12″ Calendars: 3675 x 3675 pixels (12.25″ x 12.25″ at 300 dpi)

What type of images should I use?

Page count depends on the type of binding you selected.

Image Specifications

If you are starting a design before creating an account please note that the pictures that you upload and use in your design will be saved to your design. Any pictures that are uploaded that are not used in the design are not saved because there is no account to save them to.

Be sure to register an account when working on a design and save your design to your account (if you’re in the design tool and want to save or login: Click SAVE > Name Your Design > Login or Create an Account and after you will be redirected back to your design).