Size: Overview
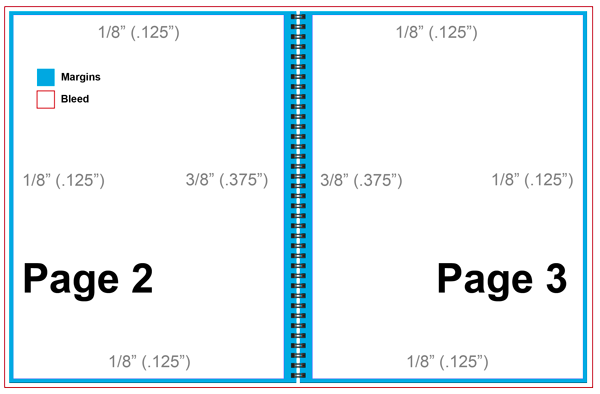
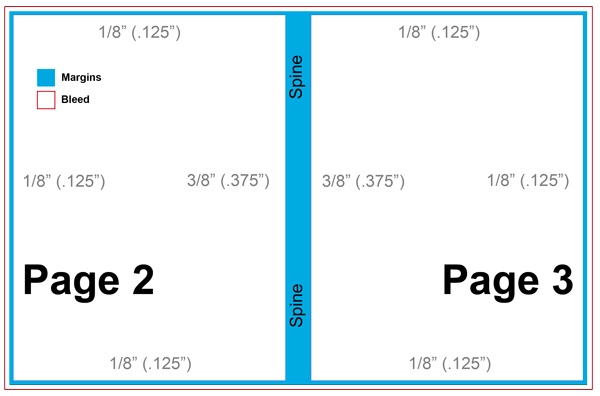
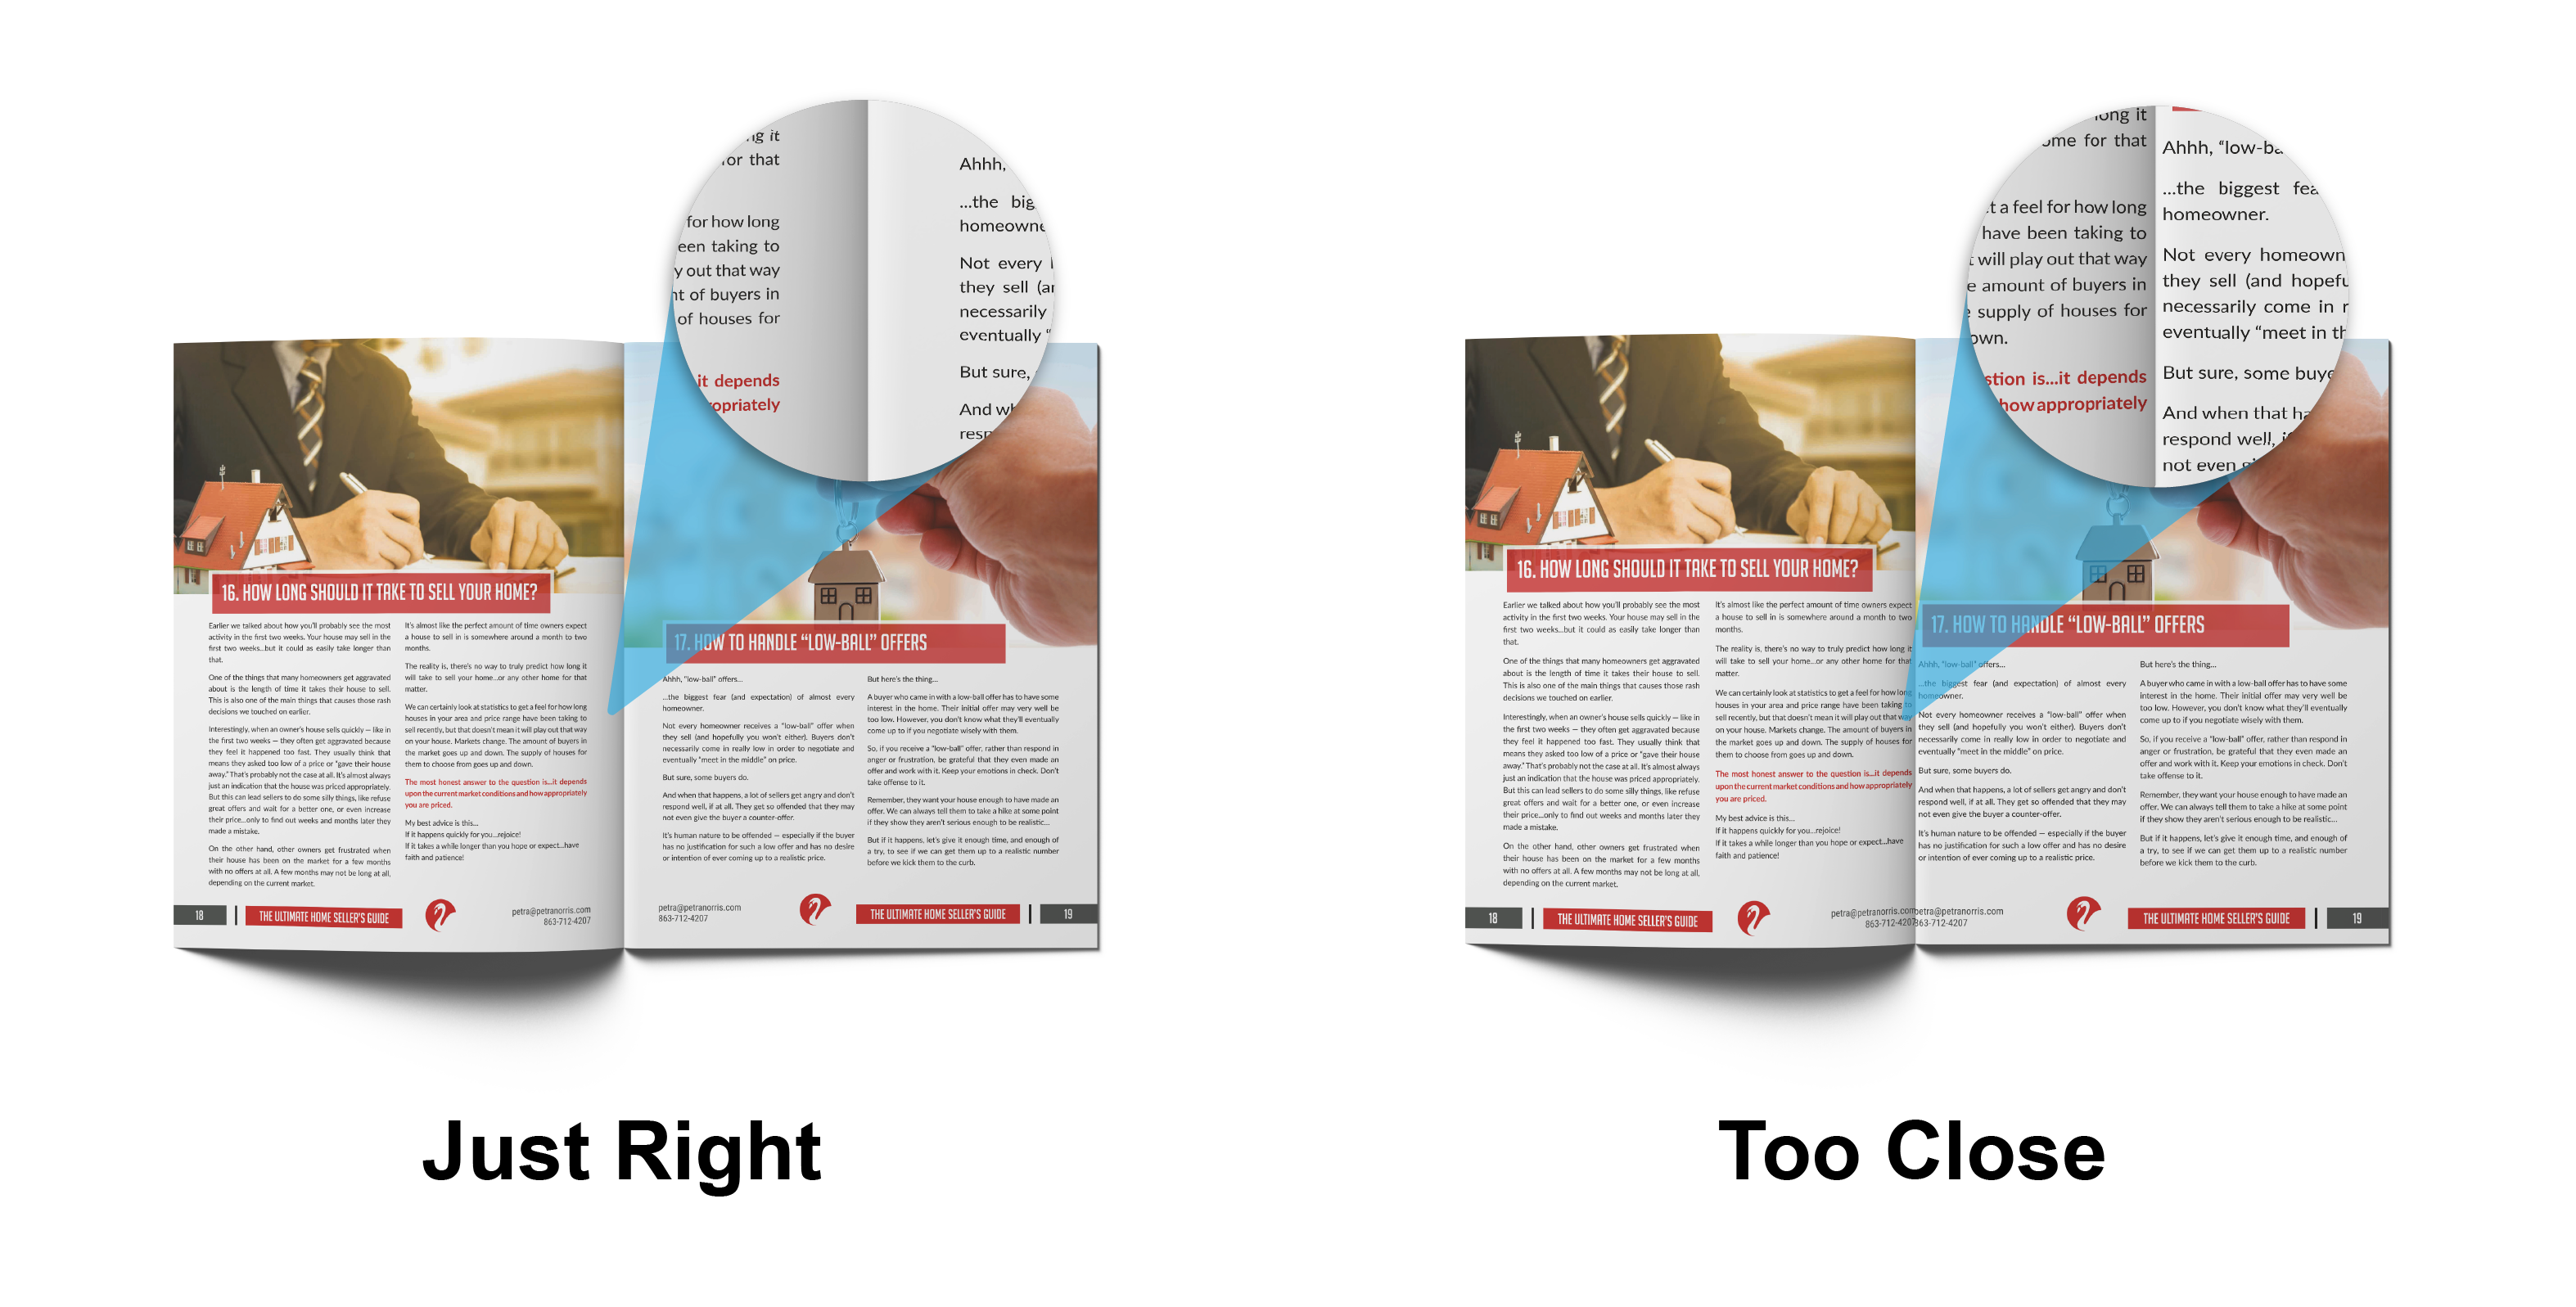
To ensure price quote and design accuracy, it is crucial that the size of the order matches the size of the PDF. The PDF (saved with bleed) should be .25 inches larger for both the length and width than your desired product size. For example, if you are ordering an 8.5” x 11” booklet, the dimensions of your PDF document (saved with bleed) should be 8.75” x 11.25”.
For more information on size, click here.
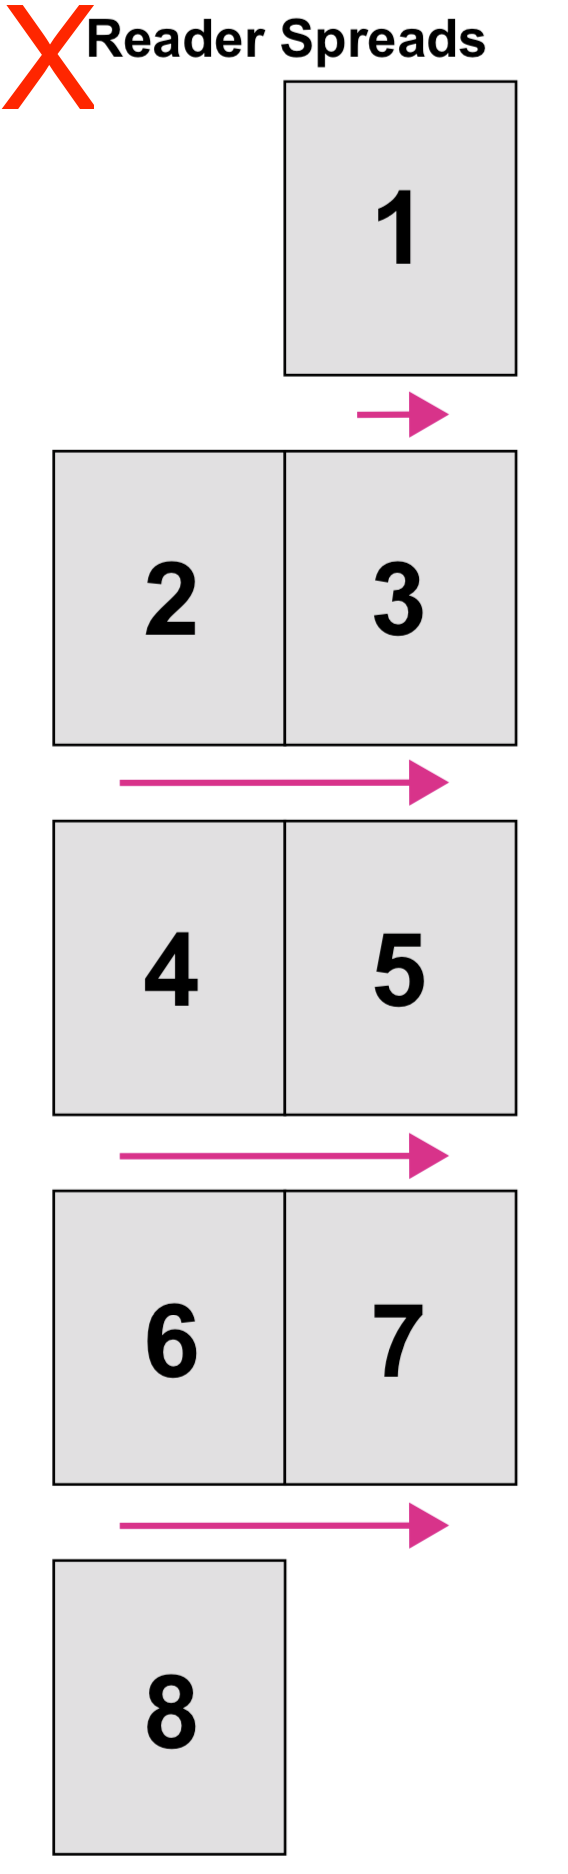
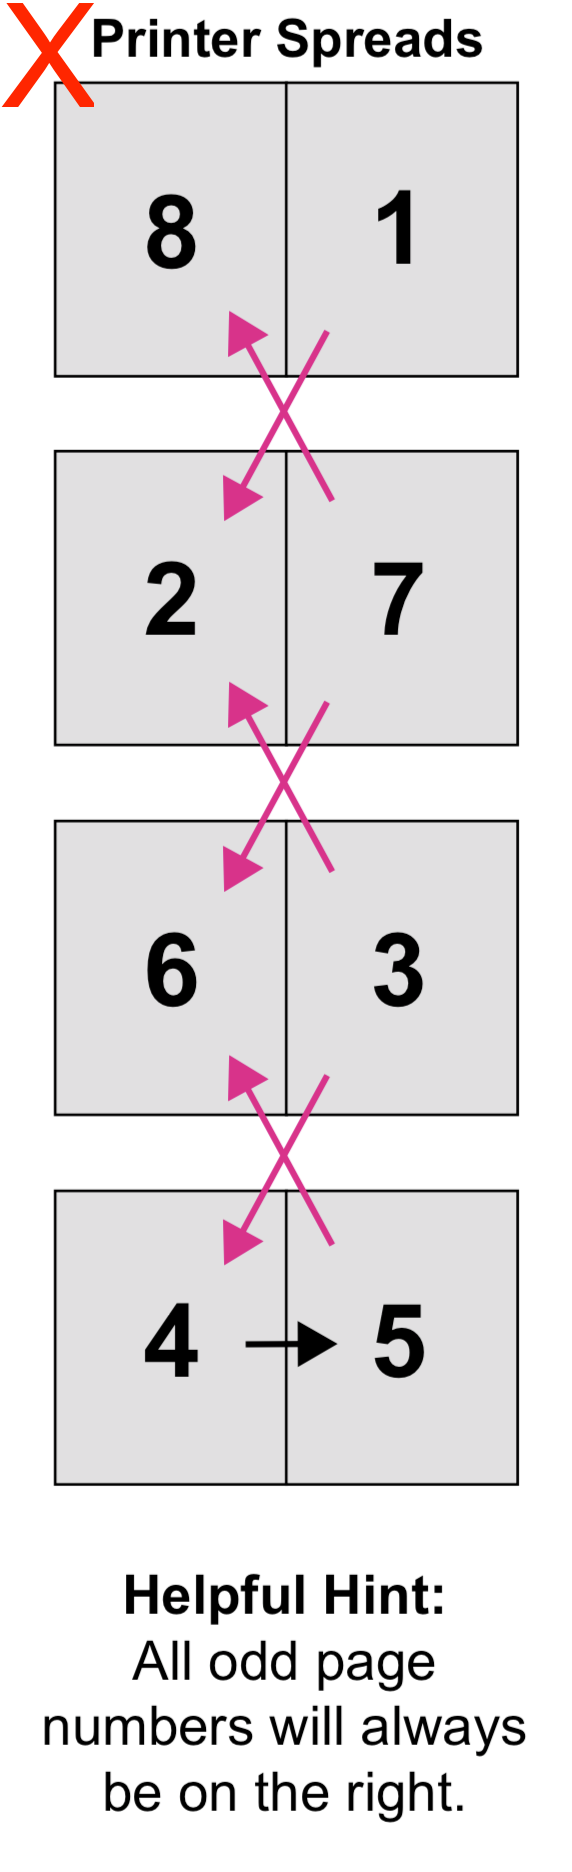
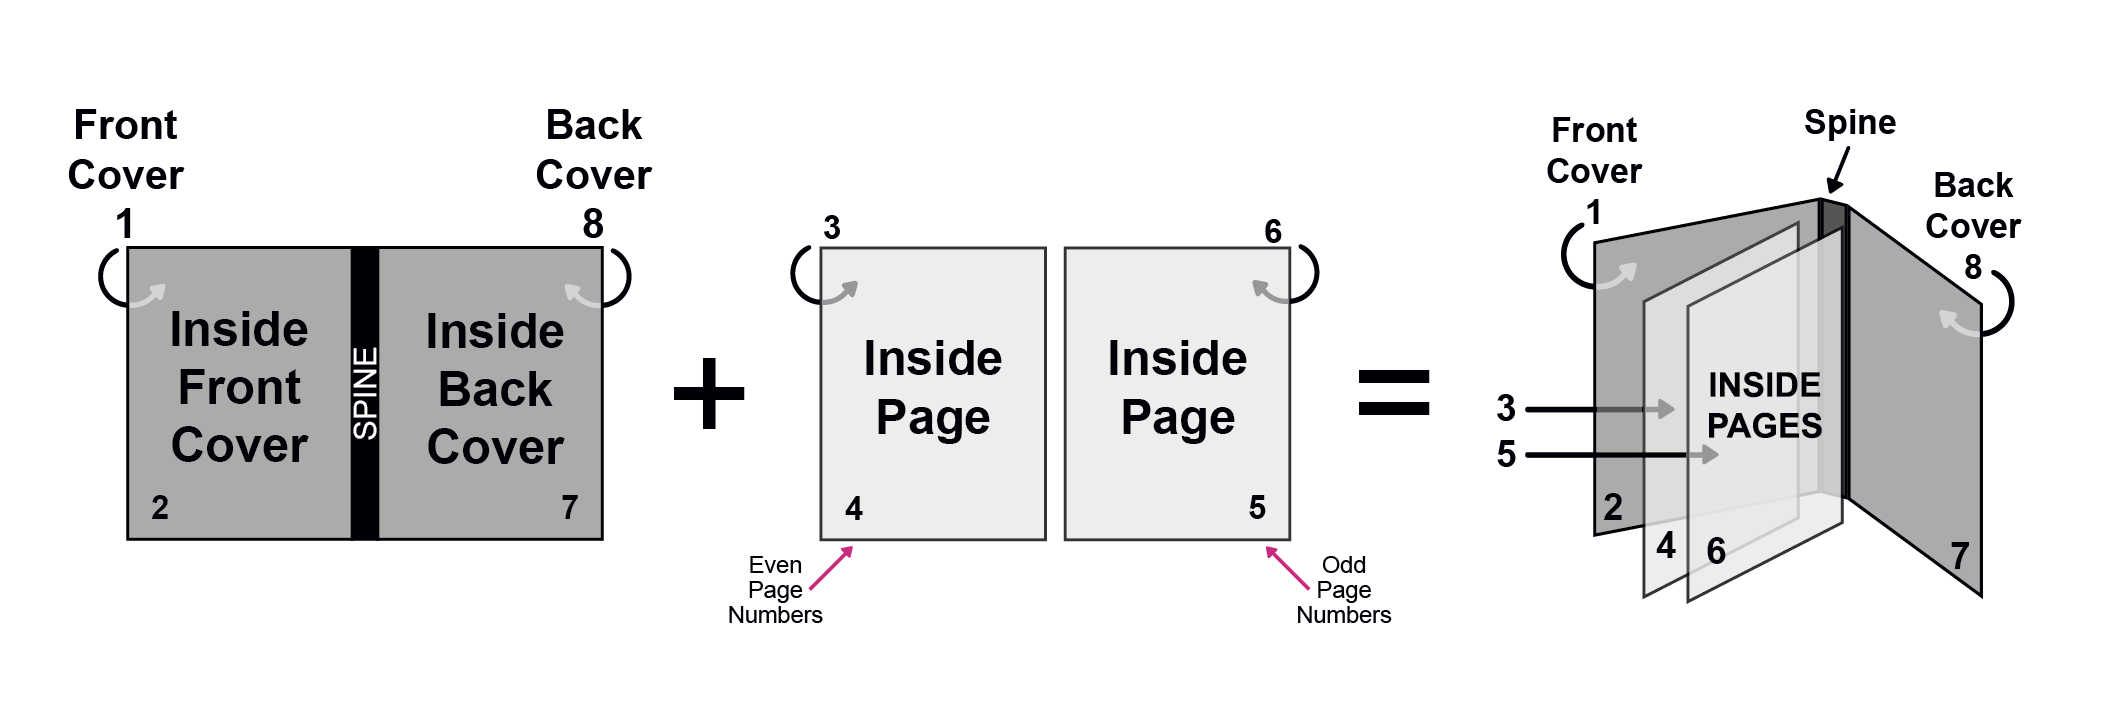
Booklets, Books, Magazines, Catalogs, Booklet Brochures, Programs, and other Multi-Page Products:

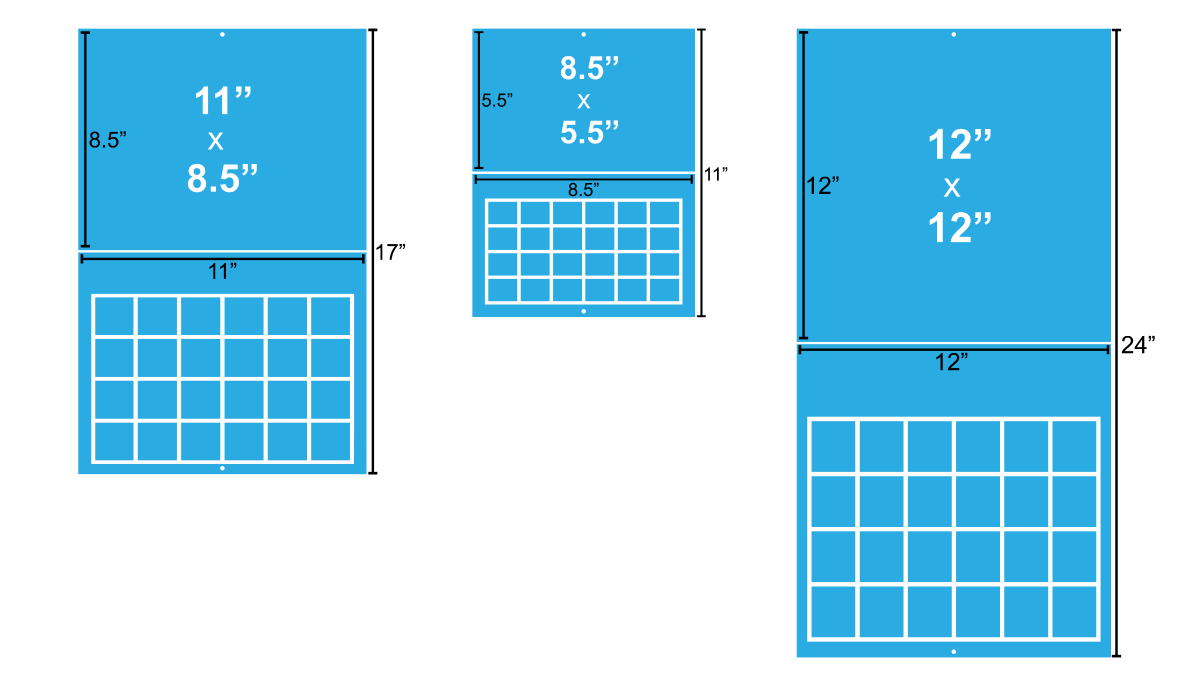
Calendars:
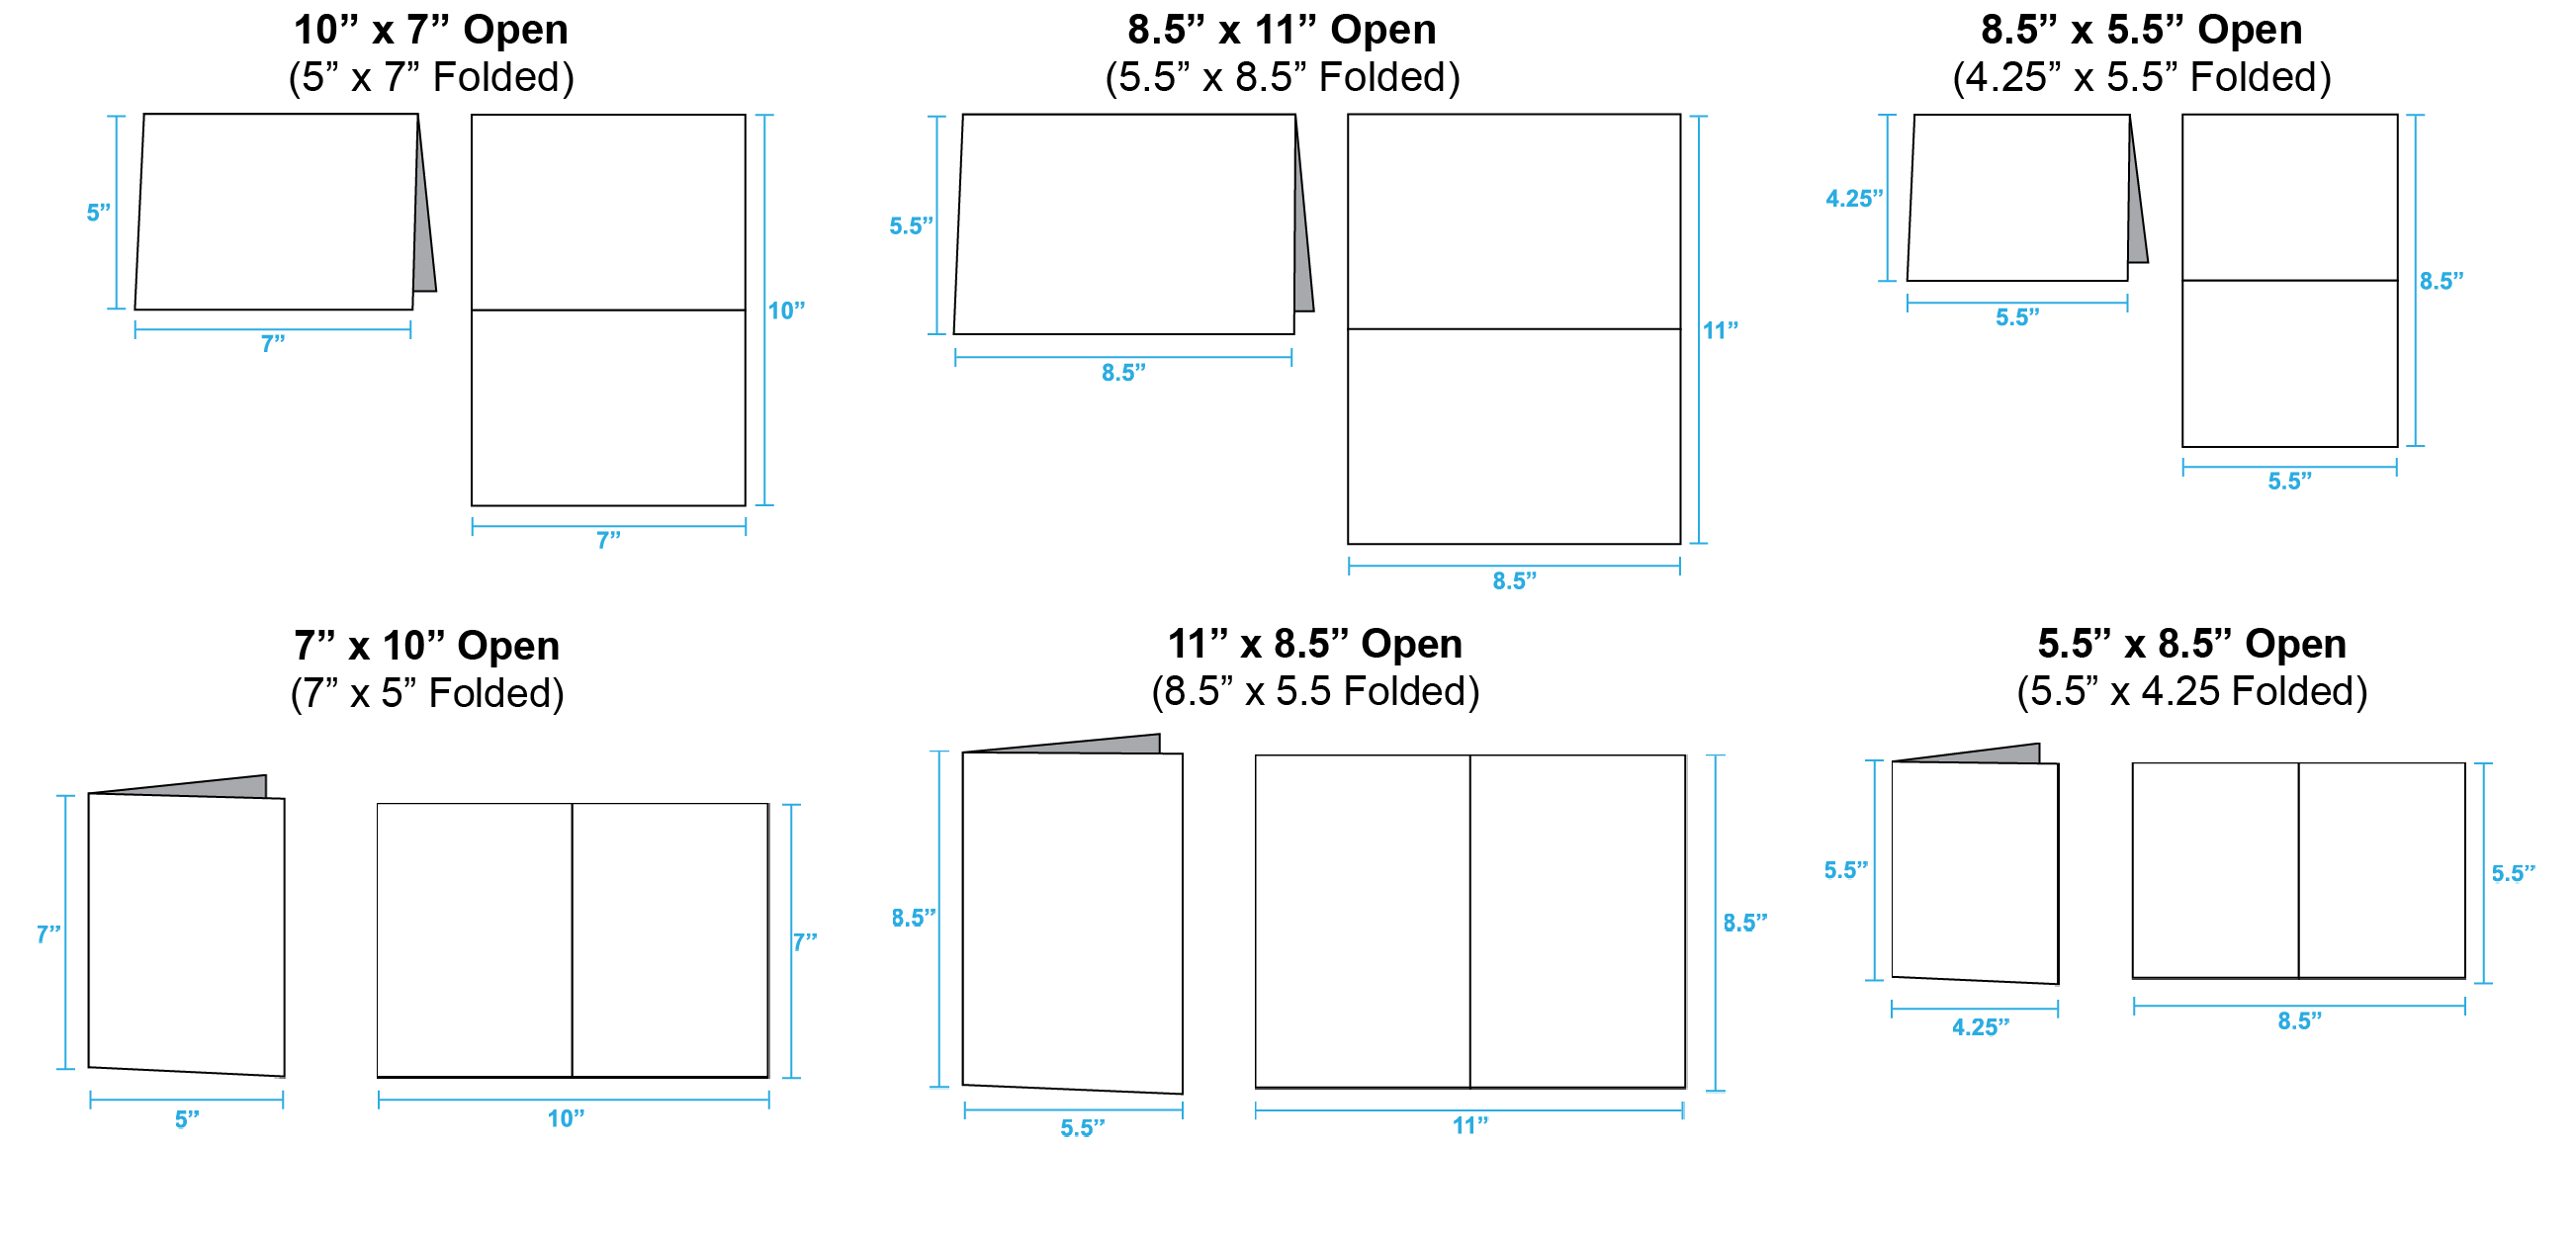
Greeting Cards:
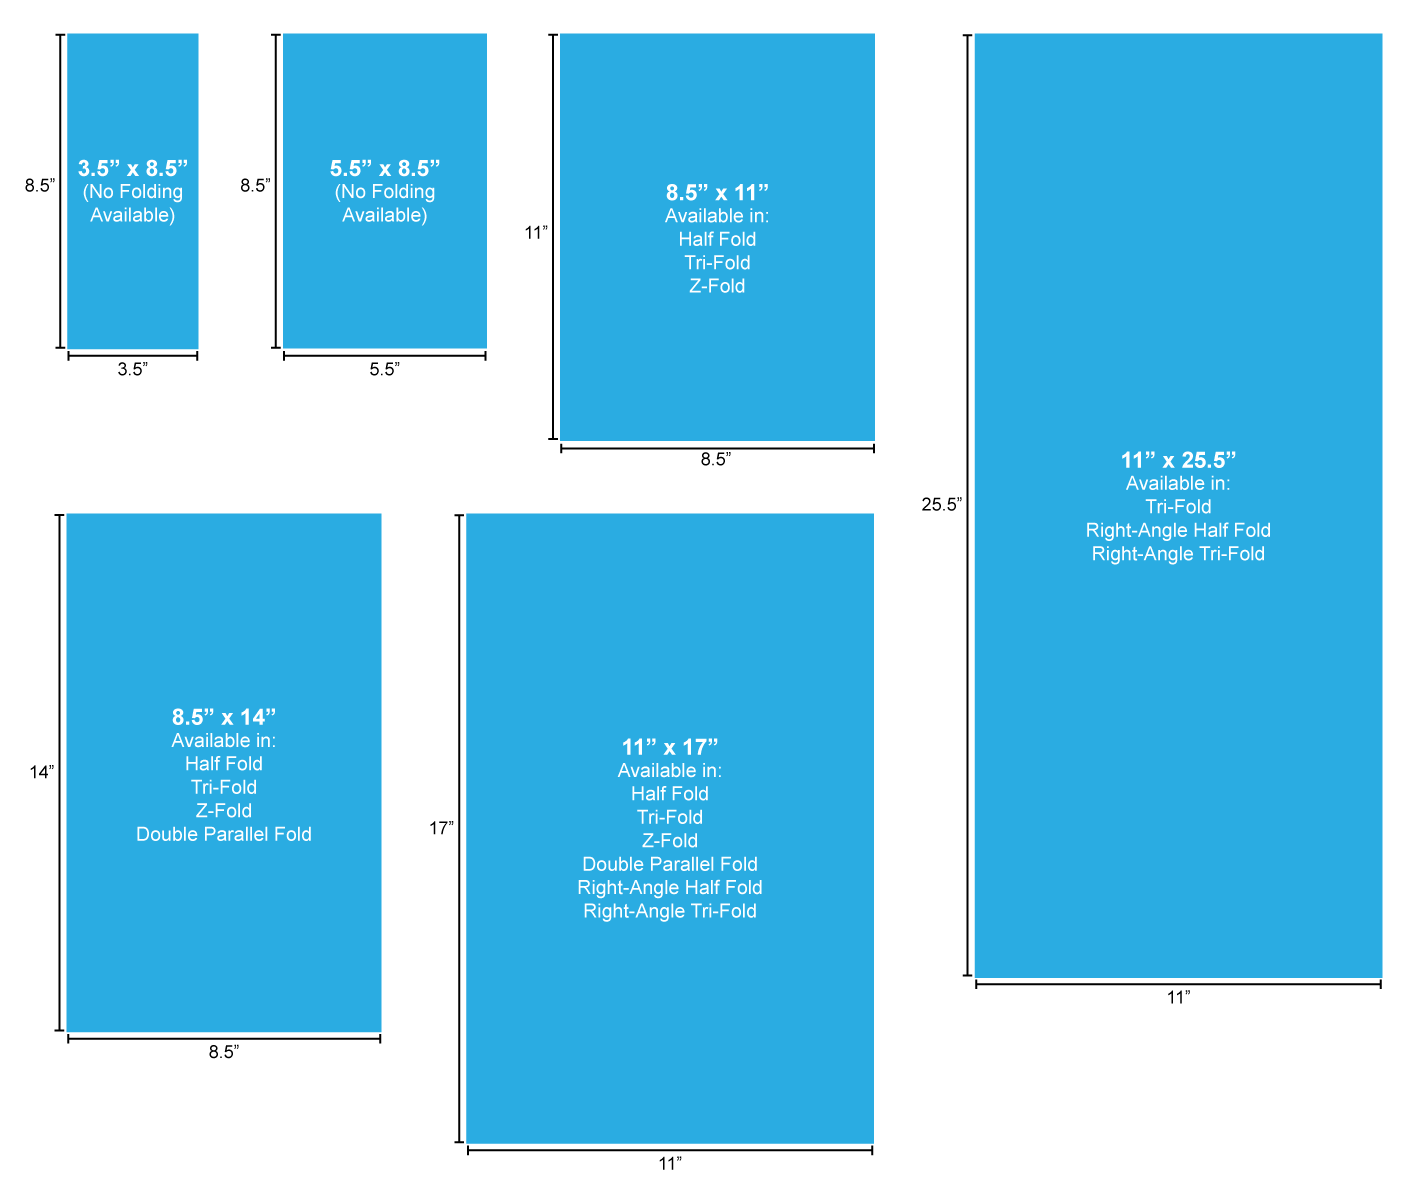
Brochures and Flyers:
For a step-by-step tutorial on checking your size, select from one of the following programs:
InDesign, Illustrator, Photoshop, Canva, Publisher, and Word
Have more questions? Check our Size FAQ.