To rotate an image, first select your image. You’ll see a rotate button centered above the image. Here:

To rotate, click and hold that button. Then move your mouse right to rotate right or move your mouse left to rotate left.

To rotate an image, first select your image. You’ll see a rotate button centered above the image. Here:
To rotate, click and hold that button. Then move your mouse right to rotate right or move your mouse left to rotate left.
If your photo is low resolution, you can’t zoom in. The zoom feature only works for high resolution images.
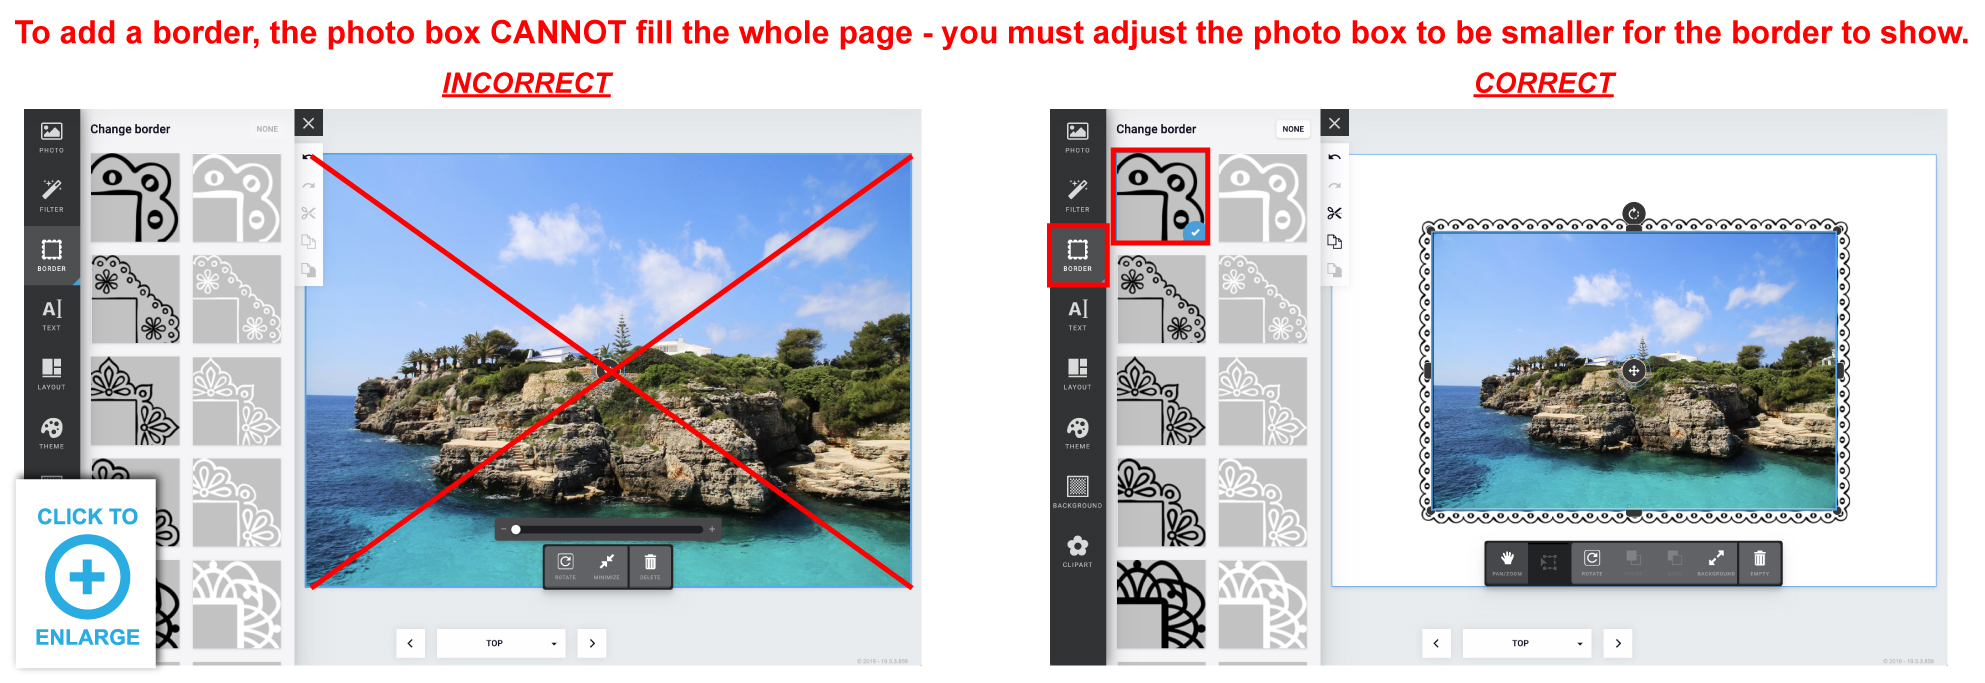
Drag & drop your photo into the area you want it in > Click BACKGROUND in the popup menu for that photo box
To undo this feature, click MINIMIZE.
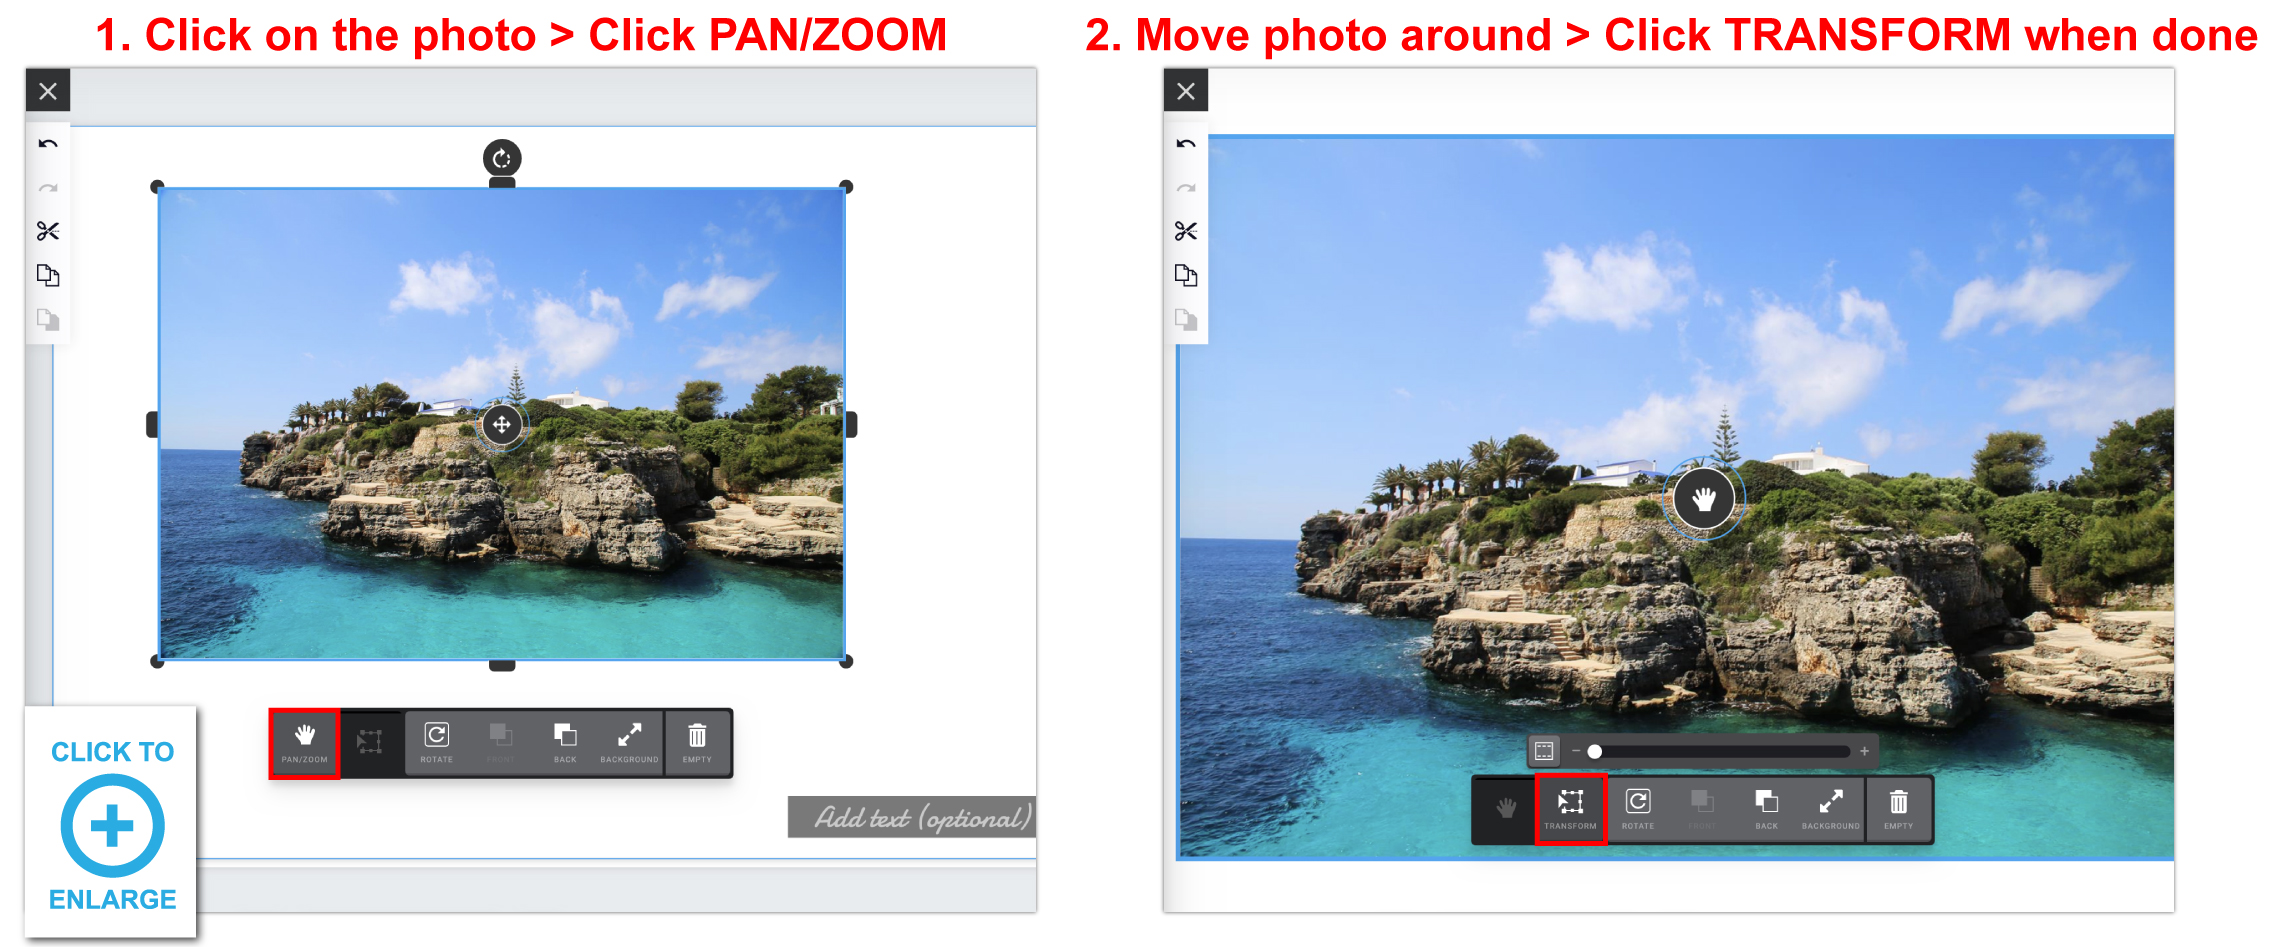
After placing a photo into a photo box, click on the photo > Click PAN/ZOOM > Now you can drag the image around within that photo box. To zoom back out, click TRANSFORM.
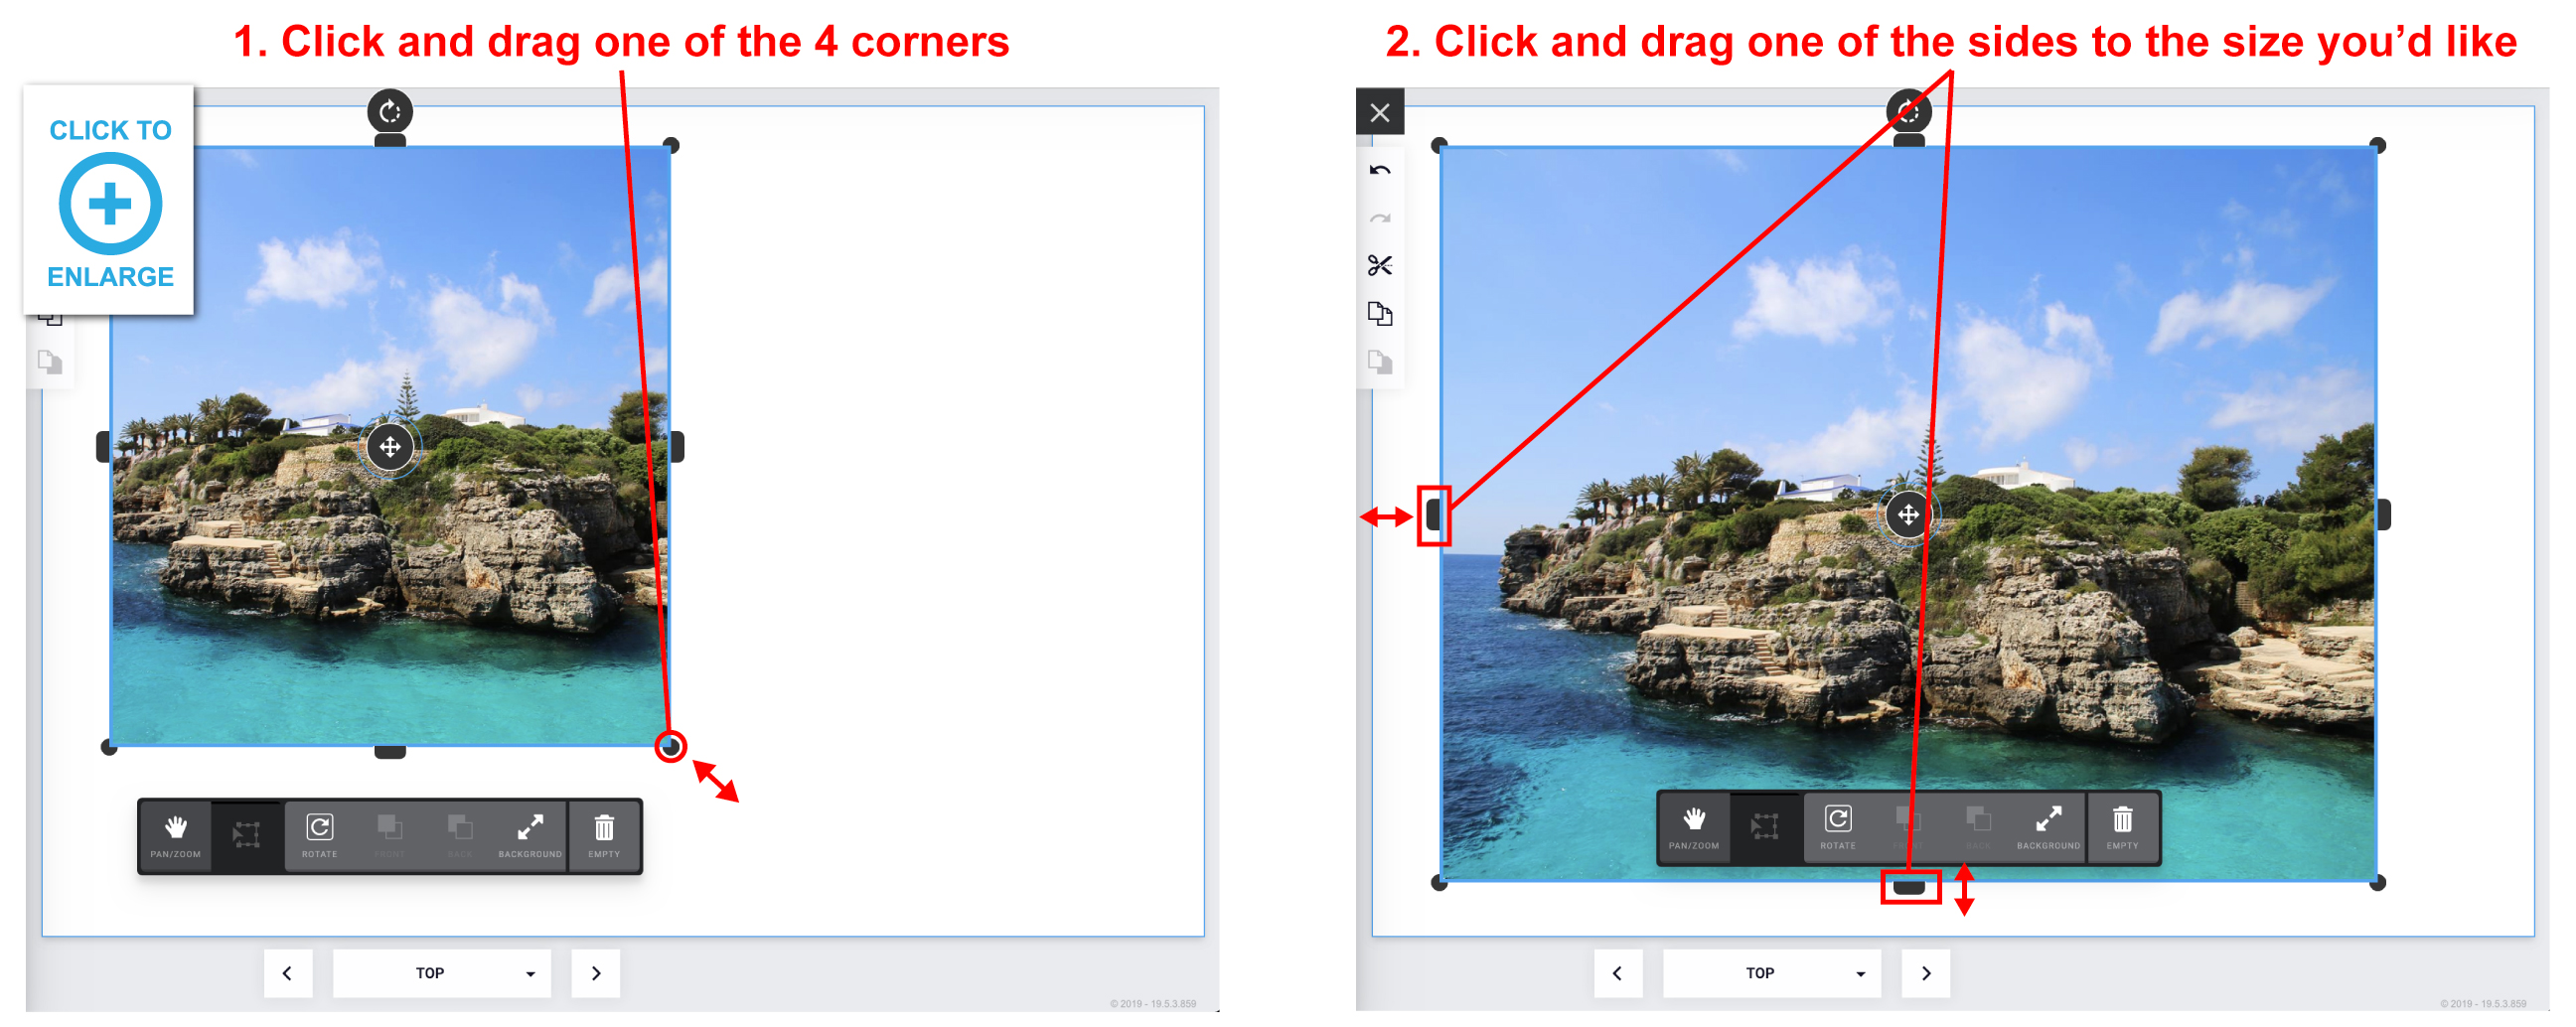
If you have placed an image into a photo box and try to adjust the photo’s height or width and it’s not working, try adjusting the image size by clicking and dragging one of the 4 corners. After making it larger, you will be able to adjust the height and/or width down to the size you need it to be.
Click on the photo box you want to delete > If you have an image placed inside, click EMPTY > Click DELETE (trash can icon).


Click TEXT > Click ADD EMPTY TEXT BOX button at the bottom > Enter your text into the white text box that says “Add text (optional).”
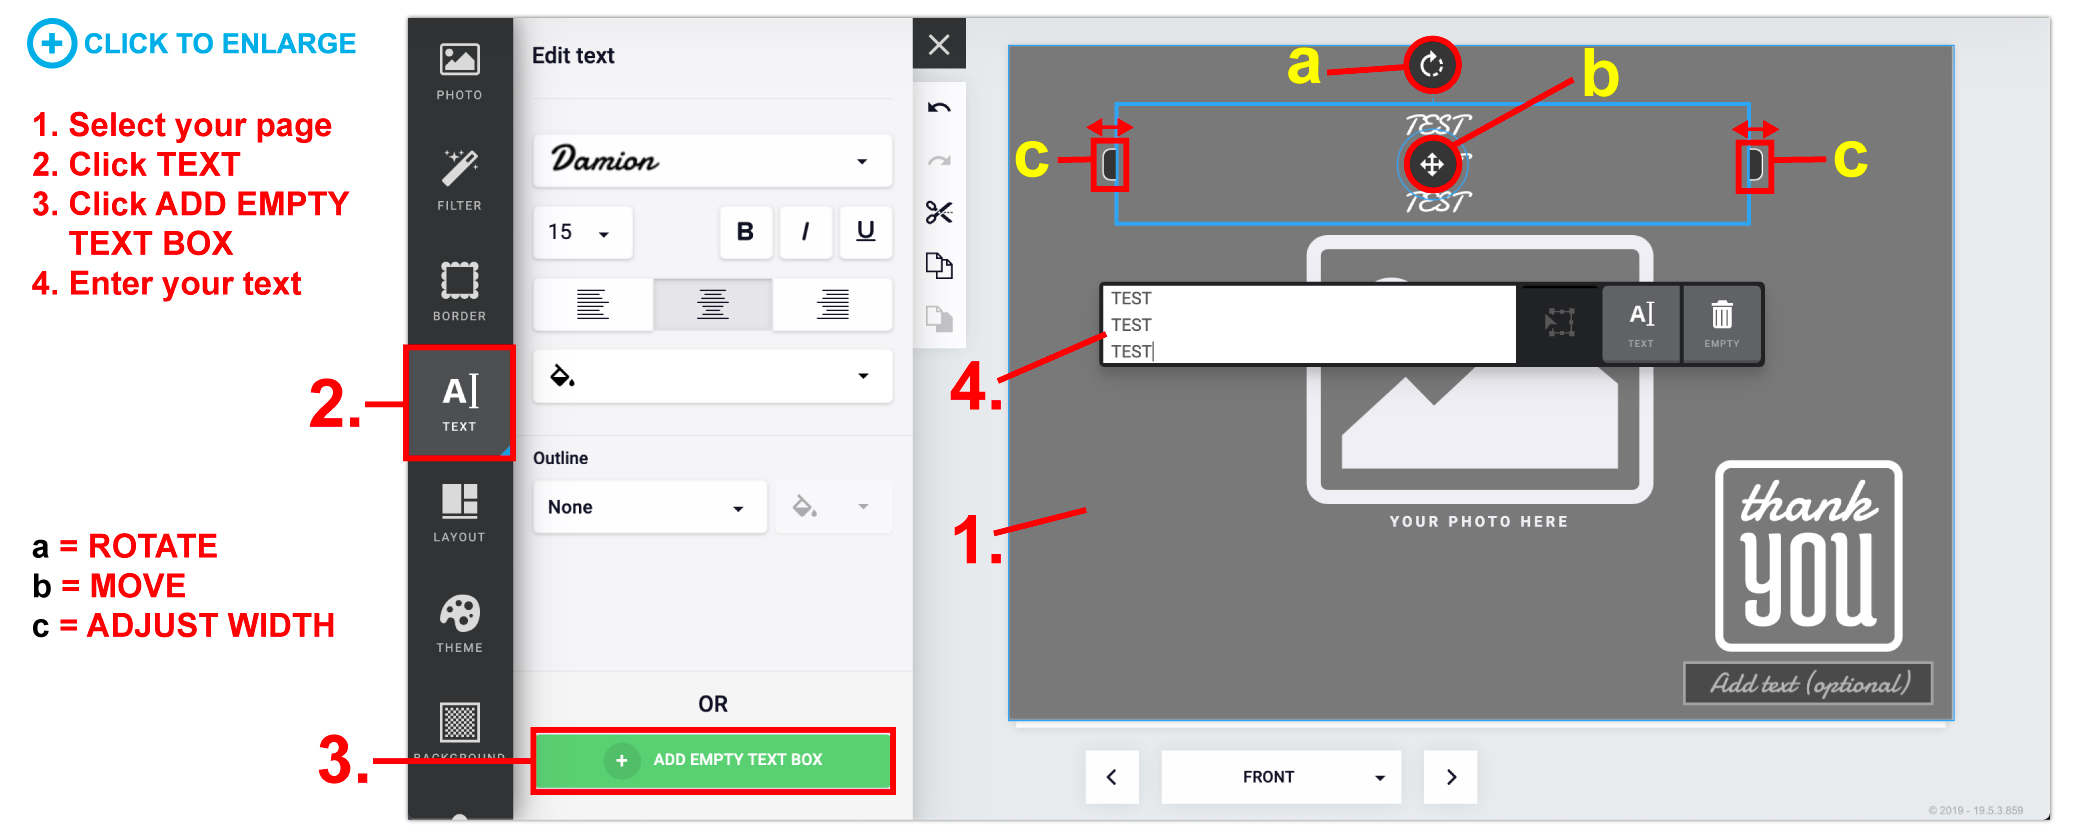
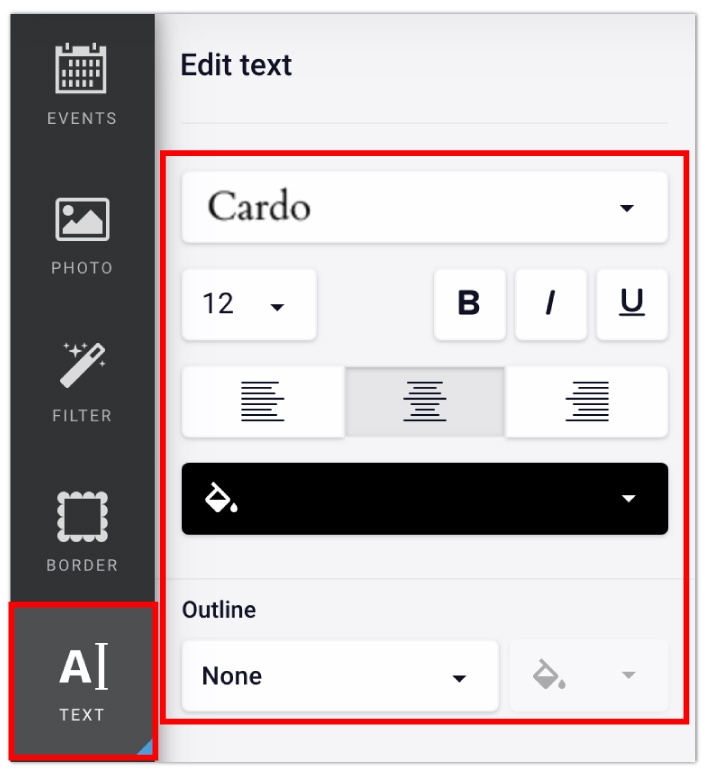
Click on the text box > in the left hand window, you can change the font type, size, alignment, color, outline, etc. (if you cannot see this area, click “TEXT” in the popup menu for that text box).
To add images, either drag and drop your photo or click the “Add empty photo box” icon in the top right corner (see below).
