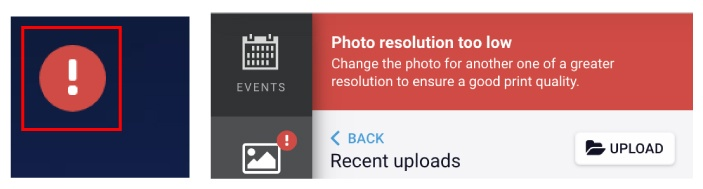
You can shrink the image to try and make it smaller or find a higher resolution version of that image. If those options don’t work, you will need to find a new image. If you use a low resolution photo, be aware that the image may print fuzzy/pixelated.
Please use images saved as RGB images for best result. CMYK images can have some color shifts during rendering FULL COLOR FILES ONLY. NO BLACK AND WHITE. All black and white files will render as full color builds. There is no option for black ink only when using our online design tool.
If you are starting a design before creating an account please note that the pictures that you upload and use in your design will be saved to your design. Any pictures that are uploaded that are not used in the design are not saved because there is no account to save them to.
Be sure to register an account when working on a design and save your design to your account (if you’re in the design tool and want to save or login: Click SAVE > Name Your Design > Login or Create an Account and after you will be redirected back to your design).
No! If you just want a design on the outside of your greeting card, leave the insides blank and choose (4/0) Color Front / Empty Back as your Ink Color in the pricing tool at checkout.
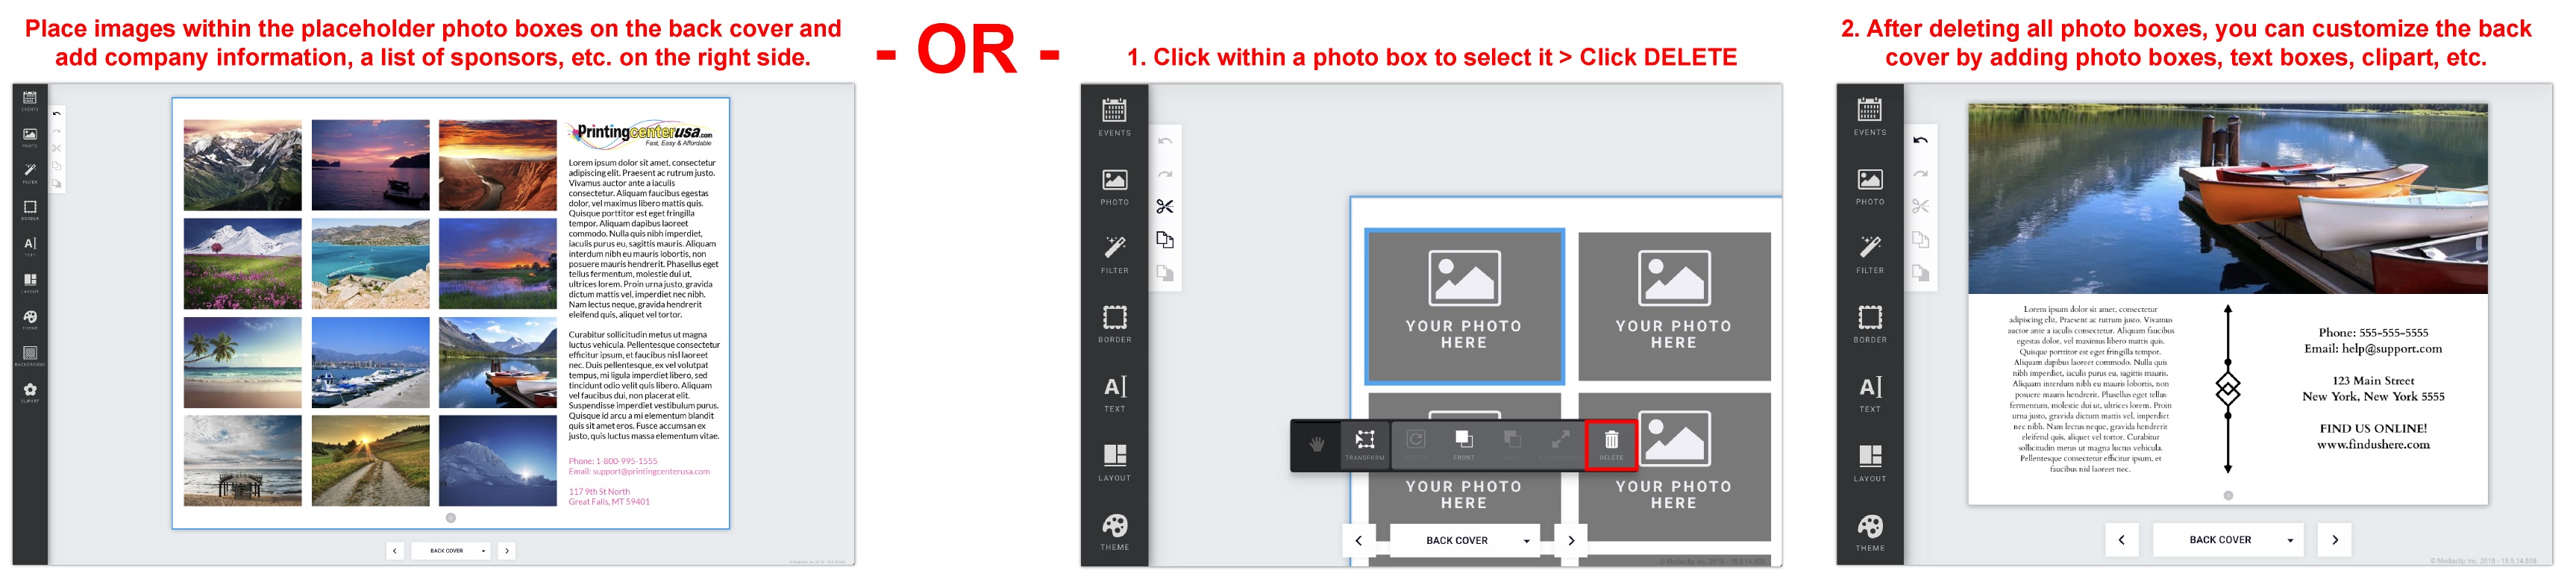
Each back cover has pre-placed photo boxes depending on the number of months you selected. For example, a 12-month calendar has 12 photo boxes so you can add in the same images you used throughout your calendar for each month. We also left empty space so that you can add in your business information, contact information, a list of sponsors, etc.
Note: On the back cover, if you leave the empty area on the right blank, it will print blank. We will not pre-populate that area for you.
If you would like to customize your back cover, all you have to do is delete the photo boxes on that page. From there, you can add your own photos, text boxes, background, clipart, etc.
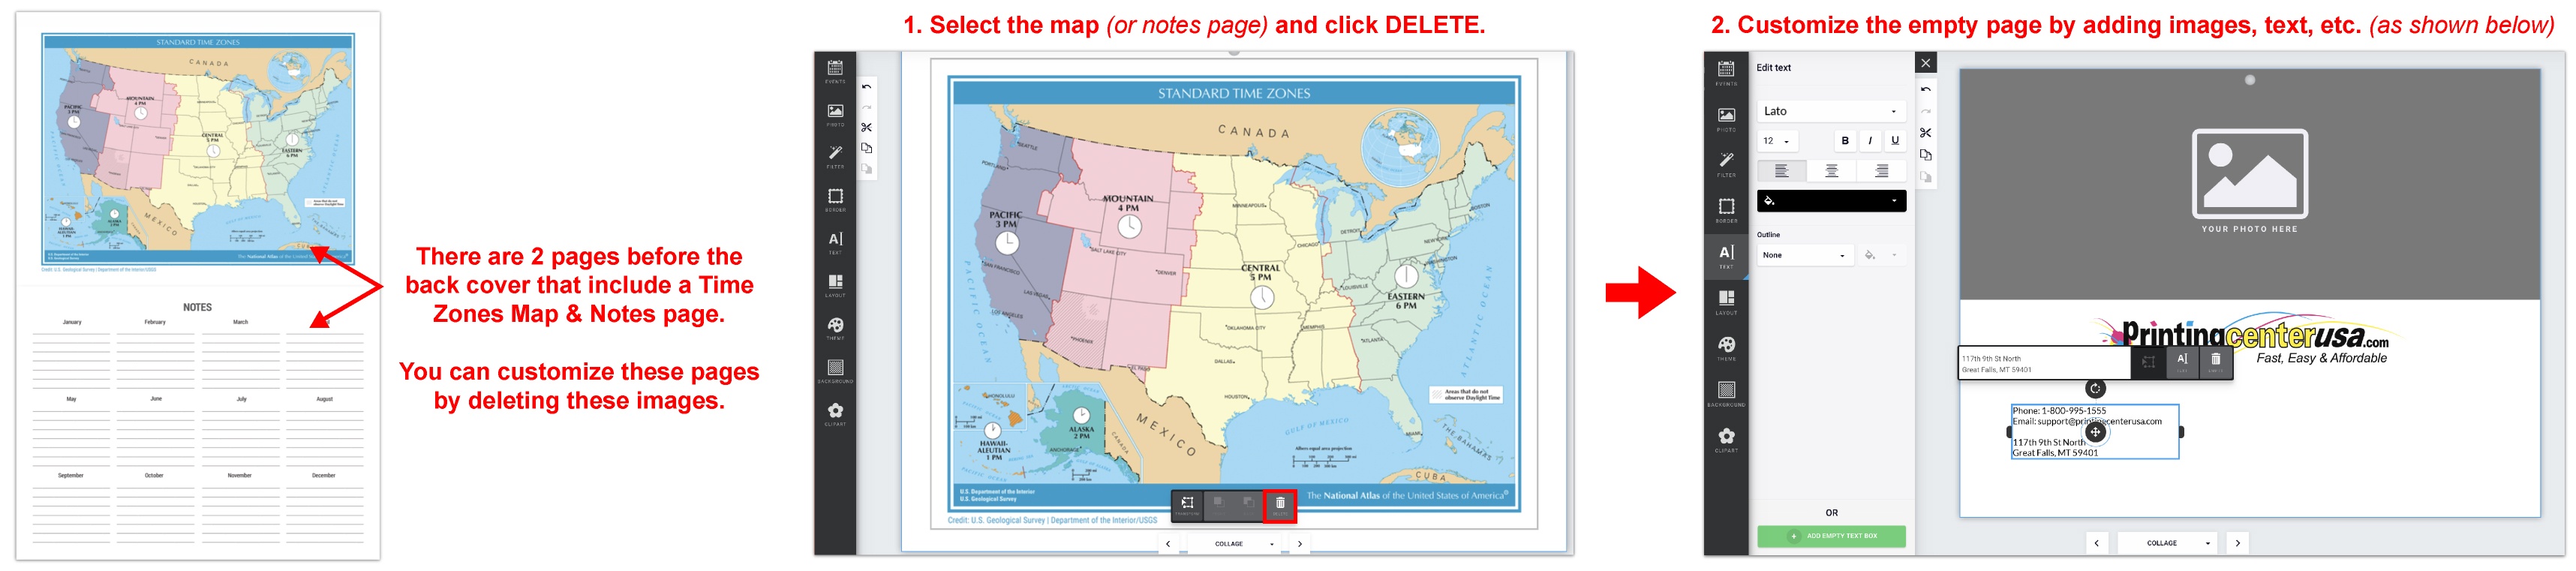
In all designs, we have included 2 filler (collage) pages before the back cover. They include a Time Zones map and a Notes page. If you’d like to design your own, all you have to do is click on the Time Zones map and/or Notes page and click delete. Now you can add photo boxes and text boxes to the pages however you’d like.
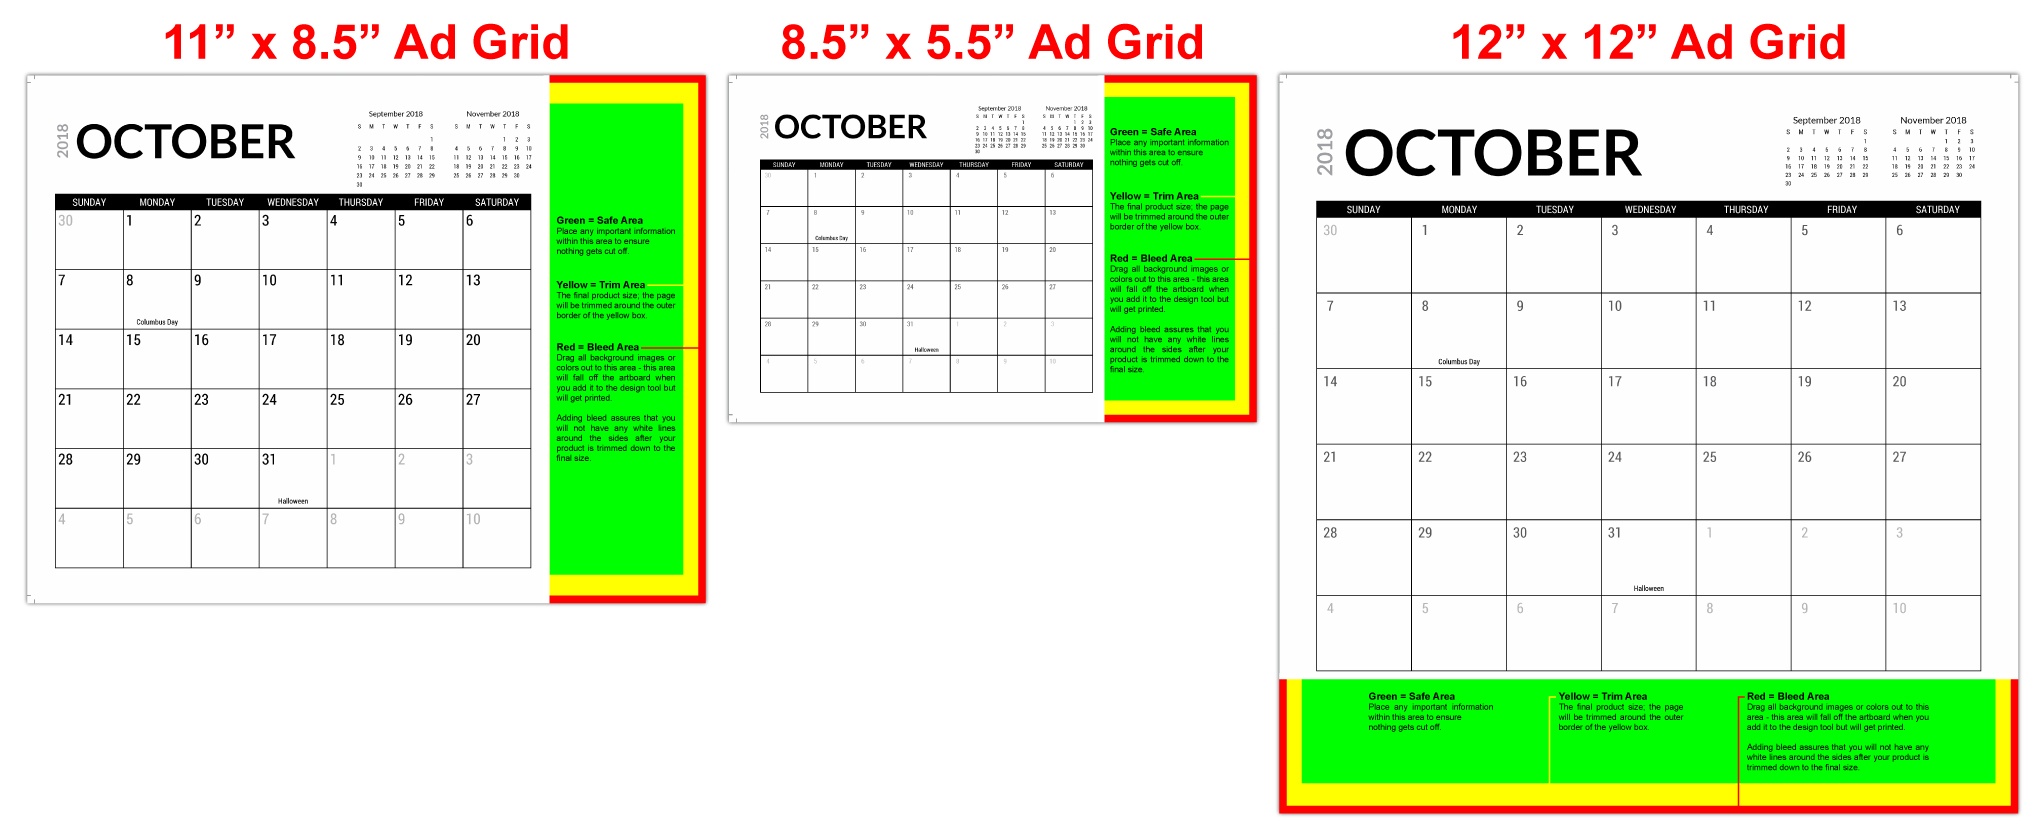
11×8.5: 777 x 2625px (with bleed) — Click here to download the 11×8.5 ad space template
8.5×5.5: 756 x 1725px (with bleed) — Click here to download the 8.5×5.5 ad space template
12×12: 3675 x 666px (with bleed) — Click here to download the 12×12 ad space template
In all designs, we have included 2 filler (collage) pages before the back cover. They include a Time Zones map and a Notes page. If you’d like to design your own, all you have to do is click on the Time Zones map and/or Notes page and click delete. Now you can add photo boxes and text boxes to the pages however you’d like.
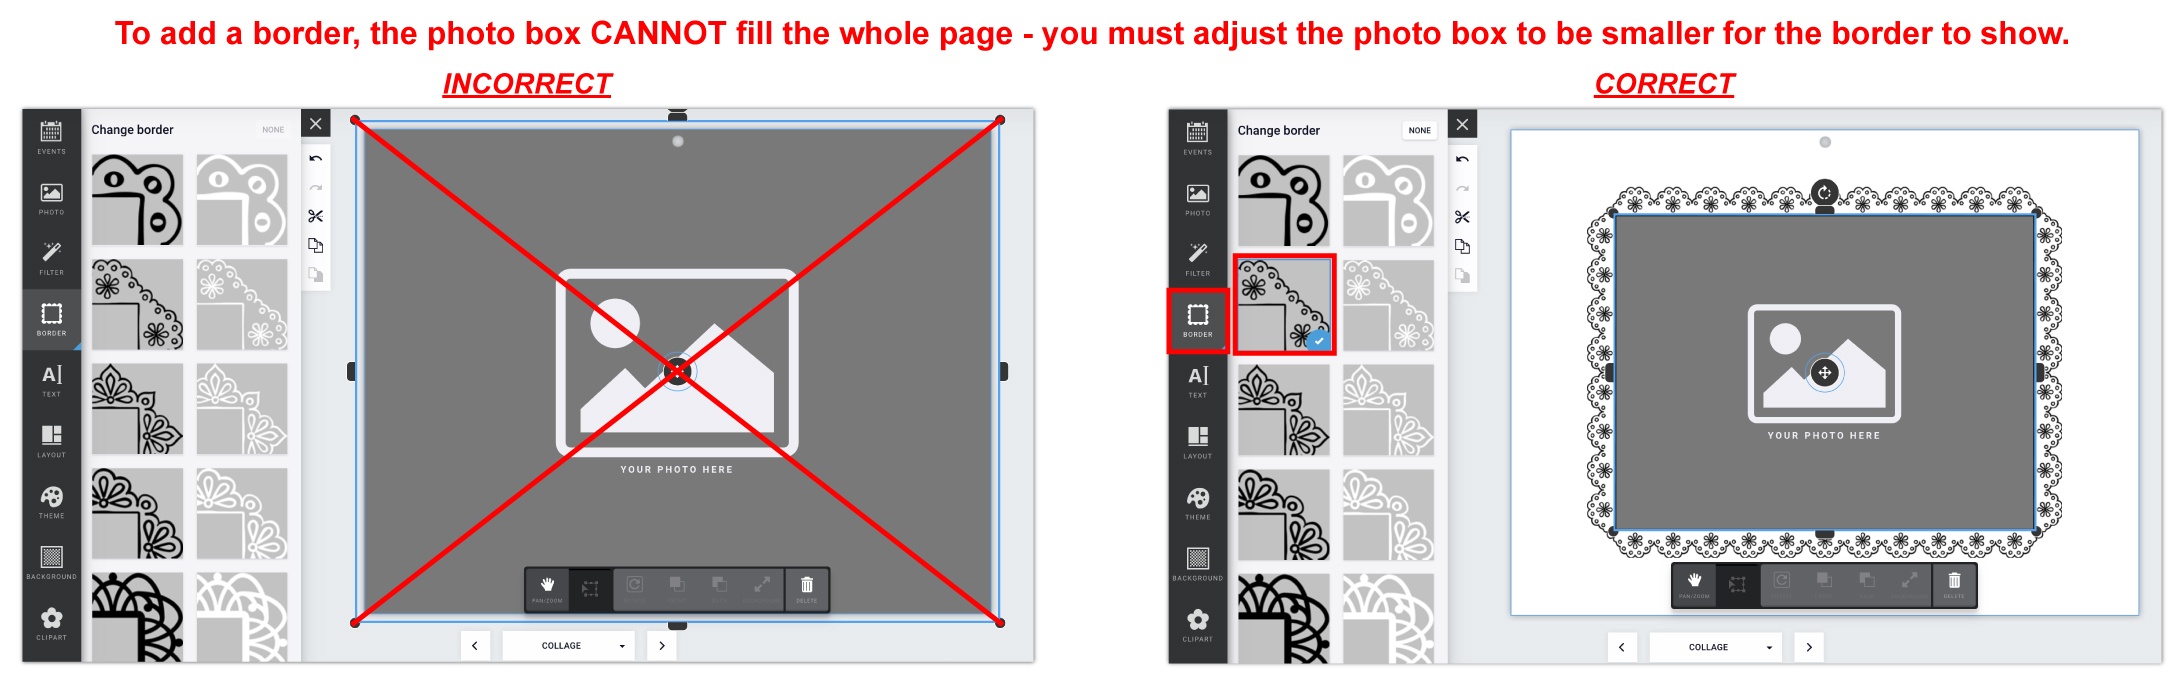
In order to add a border to your photo, you must make sure the photo box is not filling the whole page. There must be enough space around the photo box on the page to show the border.
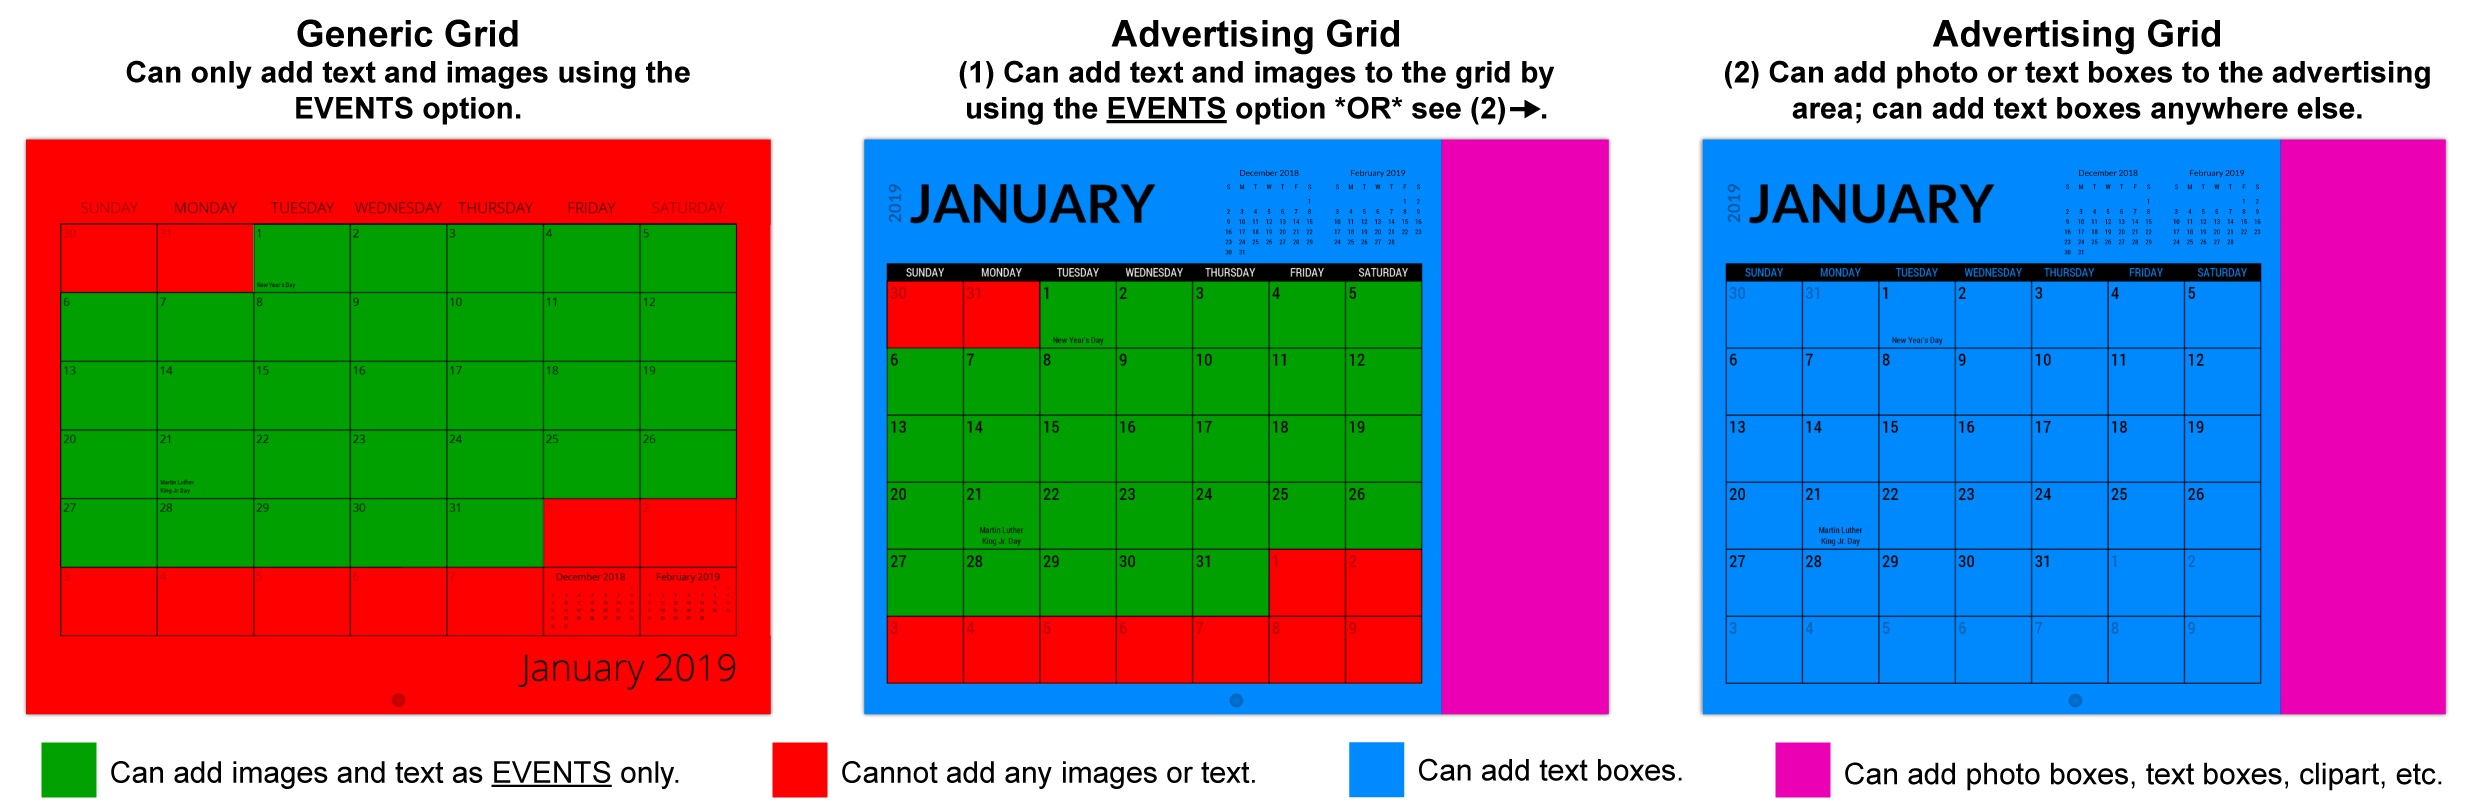
For the Generic Grid, you can add events, holidays and images to individual grid dates by selecting EVENTS. You cannot edit outside the grid area.
For the Advertising Grid, you can add events, holidays and images to individual grid dates by selecting EVENTS. You can also add text boxes anywhere on the grid, but not images. There is also space on the right side (11×8.5 and 8.5×5.5 calendars) or bottom (12×12 calendars) where you can place text and/or images.