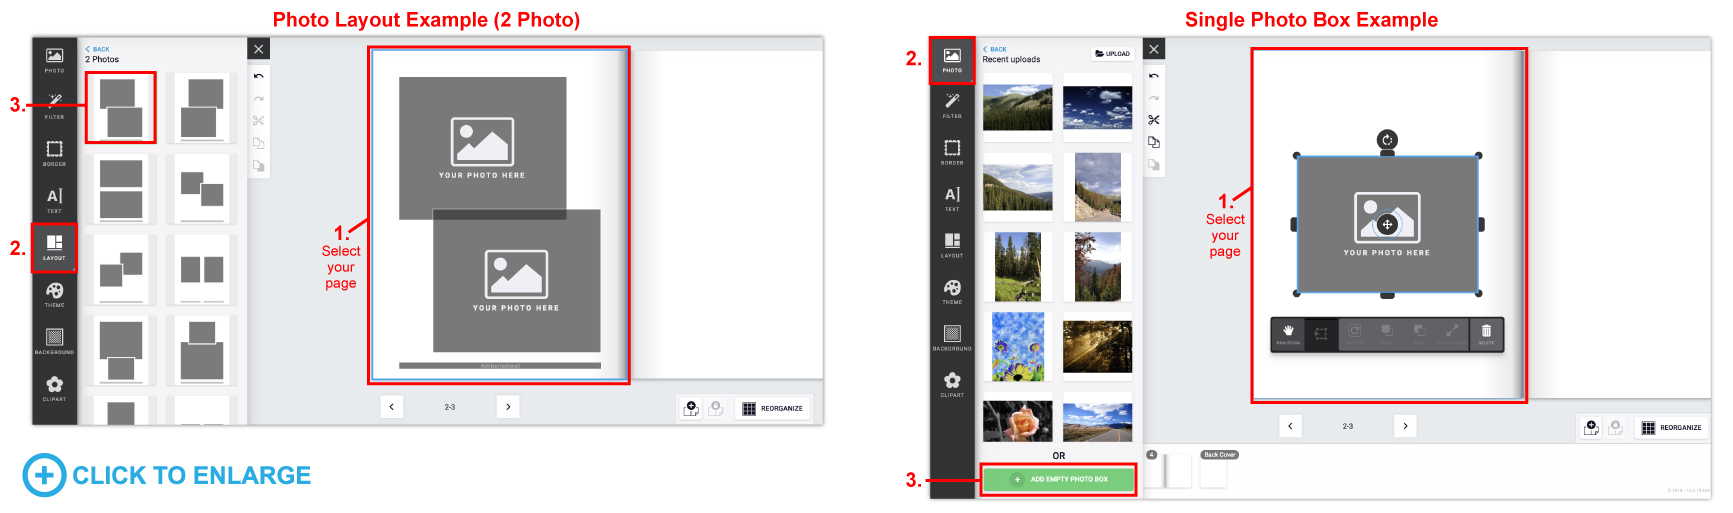
Click on the photo box you want to delete > If you have an image placed inside, click EMPTY > Click DELETE (trash can icon).

Click on the photo box you want to delete > If you have an image placed inside, click EMPTY > Click DELETE (trash can icon).

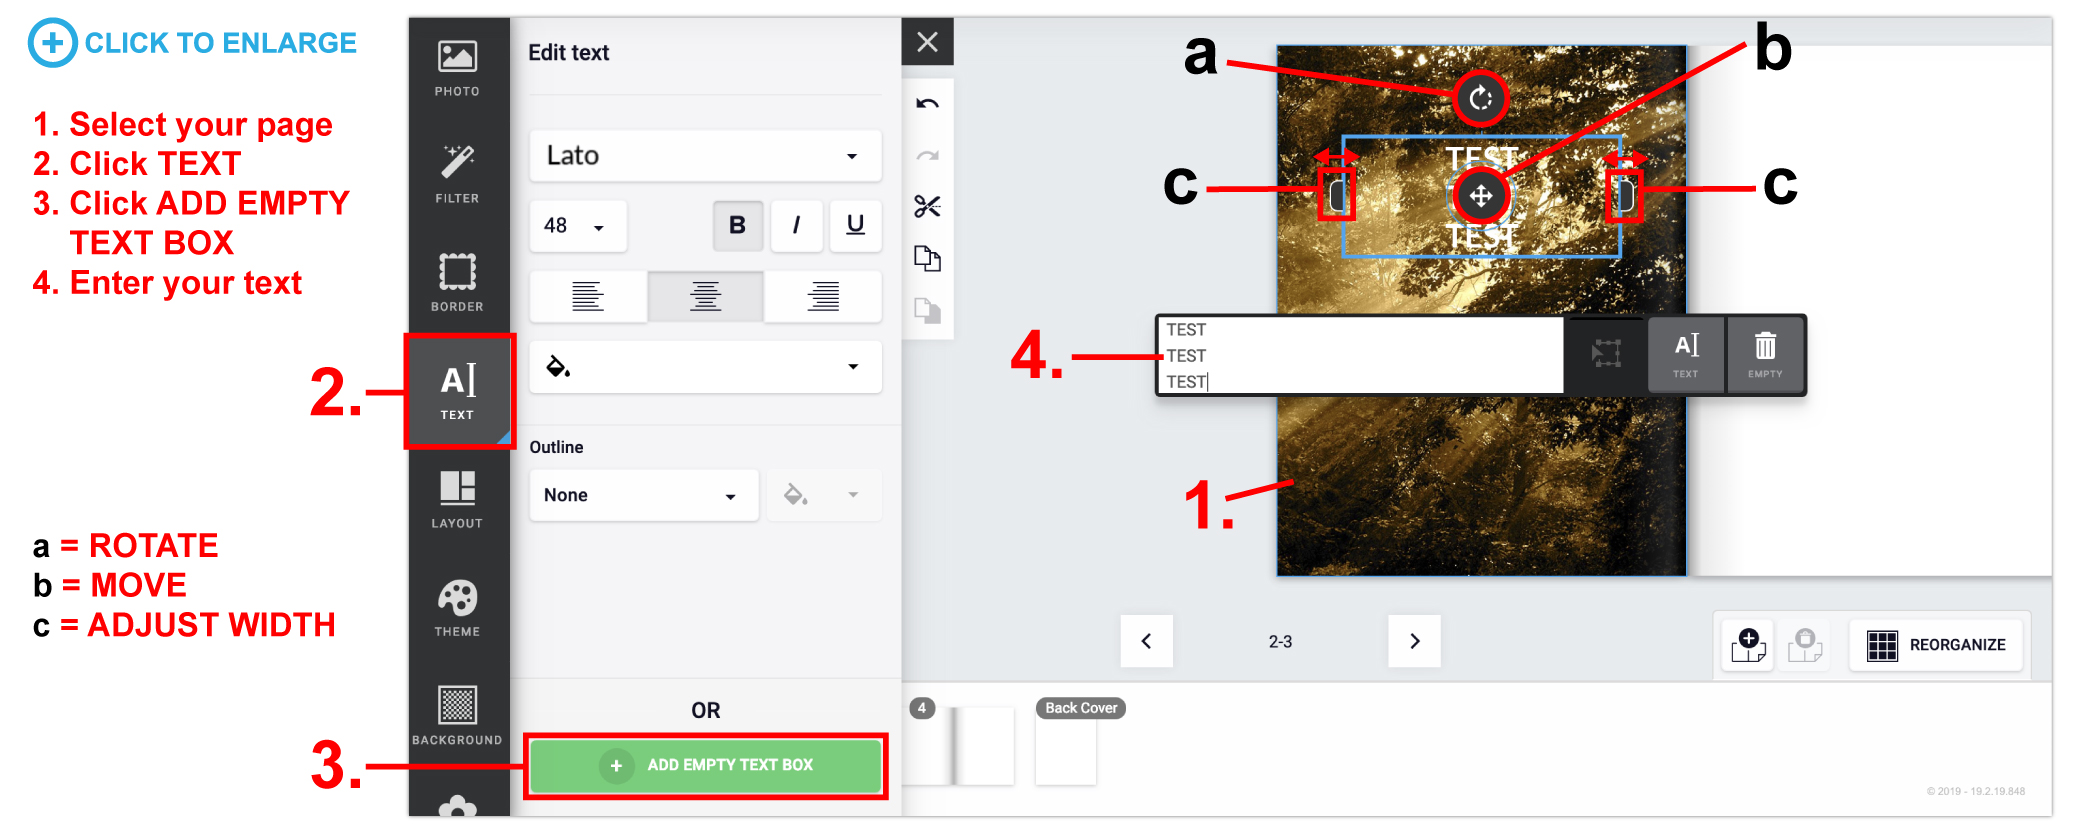
Click on the text box > in the left hand window, you can change the font type, size, alignment, color, outline, etc. (if you cannot see this area, click “TEXT” in the popup menu for that text box).

Click TEXT > Click ADD EMPTY TEXT BOX button at the bottom > Enter your text into the white text box that says “Add text (optional).”
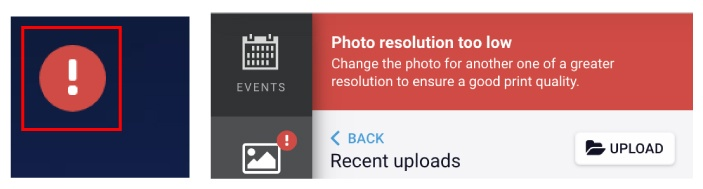
You can shrink the image to try and make it smaller or find a higher resolution version of that image. If those options don’t work, you will need to find a new image. If you use a low resolution photo, be aware that the image may print fuzzy/pixelated.
All previously uploaded files can be found by clicking PHOTO > My Uploads > Recent uploads.

From My Device:

From Facebook:

Please use images saved as RGB images for best result. CMYK images can have some color shifts during rendering FULL COLOR FILES ONLY. NO BLACK AND WHITE. All black and white files will render as full color builds. There is no option for black ink only when using our online design tool.

If you are starting a design before creating an account please note that the pictures that you upload and use in your design will be saved to your design. Any pictures that are uploaded that are not used in the design are not saved because there is no account to save them to.
Be sure to register an account when working on a design and save your design to your account (if you’re in the design tool and want to save or login: Click SAVE > Name Your Design > Login or Create an Account and after you will be redirected back to your design).
To add more pages, you must first select an inside page spread and then click the add pages icon on the righthand side of the screen.
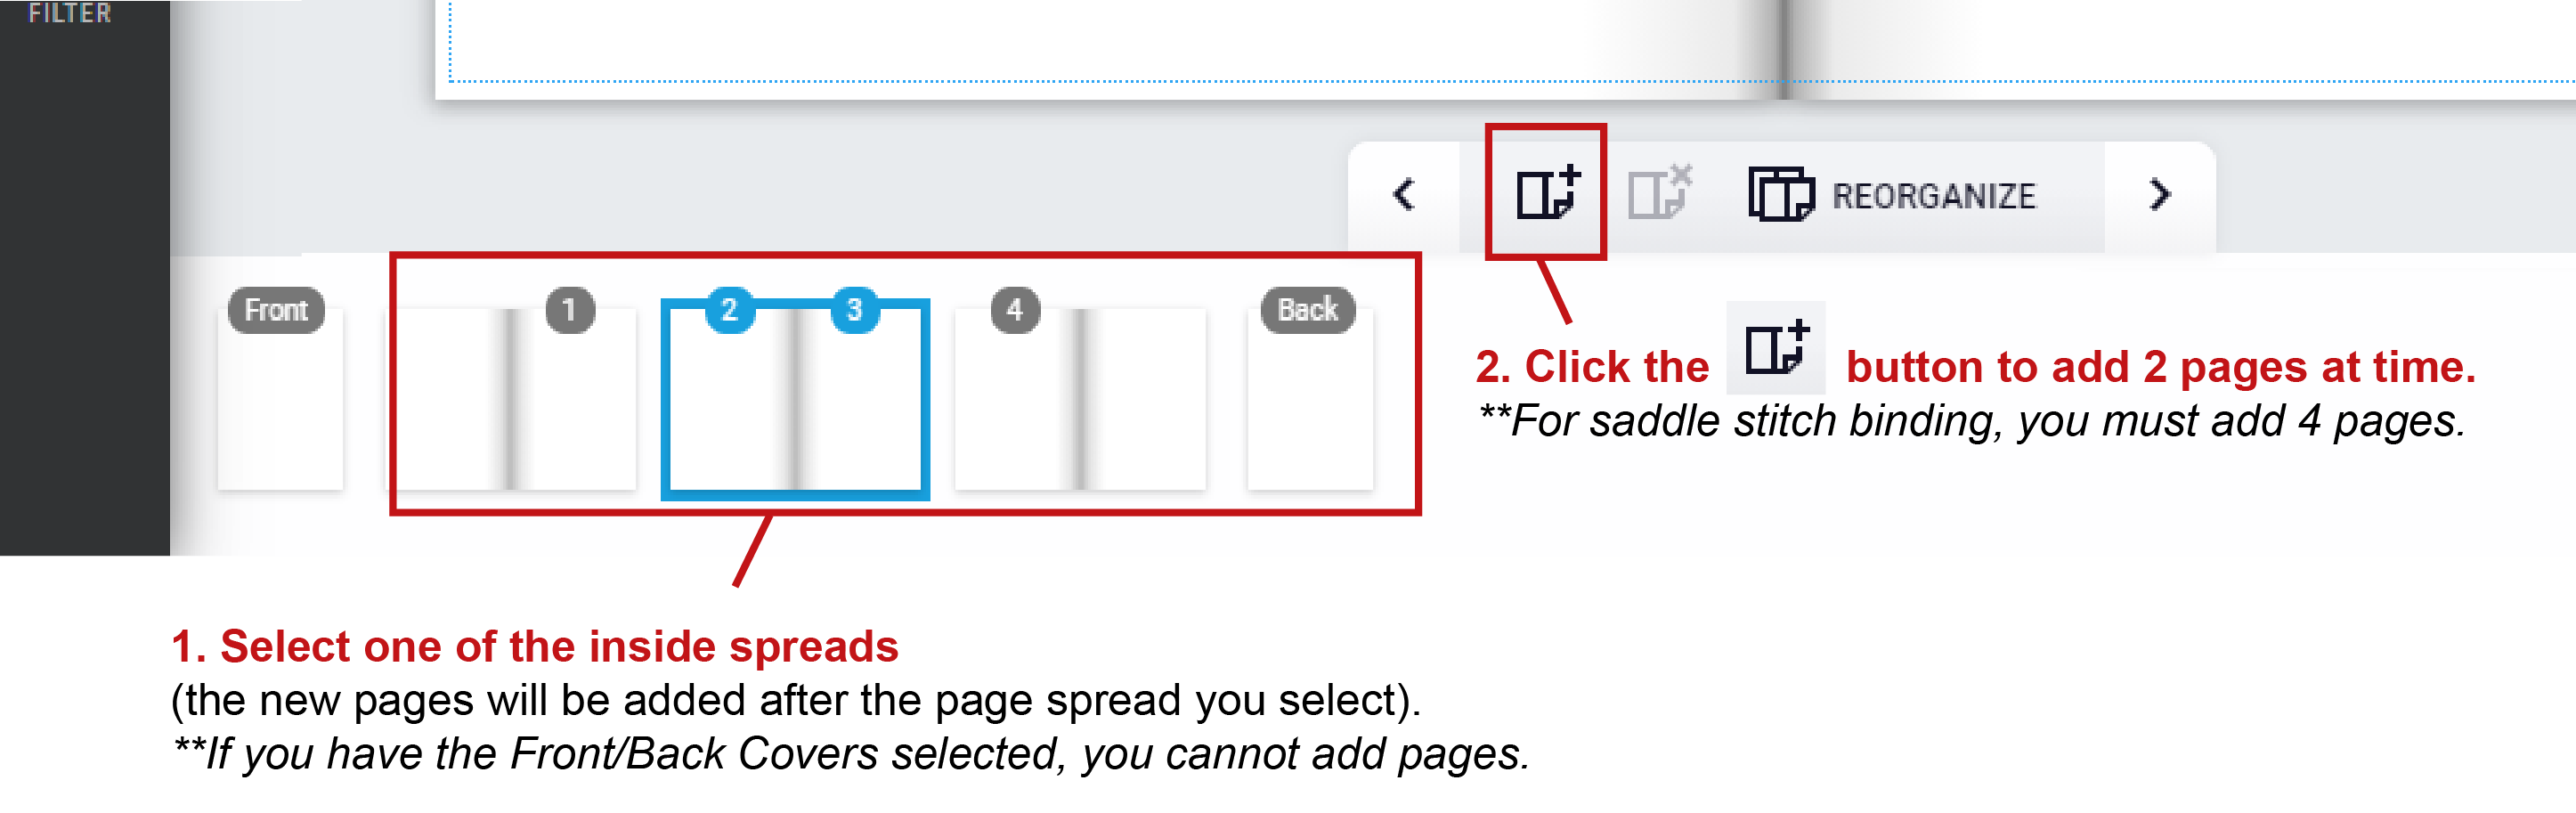
Note: If you have the Front / Back covers selected, you cannot add pages. You must first select an inside page spread.