To make a file smaller, images are changed to a lower resolution when the file is saved.
Tag: FAQ File Preparation Body
Files off the Internet usually do not provide a good quality image for printing. Images from the Internet or websites are generally 72 dpi and are not intended for print. Color and resolution are removed from these images to allow for rapid transfer on the Internet. These images will appear fuzzy and dull when printed. We recommend at least 300 dpi. Click here for a list of websites that provide high-quality images.
File and/or image resolution should be set at 300 dpi or above to ensure that the final document is not pixelated when printed. Enlarging an image will lower the resolution while reducing an image will increase the resolution. Enlarging an image in a layout is NOT recommended. Images that are less than 300 dpi could reproduce poorly looking fuzzy or pixelated. Images from the internet are not recommended, as most are only 72 dpi.
We will do everything we can to notify you of any problems we notice during preflight and file setup but PrintingCenterUSA is not responsible for any poor quality images, misspelled words, or any other problems that are part of the original file or that happened while we prepared your file to print. Please be sure to check your proofs carefully.
Optimal print resolution is 300 dpi or above; however, if your images are 180 dpi or higher the printed product will generally appear acceptable. Below 180 dpi, images will start to appear pixelated or blurry.
Learn how to check or change your resolution for the following design programs: InDesign, Illustrator, Photoshop, Canva, Publisher, and Word.
To double check the final dimensions of your PDF, open it in Adobe® Acrobat.
In the top menu bar, select File > Properties. You can view the dimensions of your document in the Properties window. Your dimensions in the PDF should be .25 inches (length and width) larger than your chosen size on the Online Pricing Tool (final trim size).
The final size of the document after the last cut is made.
Refer to the Size section in our Help Center for more information.
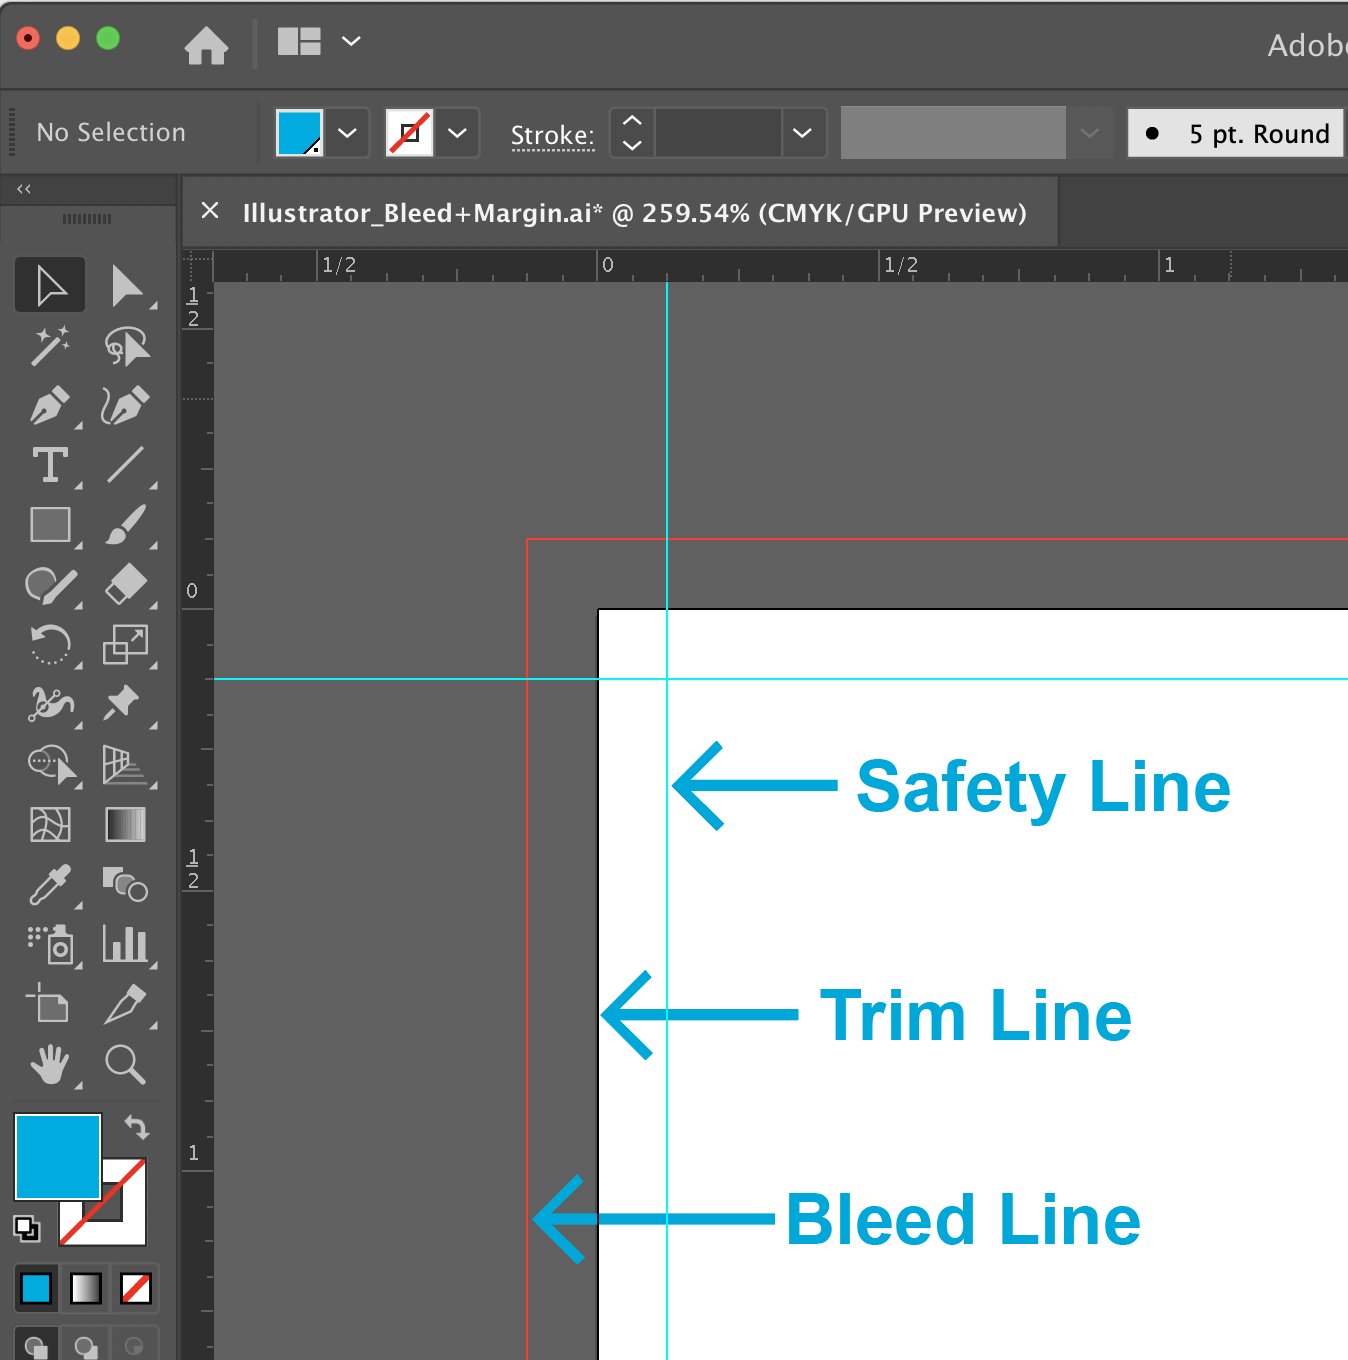
Cutting of your printing piece is done in large stacks and may vary from the top and the bottom of the stack. The safe area or inner margin in which to keep all important elements within to prevent them from trimming off, should be at least 1/8″ inside the edge of the final trim size.