How to Get to the Greeting Card Designer:
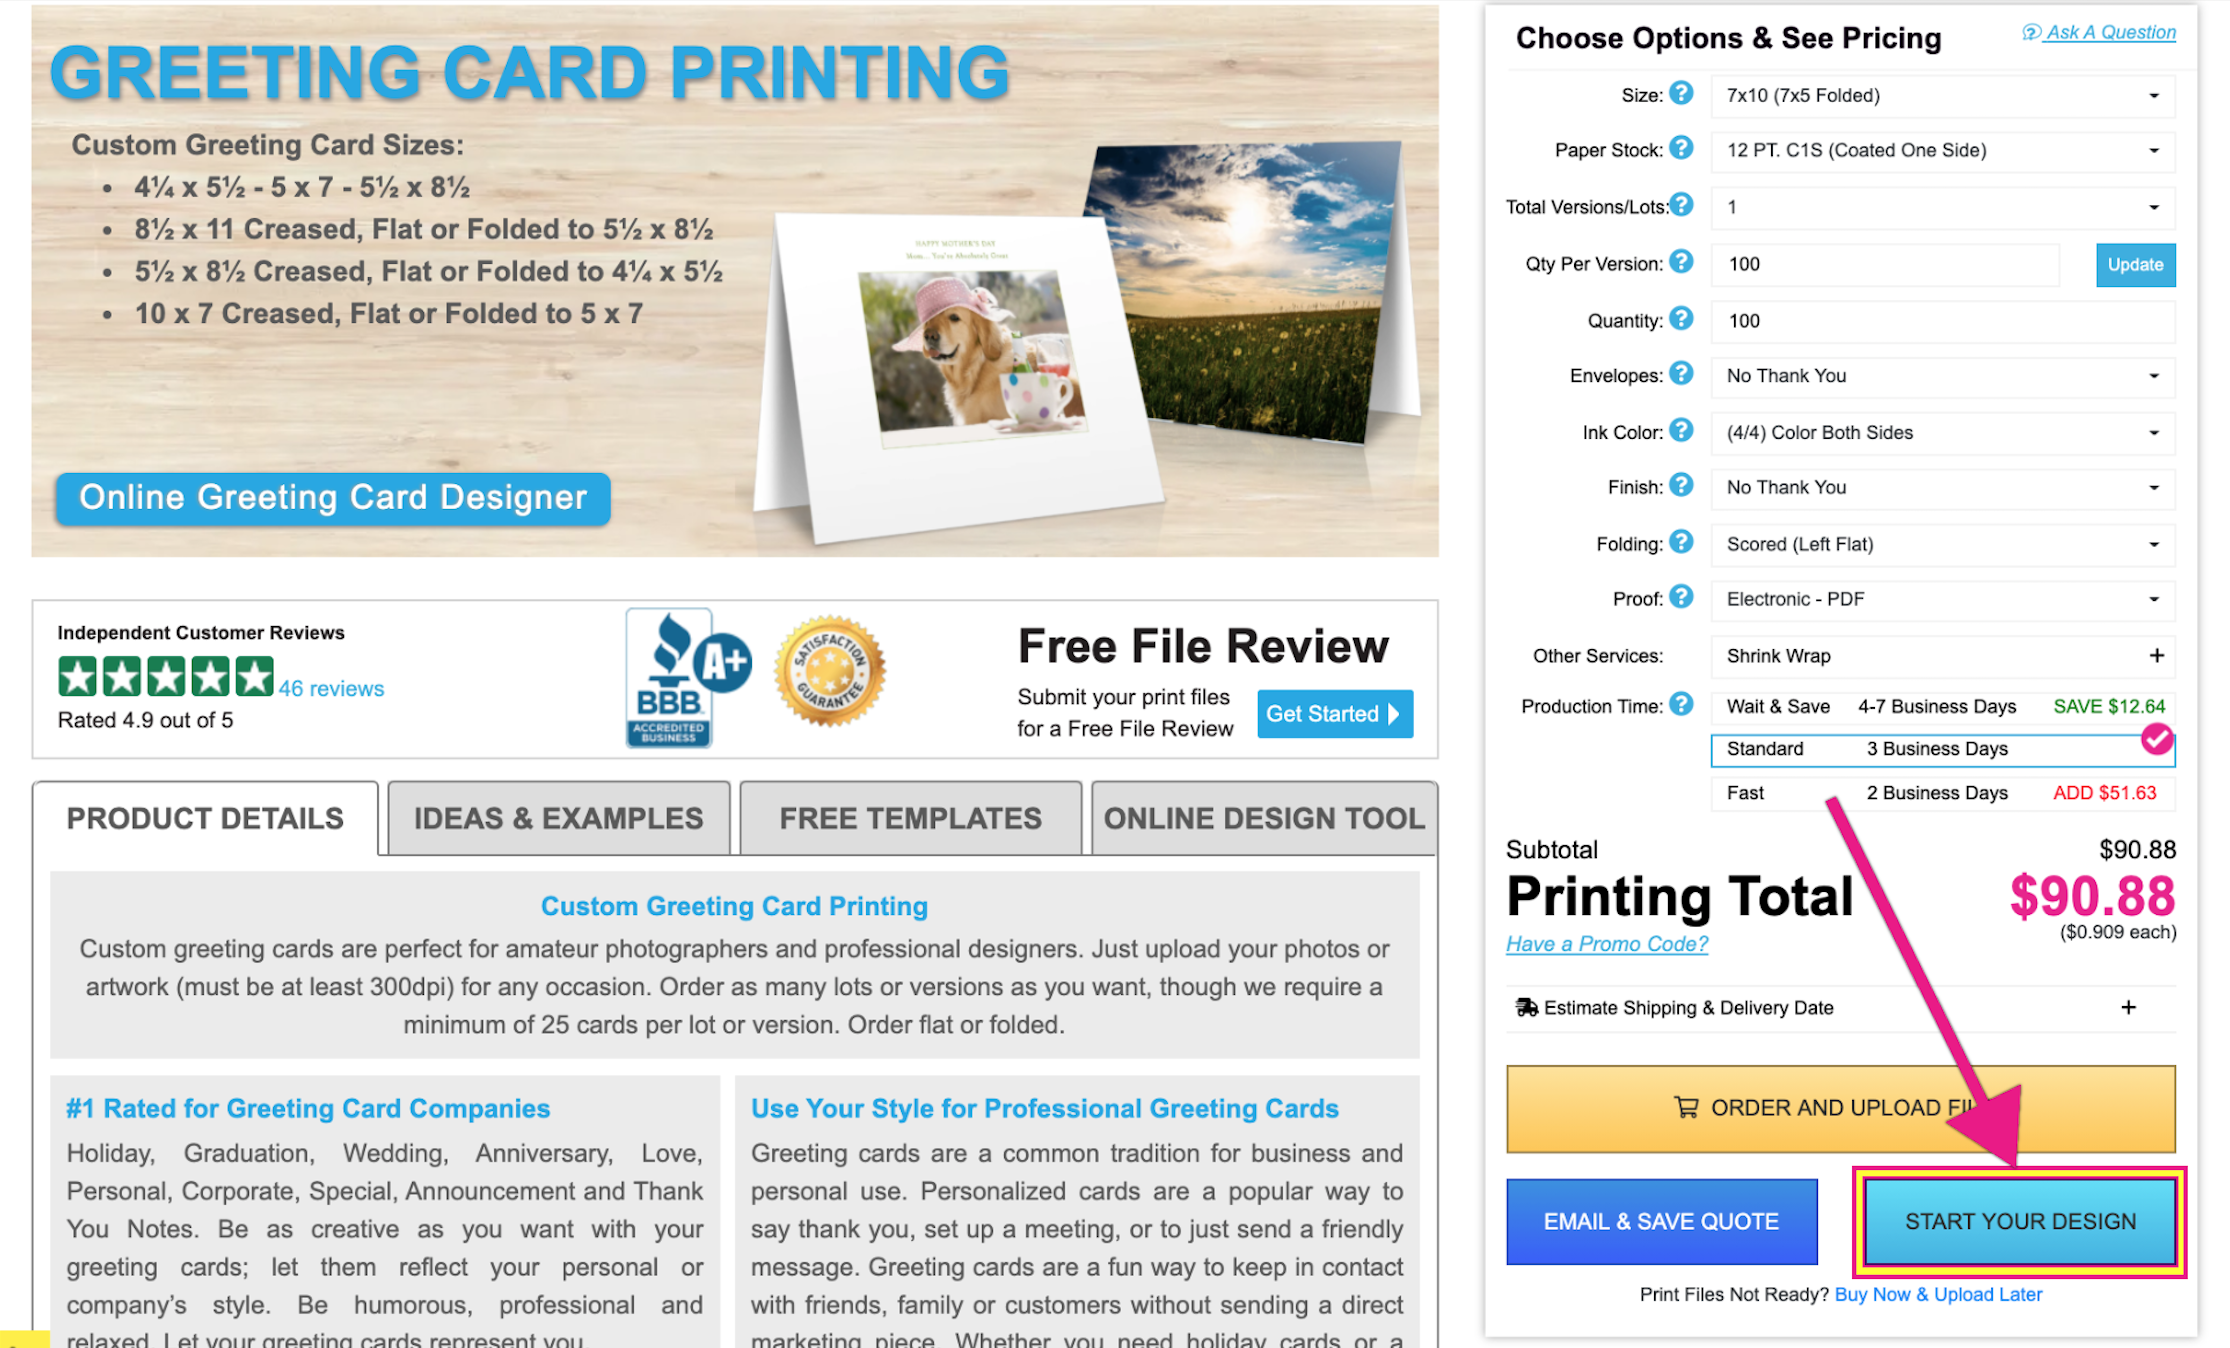
1. Visit our Greeting Card Printing page.
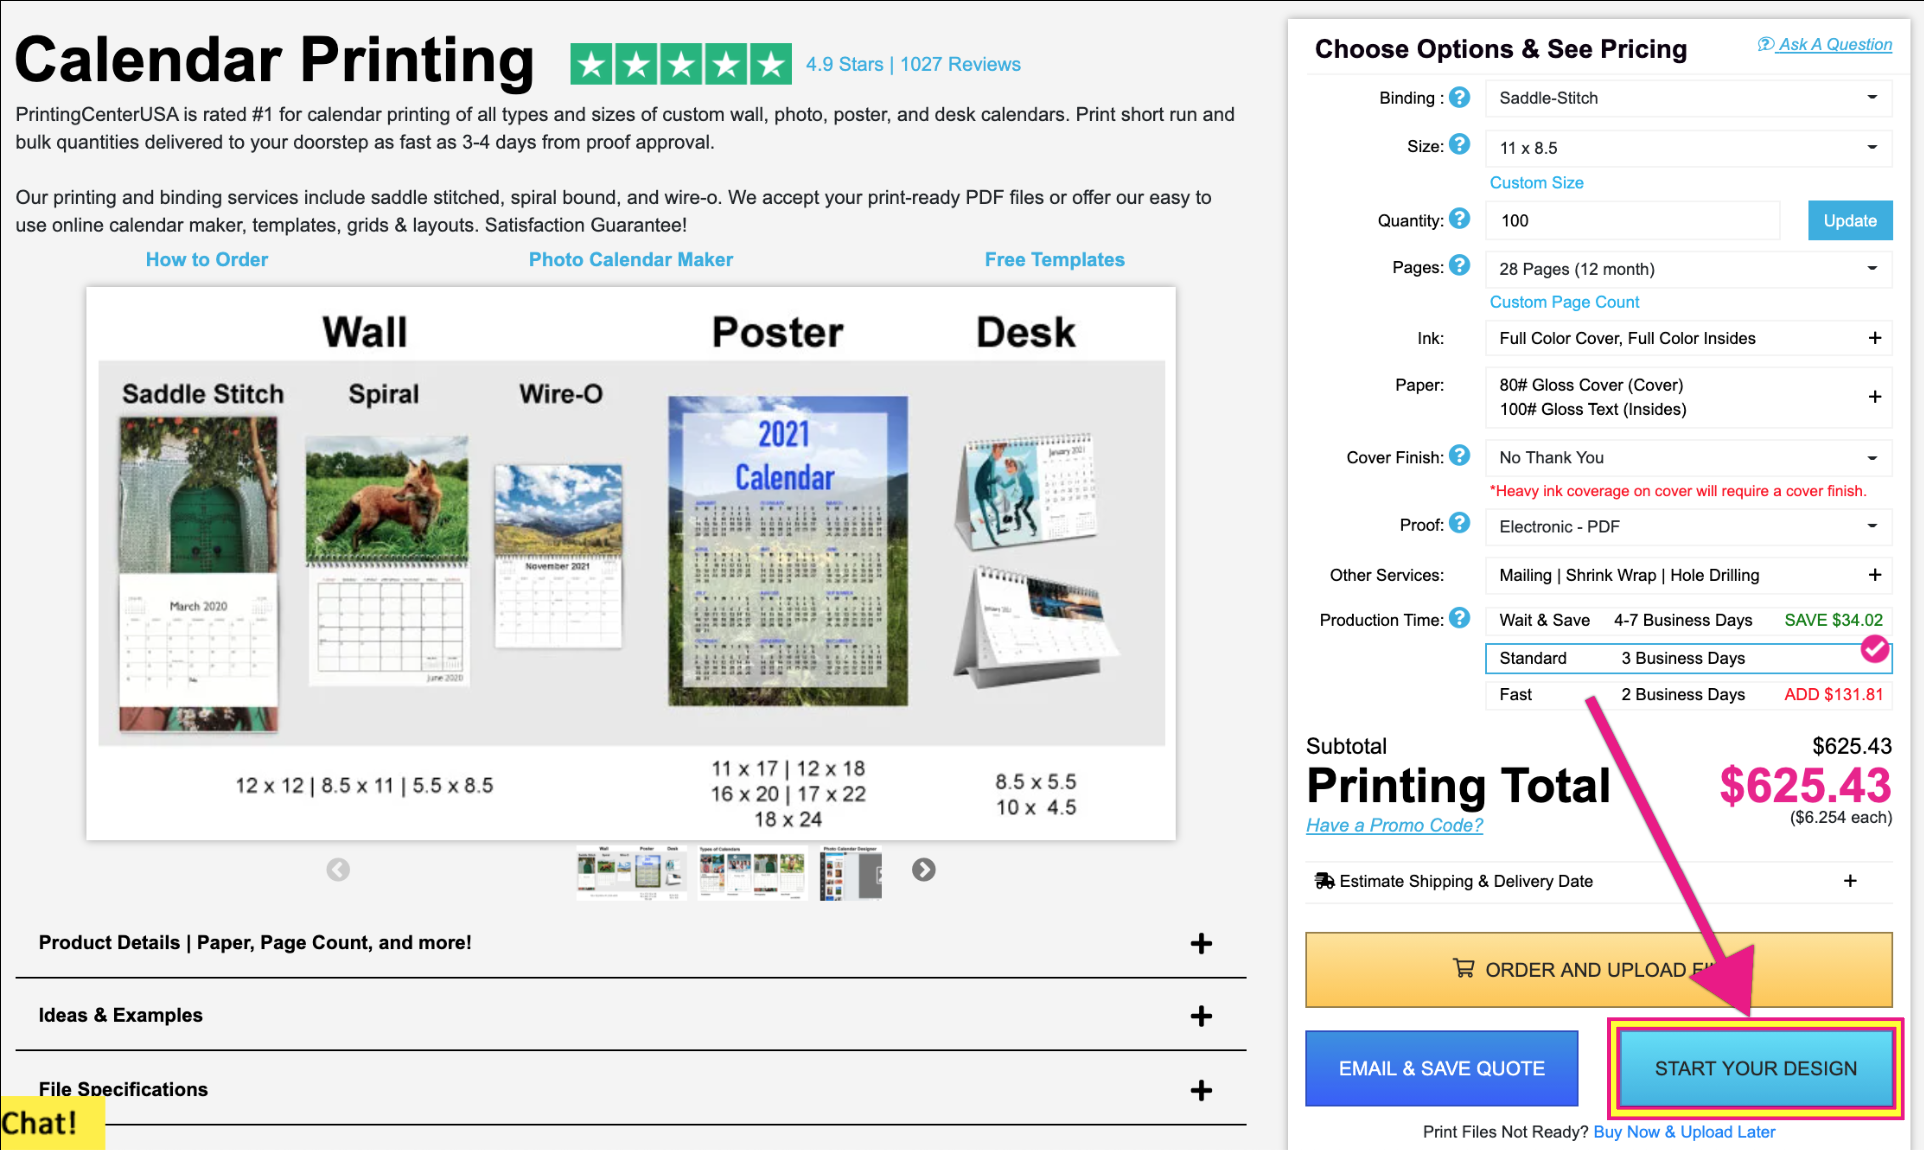
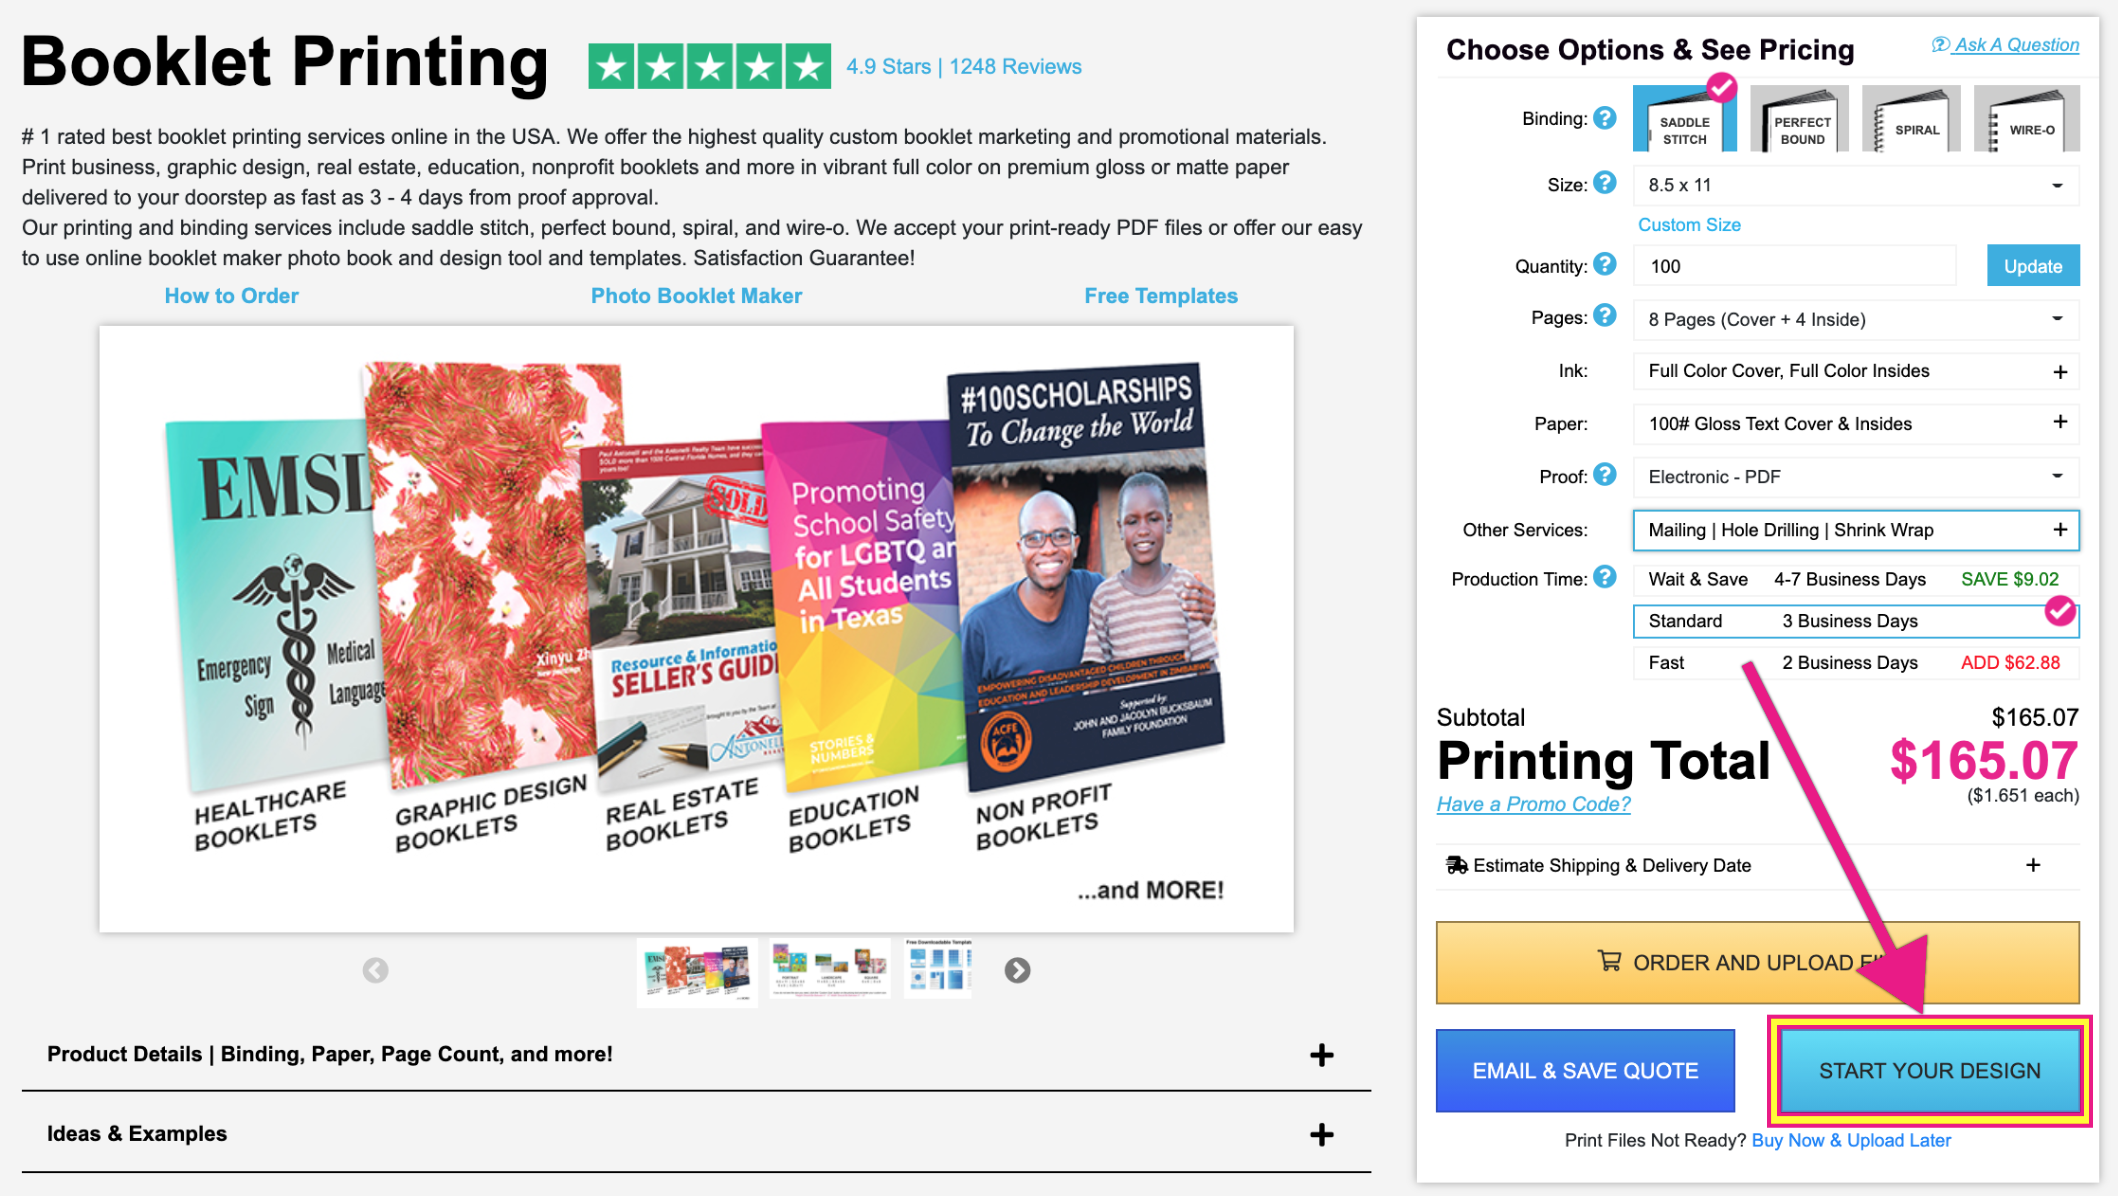
2. In the pricing tool (“Choose Options & See Pricing” section on the right), click the “START YOUR DESIGN” button.
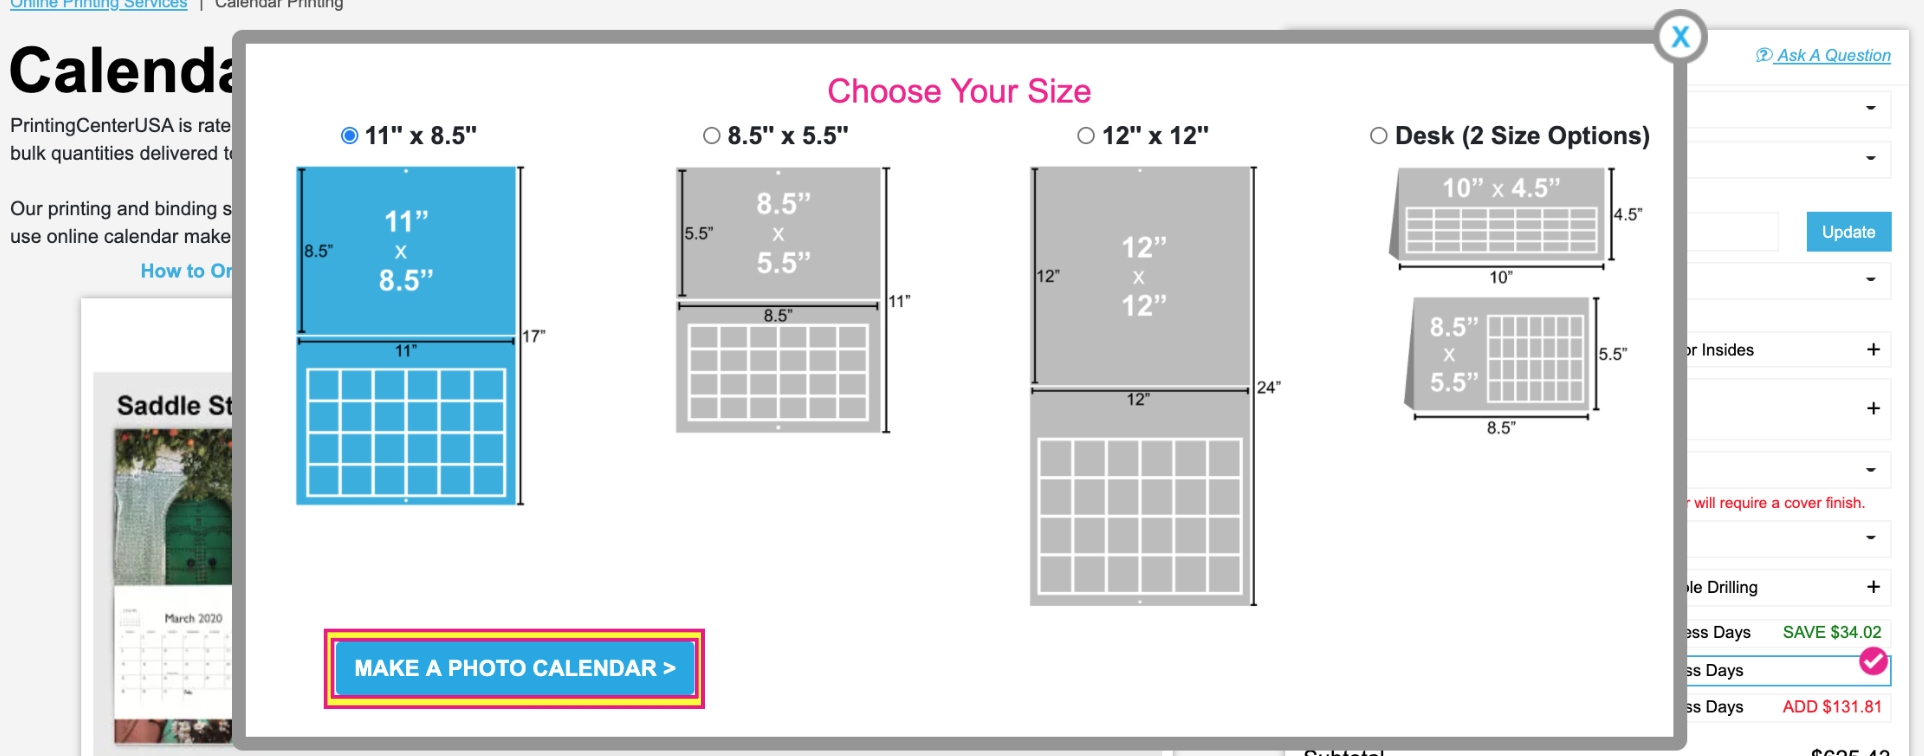
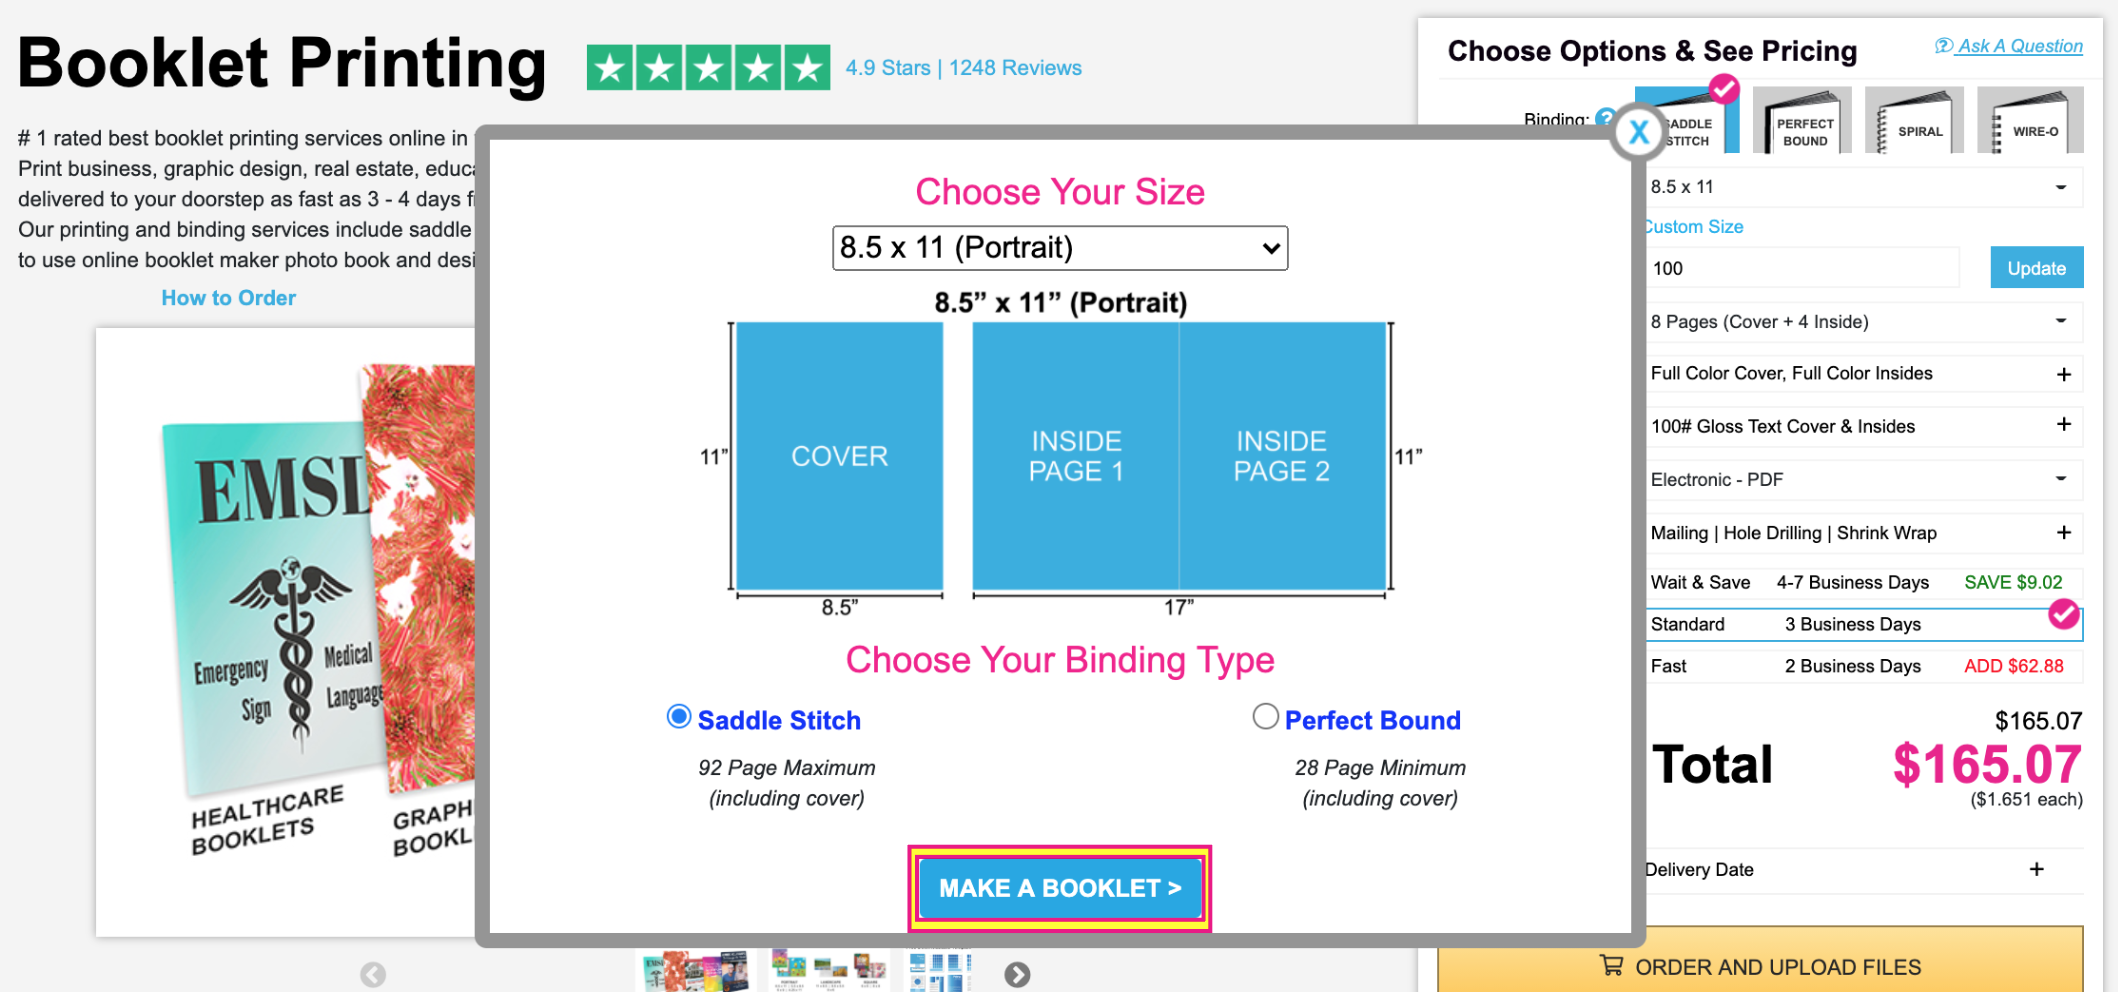
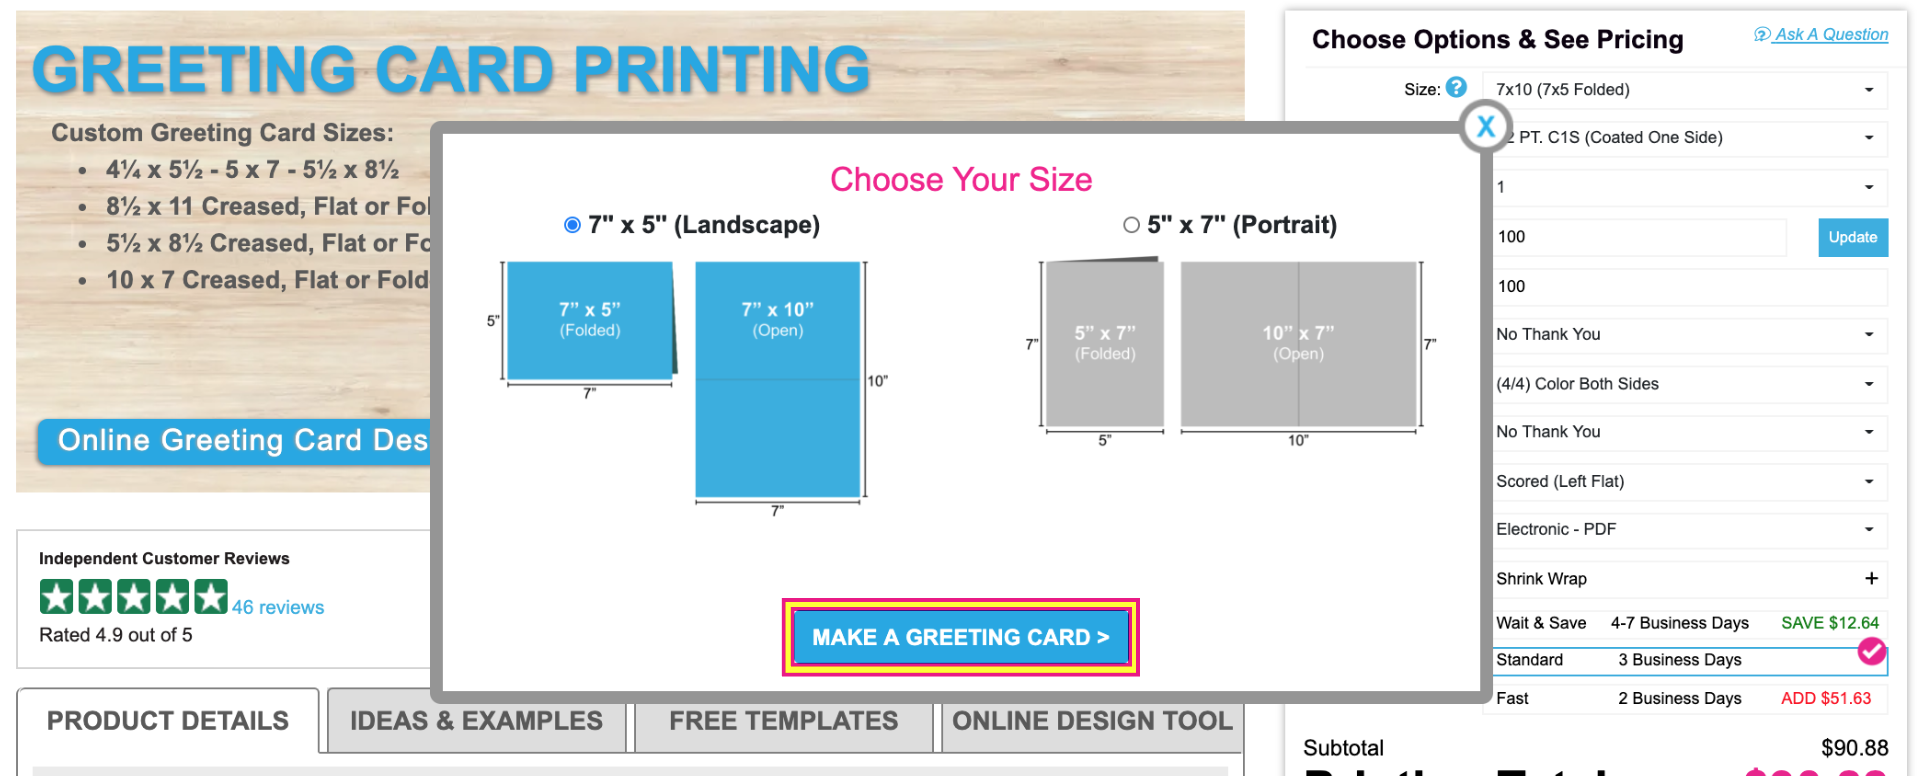
3. In the popup, choose between Landscape and Portrait and click the “MAKE A GREETING CARD” button to get started.
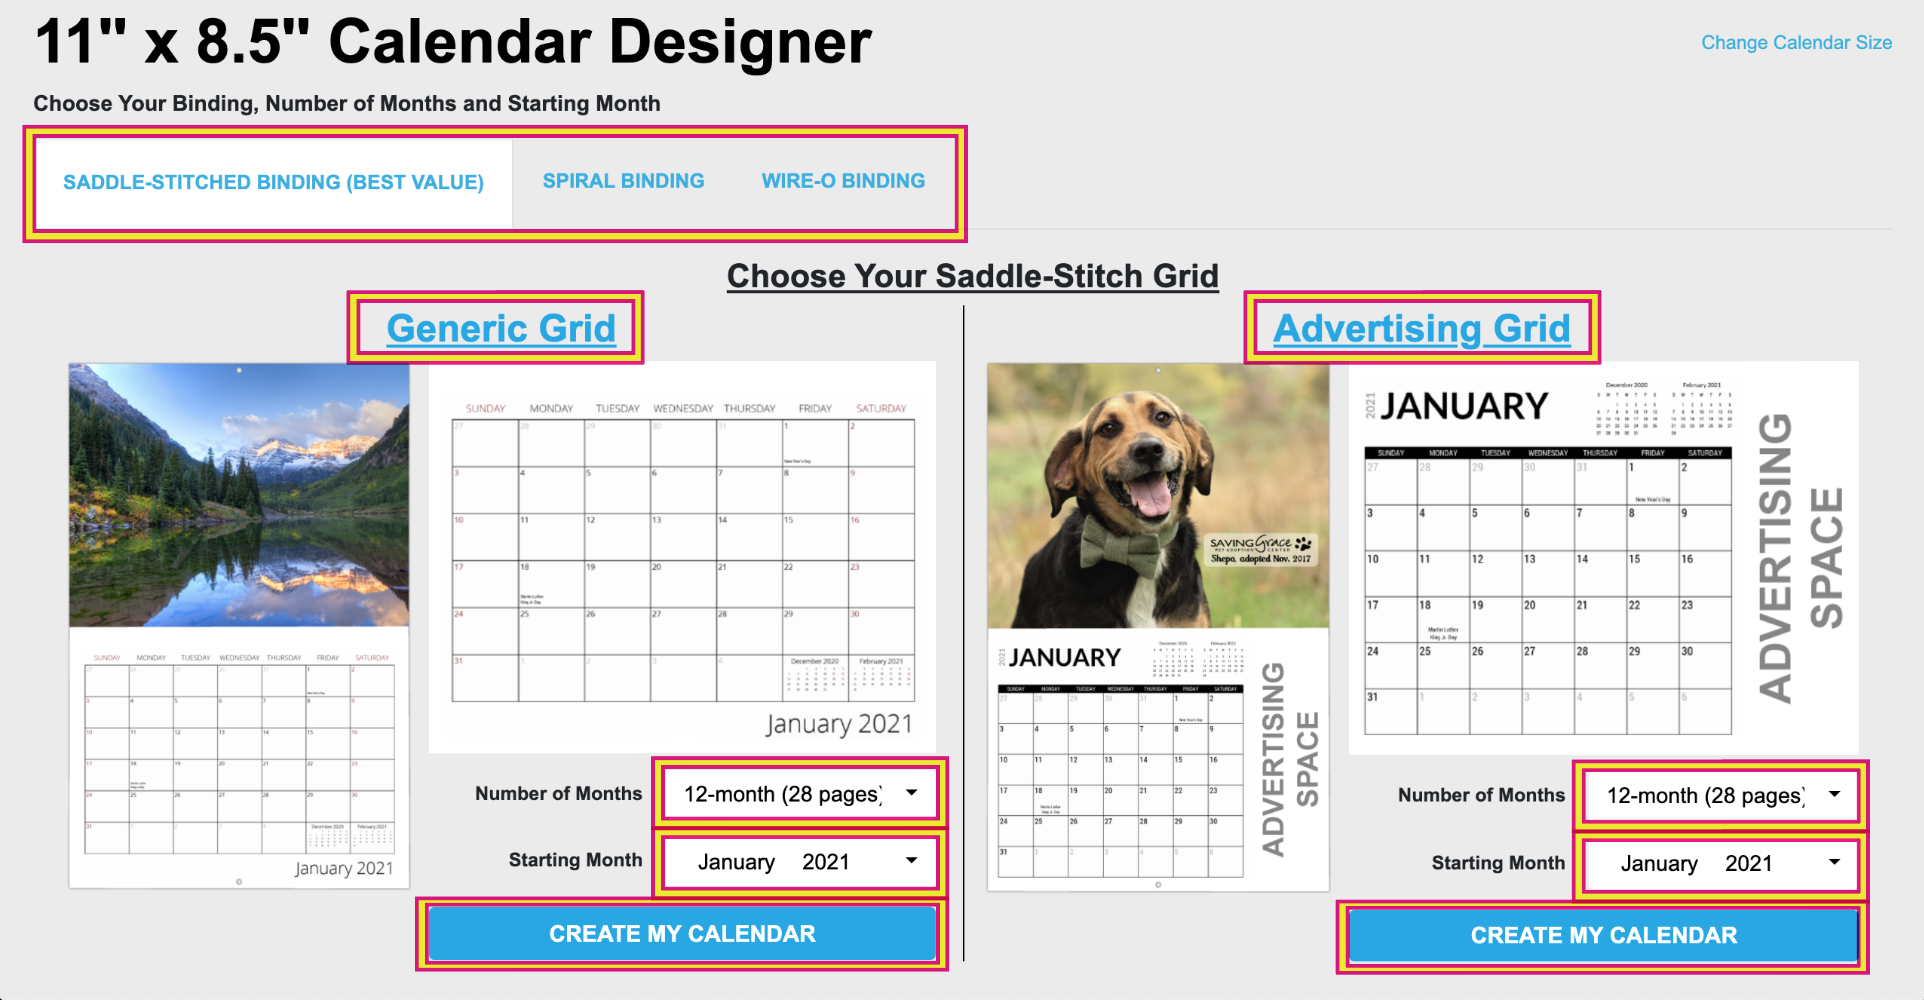
4. Select a Theme or get started with a Blank theme.
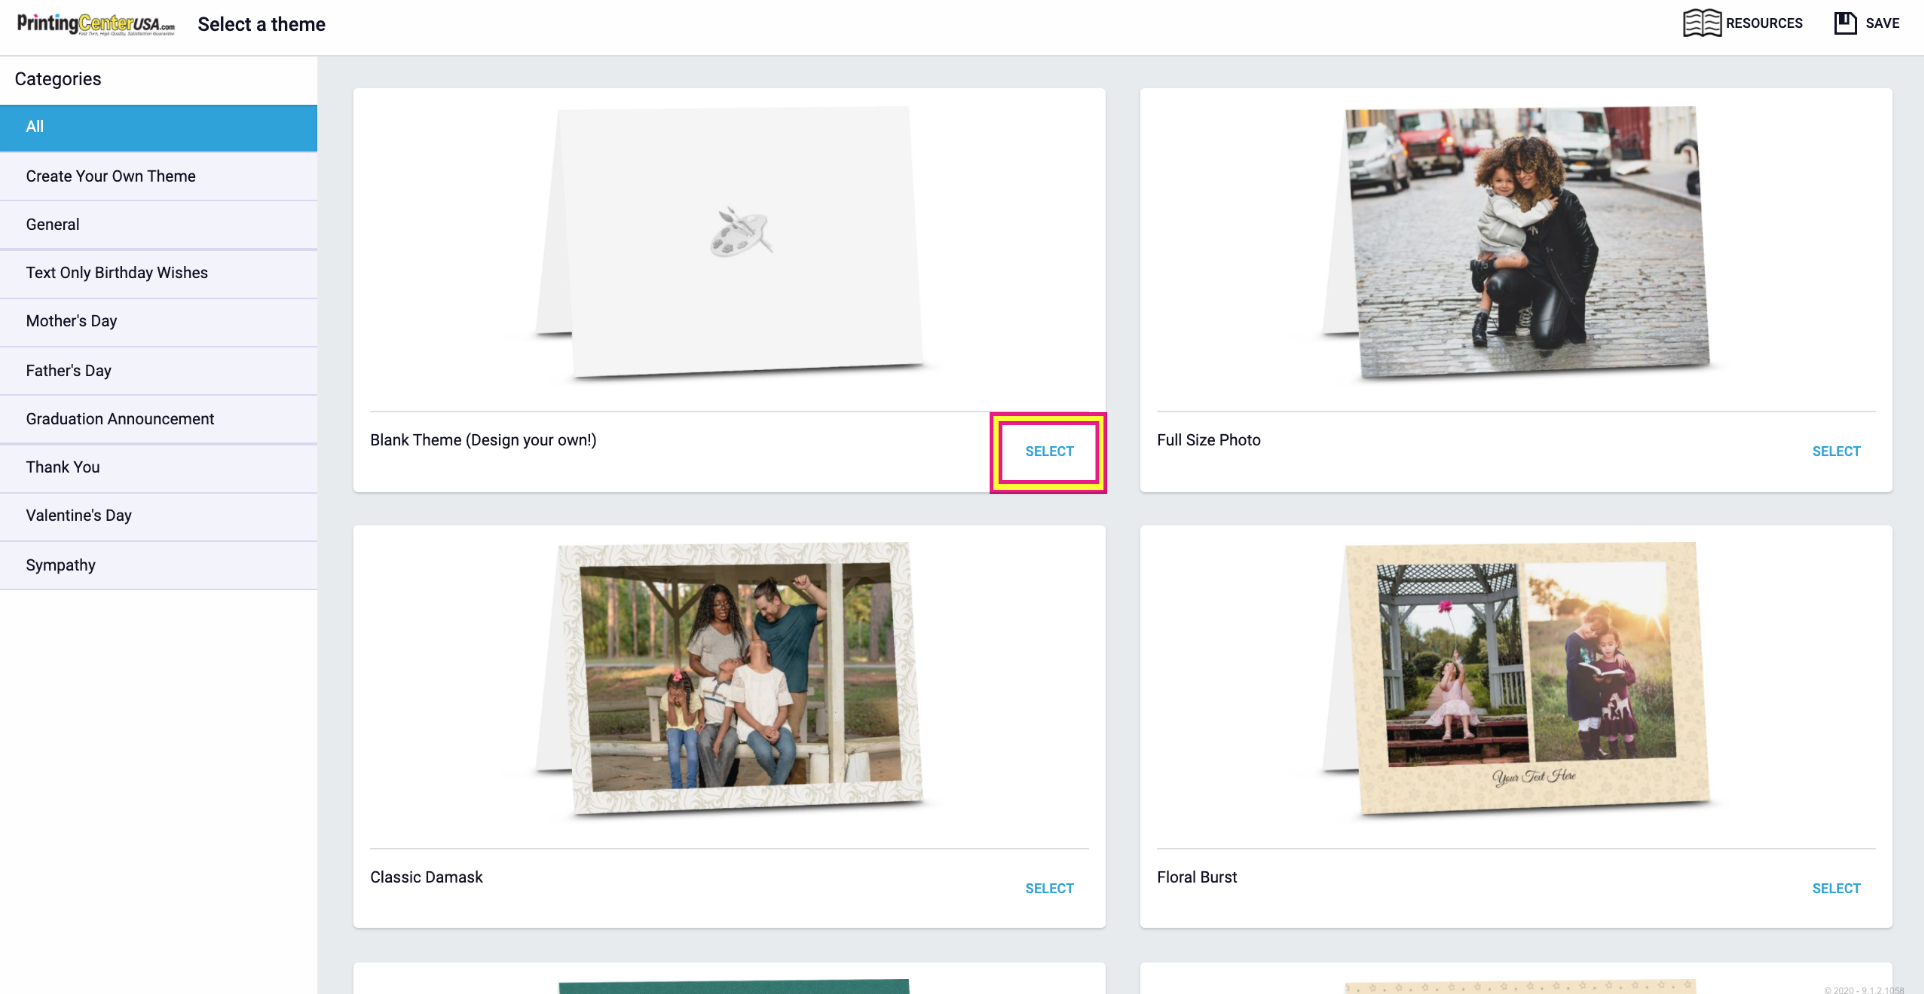
5. You will then be sent into the Greeting Card designer.
TIP: Save your design often to ensure no progress is lost.
How to Check Out from the Greeting Card Designer:
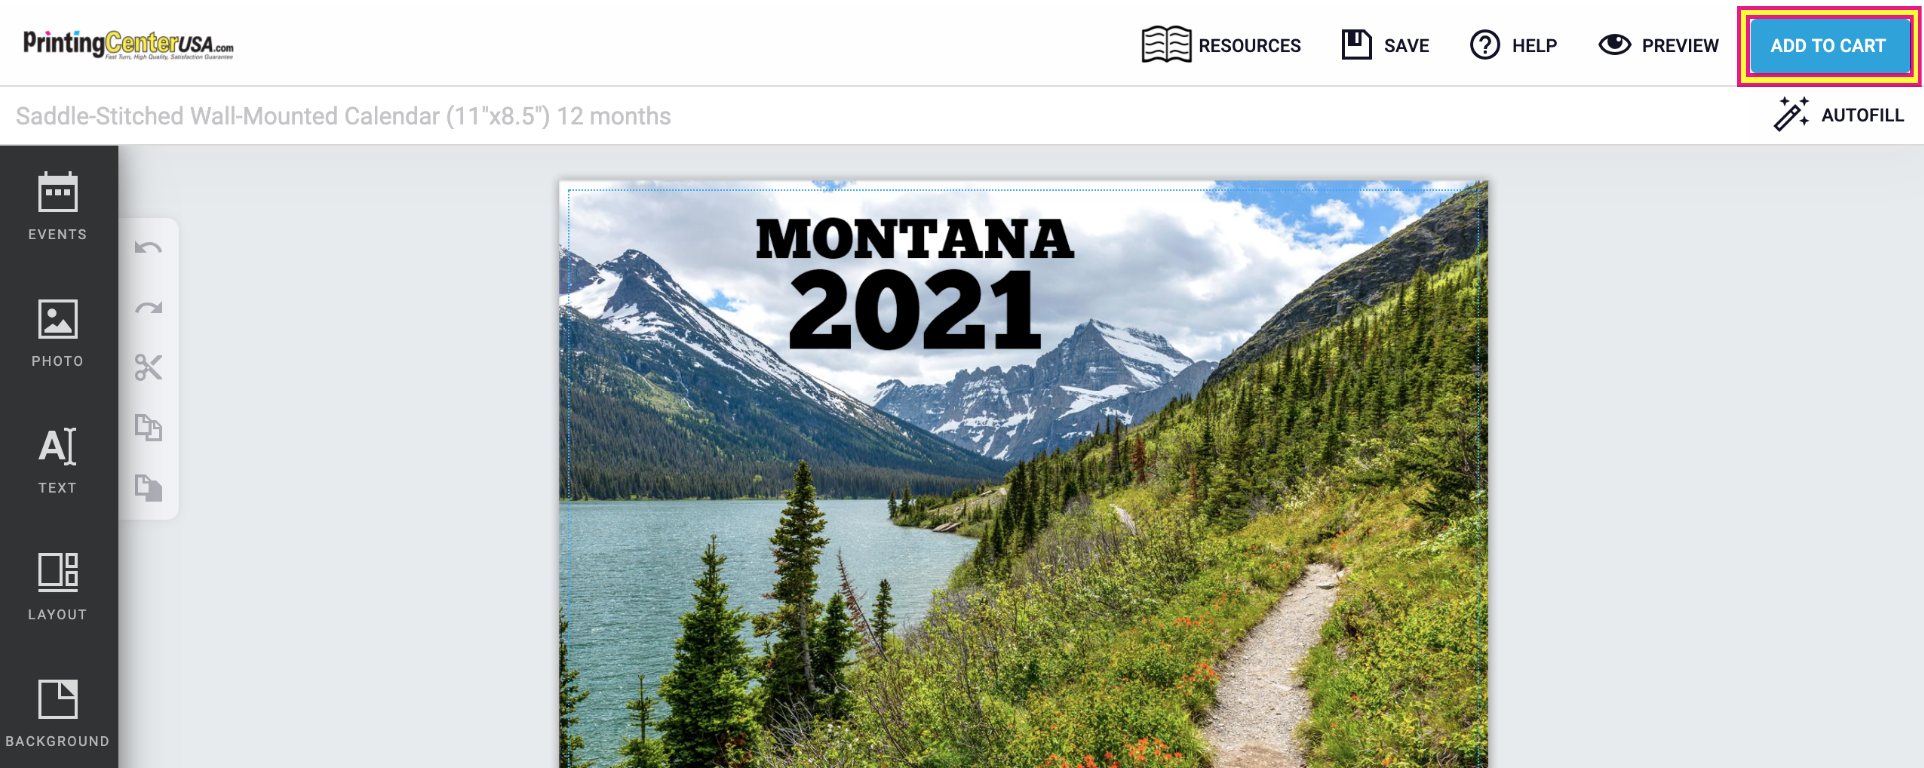
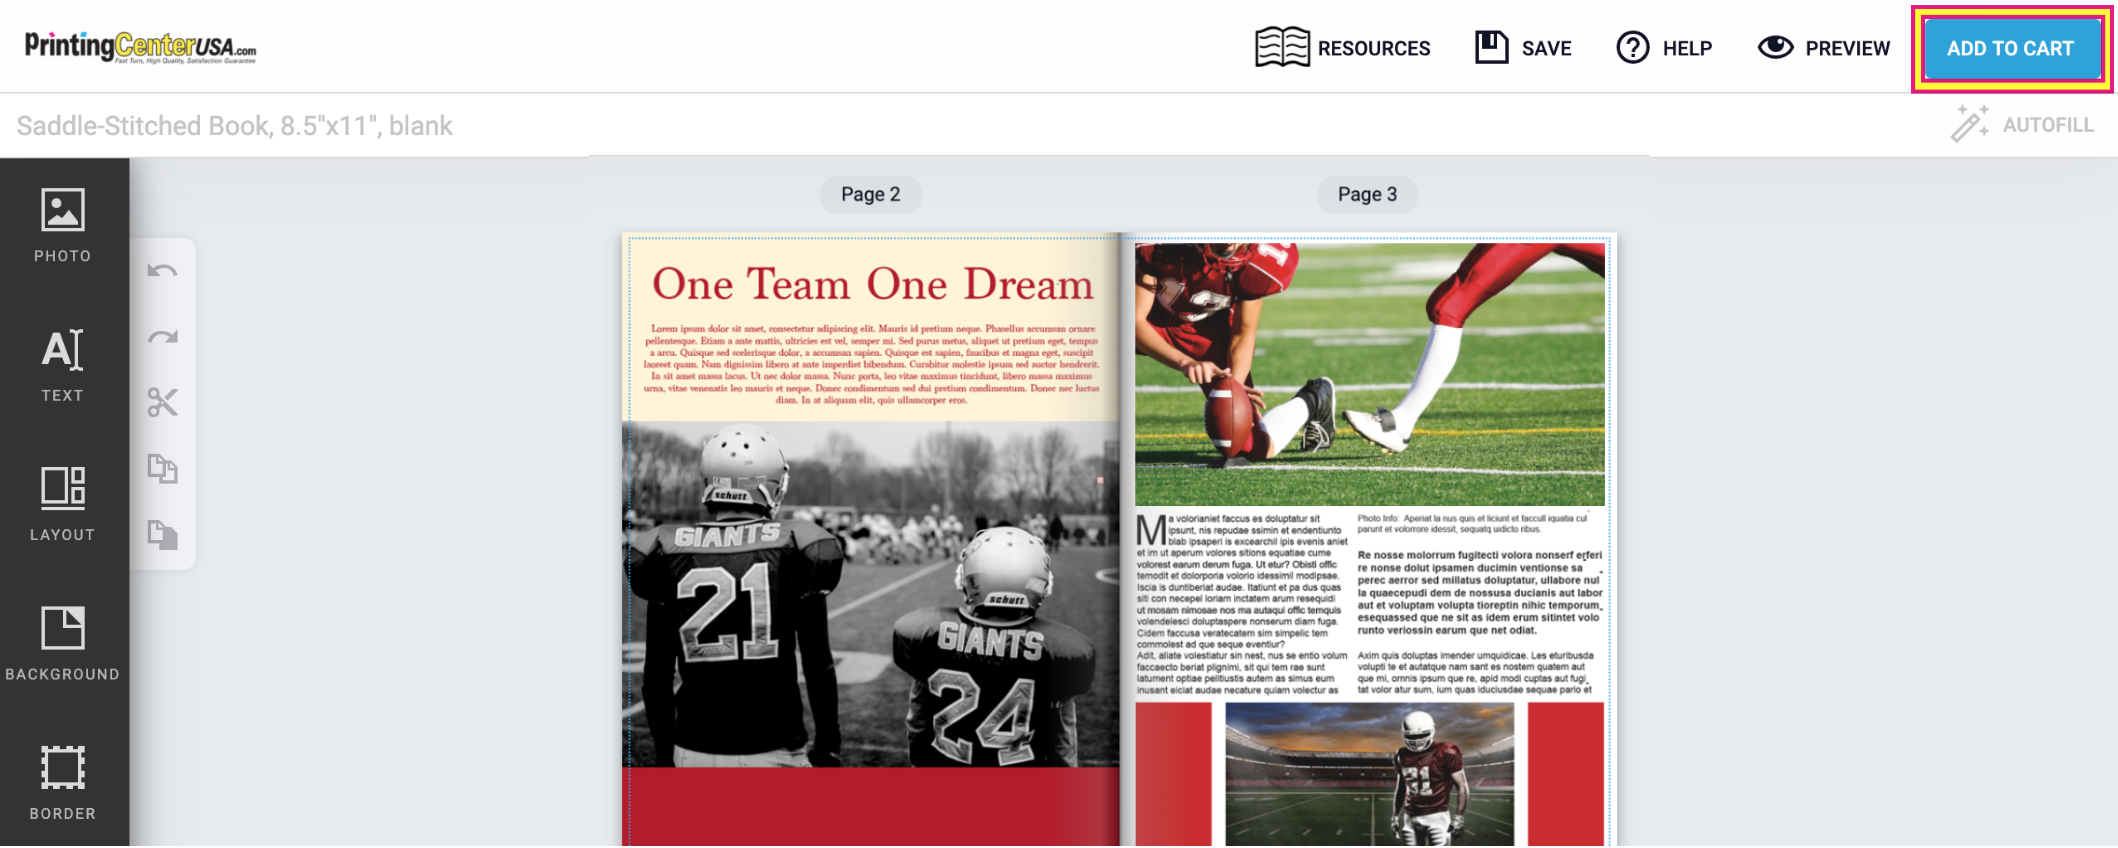
1. Once you’re finished with your design (and have the design open in the Greeting Card Designer), click the “Add to Cart” button.
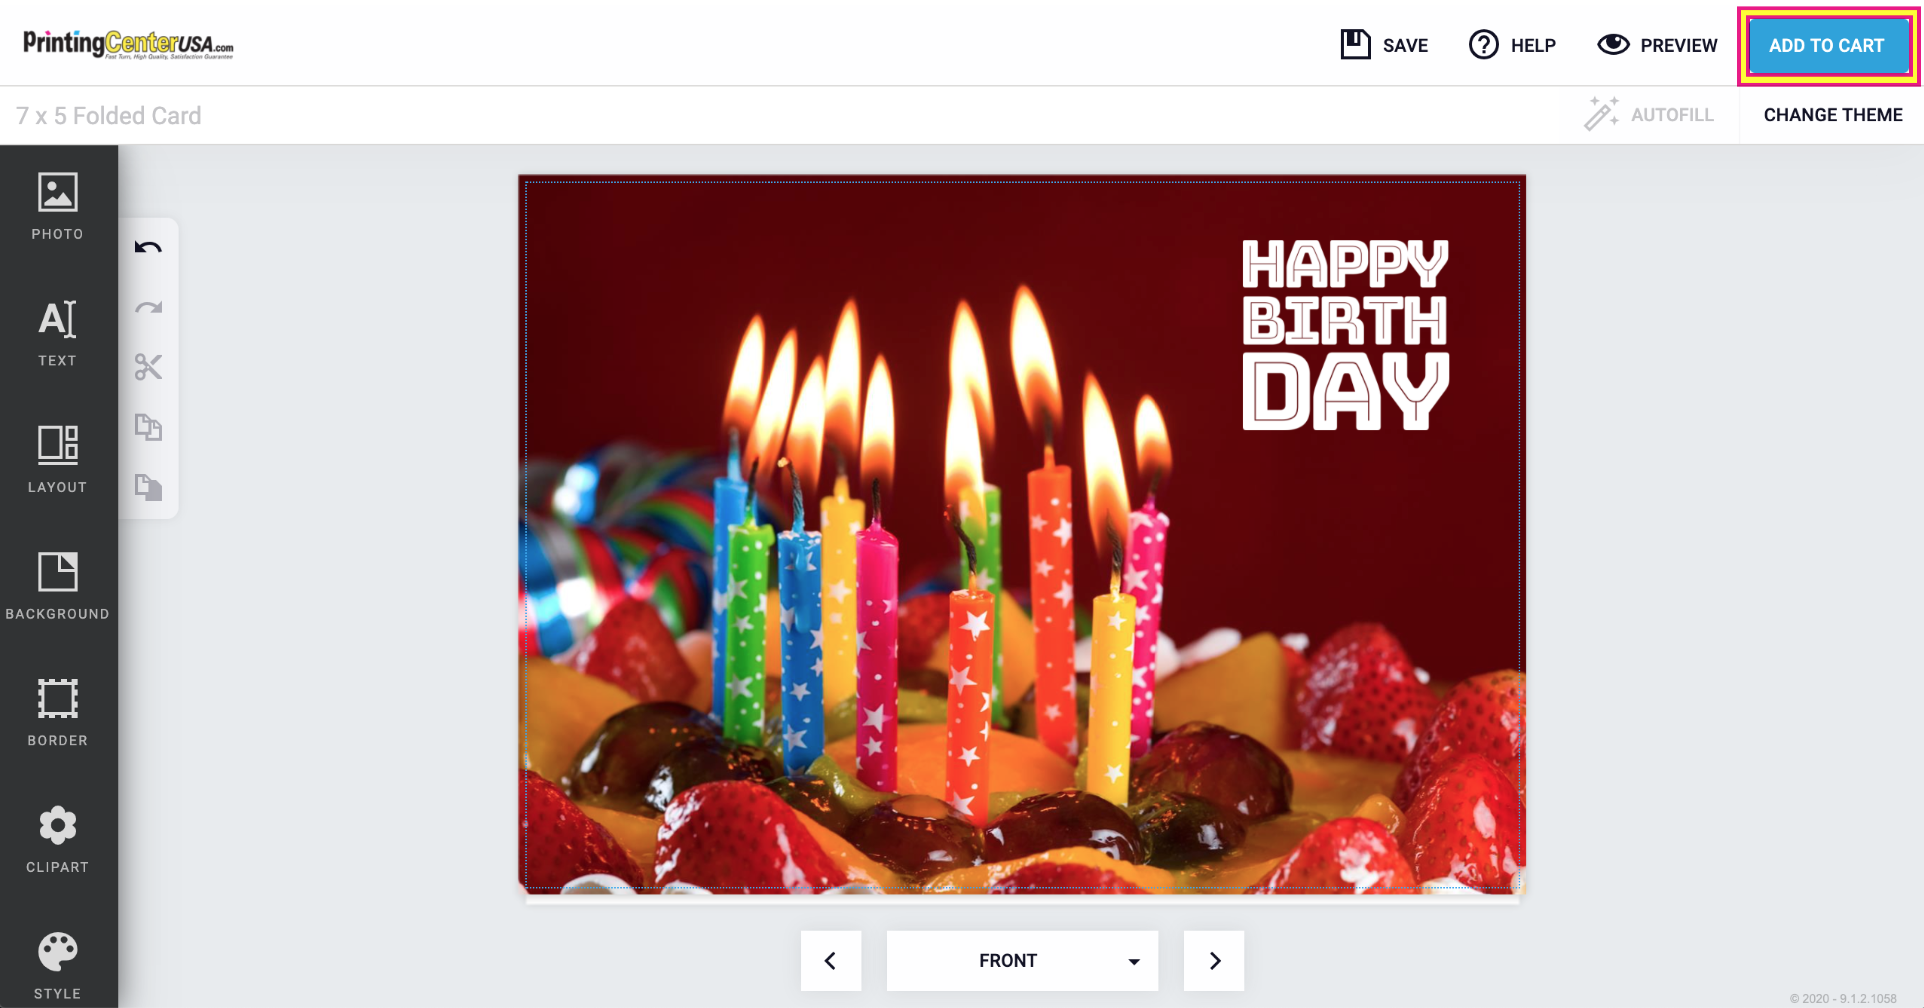
NOTE: You can access your designs by visiting your My Account page and clicking the “My Designs” tab.
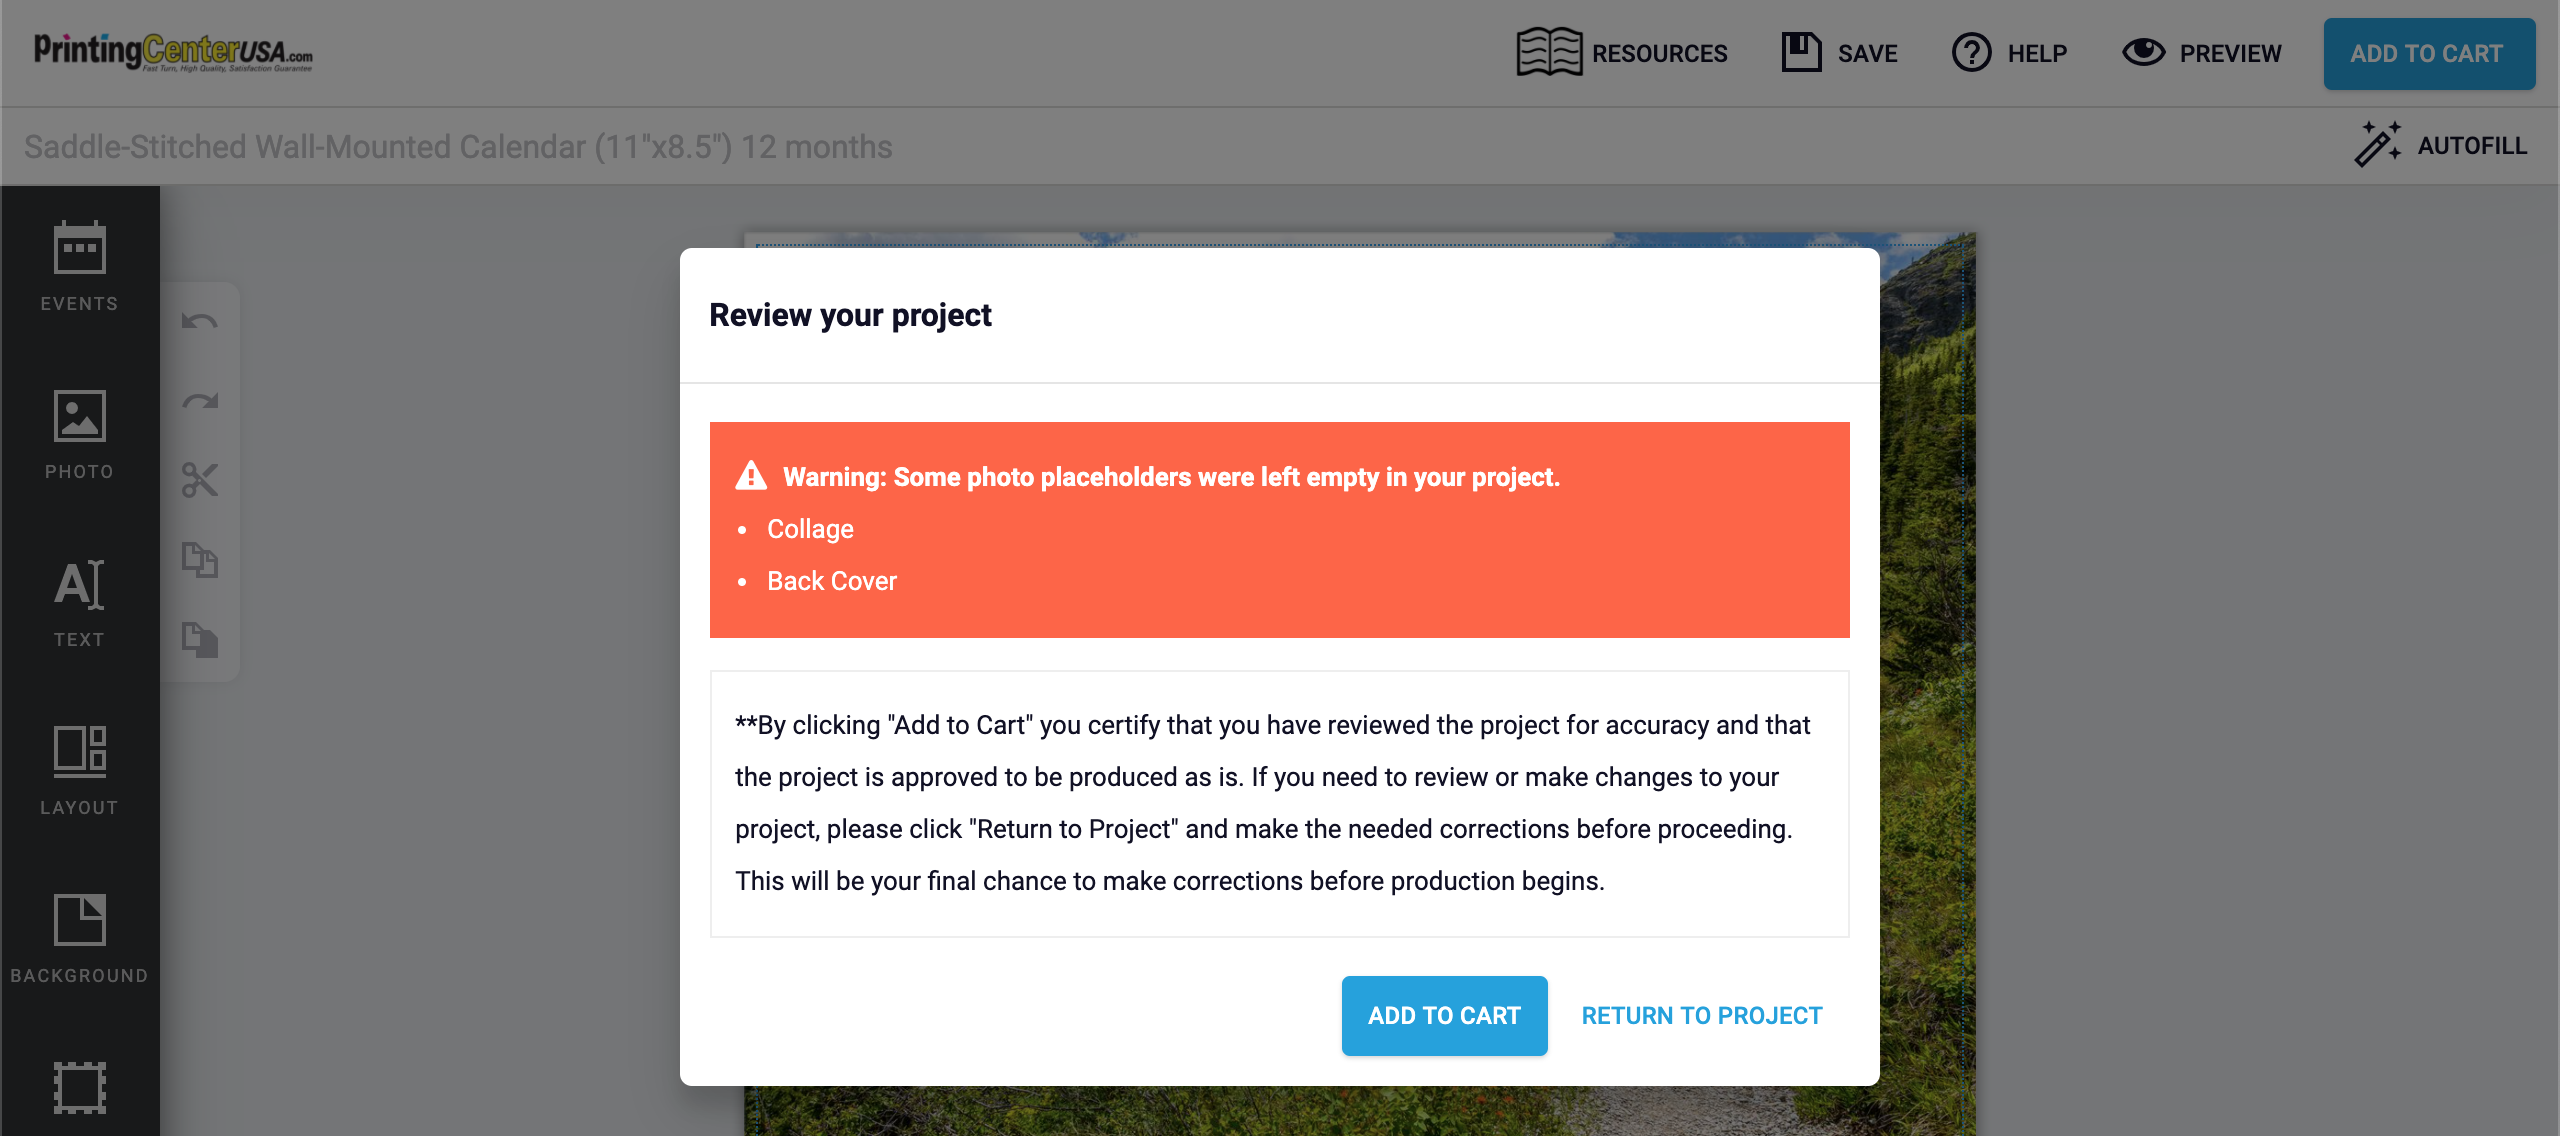
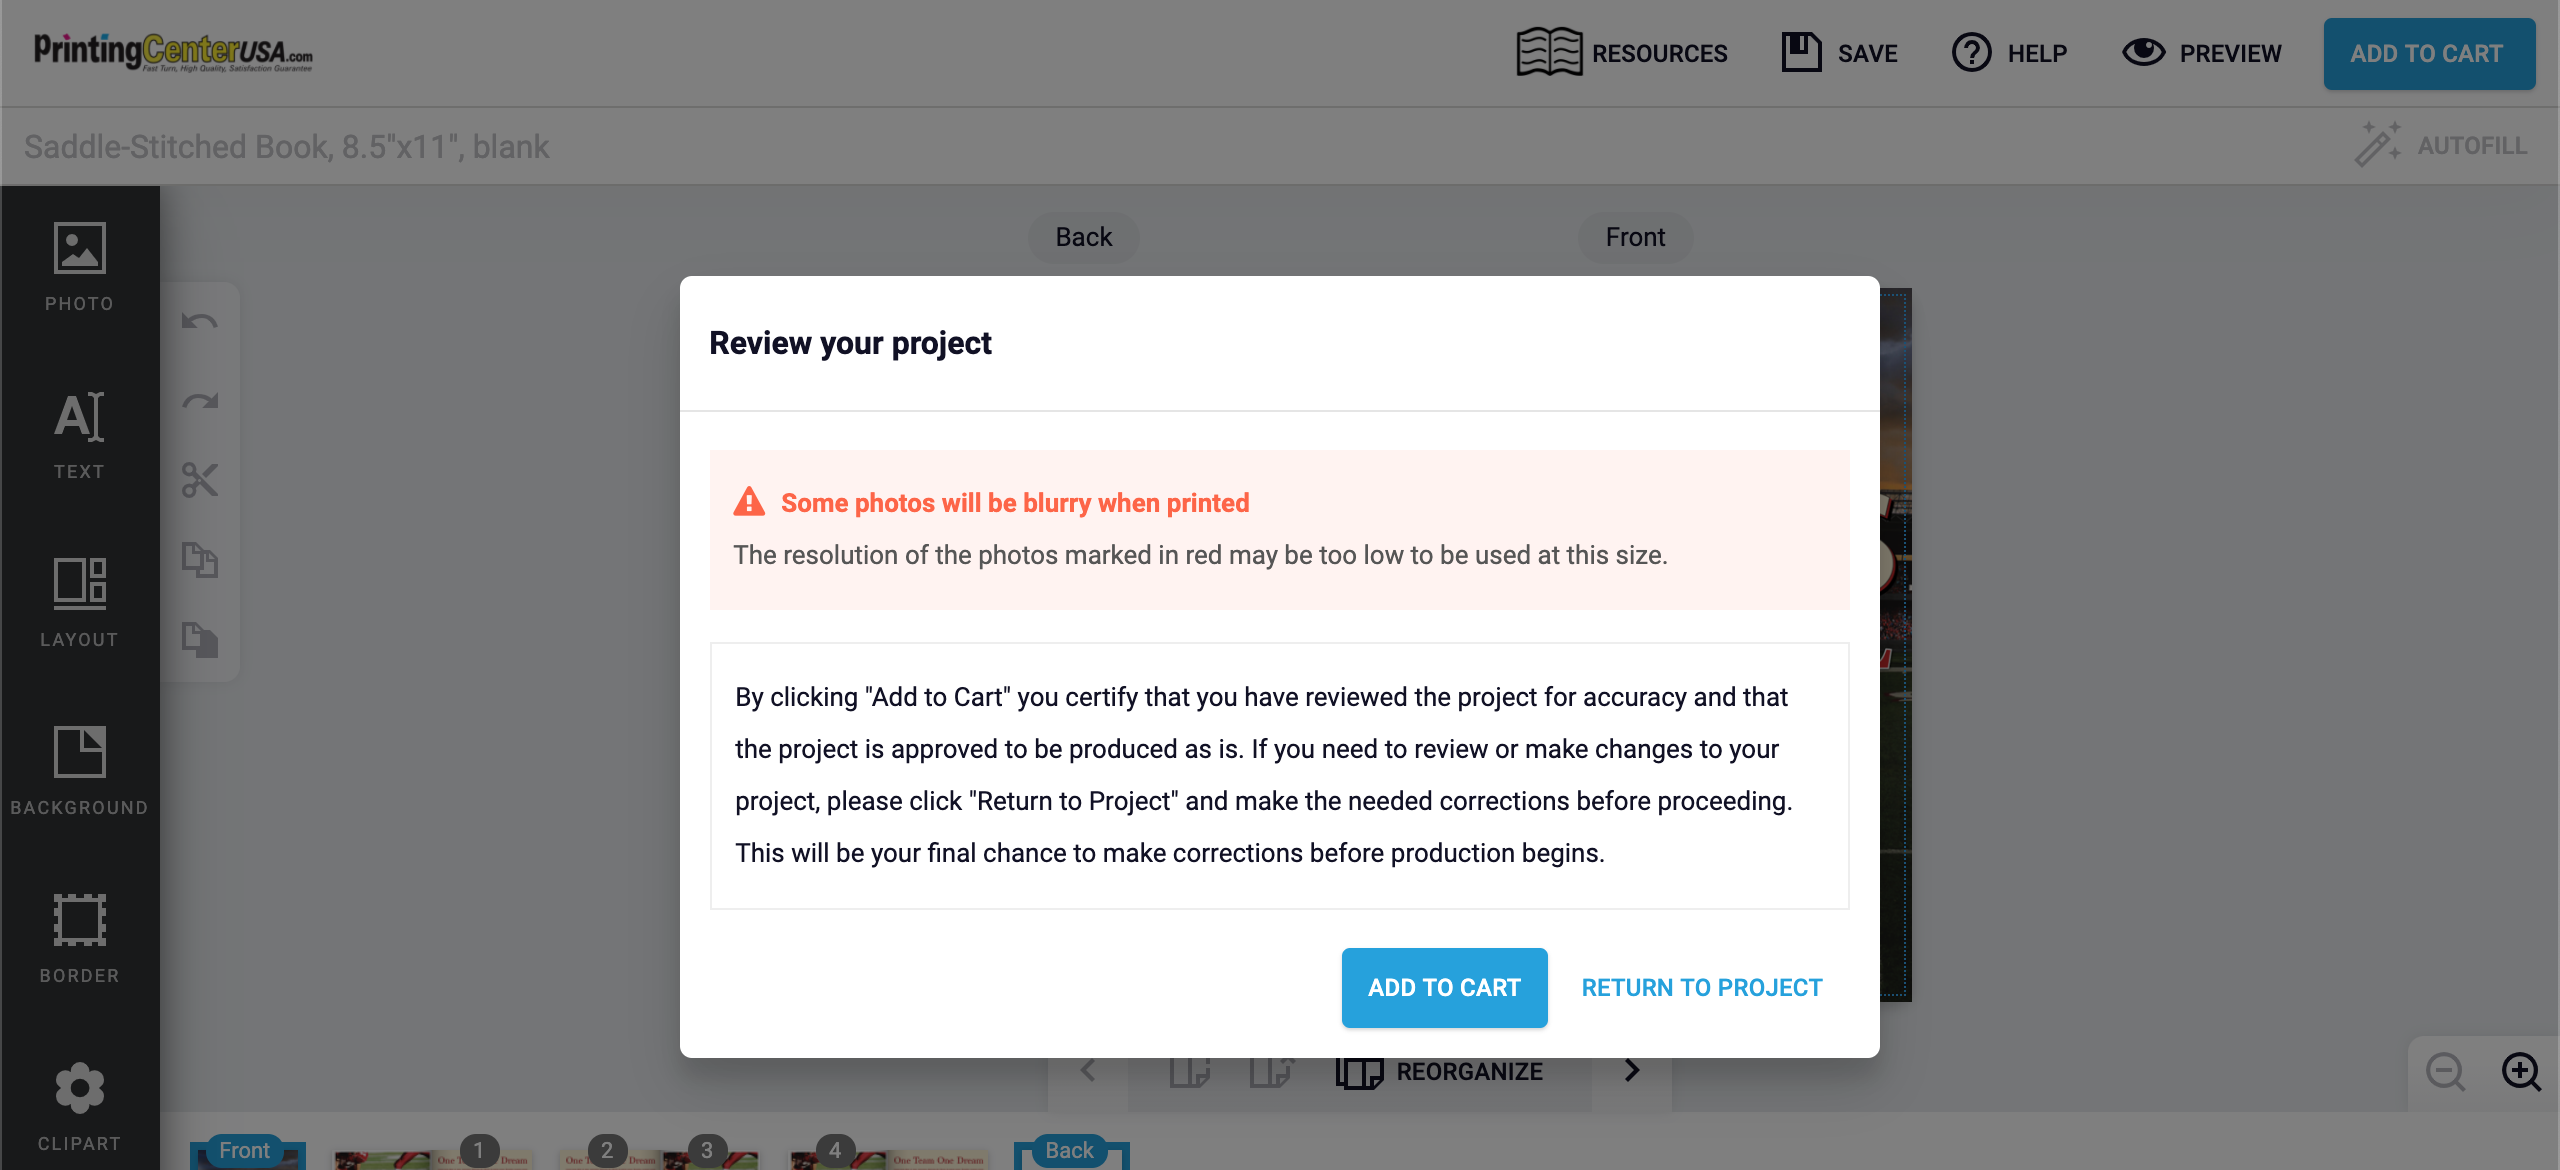
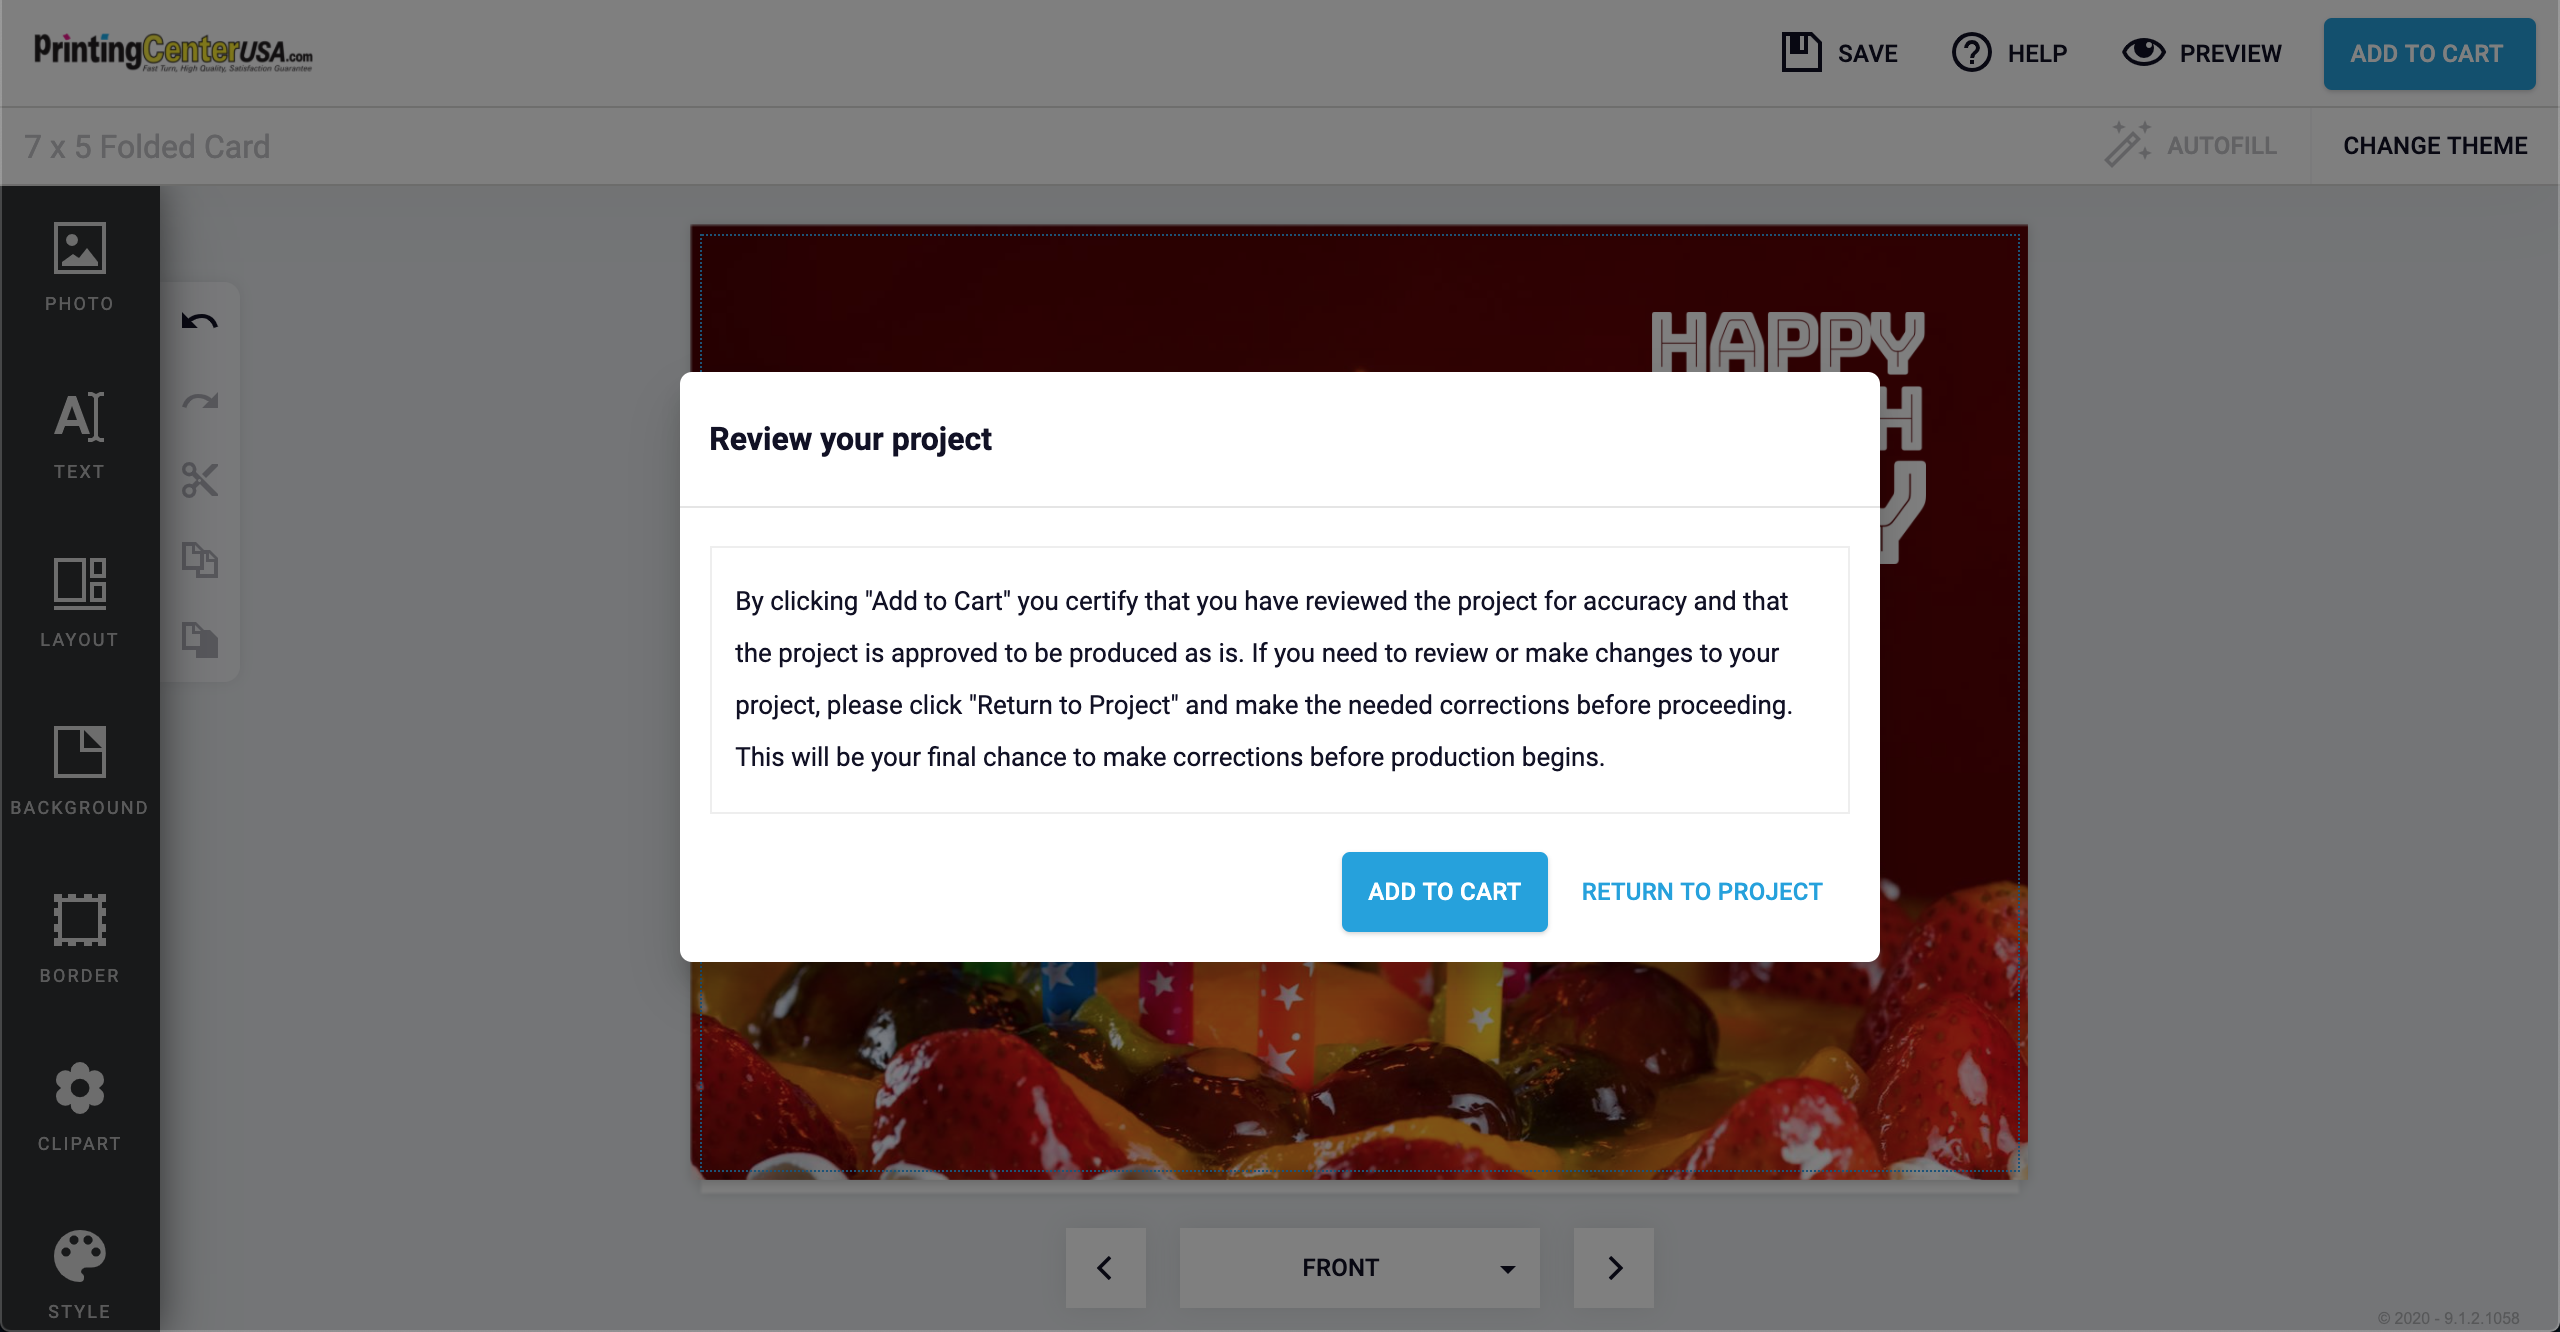
2. A ‘Review your project’ popup will come up. This is certifying that you reviewed your design carefully and that it is ready to print. Click “Add to Cart” to continue to checkout or “Return to Project” to review your design or make edits.
3. If you have not saved your design yet, it will ask you to Login (or Create an Account) and Name Your Design. If you have saved your design, it will send you to the checkout page:
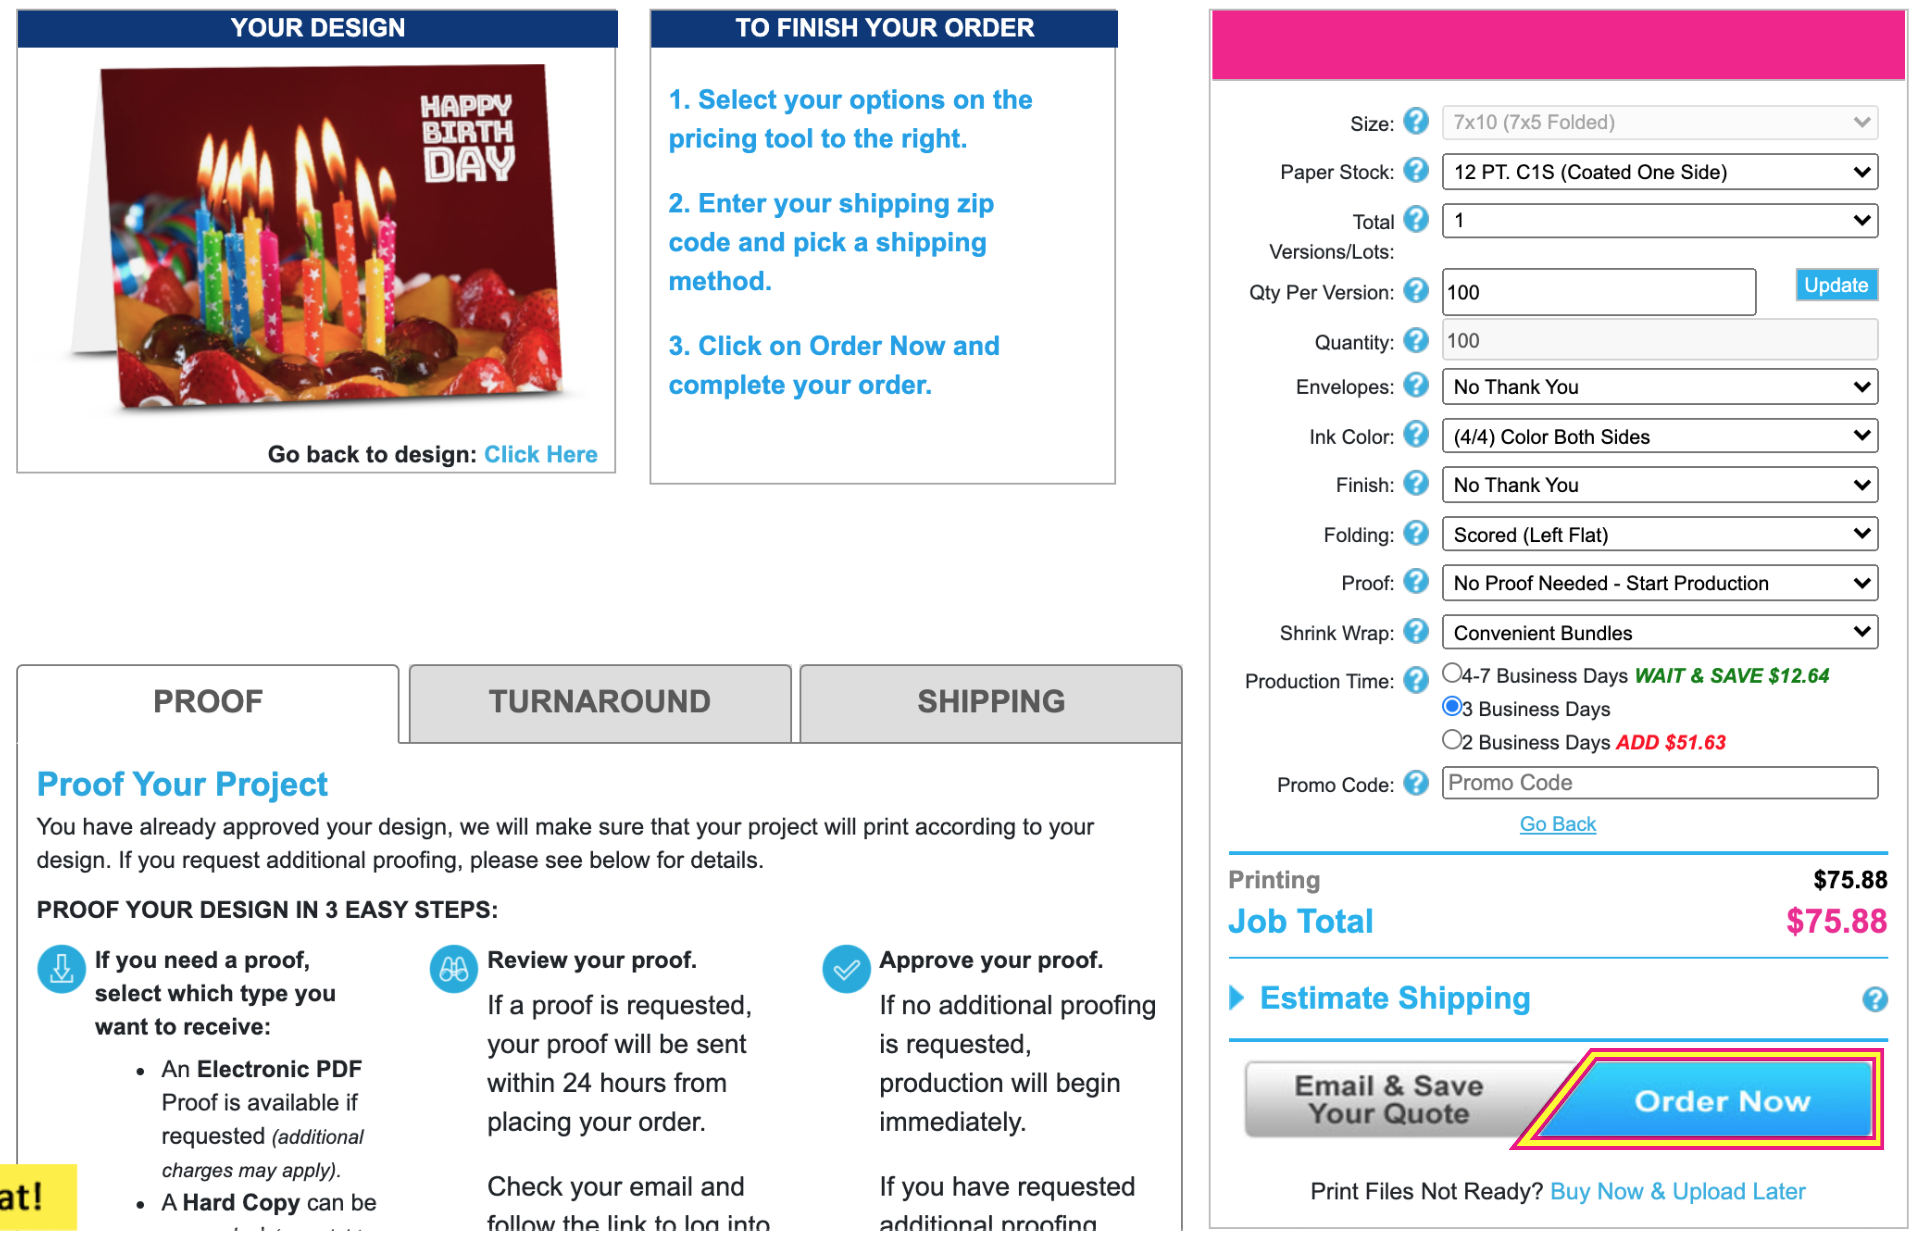
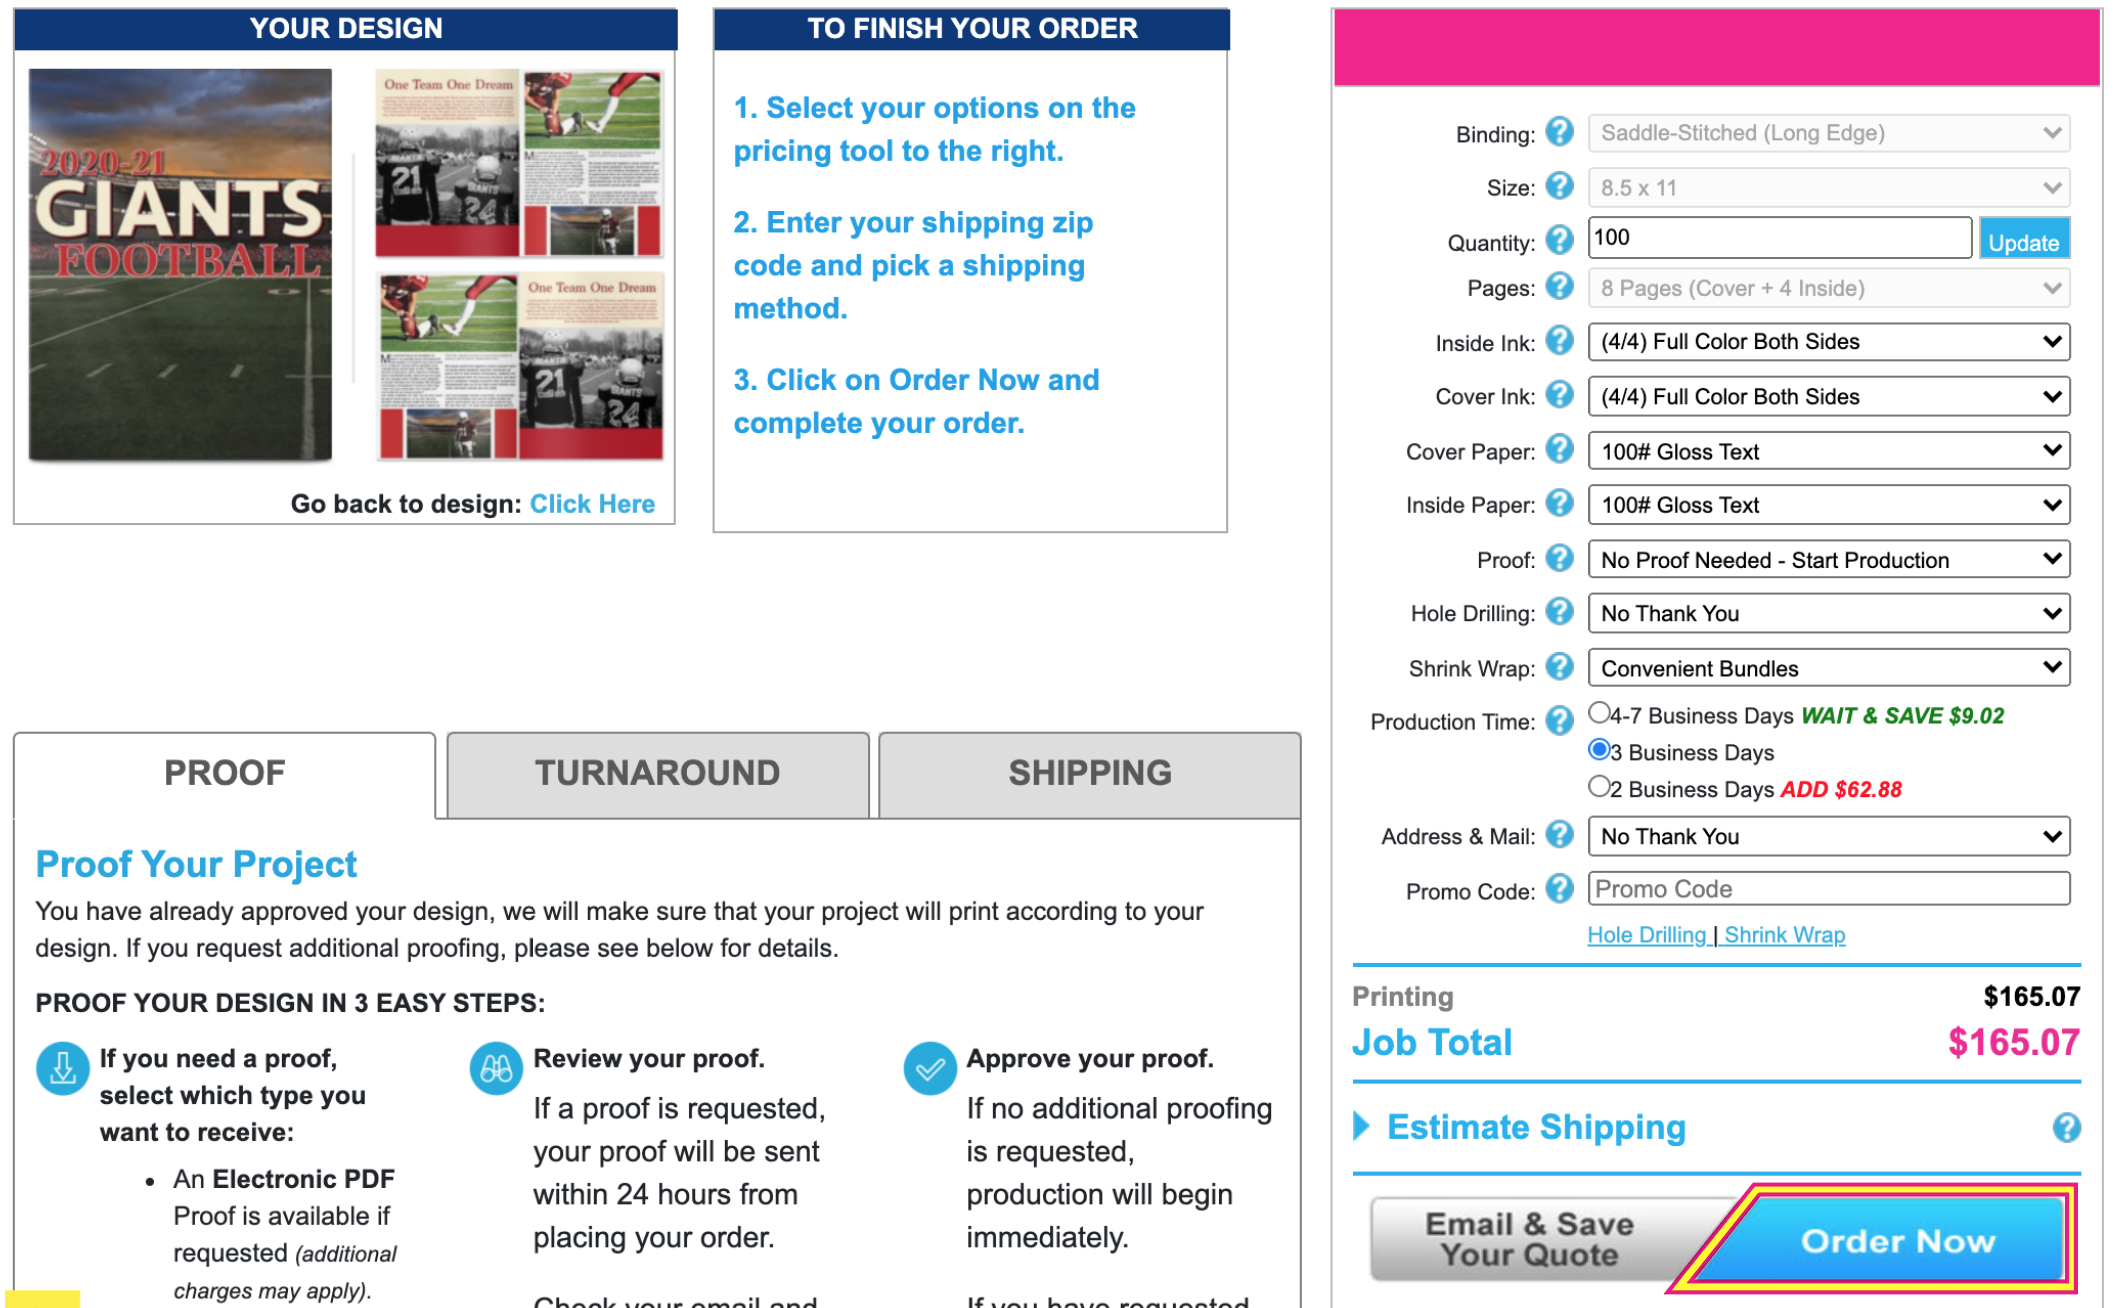
Choose the Paper, Quantity, Color, etc. you want for your Greeting Cards and click “Order Now”. You will be sent into checkout where you can complete your order.