Skip to content Skip to main navigation Skip to footer

Tag: tutorials-body

File Preparation | Size | Publisher

Size: Publisher

To ensure your price quote and design accuracy, it is crucial that the size you order matches the size of your PDF. Follow the steps below to check the size of your design in Publisher.

Checklist

  1. Open Page Setup
  2. Check the Dimensions of your Document
  3. Compare to Chosen Size in Pricing Tool

1. Open Page Setup

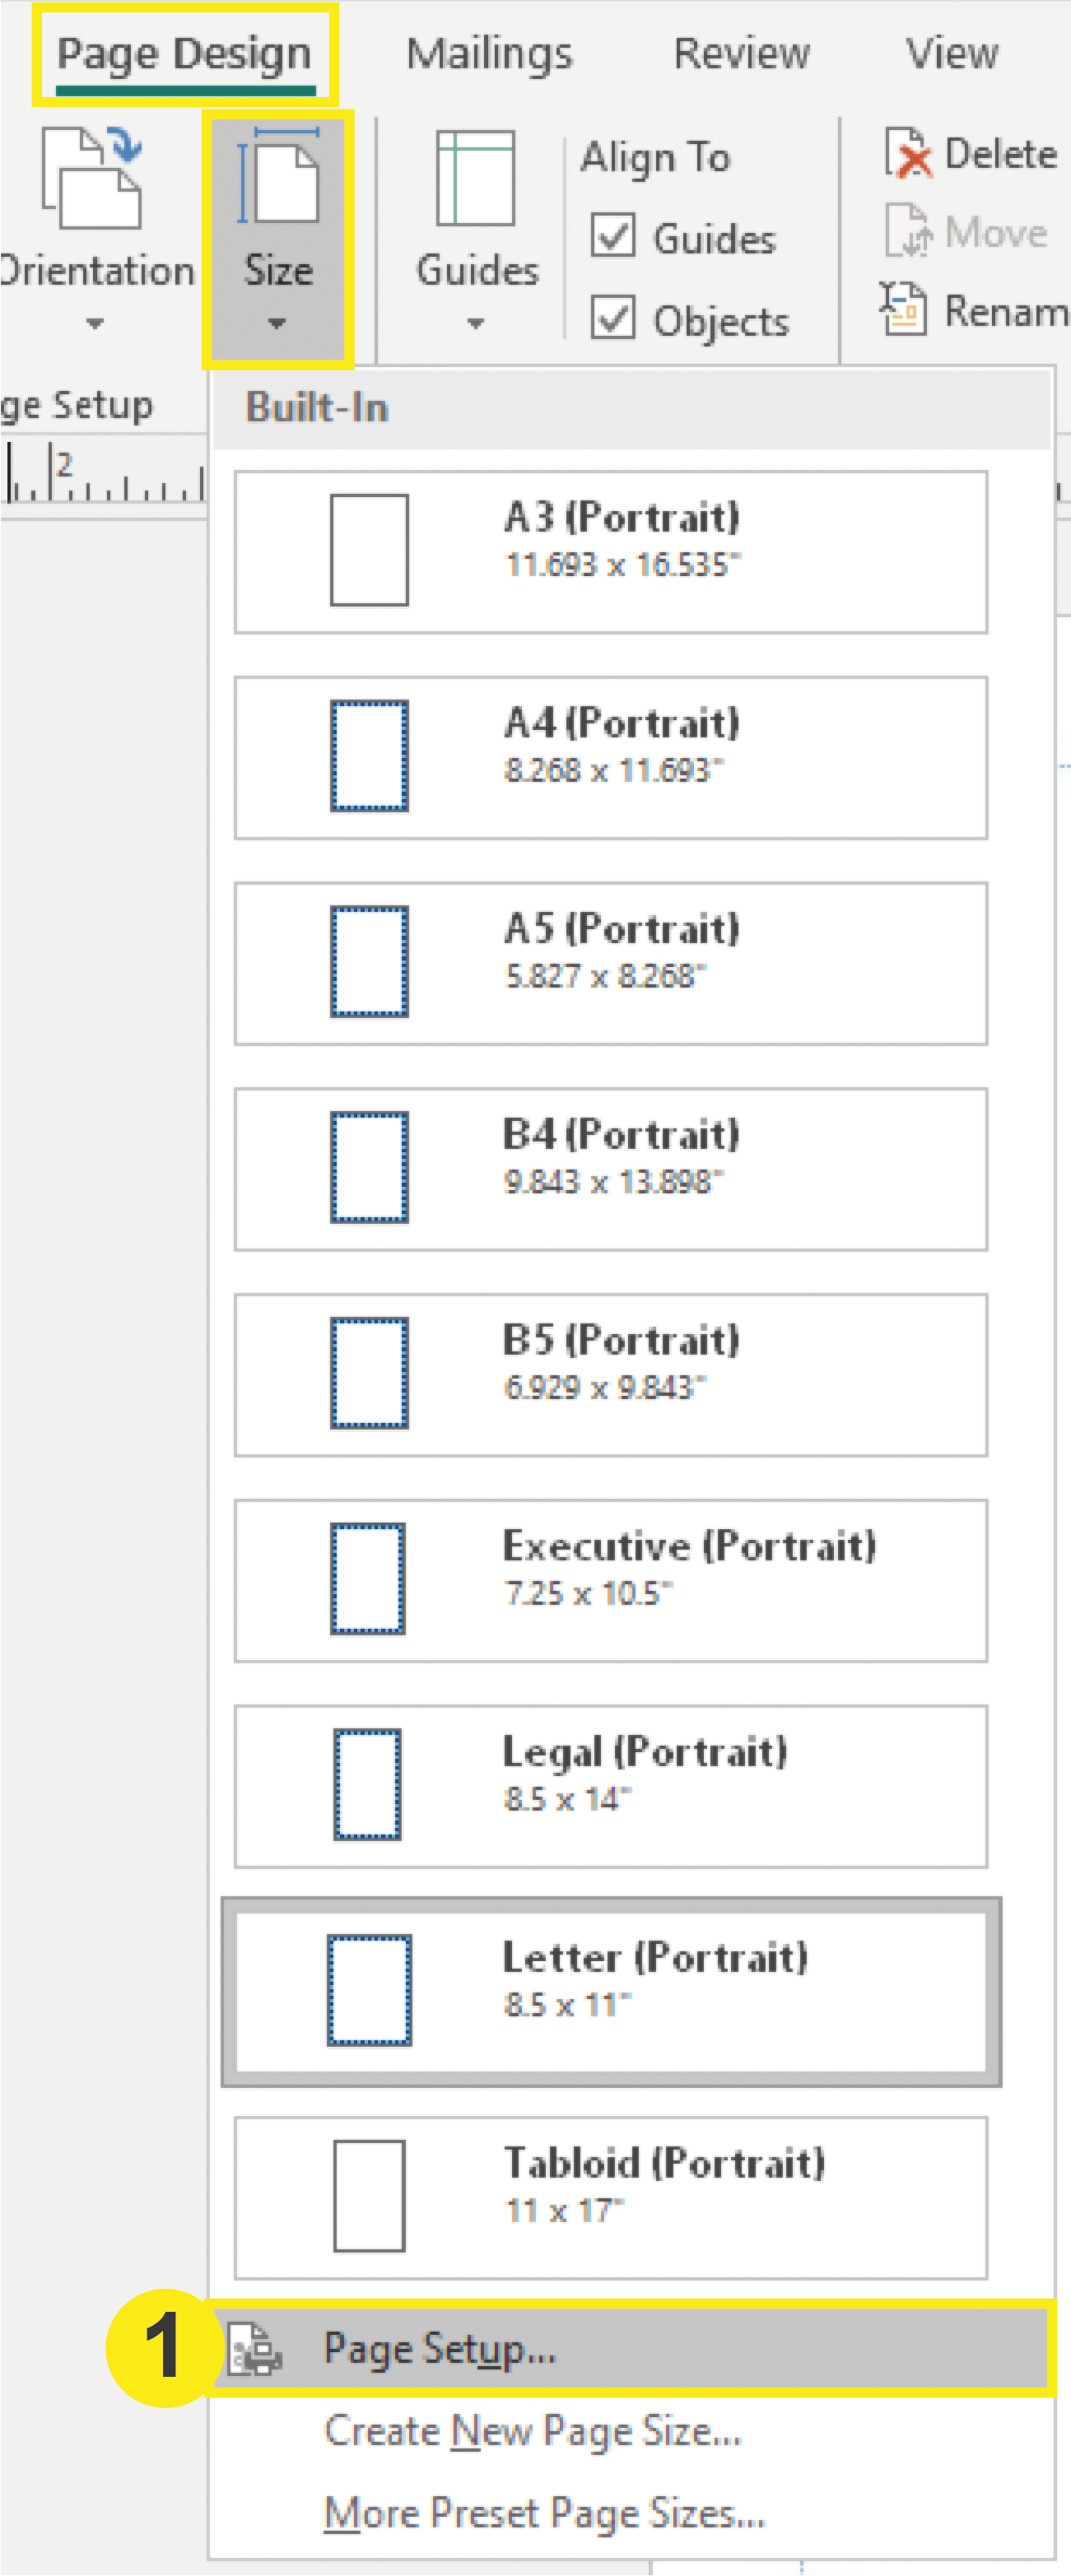
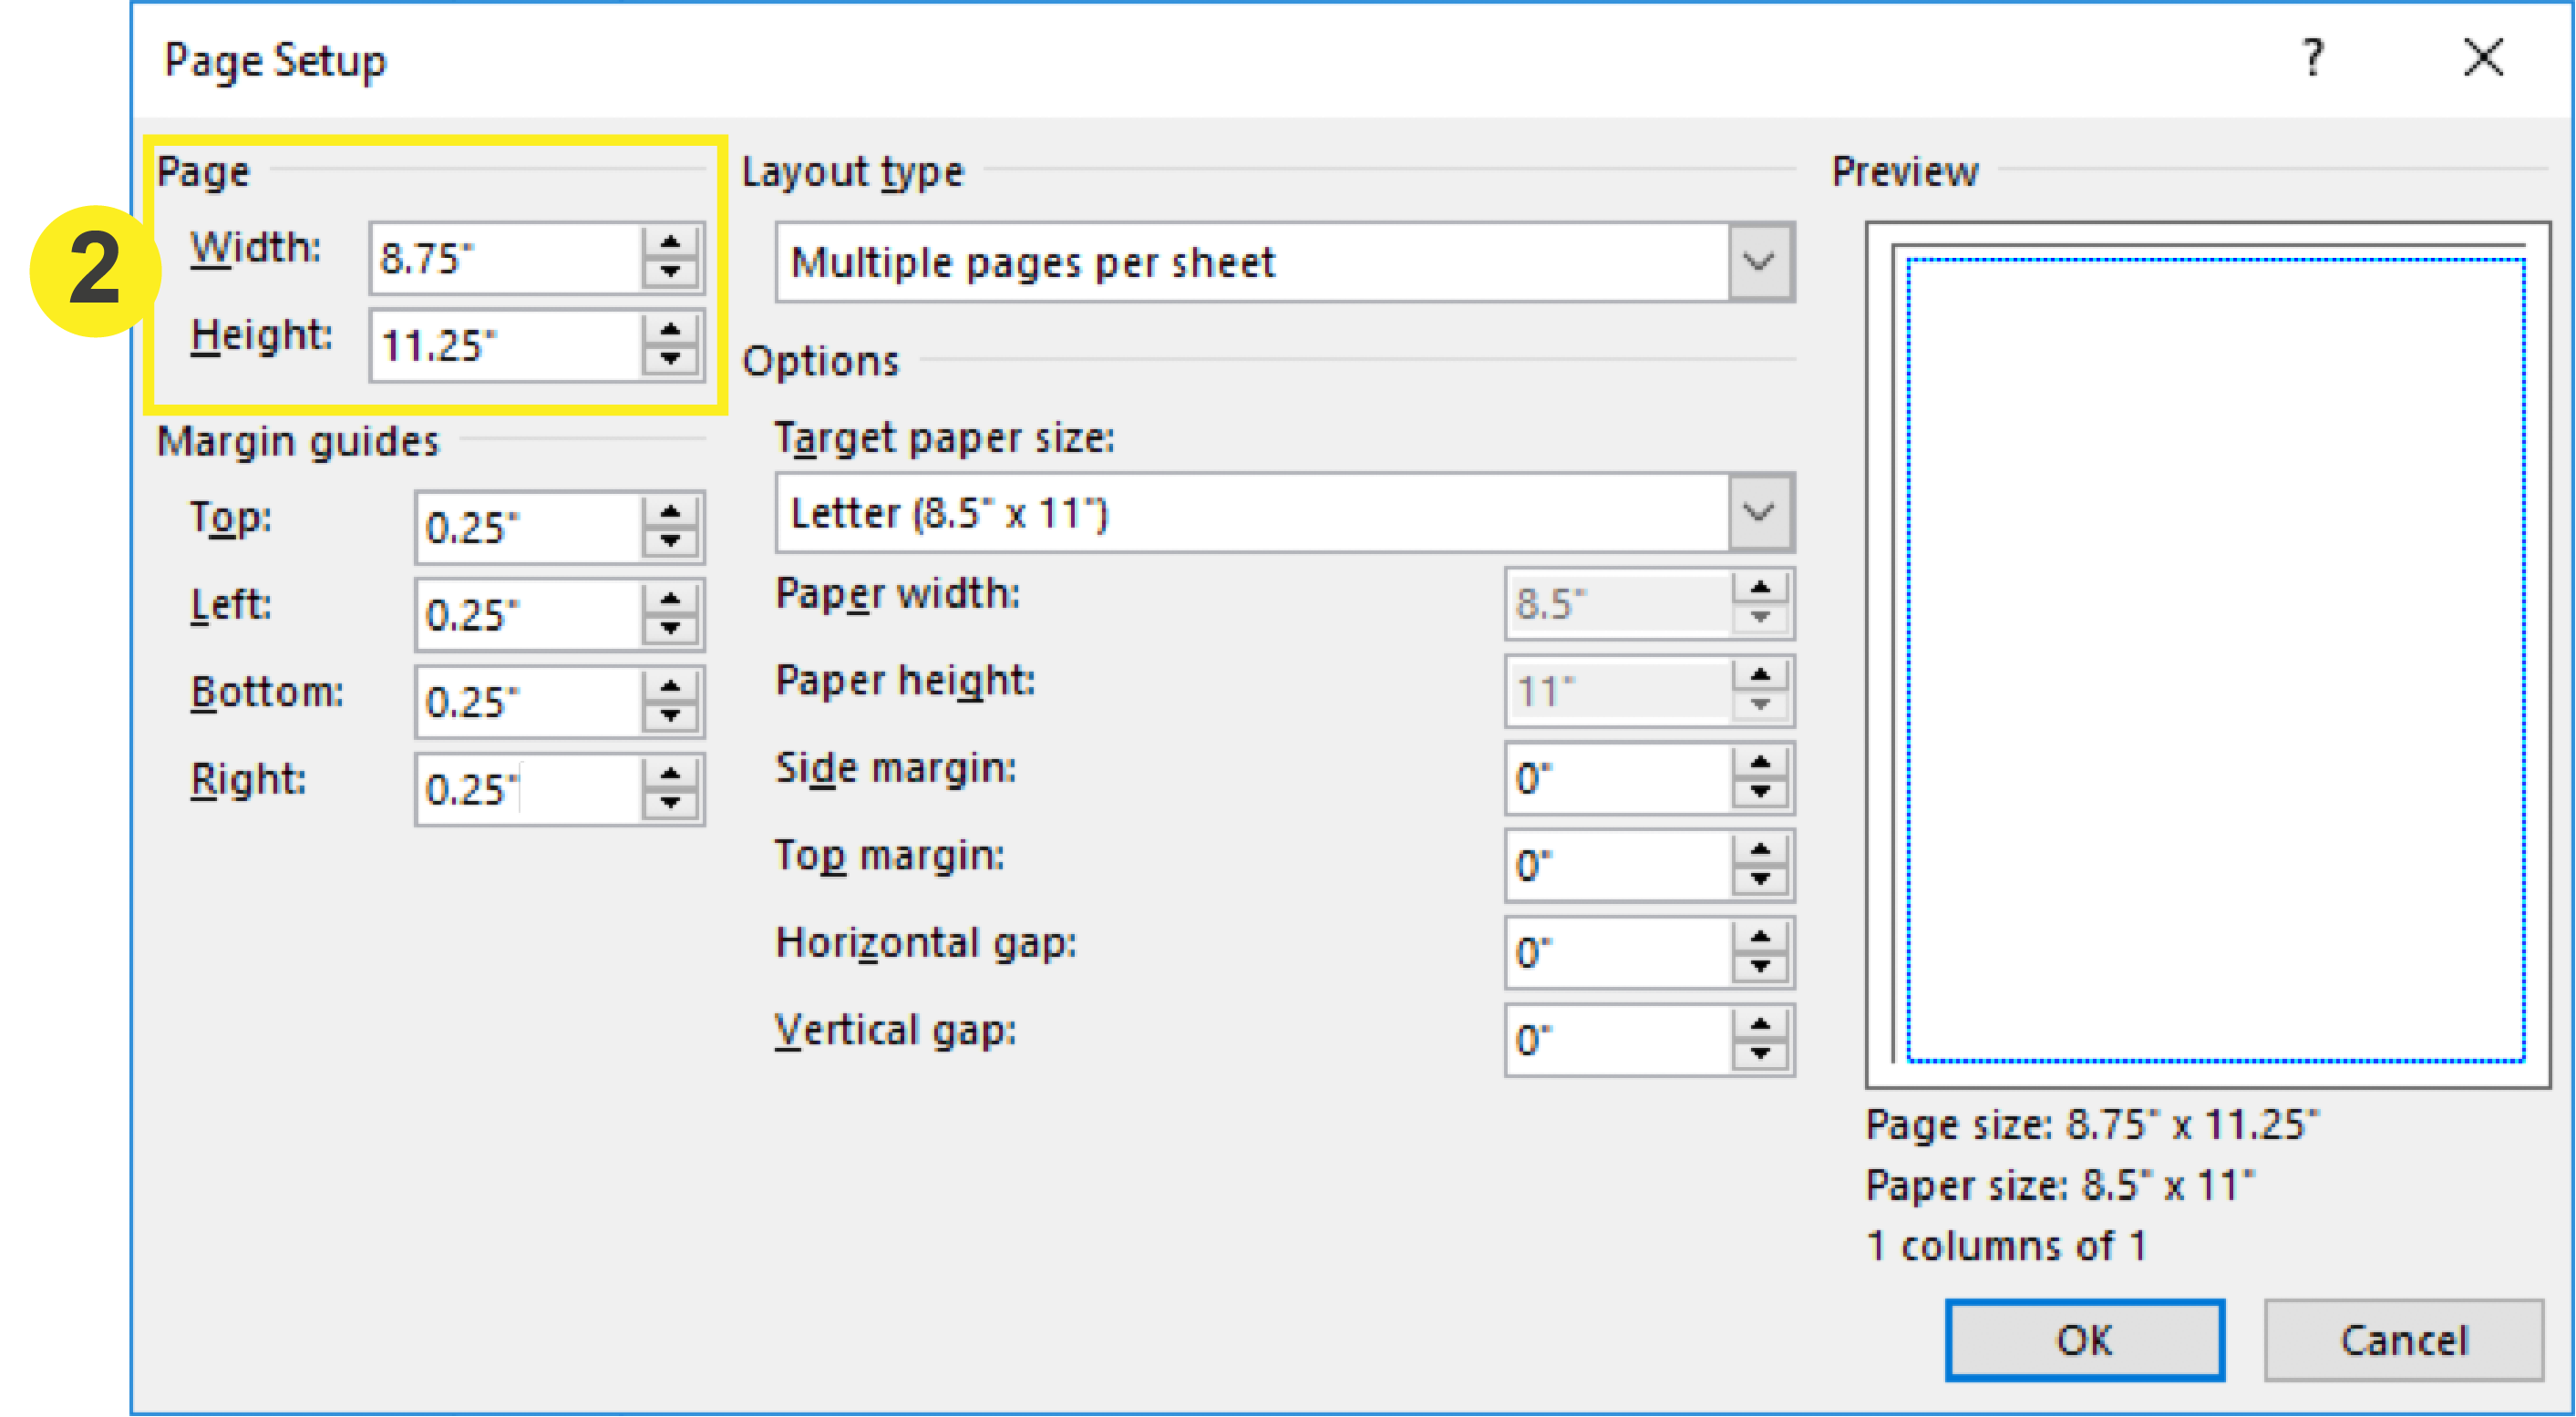
Open your document in Publisher. In the top menu, click: Page Design > Size > Page Setup. This will prompt the Page Setup window to open where you will check the dimensions of your document.
2. Check the Dimensions of your Document

In the Page Setup window, check the dimensions of the page. Your Page size should be .25 inches (width and height) larger than your final trim size (the size you will select to order in the pricing tool). For example: If your Letterhead is 8.5” x 11” then your paper size here would be 8.75” x 11.25.” This extra .25 inches accommodates for the bleed.
3. Compare to Chosen Size in Pricing Tool

Once you have checked the size of your document, compare it to your chosen size on PrintingCenterUSA’s pricing tool. The page size should be exactly the same. If they are not the same, either adjust your document size/design or the chosen size on the pricing tool.

Note: Changing the size of your product on the pricing tool may affect the price.

File Preparation | Size | Canva

Size: Canva

To see your page size in Canva, there are two options:

1. Top of Screen

You can view the top right of your screen, to the right of the title of your design. Your page size will be shown here.

2. Resize

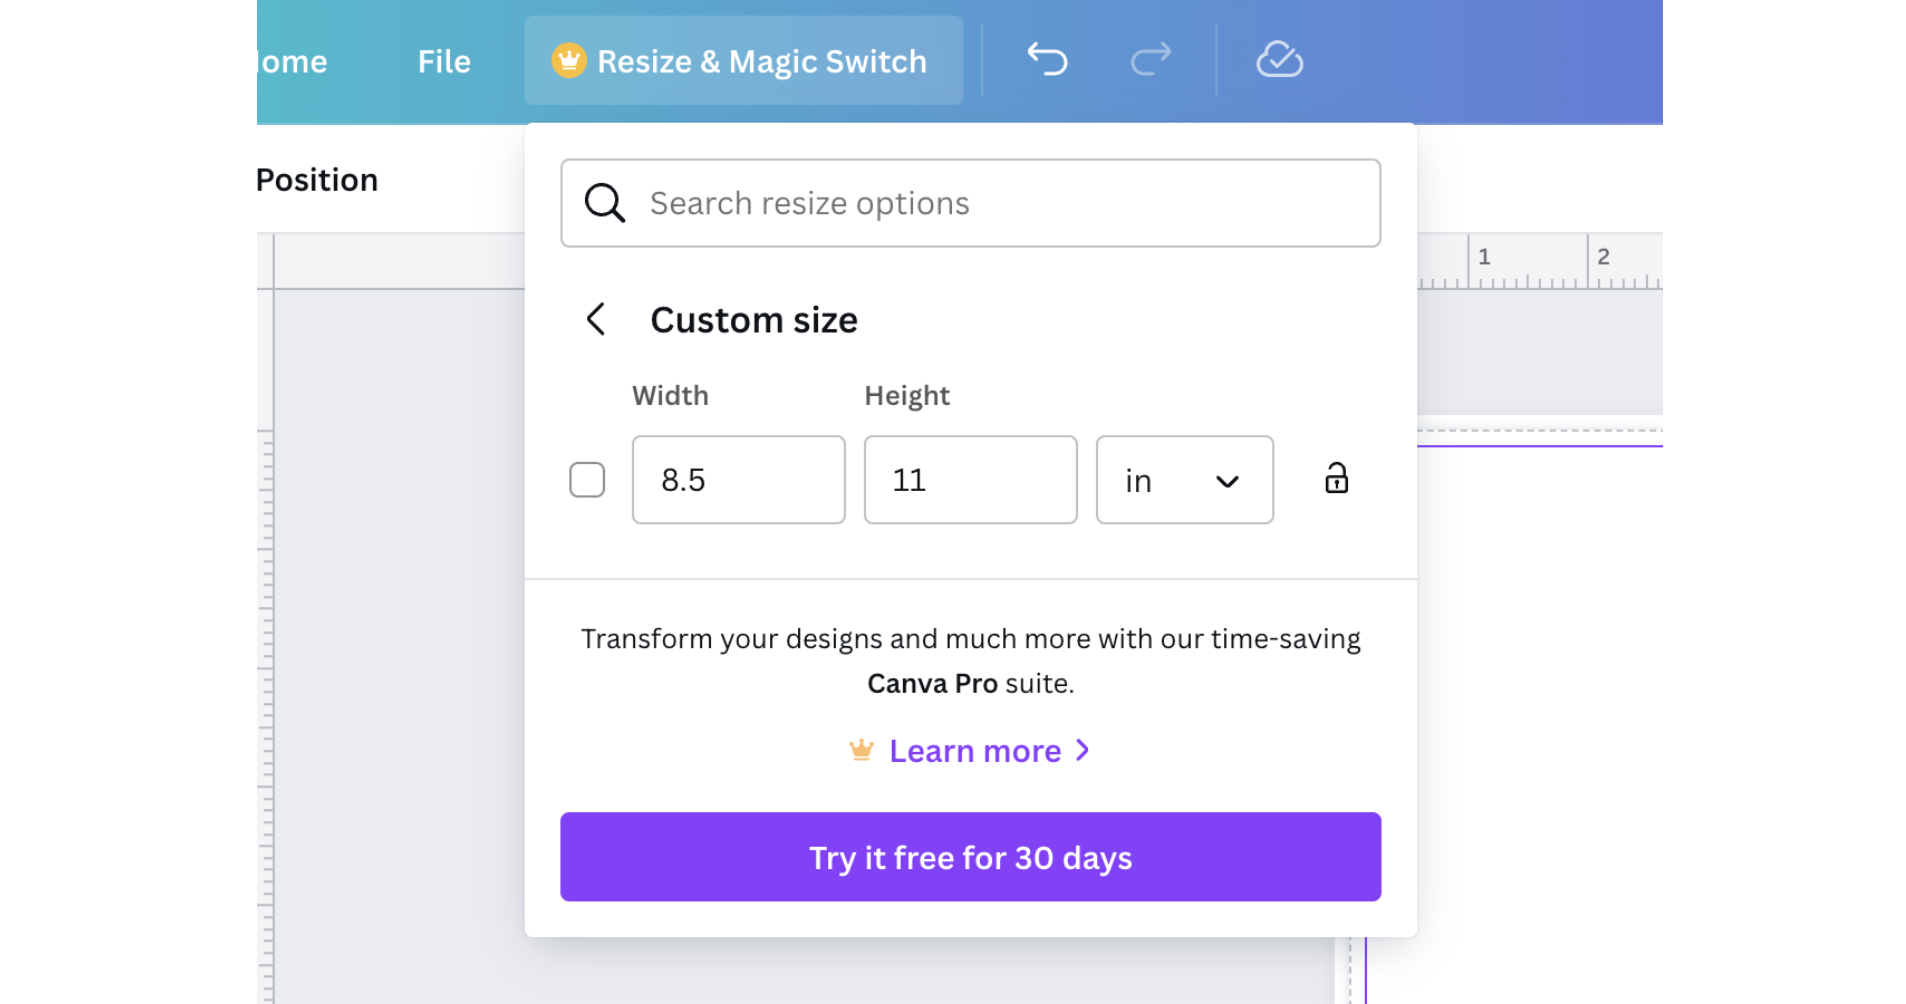
Click “Resize & Magic Switch”. In the dropdown menu, choose Resize > Custom Size. That will display your page size under “Width” and “Height”.

Warning: You cannot resize your design in the free version of Canva. You can only resize when using Canva Pro.

File Preparation | Size | Photoshop

Size: Photoshop

To ensure your price quote and design accuracy, it is crucial that the size you order matches the size of your PDF. Follow the steps below to check the size of your document in Photoshop.

Checklist

  1. Open Canvas Size
  2. Check the Dimensions of your Document
  3. Compare to Chosen Size in Pricing Tool

1. Open Canvas Size

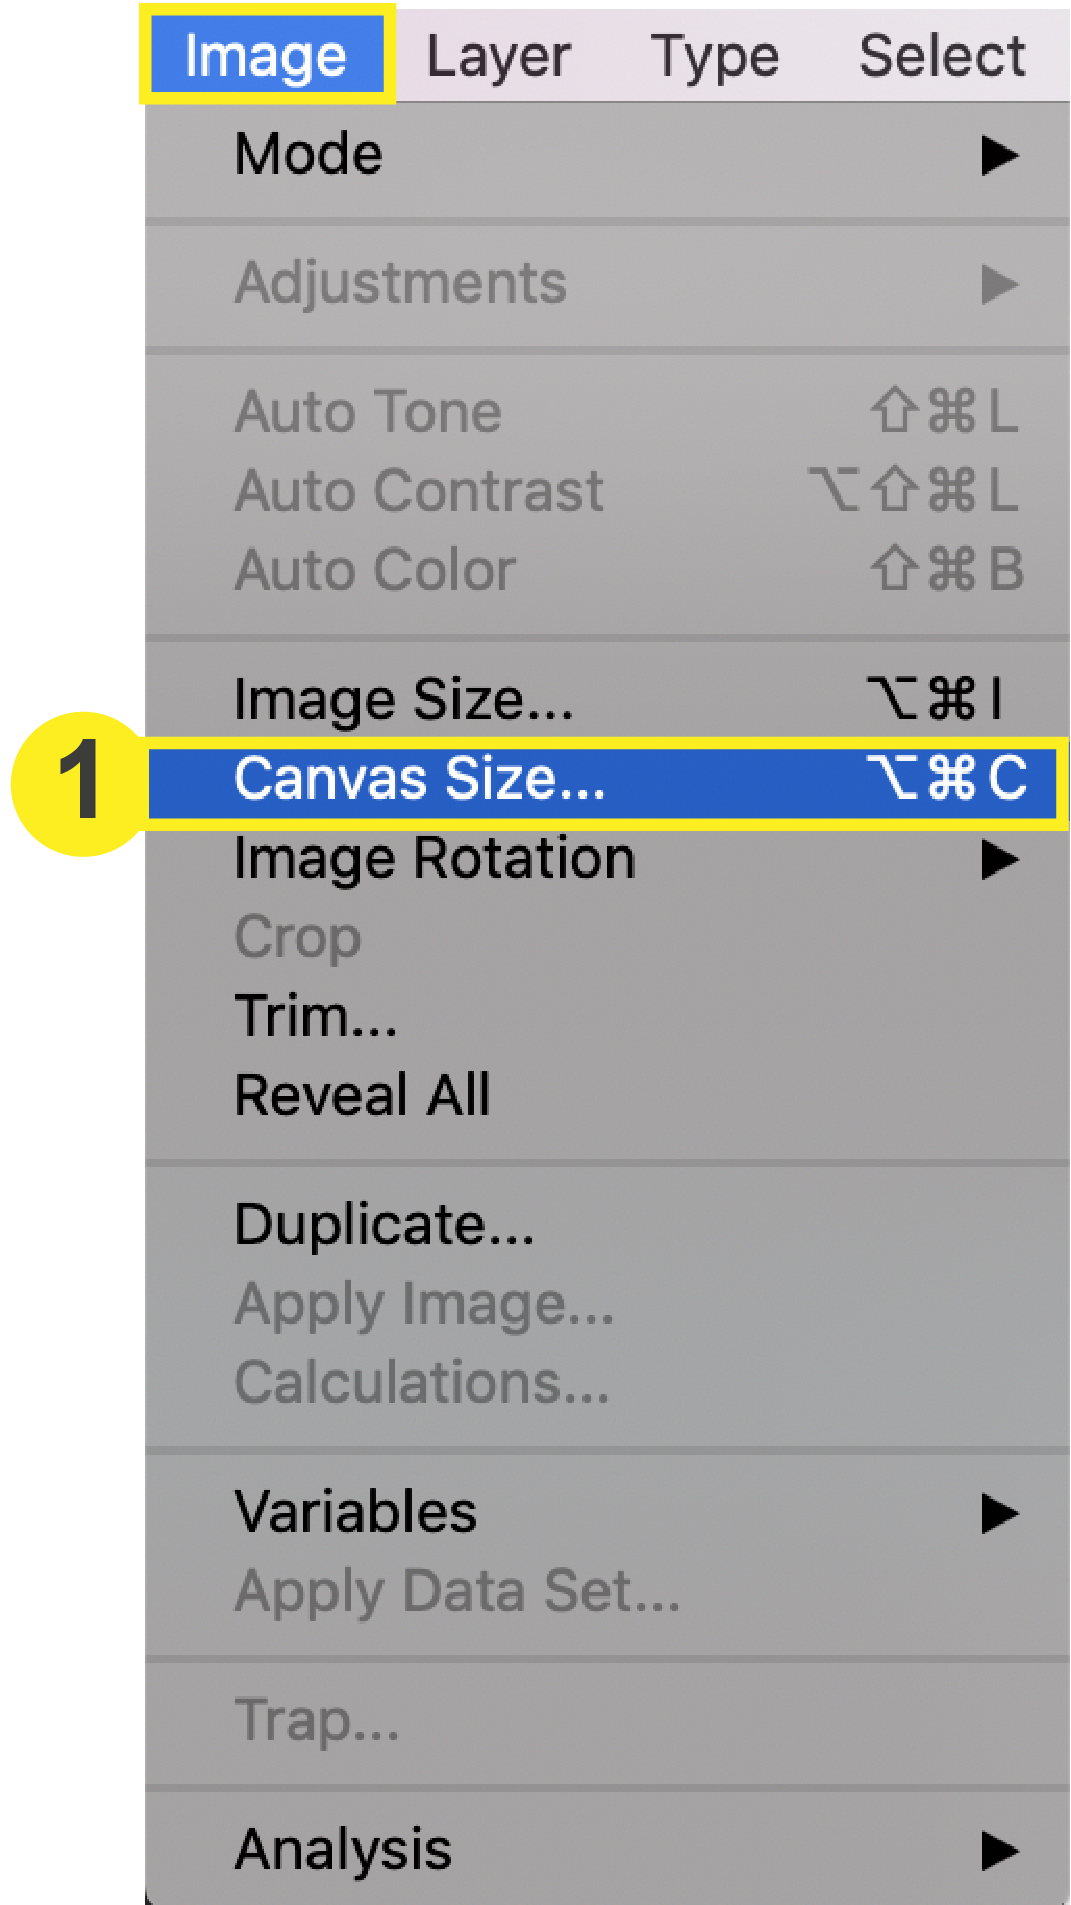
Open your document in Photoshop. In the top menu, click: Image > Canvas Size.

This will prompt the Canvas Size window to open where you will check the dimensions of your document.

2. Check the Dimensions of your Document

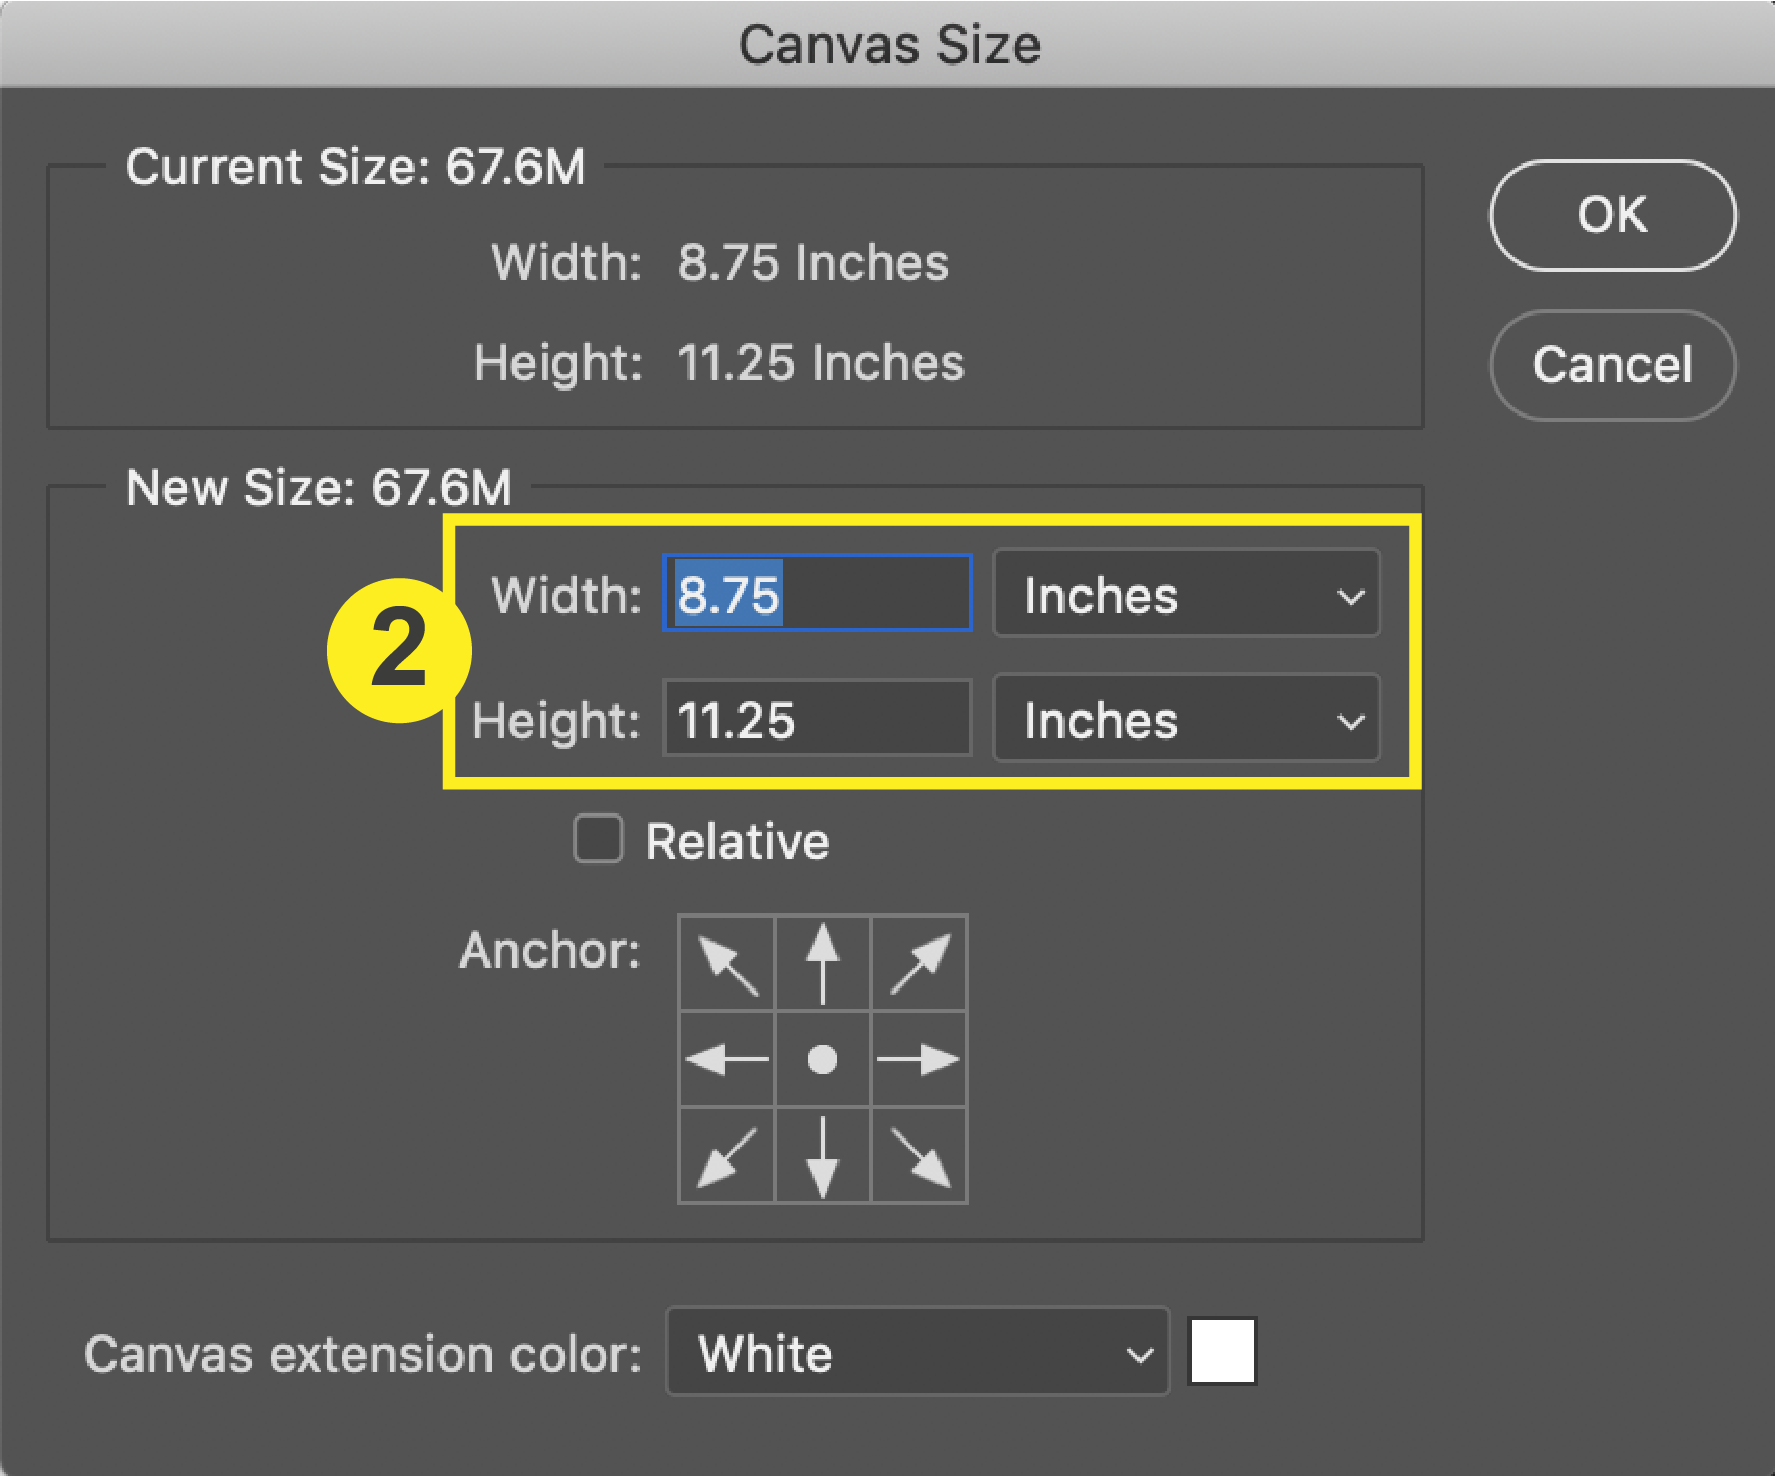
In the Canvas Size window, your canvas size should be .25 inches larger on both length and width than your final trim size (the size you will select to order in the pricing tool).

For example: If your Letterhead is 8.5” x 11” then your canvas size should be 8.75” x 11.”

This extra .25 inches is what accommodates for the bleed. To learn more about setting up bleed in Photoshop, click here. The Canvas Size window is also where you would make changes if necessary.

3. Compare to Chosen Size in Pricing Tool

Once you have checked the size of your document, compare it to your chosen size on PrintingCenterUSA’s pricing tool. The page size should be exactly the same. If they are not the same, either adjust your document size/design or the chosen size on the pricing tool.

Note: Changing the size of your product on the pricing tool may affect the price.
File Preparation | Size | Illustrator

Size: Illustrator

To ensure your price quote and design accuracy, it is crucial that the size you order matches the size of your PDF. Follow the steps below to check the size of your document in Illustrator.

Checklist

  1. Select Artboard Tool
  2. Check Your Artboard Size
  3. Compare to Chosen Size in Pricing Tool

1. Select Artboard Tool

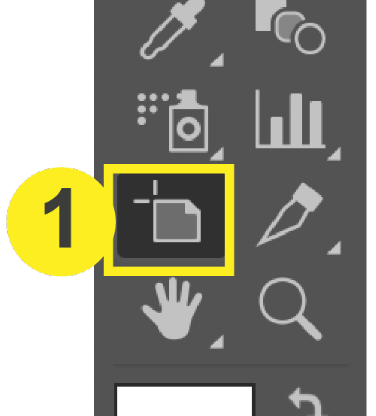
Open your document in Illustrator. In your toolbar, select the artboard tool. If you have multiple artboards (pages), then click the artboard you are wanting to check.

Note: Repeat steps 1-3 for each artboard.

2. Check your Artboard Size

Once you have clicked on the artboard you are checking, the dimensions of the artboard will show at the top of the Illustrator workspace. This is also where you would make changes if necessary.

Note: If you do not see the dimensions appear at the top, try changing your workspace to “Essentials Classic” at the top right of Illustrator.

3. Compare to Chosen Size in Pricing Tool

Once you have checked the size of your document, compare it to your chosen size on PrintingCenterUSA’s pricing tool. The page size should be exactly the same. If they are not the same, either adjust your document size/design or the chosen size on the pricing tool.

Note: Changing the size of your product on the pricing tool may affect the price.
File Preparation | Size | InDesign

Size: InDesign

To ensure your price quote and design accuracy, it is crucial that the size you order matches the size of your PDF. Follow the steps below to check the size of your document in InDesign.

Checklist

  1. Open Document Setup
  2. Check the Dimensions of your Document
  3. Compare to Chosen Size in Pricing Tool

1. Open Document Setup

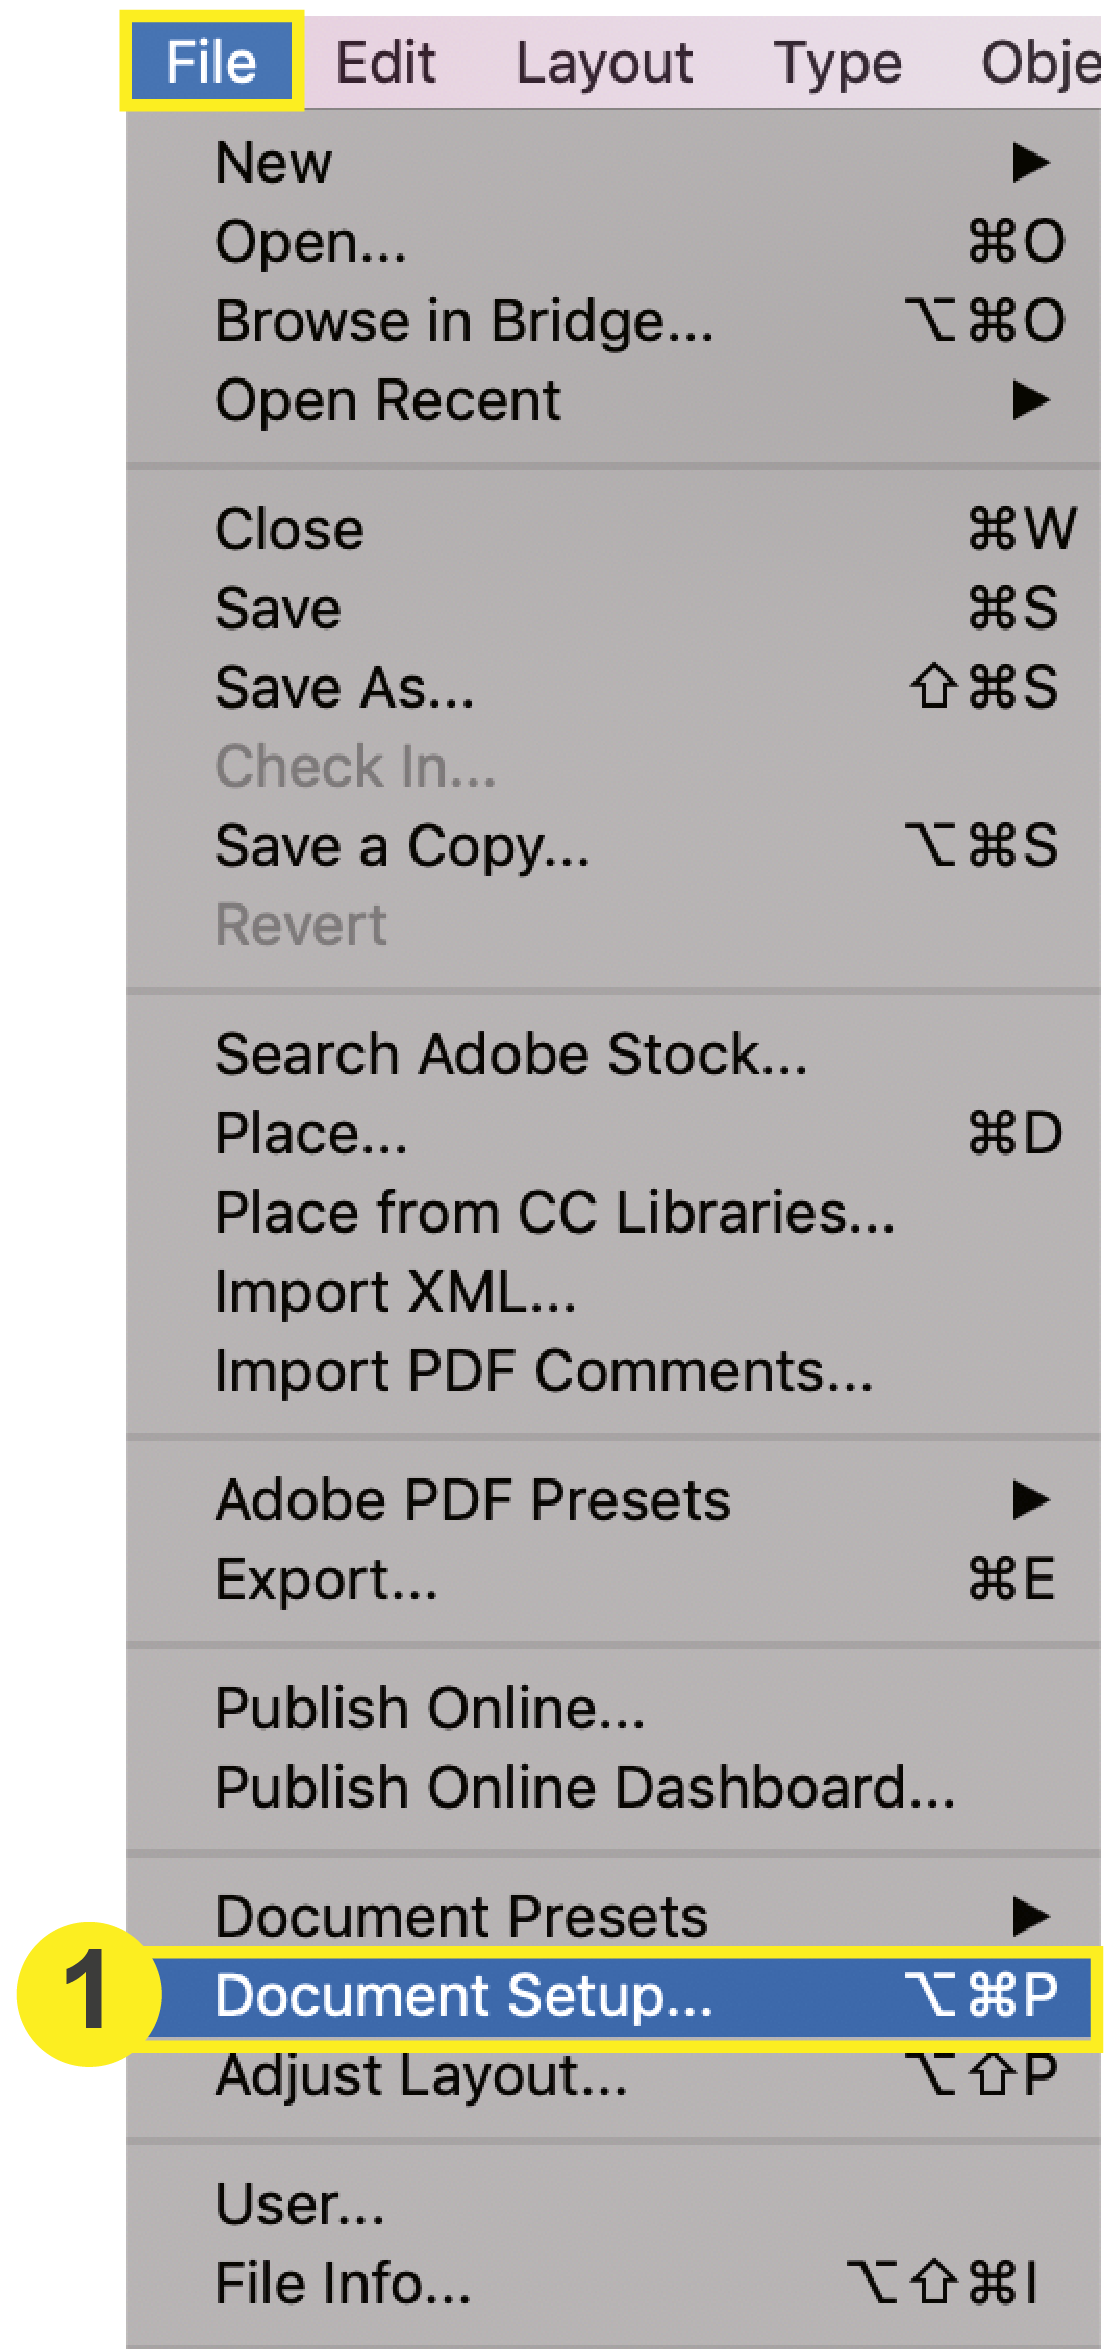
Open your document in InDesign. In the top menu, Click: File > Document Setup.

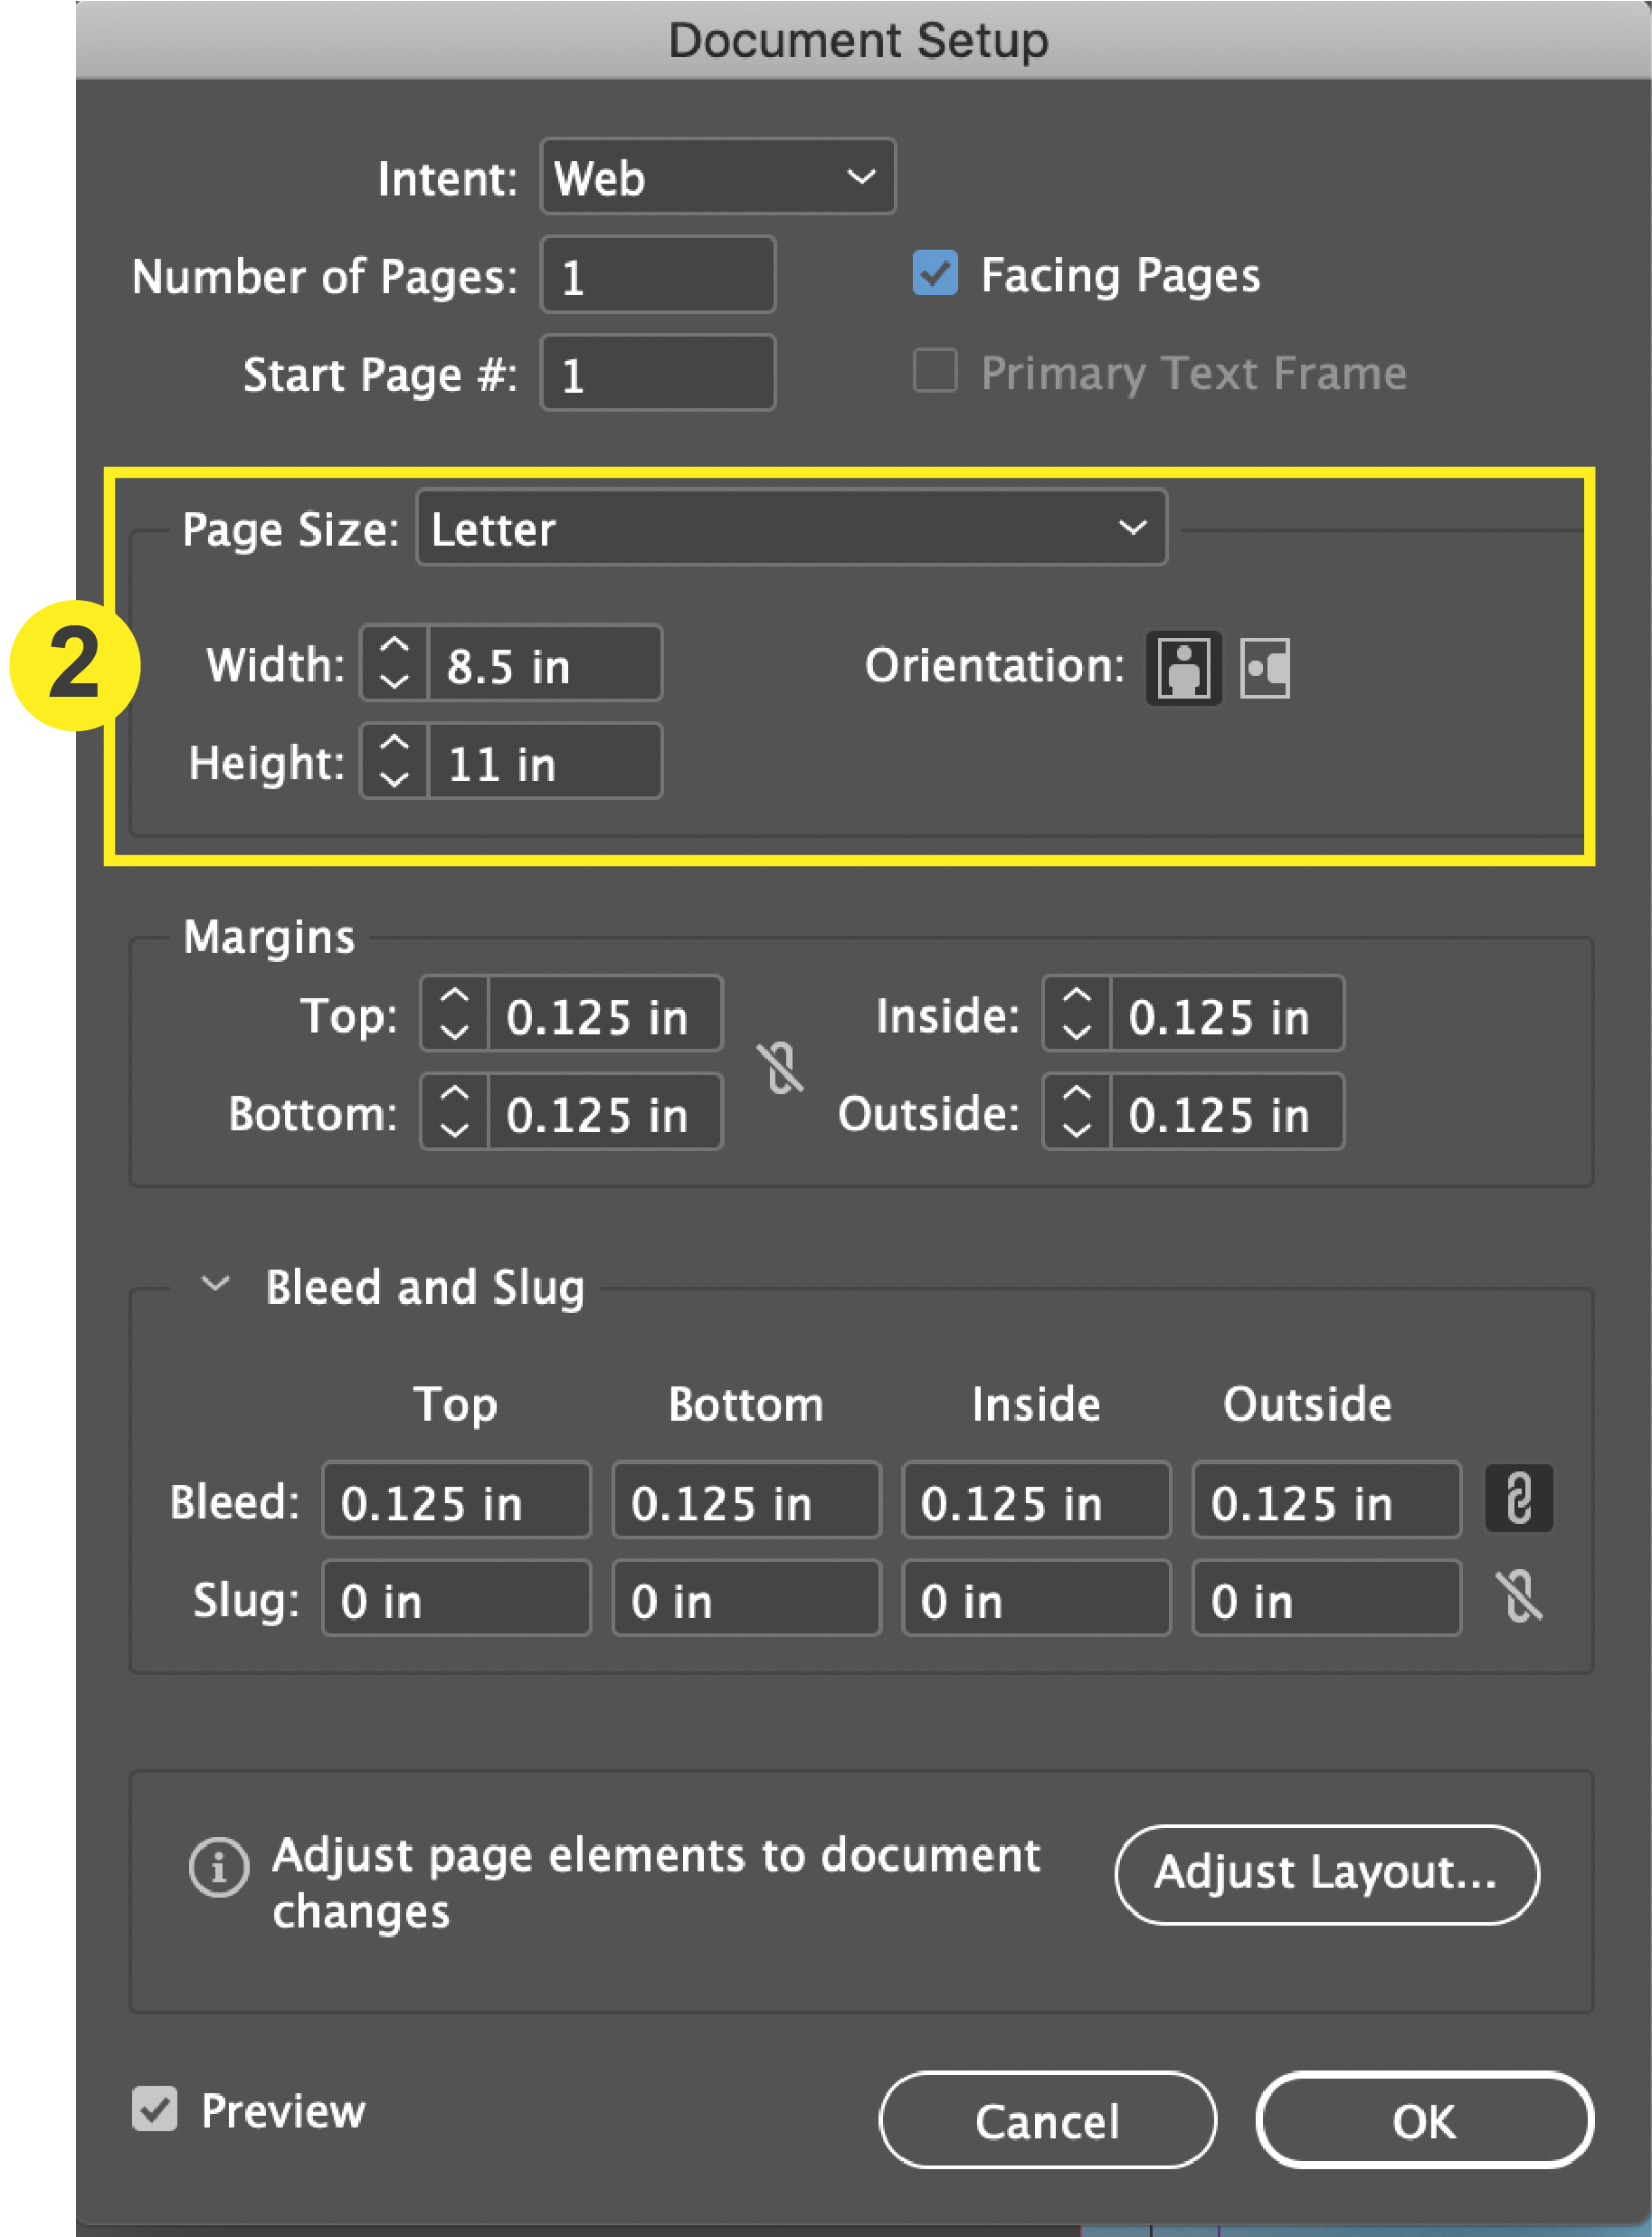
This will prompt the Document Setup window to open where you will check your dimensions.

2. Check the Dimensions of your Document

In the Document Setup window, check the size of your document. This is also where you would make changes if necessary.

Note: You can also check your bleed settings in the “Bleed and Slug” section.

3. Compare to Chosen Size in Pricing Tool

Once you have checked the size of your document, compare it to your chosen size on PrintingCenterUSA’s pricing tool. The page size should be exactly the same. If they are not the same, either adjust your document size/design or the chosen size on the pricing tool.

Note: Changing the size of your product on the pricing tool may affect the price.
File Preparation | Size | Overview

Size: Overview

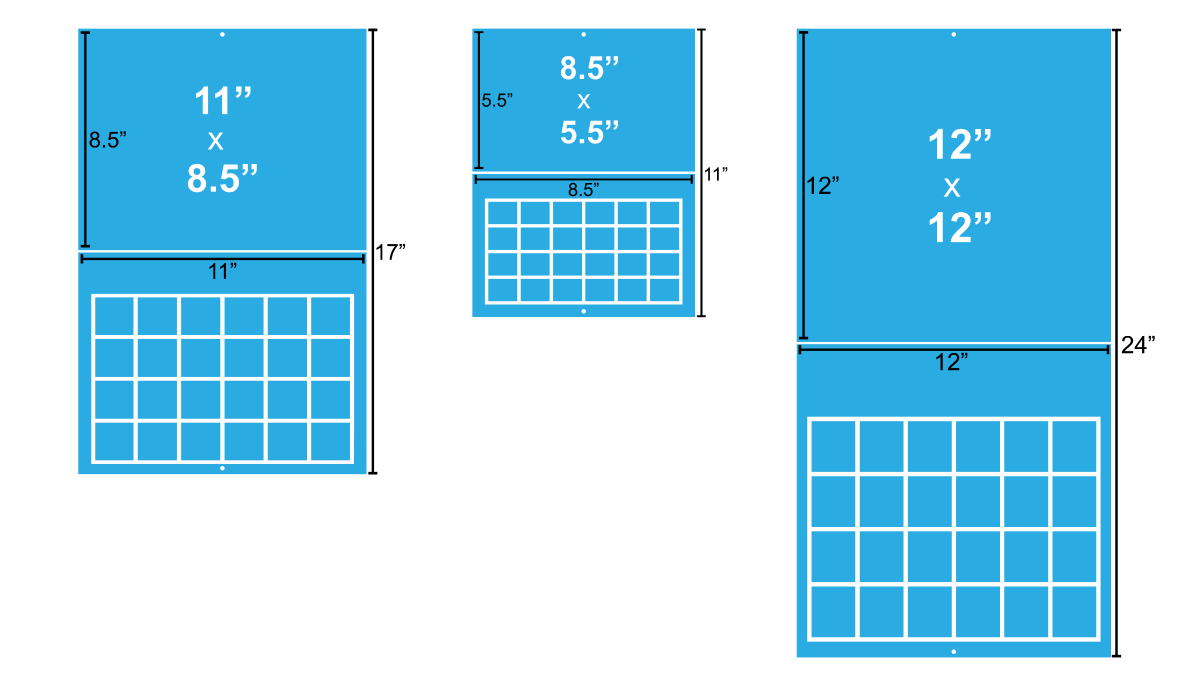
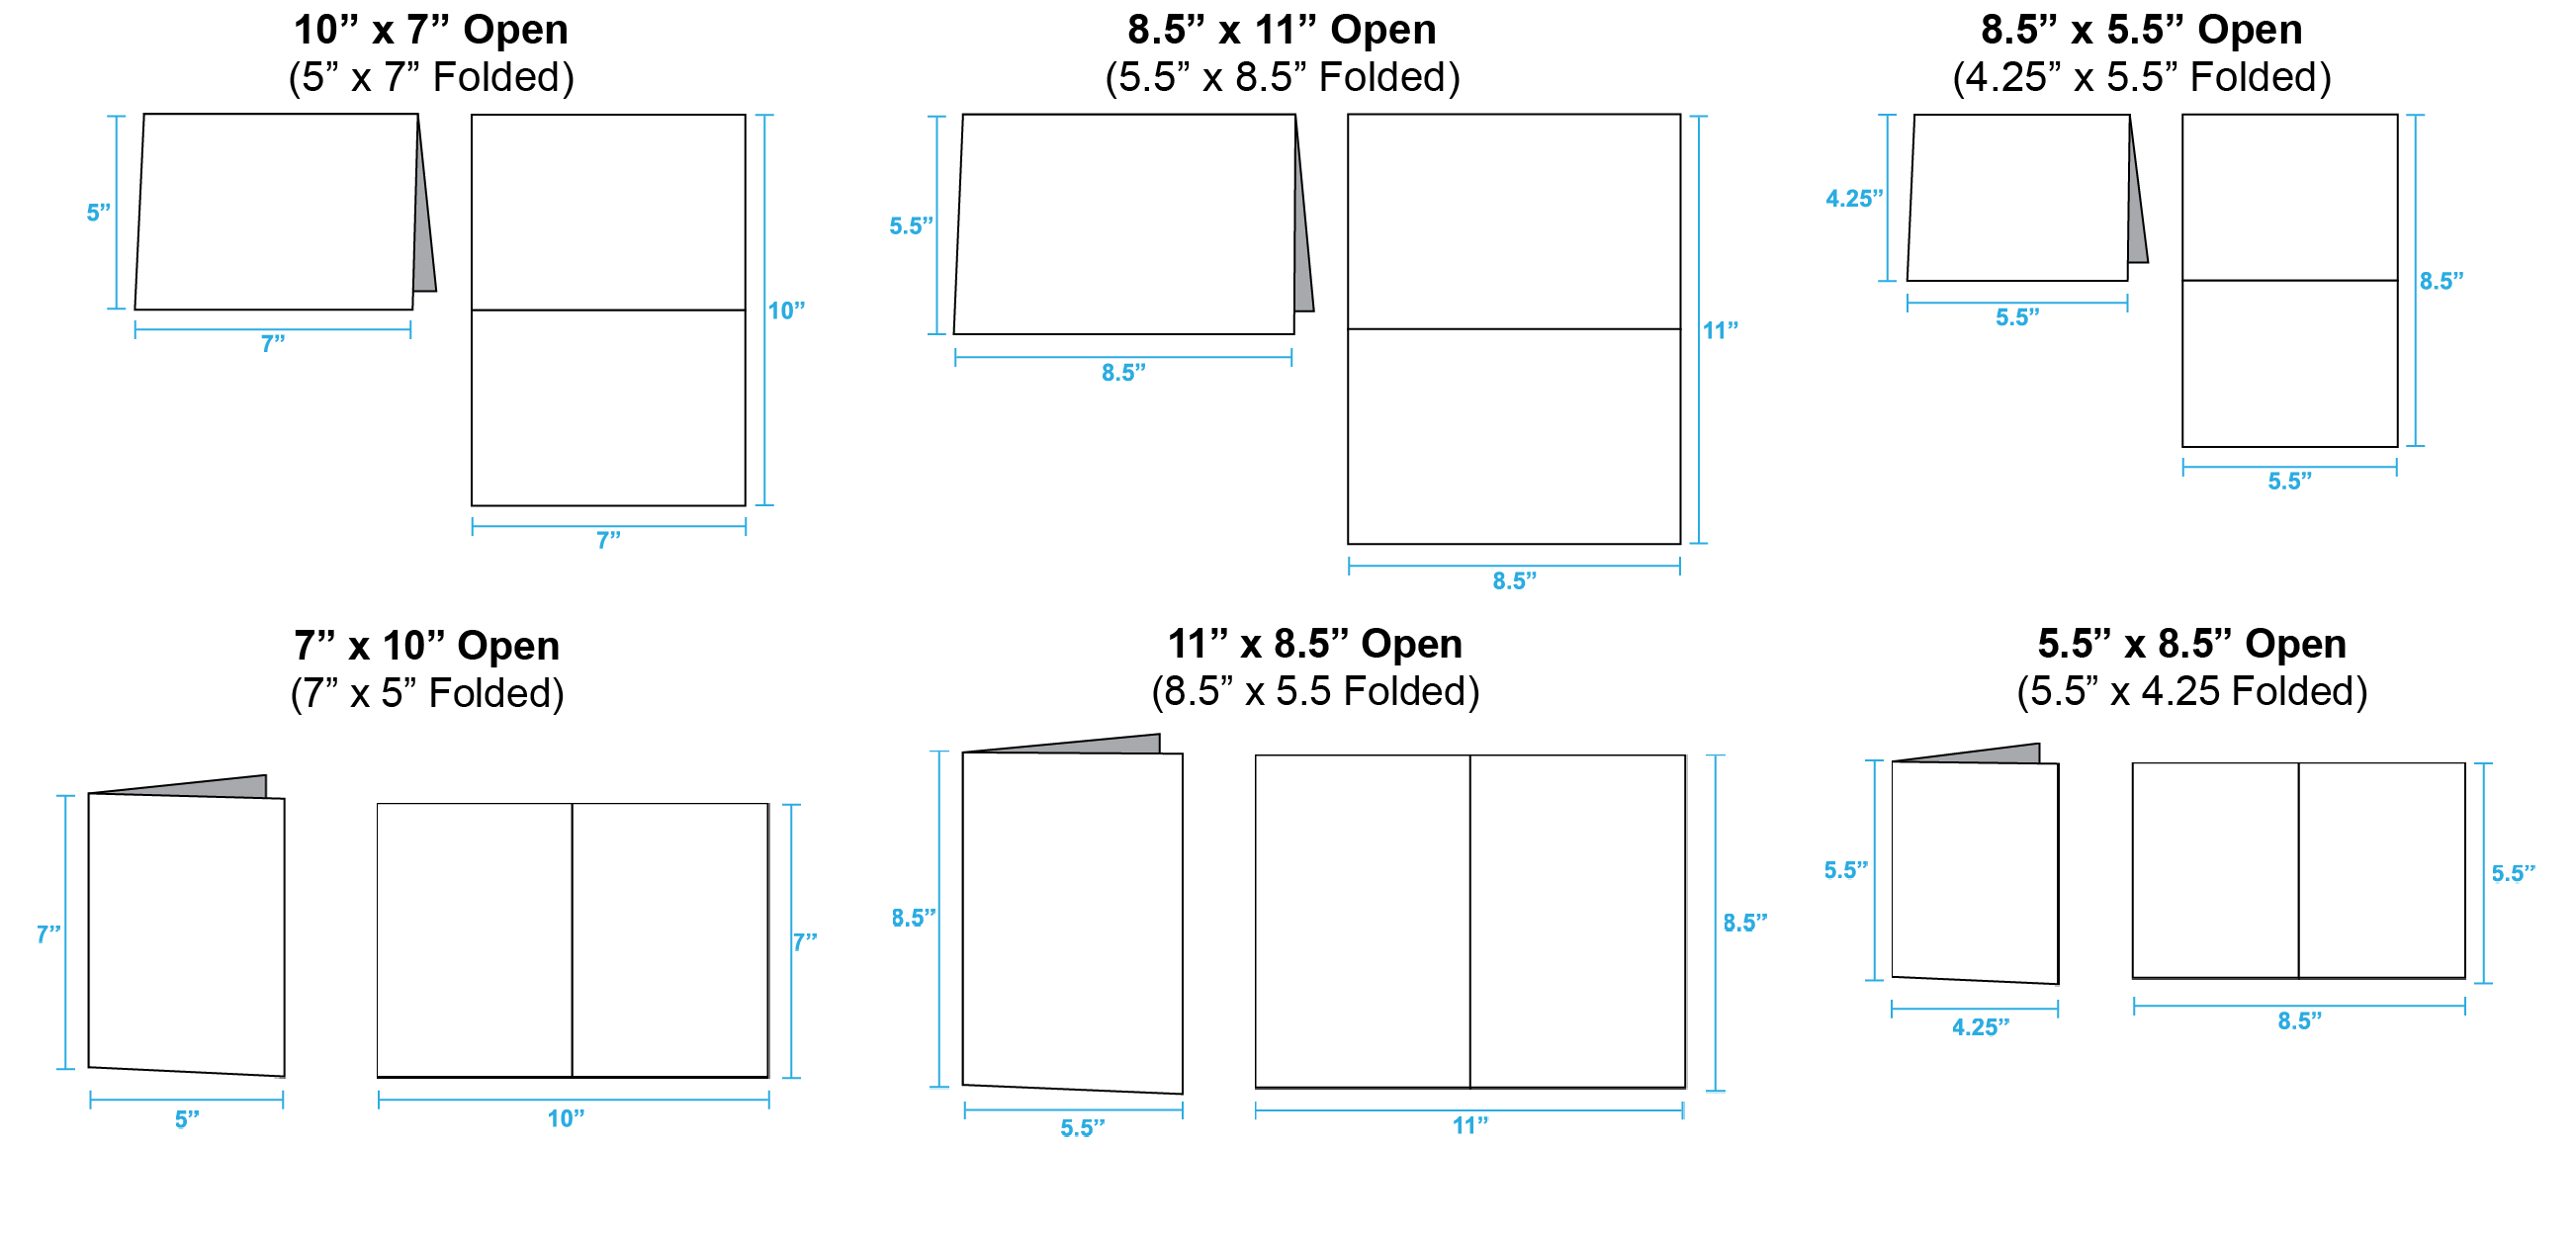
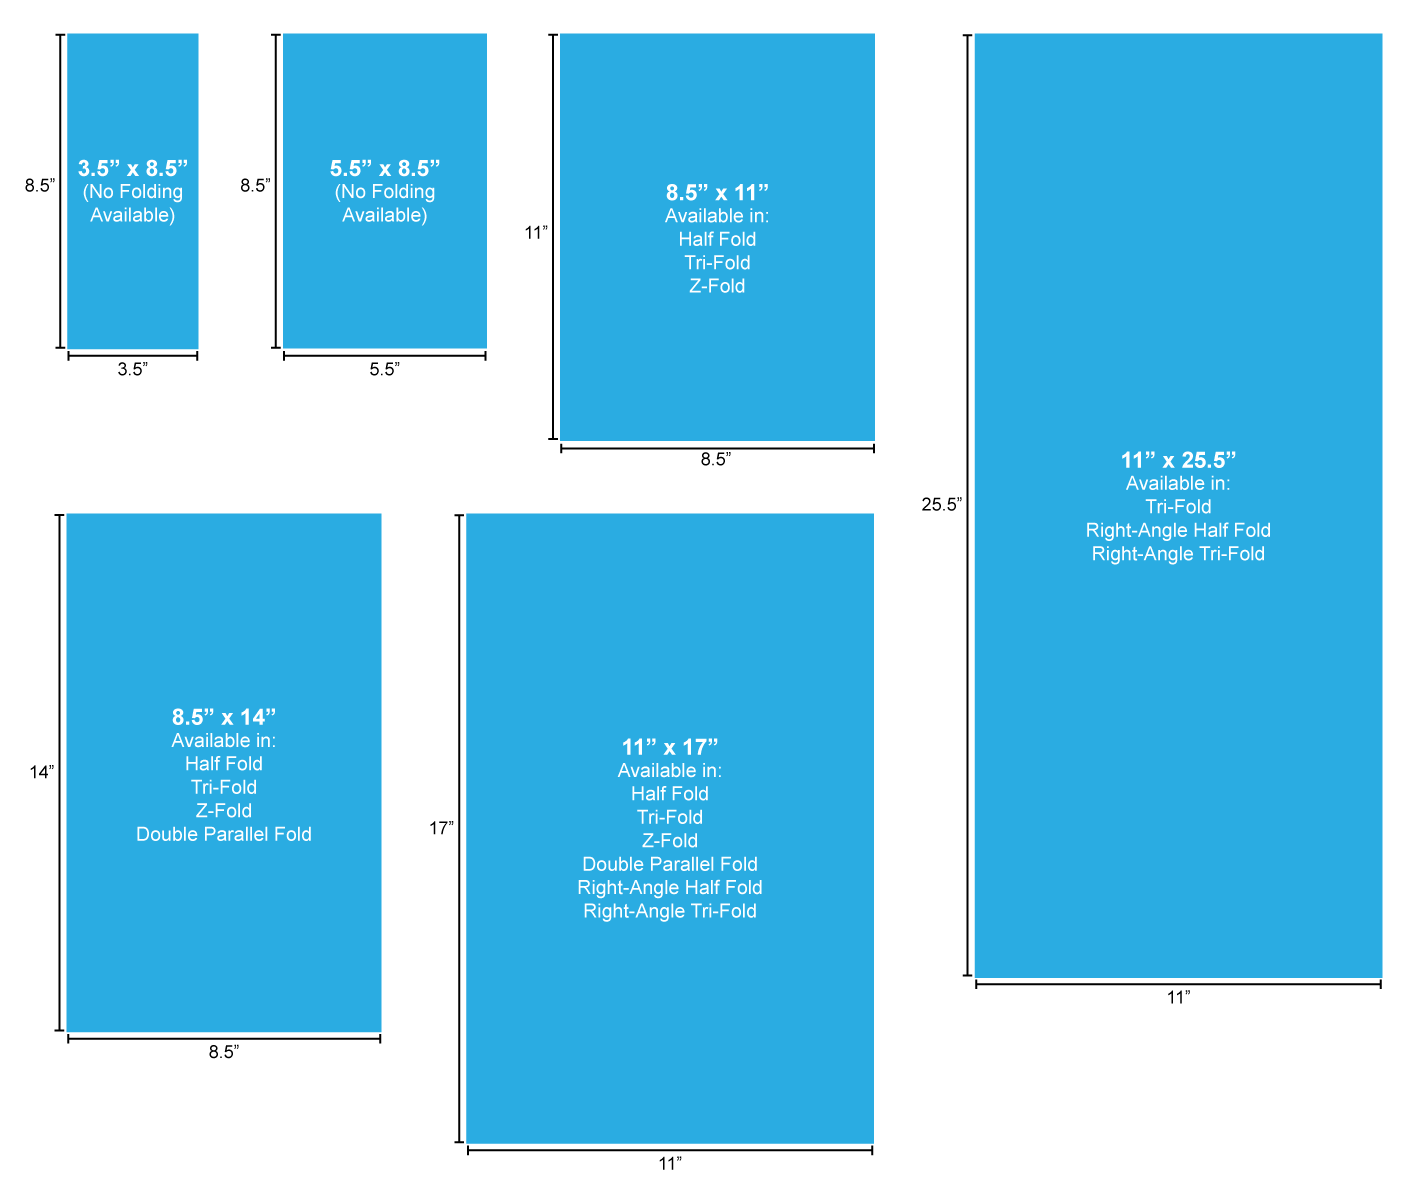
To ensure price quote and design accuracy, it is crucial that the size of the order matches the size of the PDF. The PDF (saved with bleed) should be .25 inches larger for both the length and width than your desired product size. For example, if you are ordering an 8.5” x 11” booklet, the dimensions of your PDF document (saved with bleed) should be 8.75” x 11.25”.

For more information on size, click here.

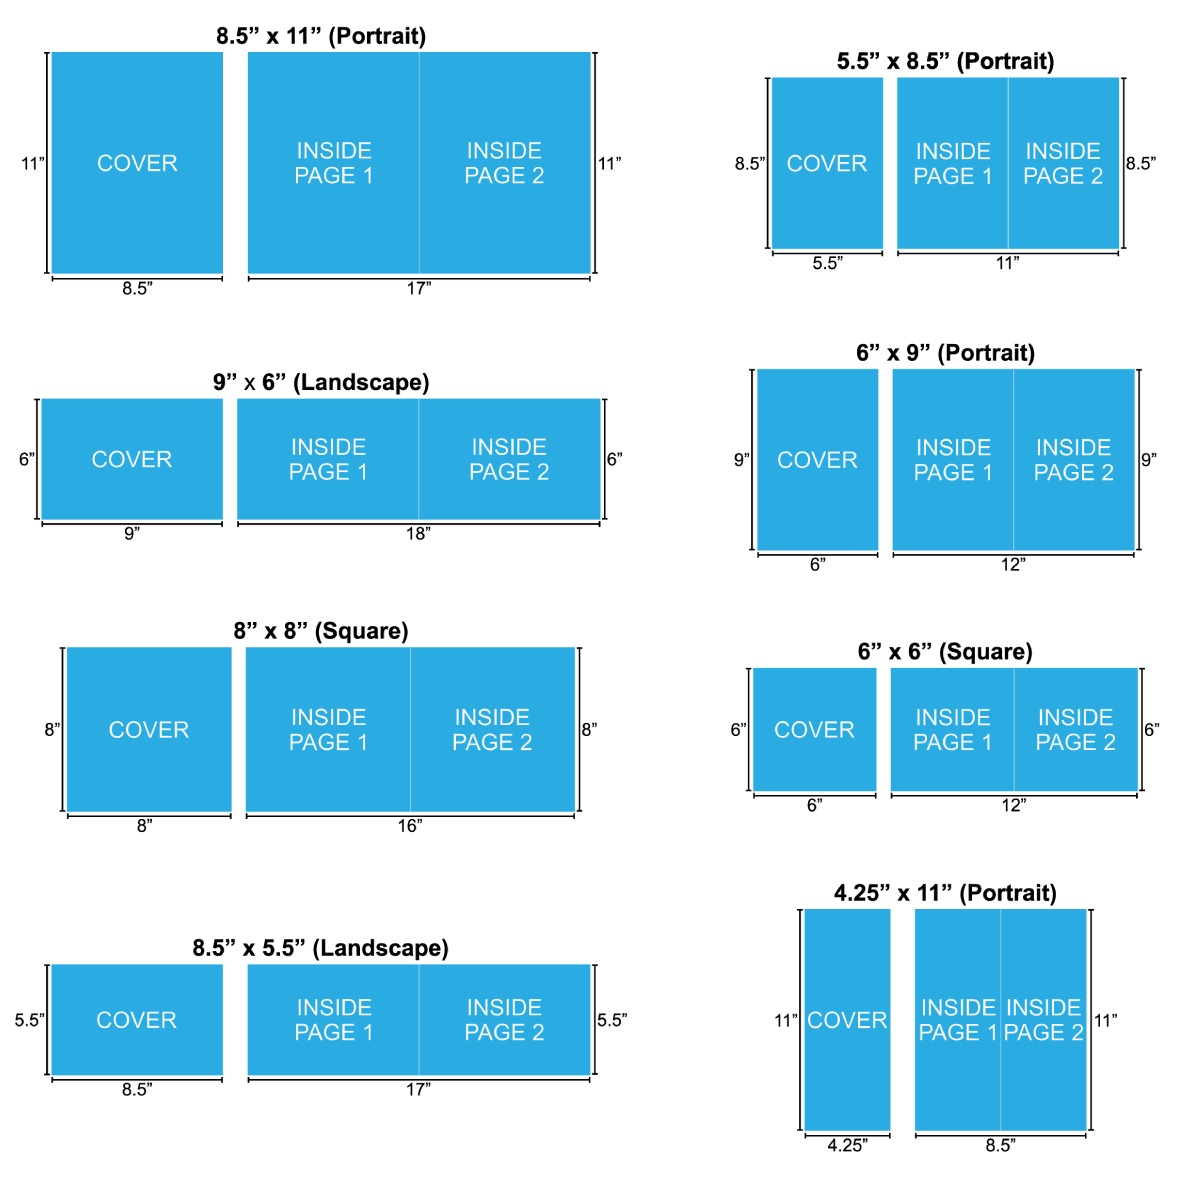
Booklets, Books, Magazines, Catalogs, Booklet Brochures, Programs, and other Multi-Page Products:

Booklet, Catalog and Magazine Sizes

Calendars:

Greeting Cards:

Greeting Card Sizes

Brochures and Flyers:

Brochure and Flyer Sizes

For a step-by-step tutorial on checking your size, select from one of the following programs:
InDesign, Illustrator, Photoshop, Canva, Publisher, and Word

Have more questions? Check our Size FAQ.

File Preparation | Page Count | Spreads

Page Count: Printer vs. Reader Spreads

Note: Please do not submit your document in printer spreads or reader spreads. Please refer to Page Count for more information on single page PDFs.

Snow

Reader Spreads

Reader Spreads show consecutive pages in two page spreads. They are in the correct order for someone to read the document.

Printer Spreads

Printer Spreads are not in consecutive page order, they are in proper order so that when the document is printed, trimmed, assembled all the pages appear consecutively.

At PrintingCenterUSA, we prefer that you upload your PDFs as single pages (see Page Count). If you happen to use reader spreads or printer spreads, let your Customer Service Representative know which spread you used so we can ensure that your final printed document is in the correct page order.

When you open up your single PDF document in Acrobat®, you should see your pages individually (see image below).

File Preparation | Page Count | Wire-O

Page Count: Wire-O Binding

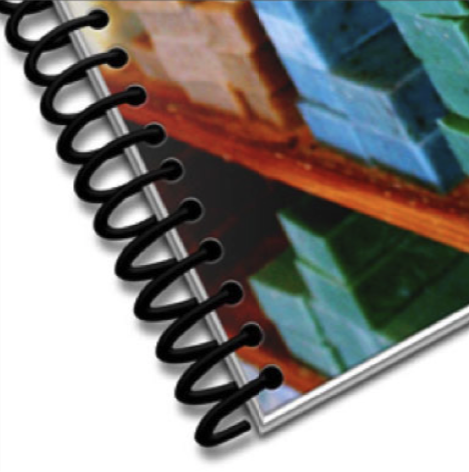
Wire-O binding is similar to Spiral binding. Wire-O binding is great for Calendars, Directories, Annual Reports, and many other types of products. They will lay flat or wrap back around themselves. It is a metal coil that passes through a row of punched holes at the edge of the printed piece. The binding can be on the left or top of the project depending on how the project is designed. Wire-o bound books are a series of parallel wire loops attached along a wire. Wire-o binding can be 1 1⁄4″ thick.

Number of Pages Accepted

We can print wire-o orders that have 8 pages – 800 pages (or up to 1 1⁄4″ inches thick) and we require them be in 2 page increments.

Design Tips

  1. You must leave extra space for the hole driling on the binding-side of your Wire-O booklet. Set your binding-side margins to be 7/8”. Refer to our free downloadable templates for a design guide.
  2. While bleeding images are fully acceptable, PrintingCenterUSA does not recommend crossover images due to the substantial gap between pages.

File Preparation | Page Count | Spiral

Page Count: Spiral

Spiral Bound Printing

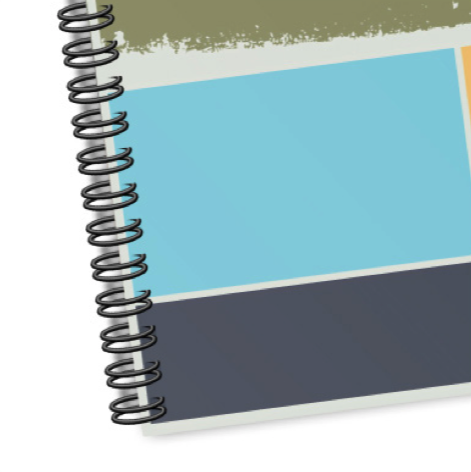
Spiral bound printing is a coil of a plastic continuous loop passing through a row of punched holes at the edge of the printed piece in a spiral. The binding can be on the left or top of the project depending on how the project is designed. Spiral bound coils are available in different colors and sizes. You cannot print on the spine or add or remove pages. Spiral bound book printing is great for manuals, directories, annual reports, calendars and many other types of products. Spiral binding can be up to 2 3⁄4“ thick.

Number of Pages Accepted

We can print spiral orders that have 8 pages – 800 pages (or up to 2 3/4″ inches thick) and we require them be in 2 page increments.

Design Tips

  1. You must leave extra space for the hole driling on the binding-side of your Spiral booklet. Set your binding-side margins to be 7/8”. Refer to our free downloadable templates for a design guide.
  2. While bleeding images are fully acceptable, PrintingCenterUSA does not recommend crossover images due to the substantial gap between pages.

File Preparation | Page Count | Perfect Binding

Page Count: Perfect Bound

Perfect Bound Printing

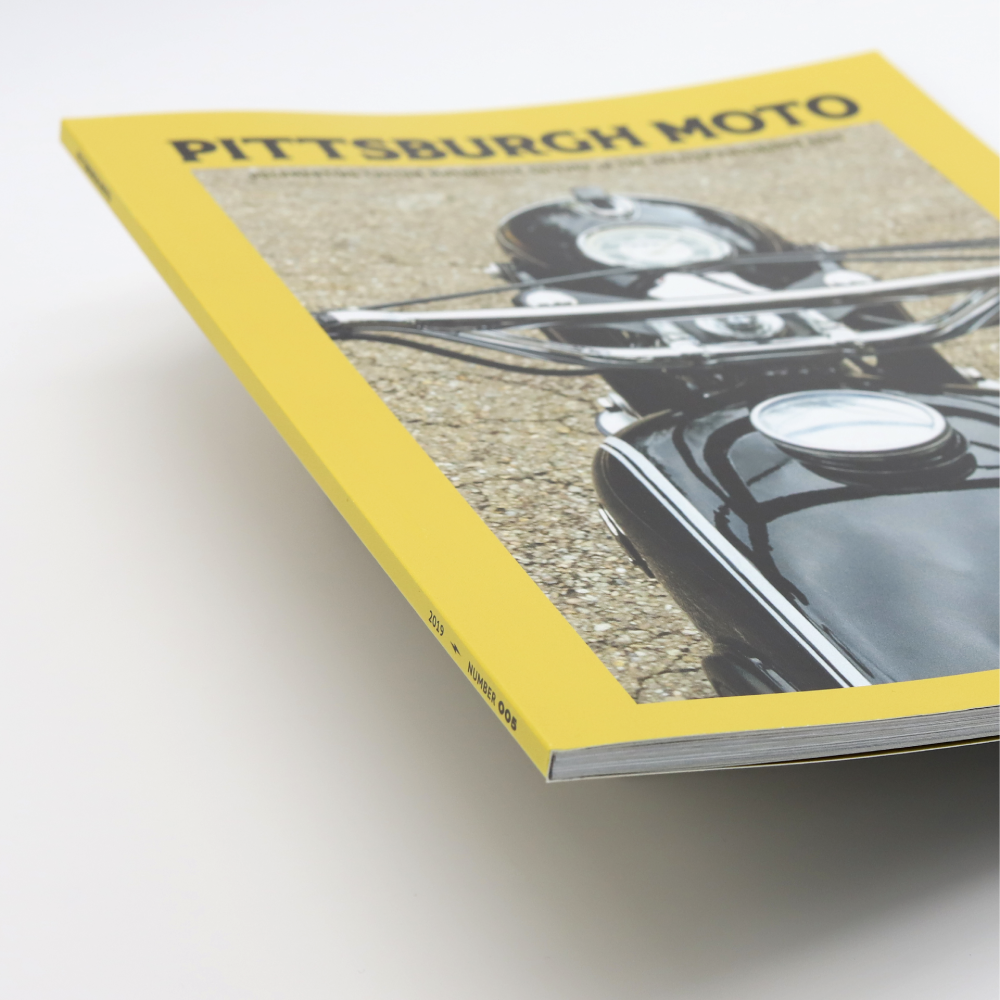
Printed sheets are gathered into a book, one on top of the other and the edges are ground off and the book is glued into a wrap around cover and then trimmed to size. This type of perfect bind creates a square spine. They provide an attractive looking durable book. They do not lay flat. Perfect bound book printing is great for directories, magazines, manuals, year books or any type of booklet that has many pages.

Number of Pages Accepted

The minimum number of pages is 28 pages to 2” thick maximum. 2 page increments are required when ordering.

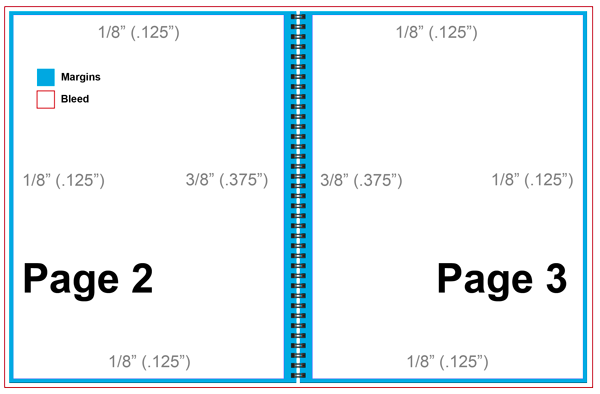
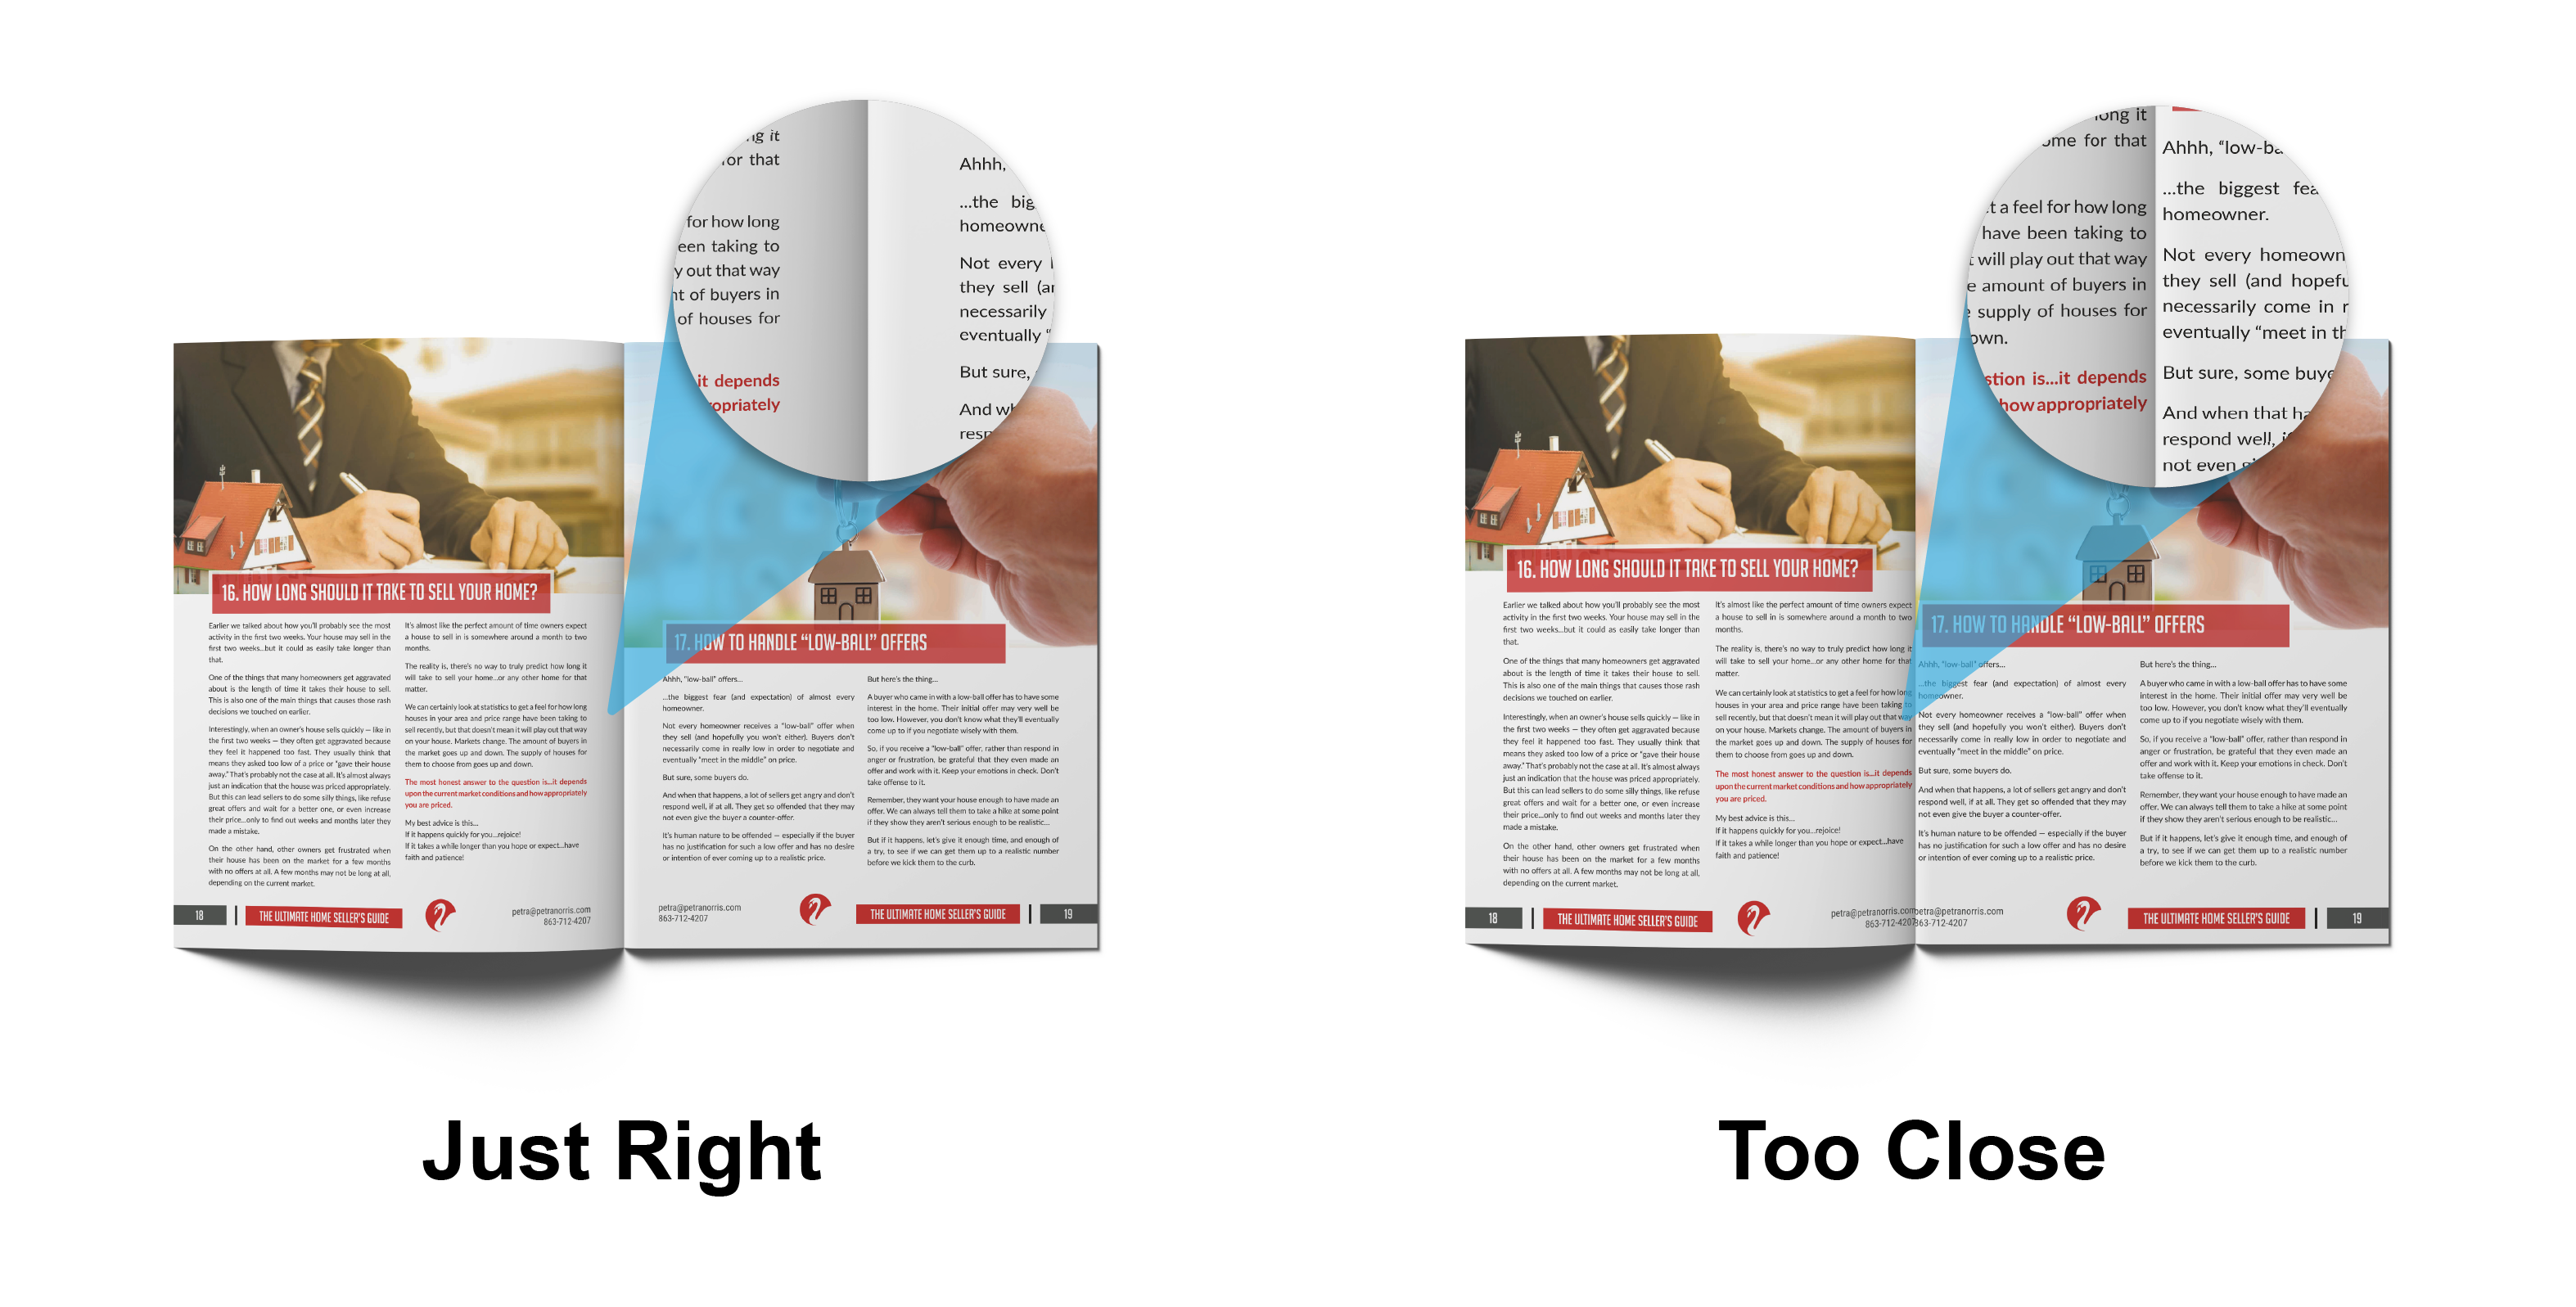
Since perfect bound books are glued at the spine, it makes it harder to see or read content near the binding side (see the image below). To help avoid this, we recommend you have a 3/8” (0.375”) margin on the binding side of all pages, including inside cover pages. Smaller books may need less margin while larger books may need more.

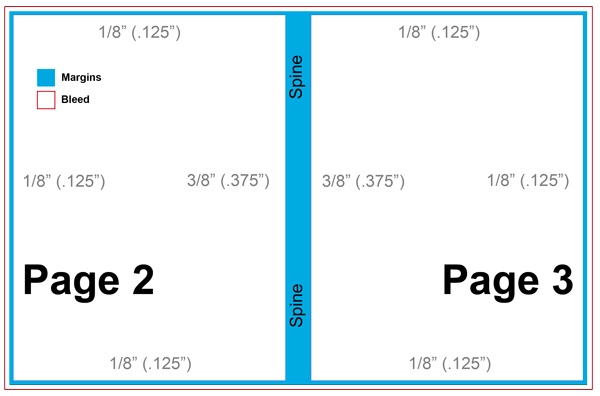
For example, if you are designing a perfect bound book, then your margins should look similar to the graphic below. Notice the binding side margins are thicker (3/8”) than the other margins and that the binding spine margin reflects the adjacent facing page.

Upload Pages in this Order

To calculate Page Count in a Document:
Set up numbered pages as single pages

  • In the image above, Page 1 is the Front Cover
  • Page 2 is Inside the Front Cover
  • Pages 3-6 are all inside pages
  • Page 7 is the Inside of the Back Cover
  • Page 8 is the Back Cover