There is no way to check the resolution of your images once they are in Publisher. Be sure to check that your images are 300 ppi or more before placing them in your document.
To ensure your document itself is saving as a high-resolution PDF, please refer to our File Saving guide for Publisher here.
Unfortunately, there is no option for seeing your image resolution when it is uploaded to Canva. We recommend viewing your images at 100% zoom to see if they are of acceptable quality.
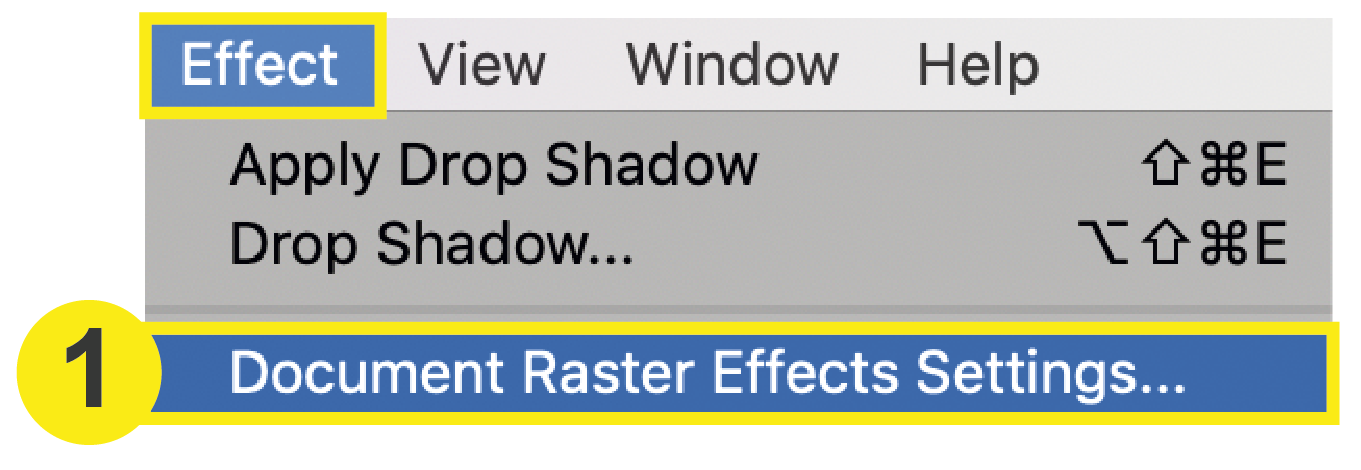
From the top menu Click: Effect > Document Raster Effect Settings
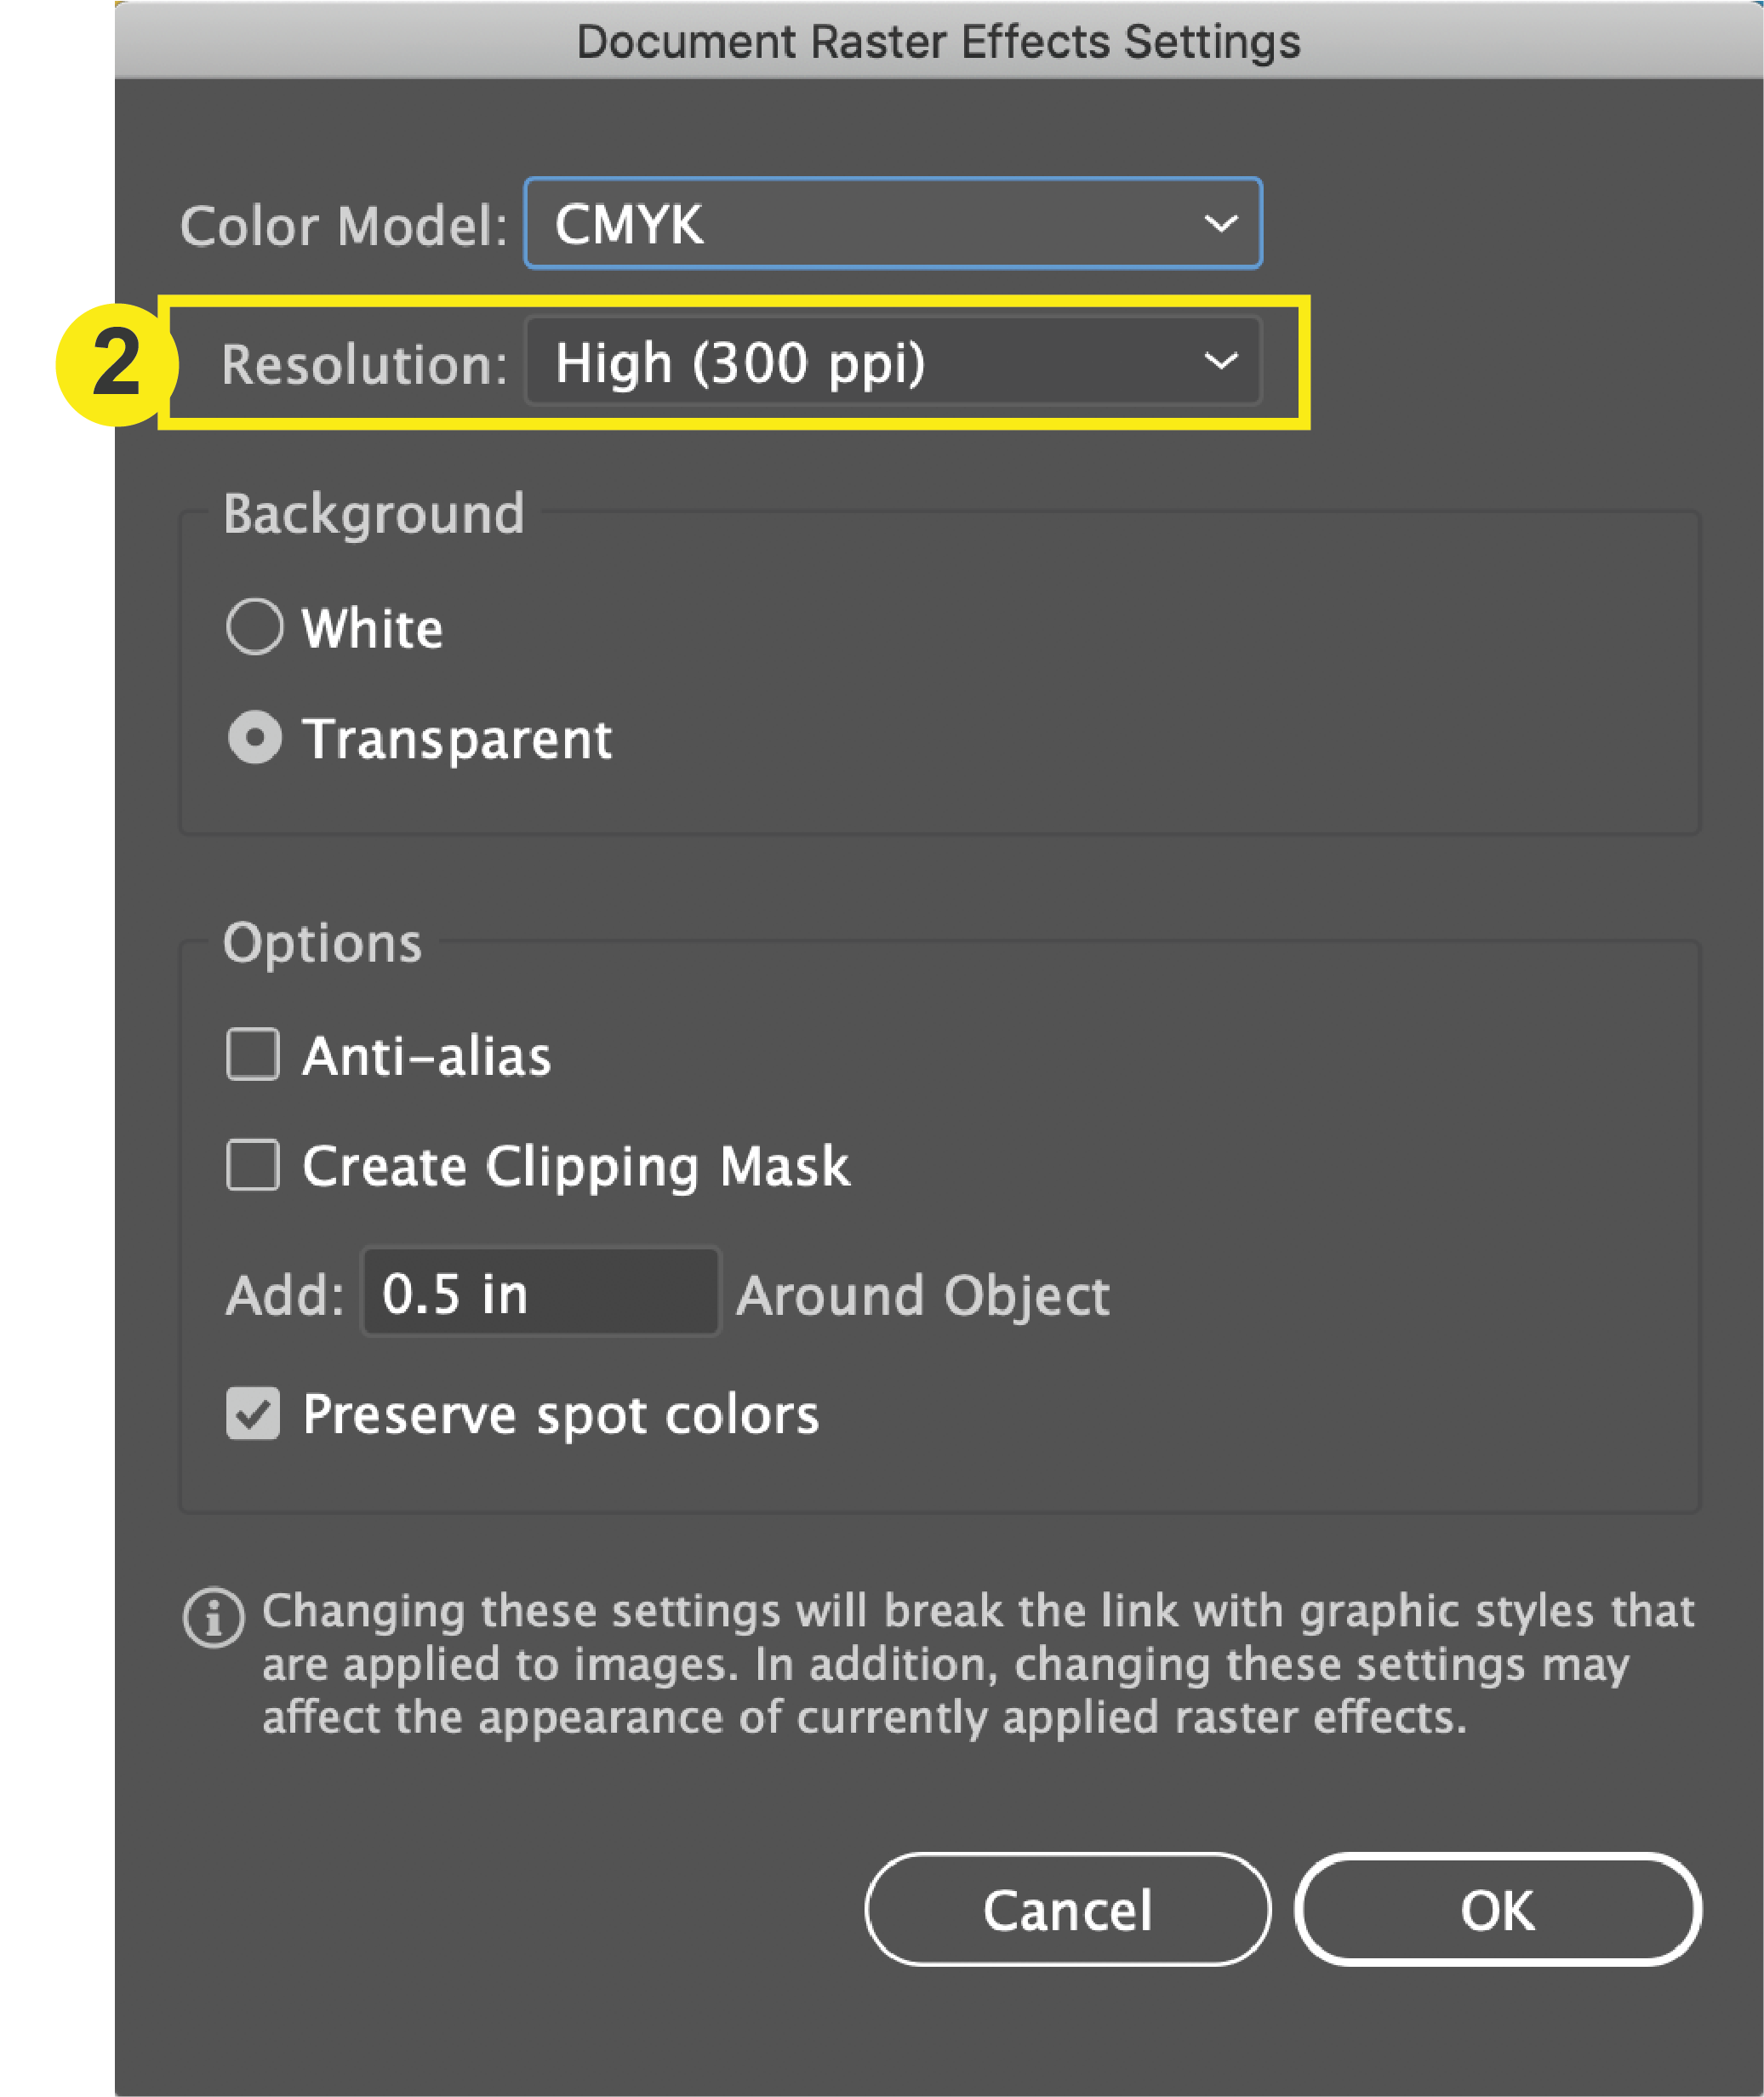
2. Change Resolution
Change the resolution to High (300 ppi). Click OK.
Checklist (Image Resolution)
Open the Document Info
Select Linked or Embedded File
Check Resolution
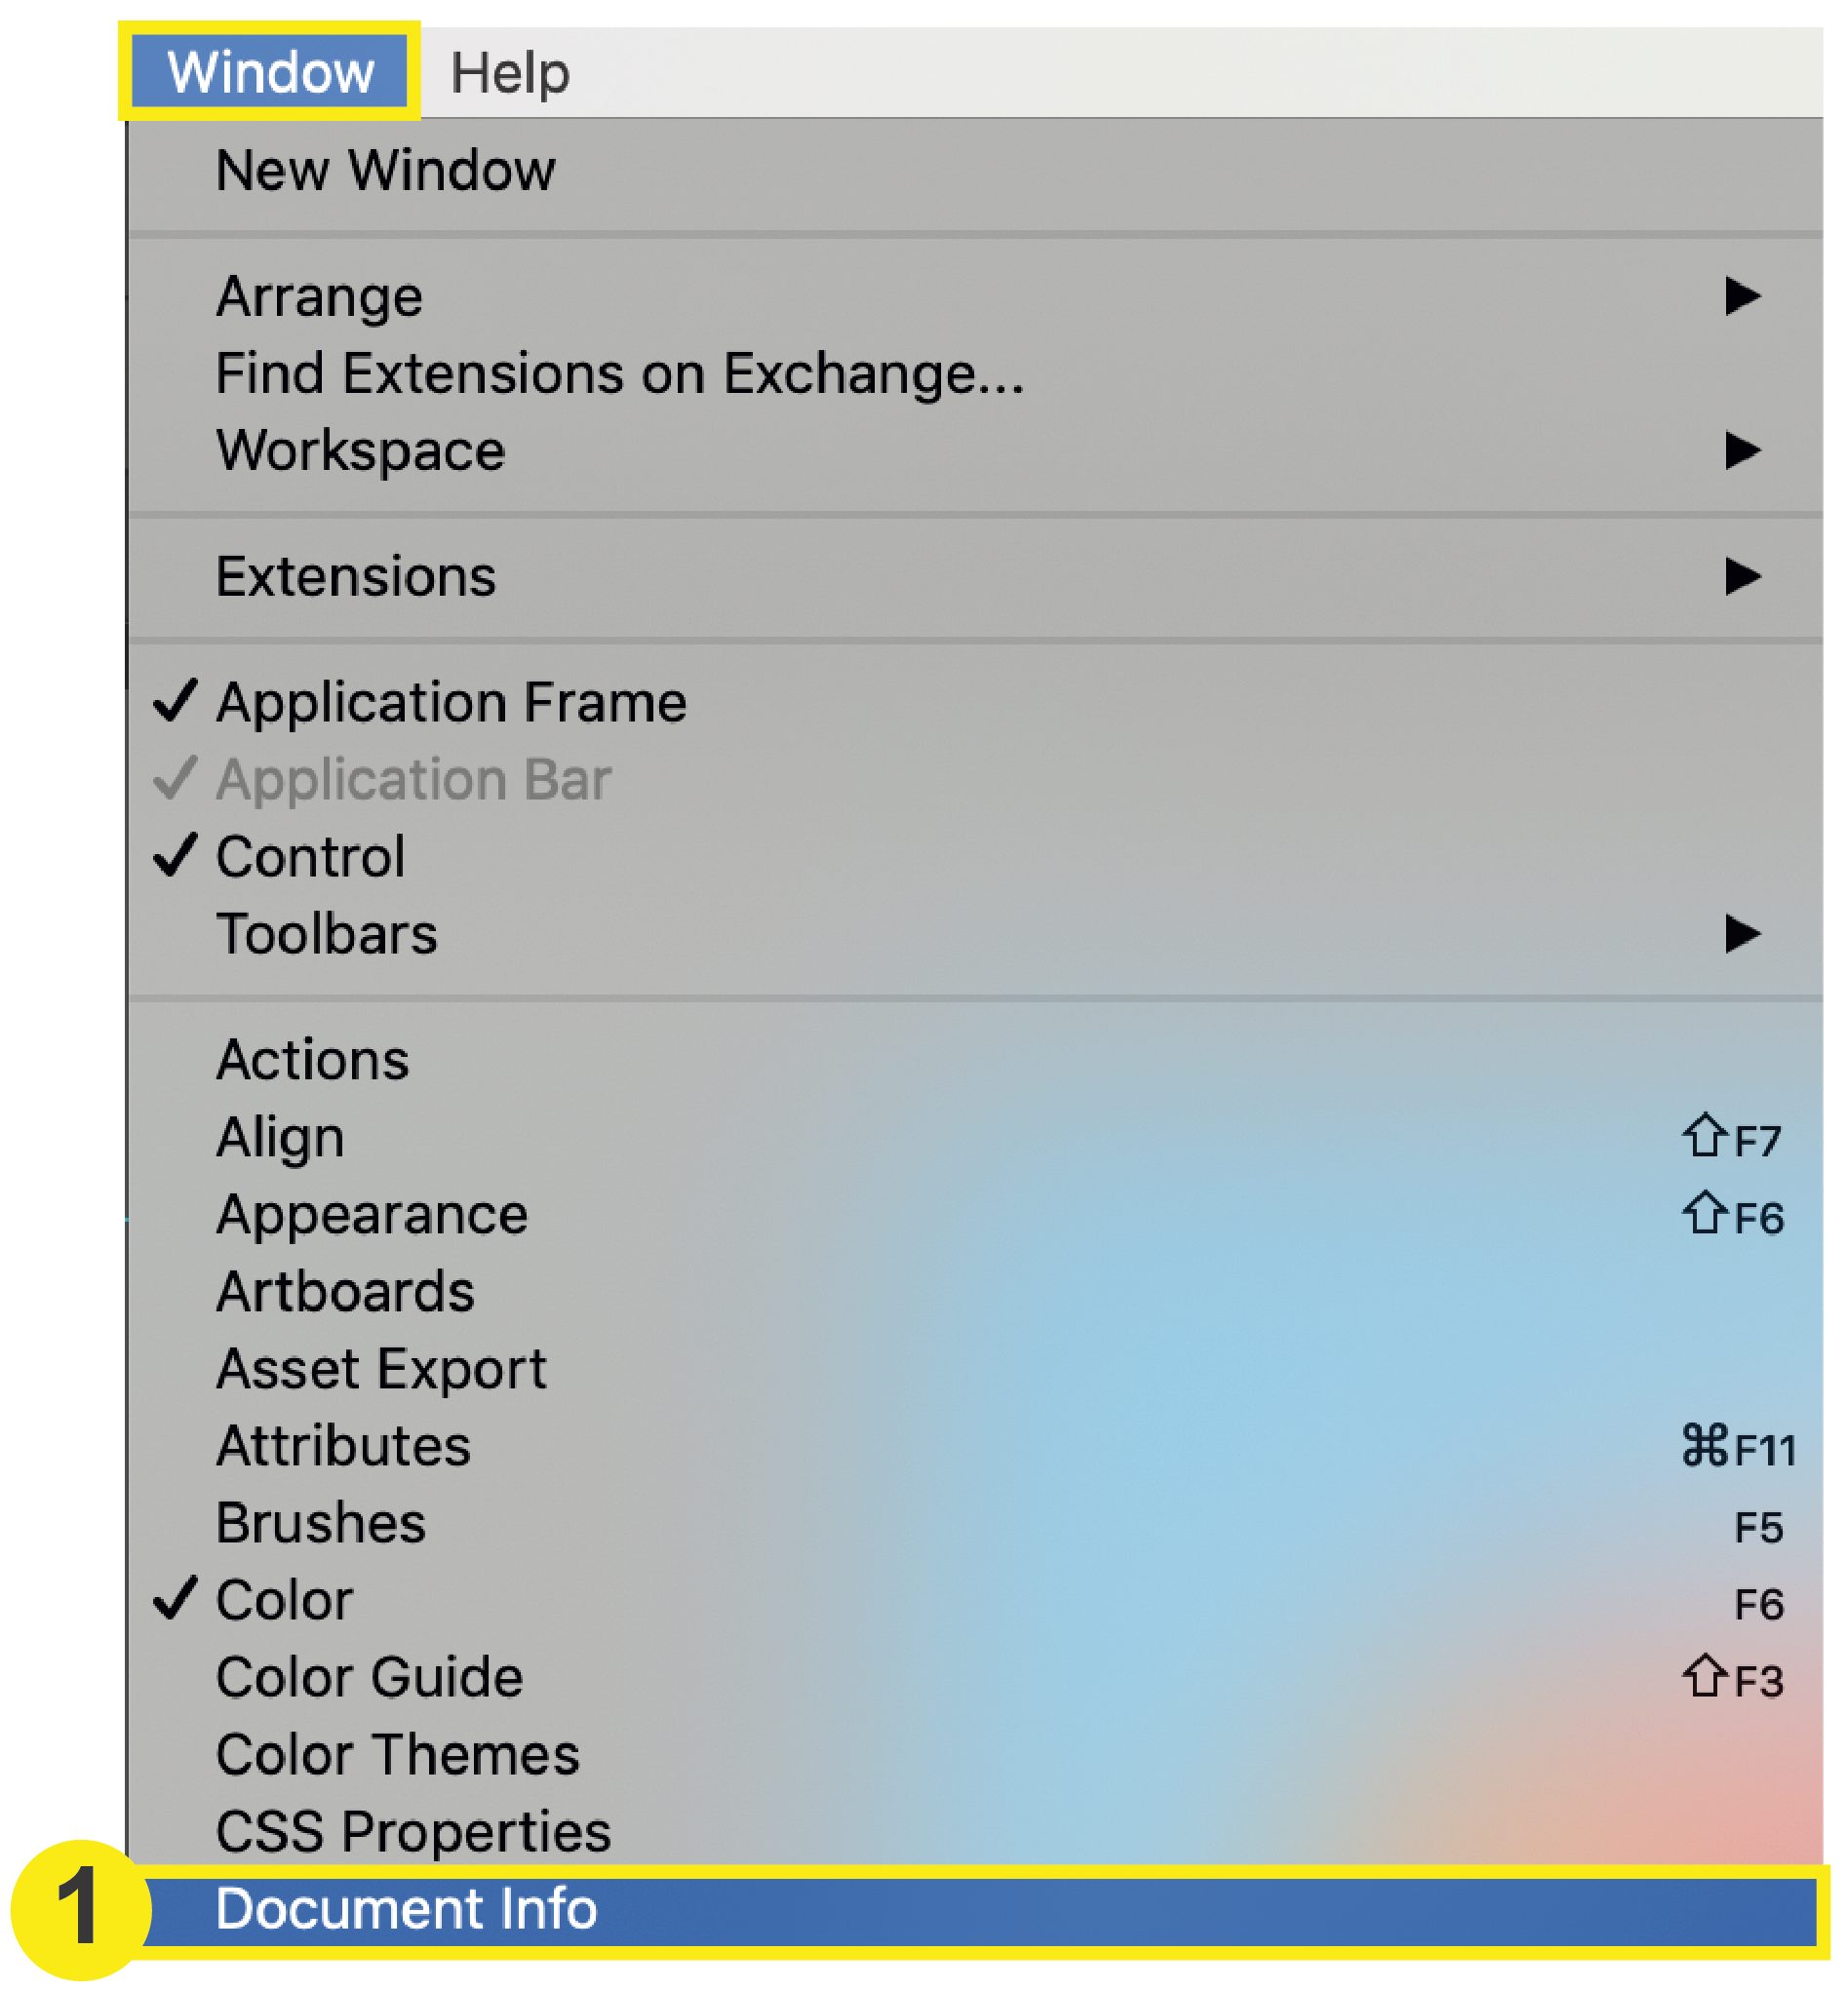
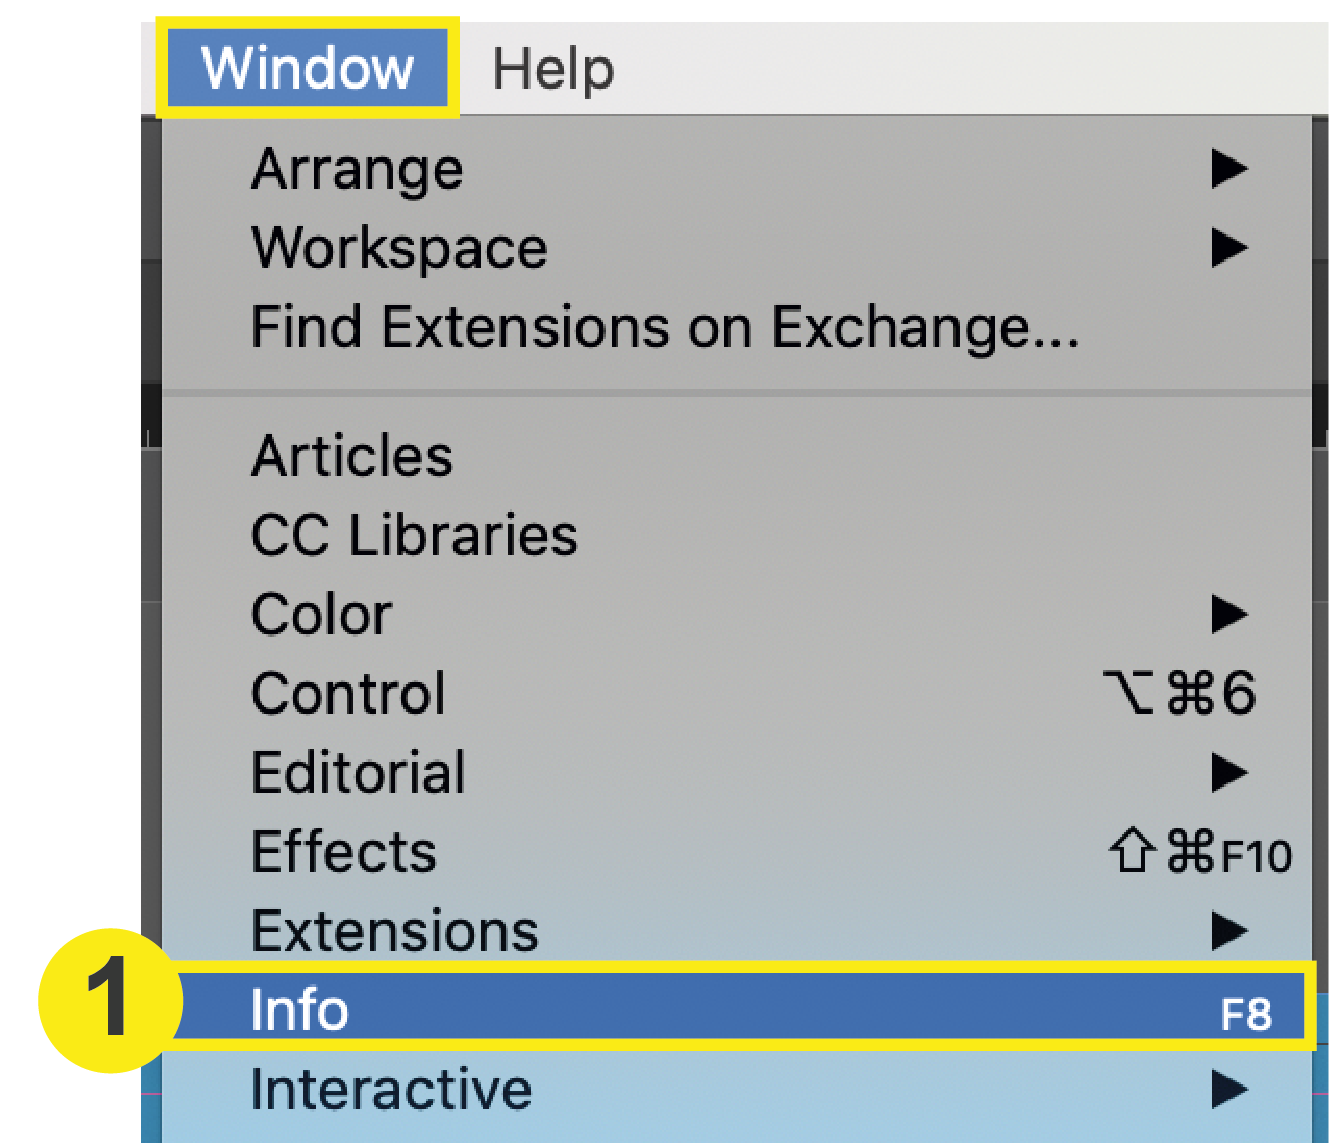
1. Open Document Info
In the top menu Click: Window > Document Info. This will prompt a small window to open.
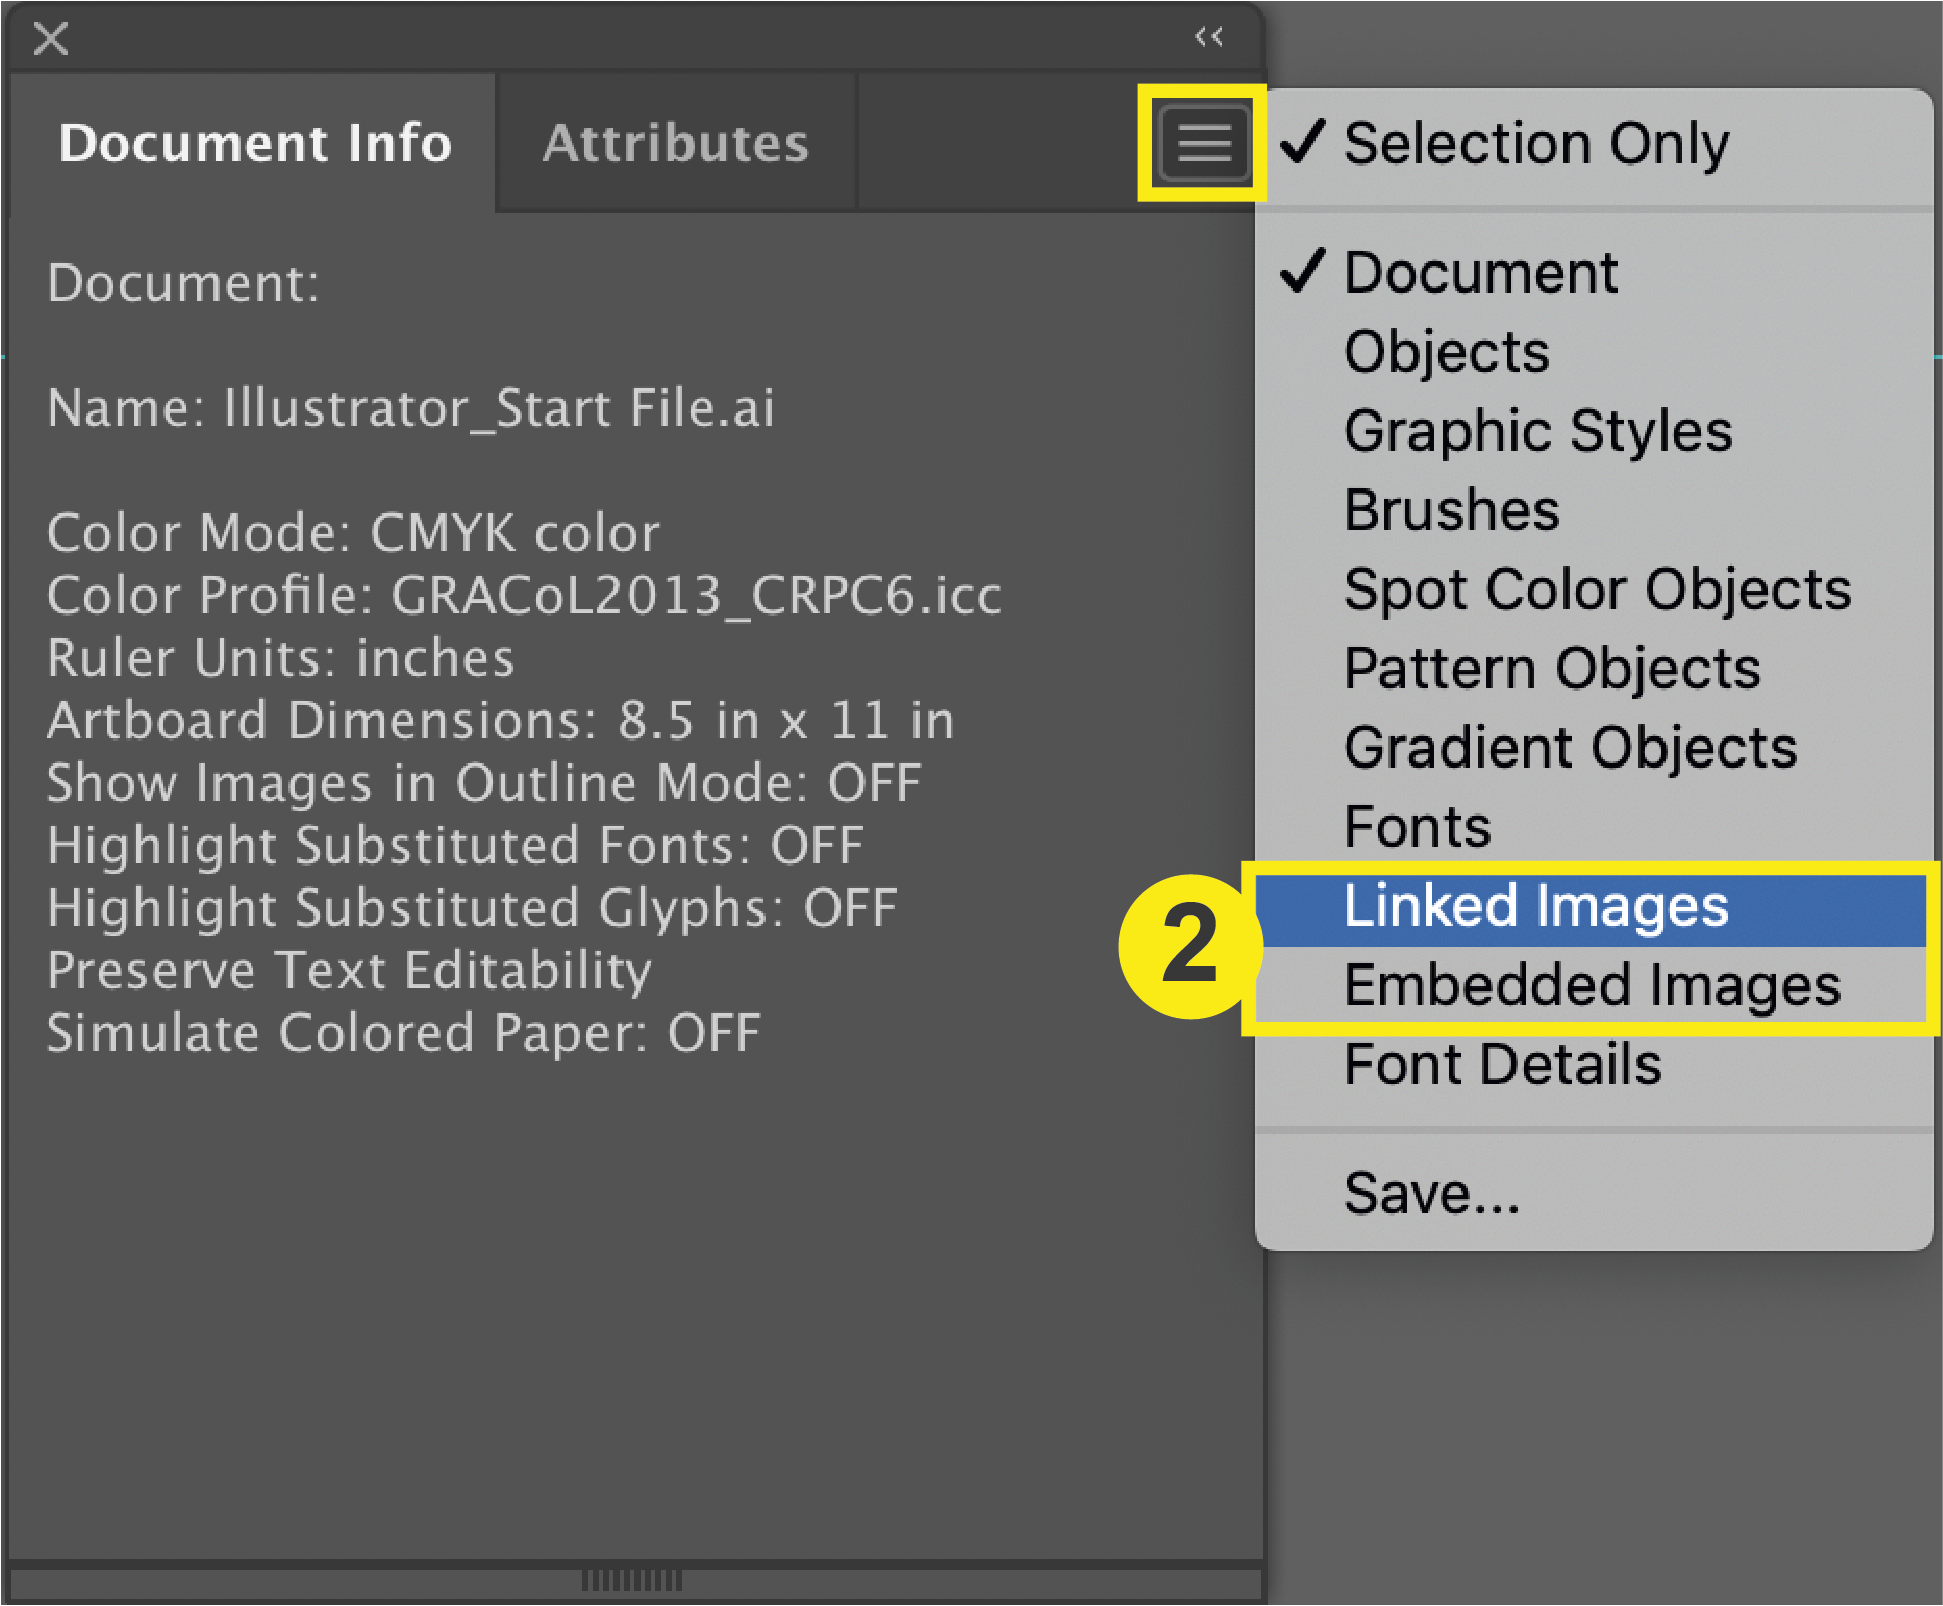
2. Select Linked or Embedded File
In the Document Info window, click the list icon in the top right corner, then select either Linked or Embedded.
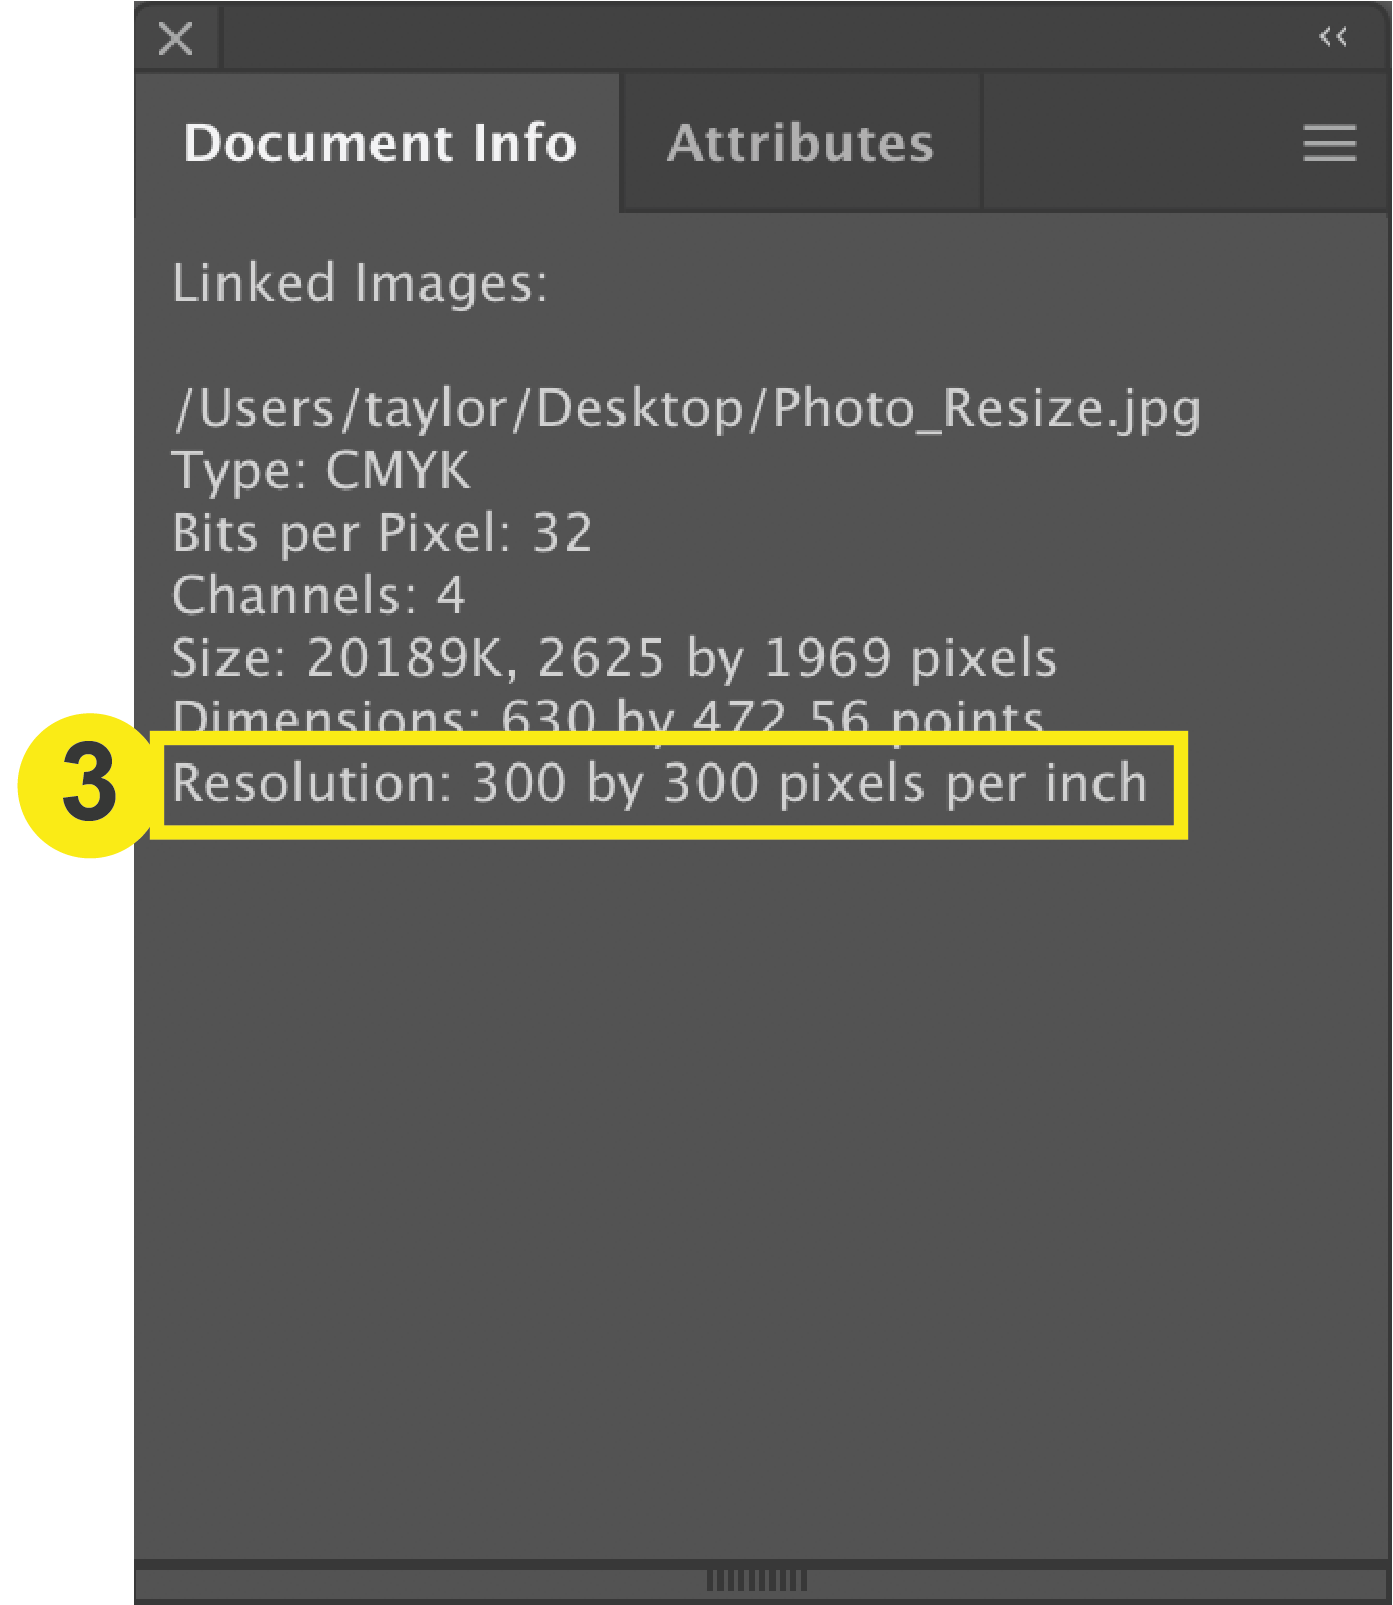
3. Check Resolution
Check the resolution of your linked or embedded images. If your image is lower than 300 pixels per inch, then you will need to replace your image with one that has a higher resolution.
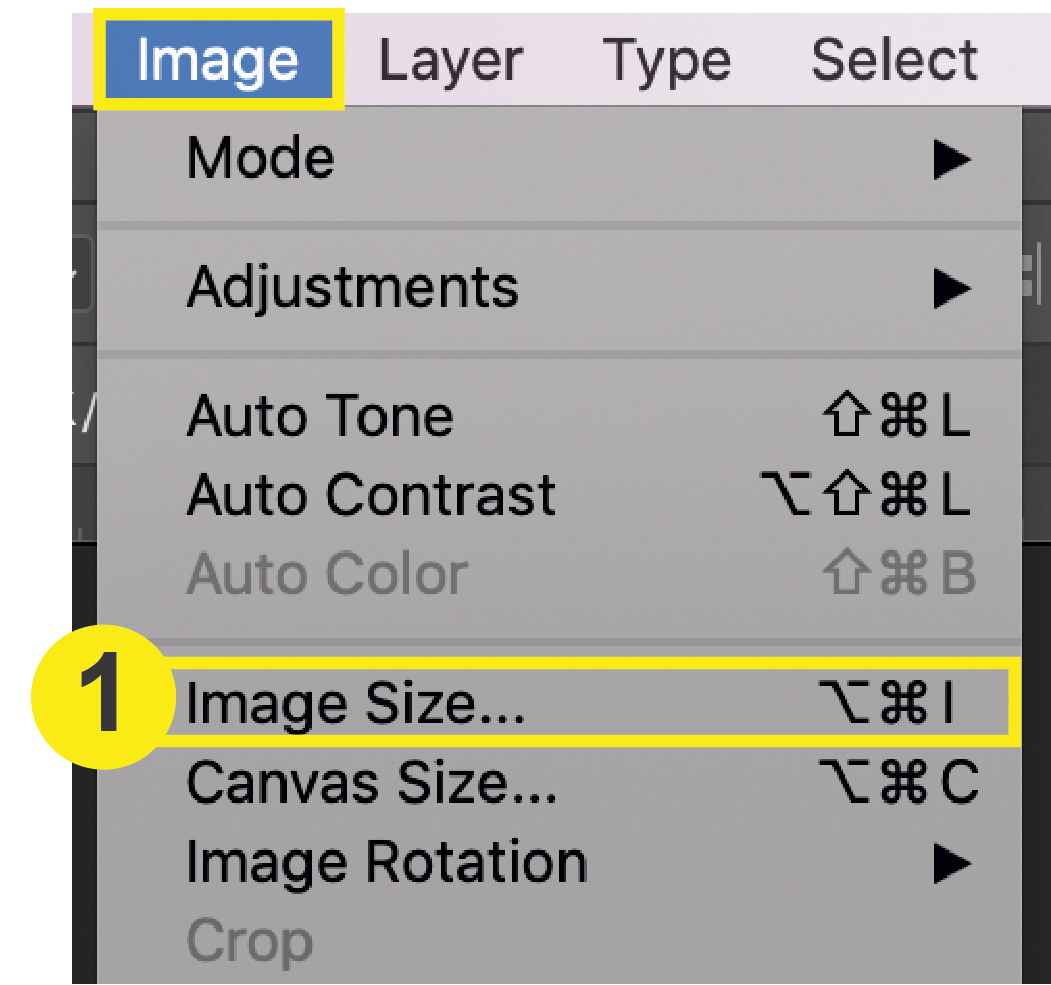
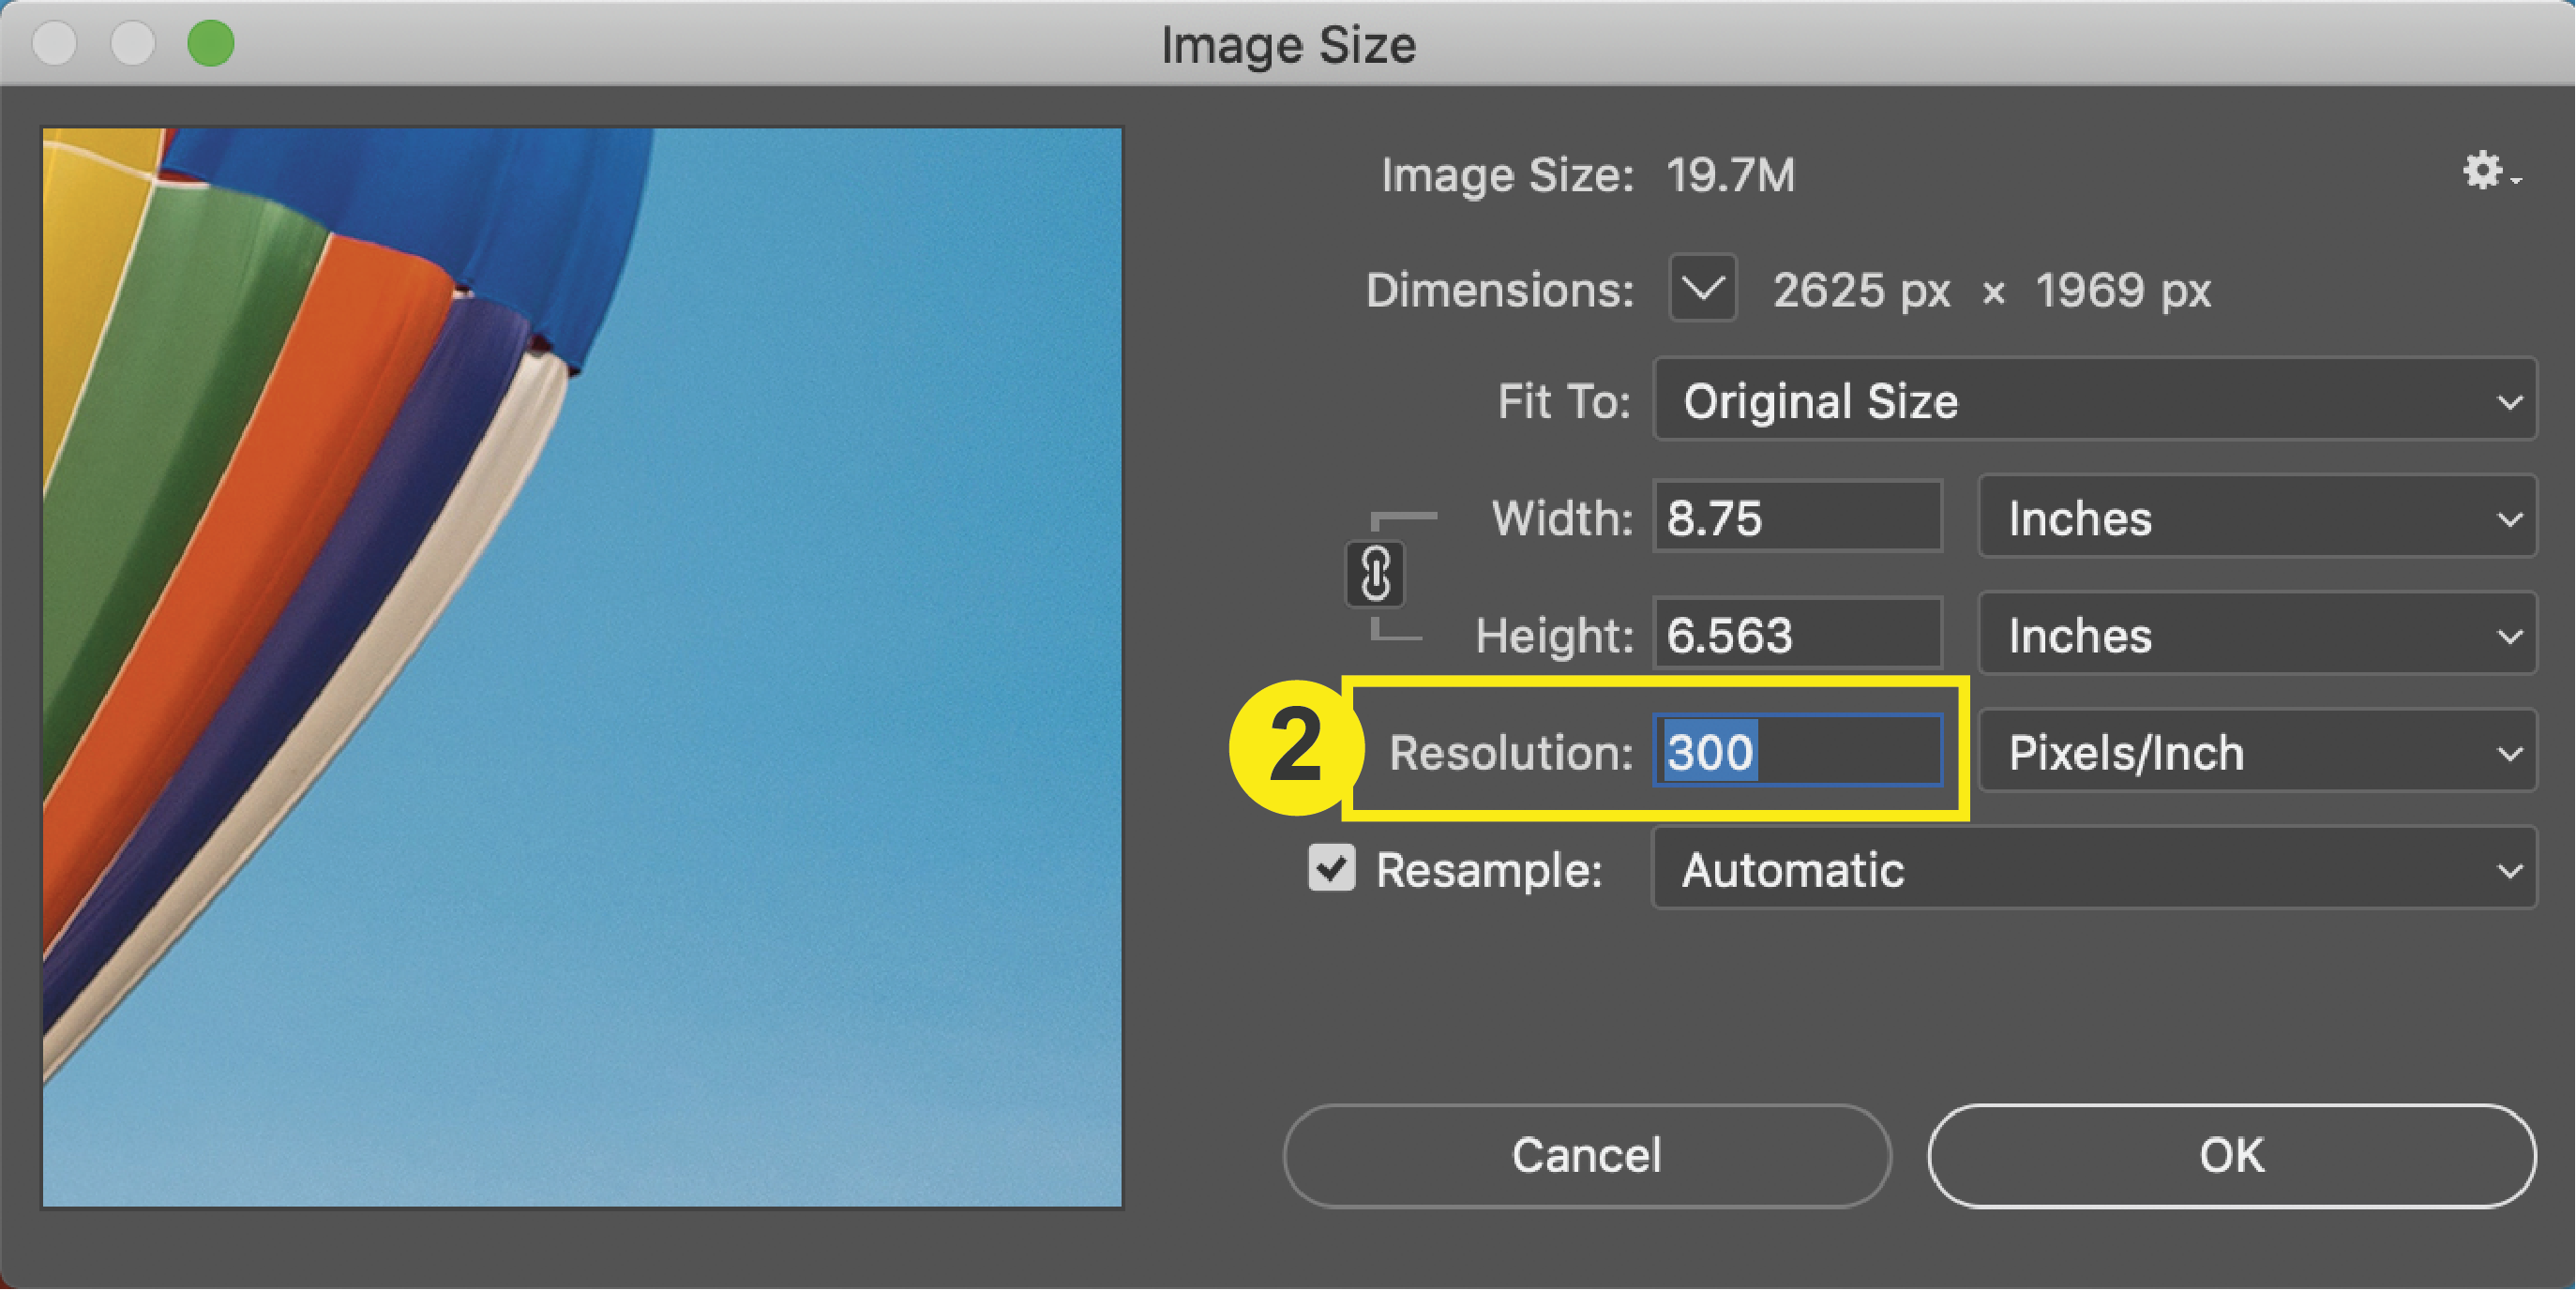
If you change the resolution to 300, click OK, and the image gets larger in Photoshop, then you have just made the image larger than it actually is. This will make the image just as pixelated as before and you may need to find a new image.
Please note that in Photoshop, your document itself is treated like an image. Because of this, your image size and document size will be the same.
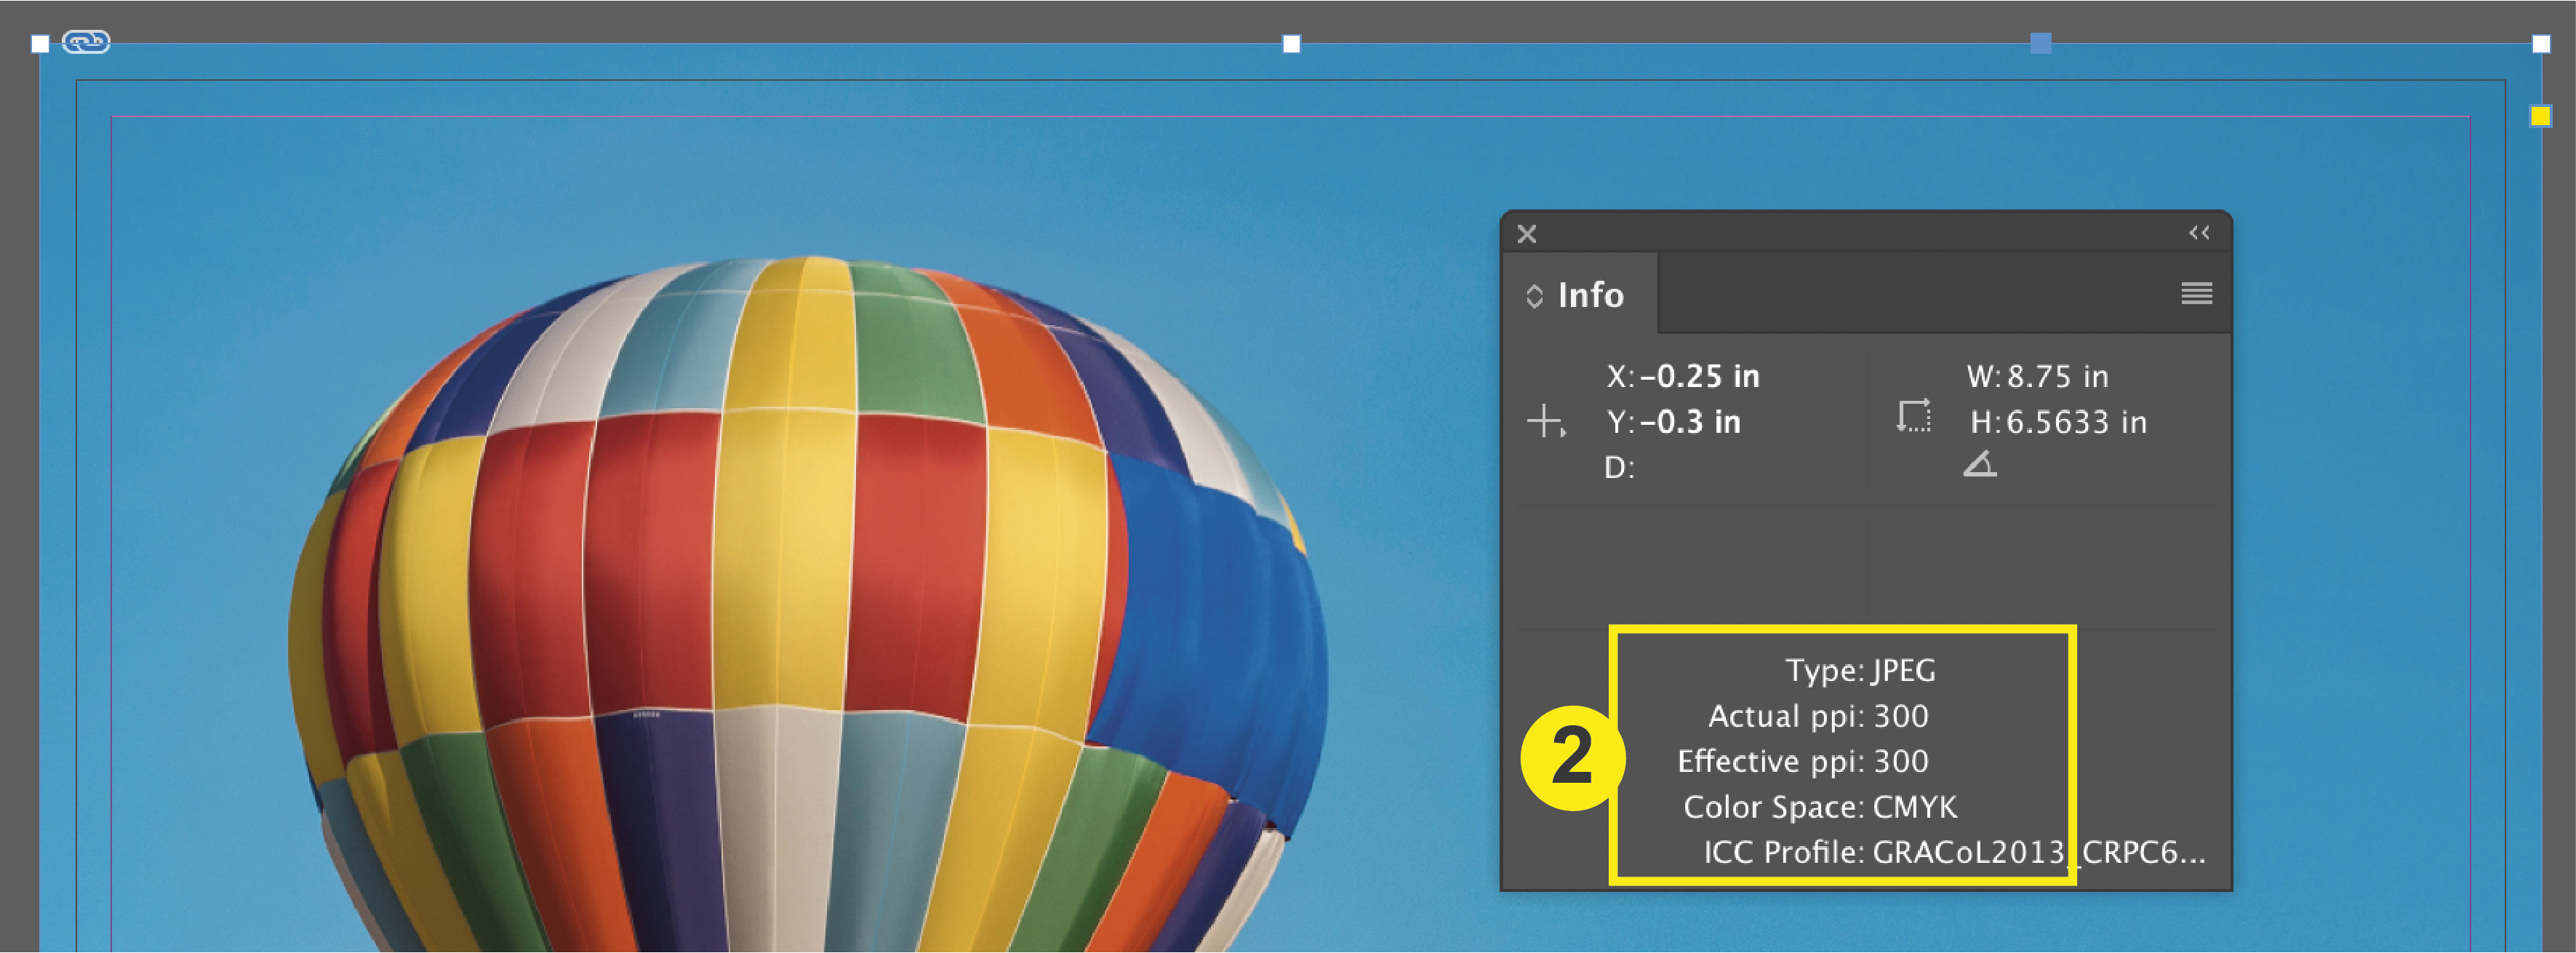
With the info window open, click on the image you are wanting to check. The info panel will showcase your:
Actual PPI: resolution at 100%
Effective PPI: resolution after scaling What you need to pay the closest attention to is the Effective PPI. This accounts for any scaling of your image within the document. As long as the Effective PPI Remains above 300, your images will print perfectly!
Please note that in InDesign, there is no document ppi setting until you choose your exportation file type. To ensure you are saving your InDesign document at a high enough resolution, refer to our File Saving tutorial here.
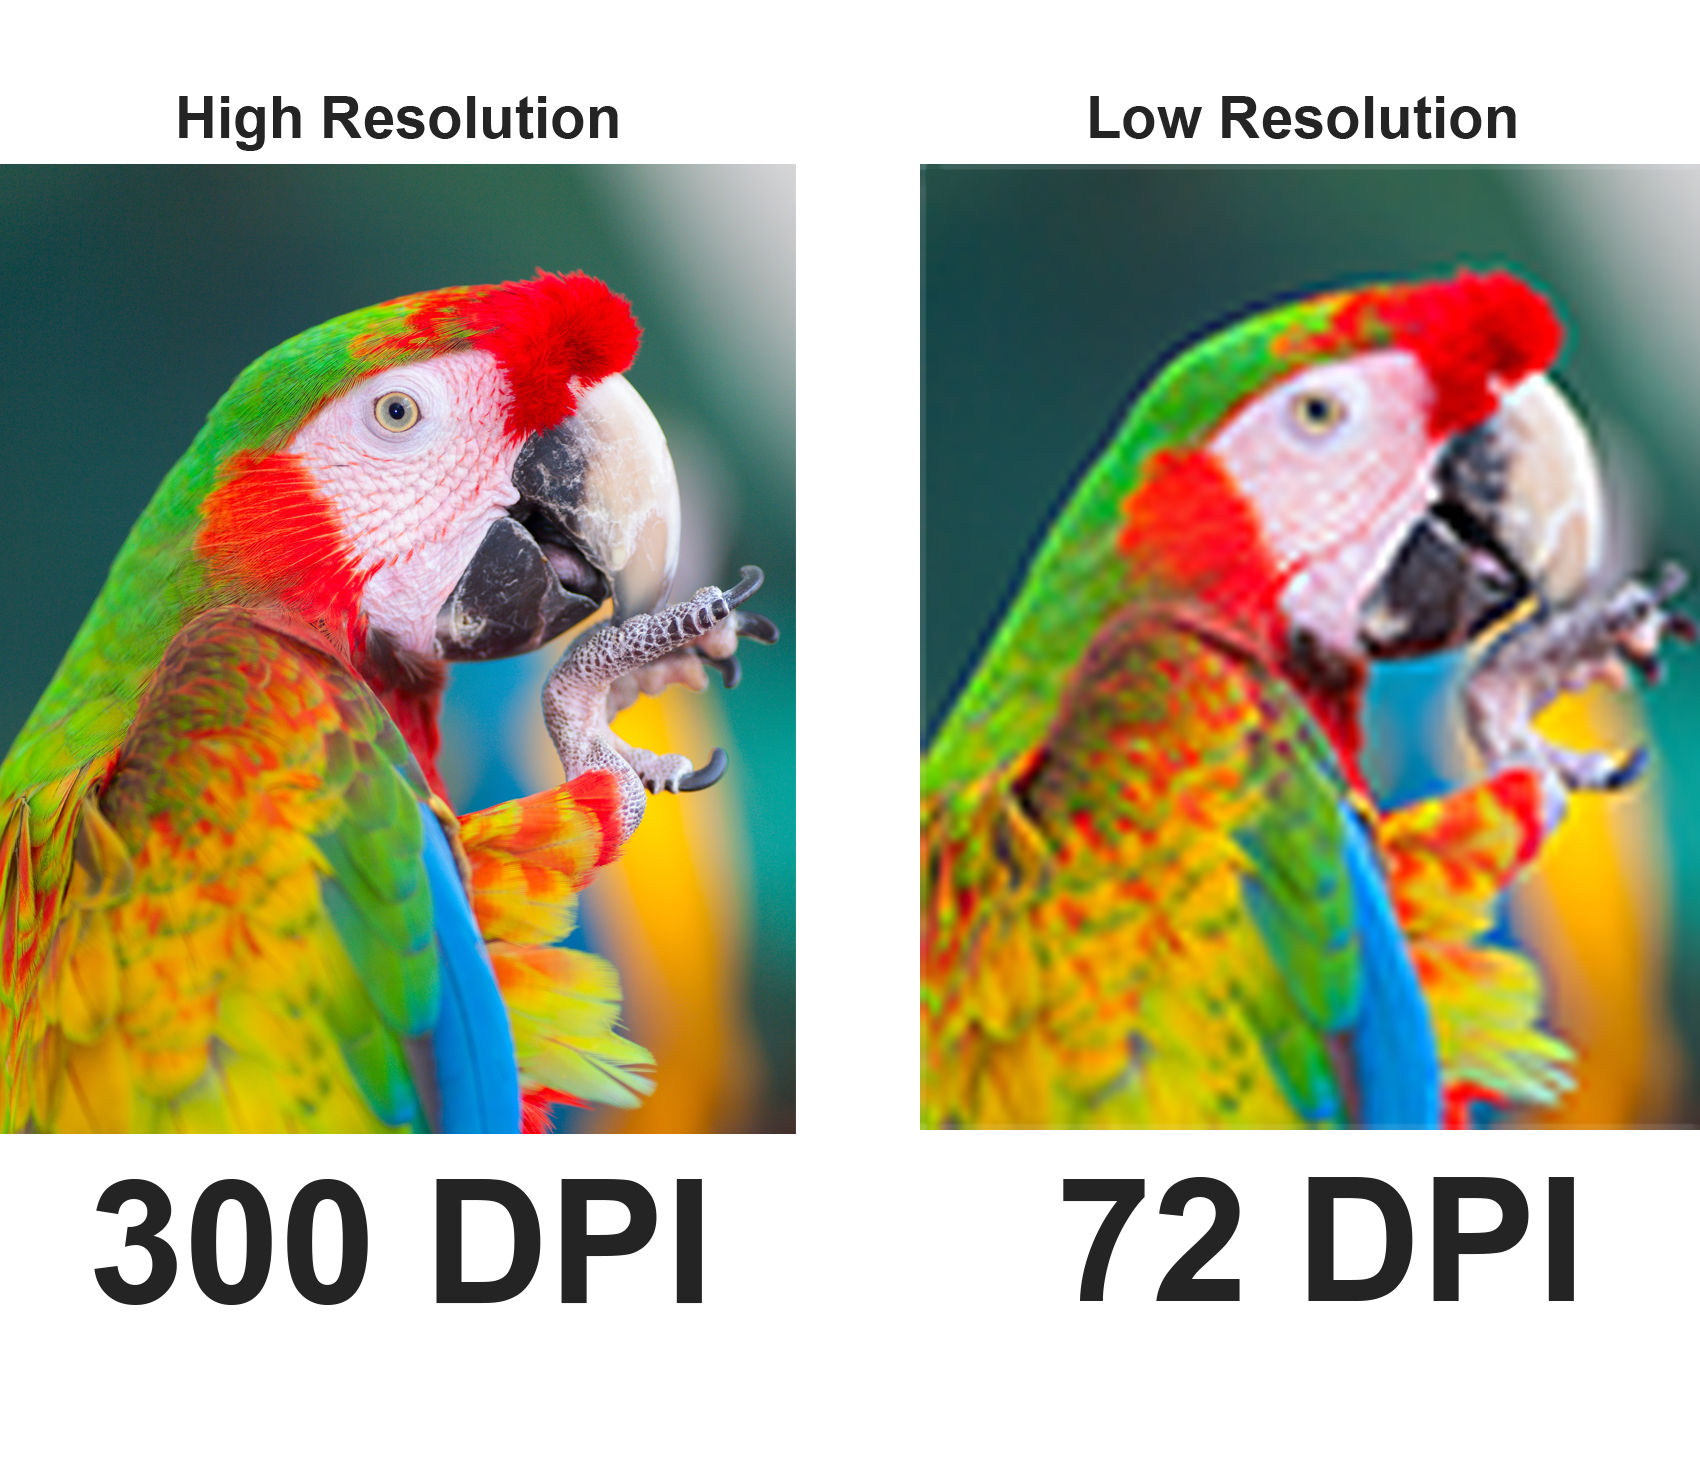
PrintingCenterUSA recommends that the file and/or image resolution should be set at 300 dpi to ensure that the final document is not pixelated (fuzzy) when printed. However, some customers find 180 dpi (or better) to be an acceptable resolution. You must closely review the resolution during the proofing process to determine if there are any issues.
Enlarging an image will lower the resolution while reducing an image will increase the resolution. Enlarging an image in a layout is NOT recommended. Images that are less than 300 dpi could reproduce poorly looking fuzzy or pixelated.
Images from the internet are not recommended, as most images are only 72 dpi.
An unfavorable image cannot be resaved as a different type of file. For example, you cannot place a gif file in Photoshop and resave it as an EPS file. This does not change the compatibility of the file. If you have to use low-resolution images we will print only after you consent to the quality.
From the top menu, Click File > Page Setup. This will prompt the Page Setup window to open.
2. Add Bleeds and Margins (Safety Lines)
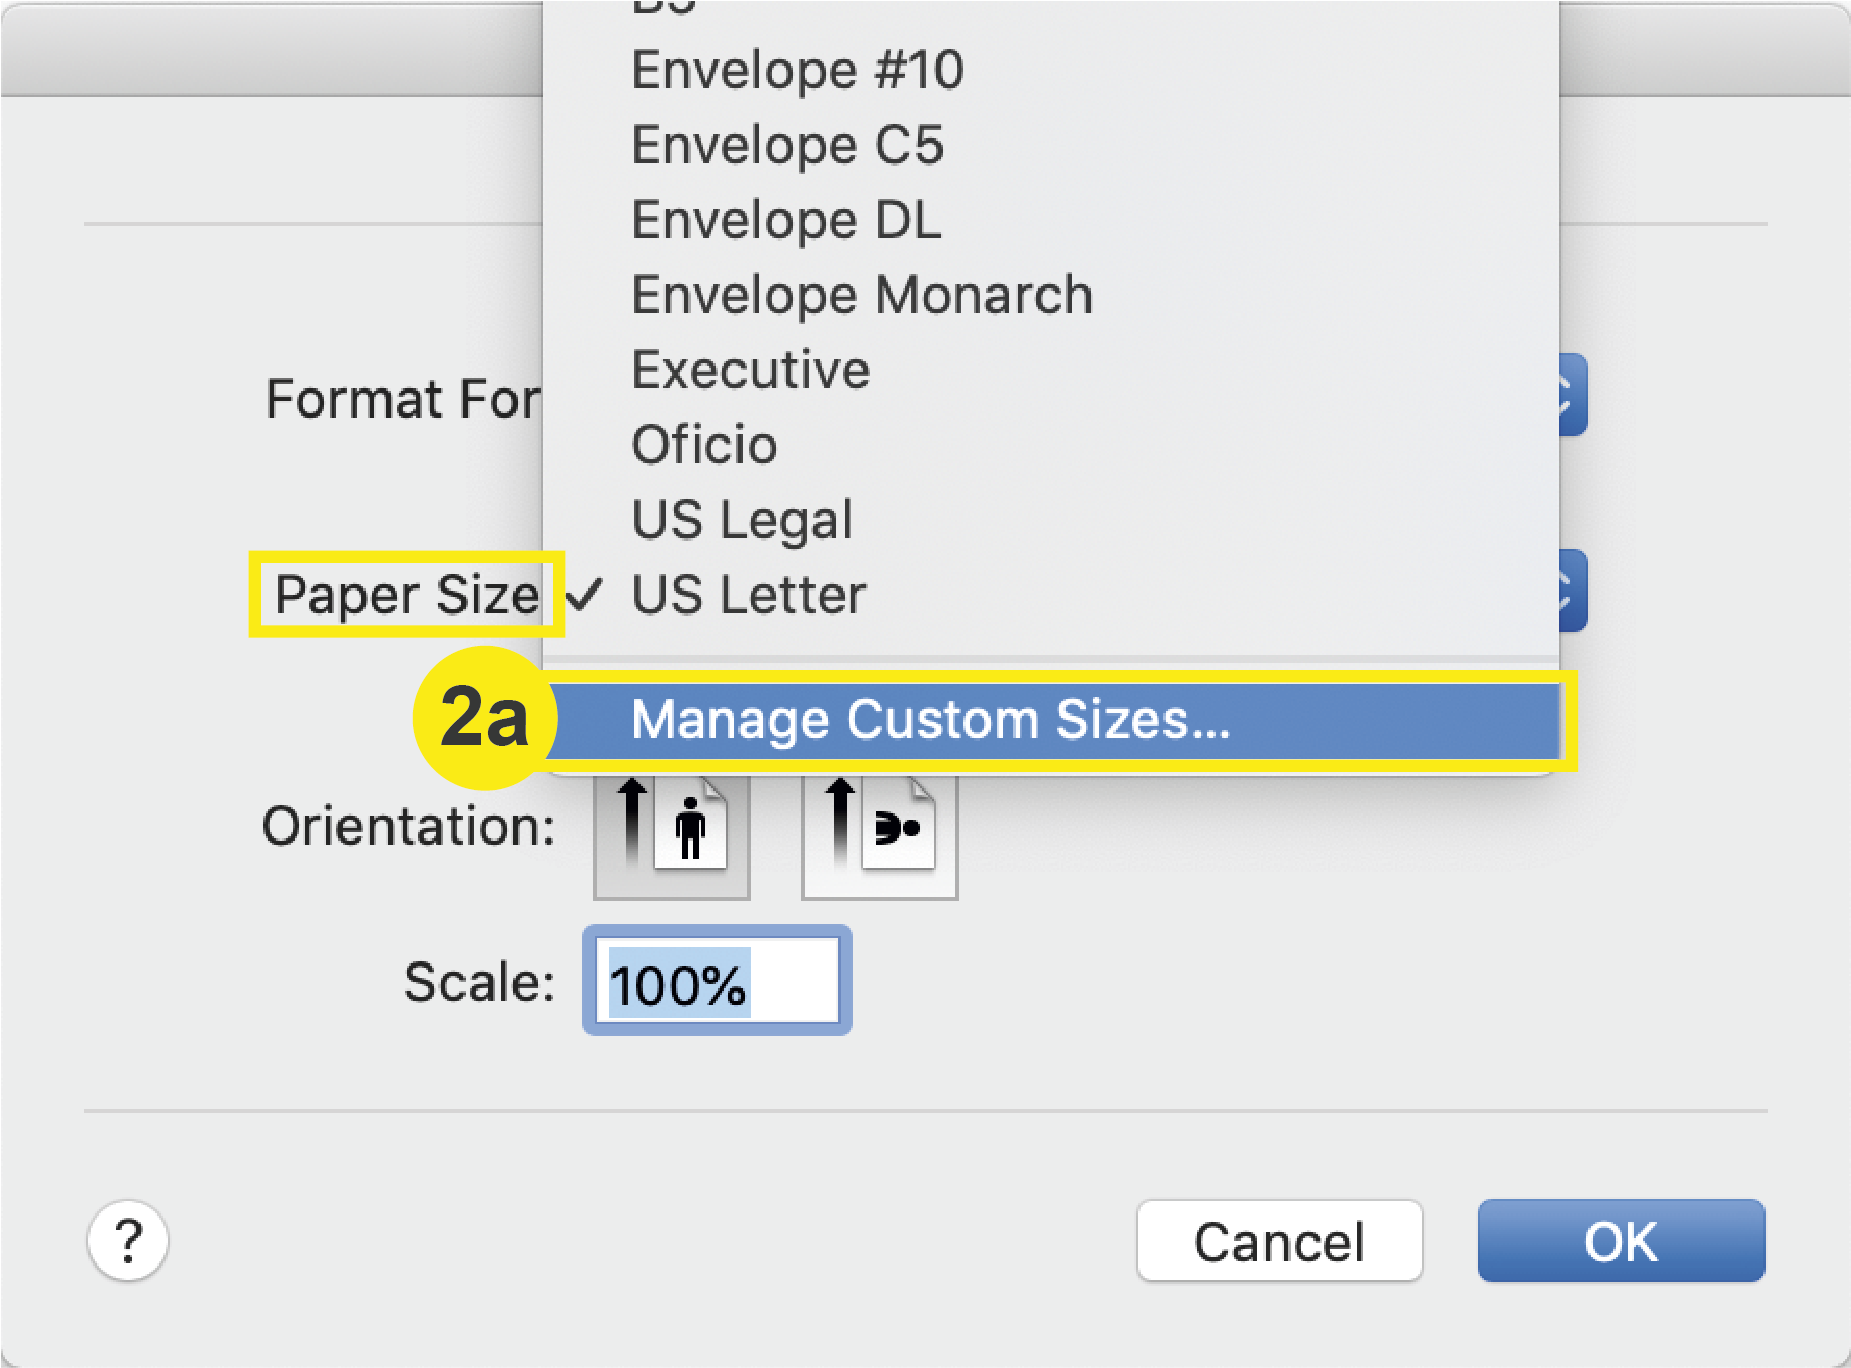
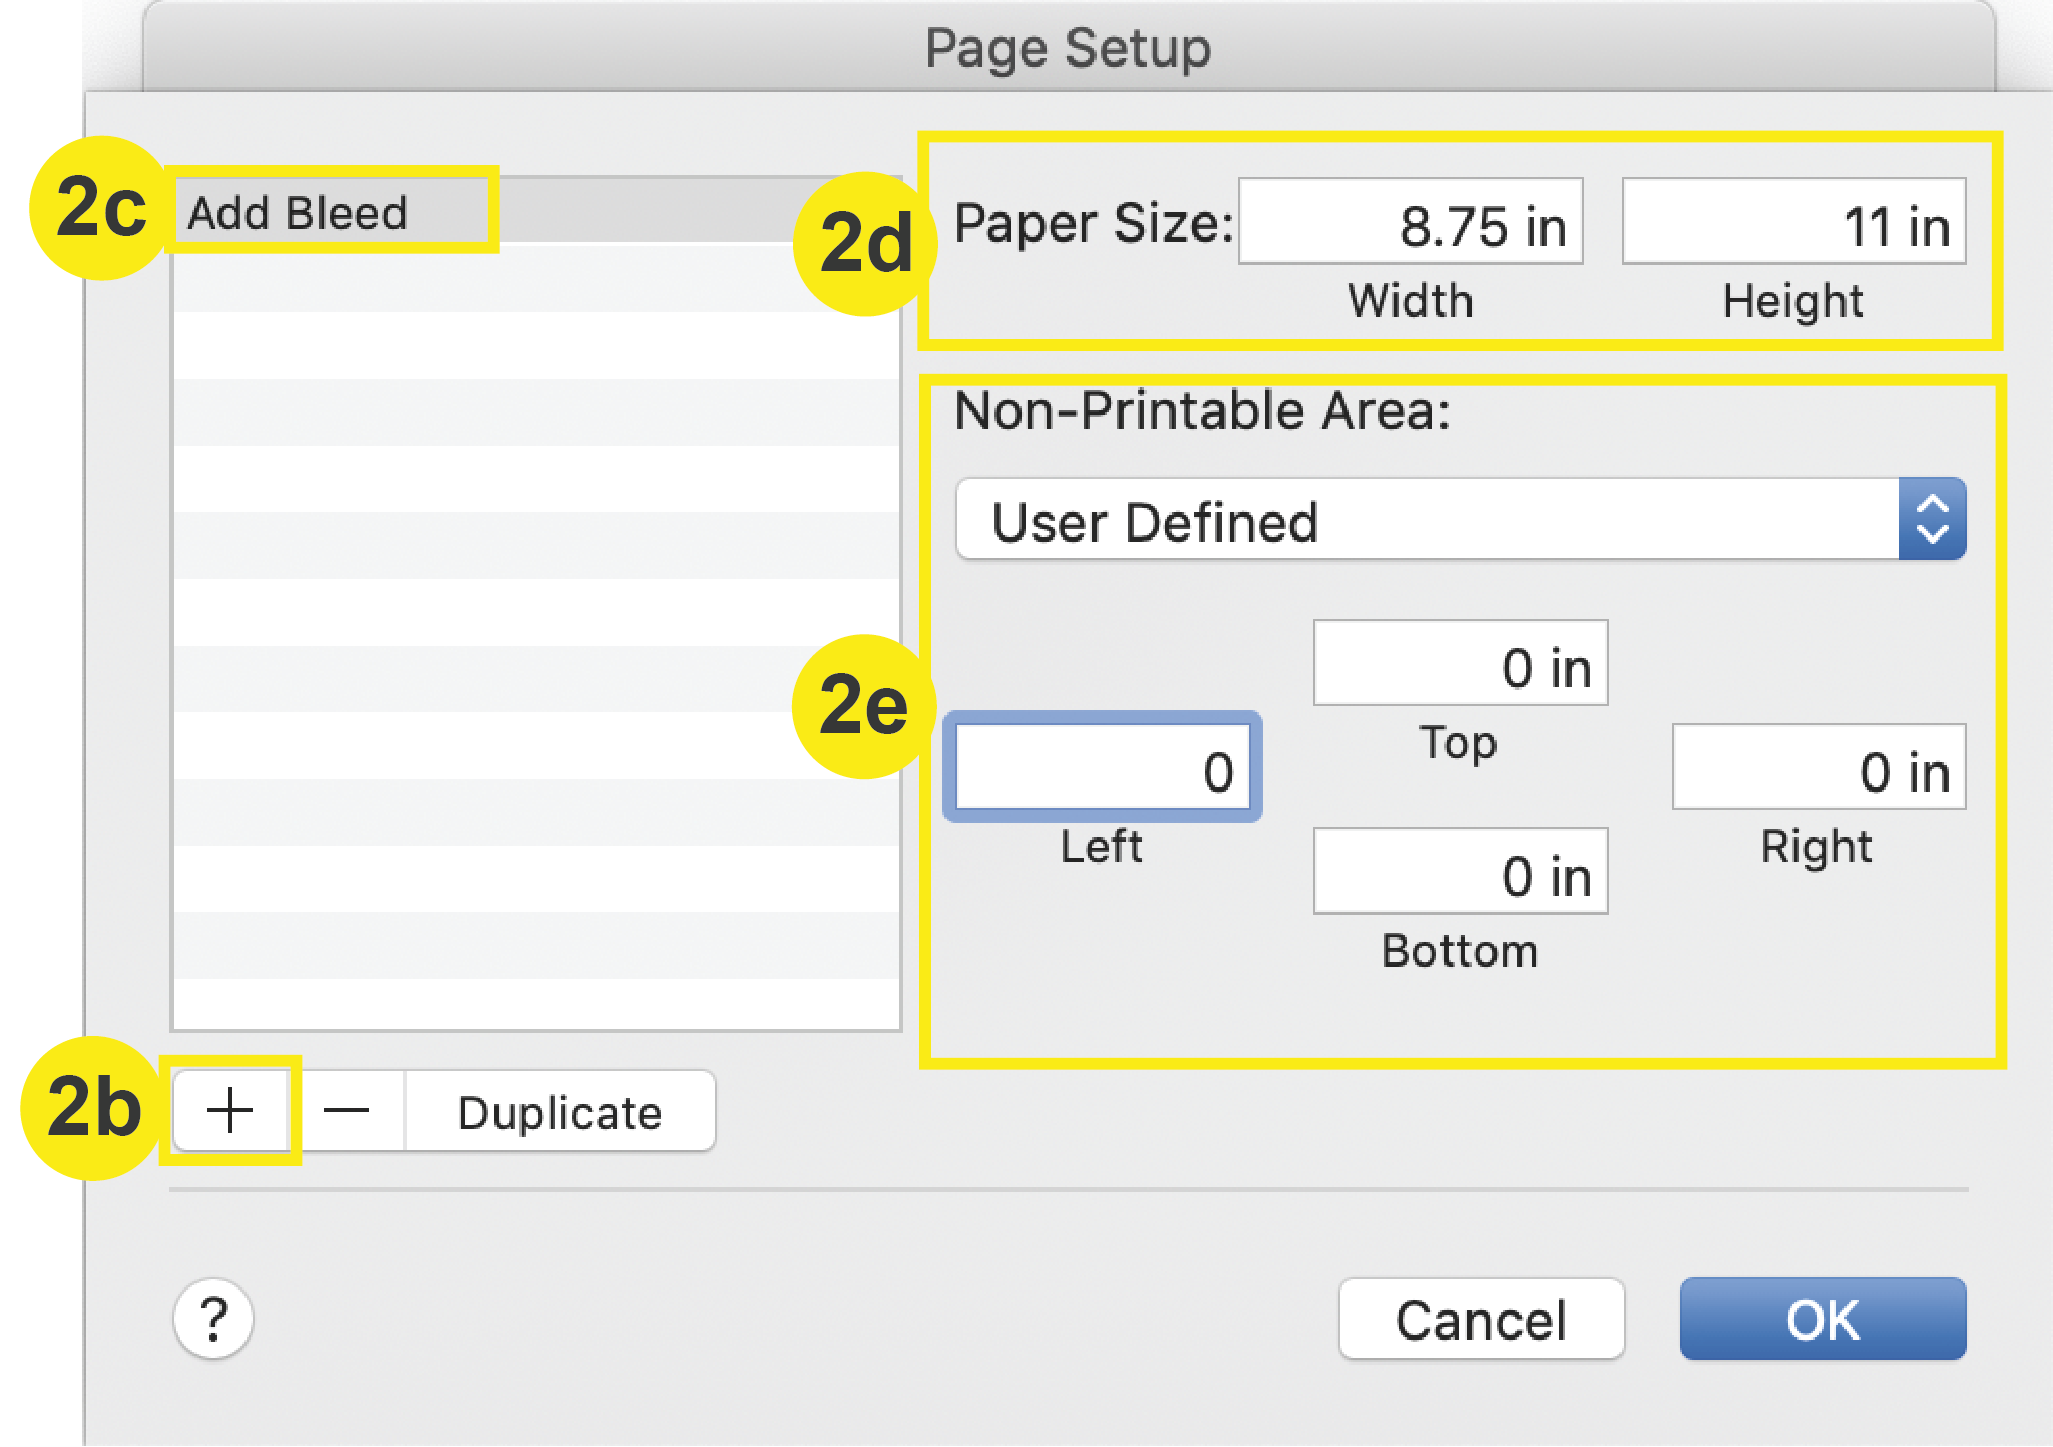
a. In the Page Setup window, select the Paper Size dropdown and click Manage Custom Sizes. This will prompt another window where you will set a bleed preset.
b. At the bottom left of this window, click the “+” button. c. Double click the Untitled and type a descriptive name, such as “Add Bleed” so you have it for next time. d. Adjust the paper size by adding .25 inches to both the width and height of your final trim size. e. In the Non-Printable Area section, enter “0” for all margin values. Click OK.
3. Warnings
Although you can extend the document size to accommodate for bleeds, you will not be able to set any graphics or images all the way to this line. This means that you will end up with a white border around your final product. If this is not what you want, try using our free Online Design Tool.
* There is no way to set up a safety line in Word.
In the top menu, navigate to Page Design > Size > Page Setup. This will prompt the Page Setup window to open where you will input your document settings.
2. Add Bleeds and Margins (Safety Lines)
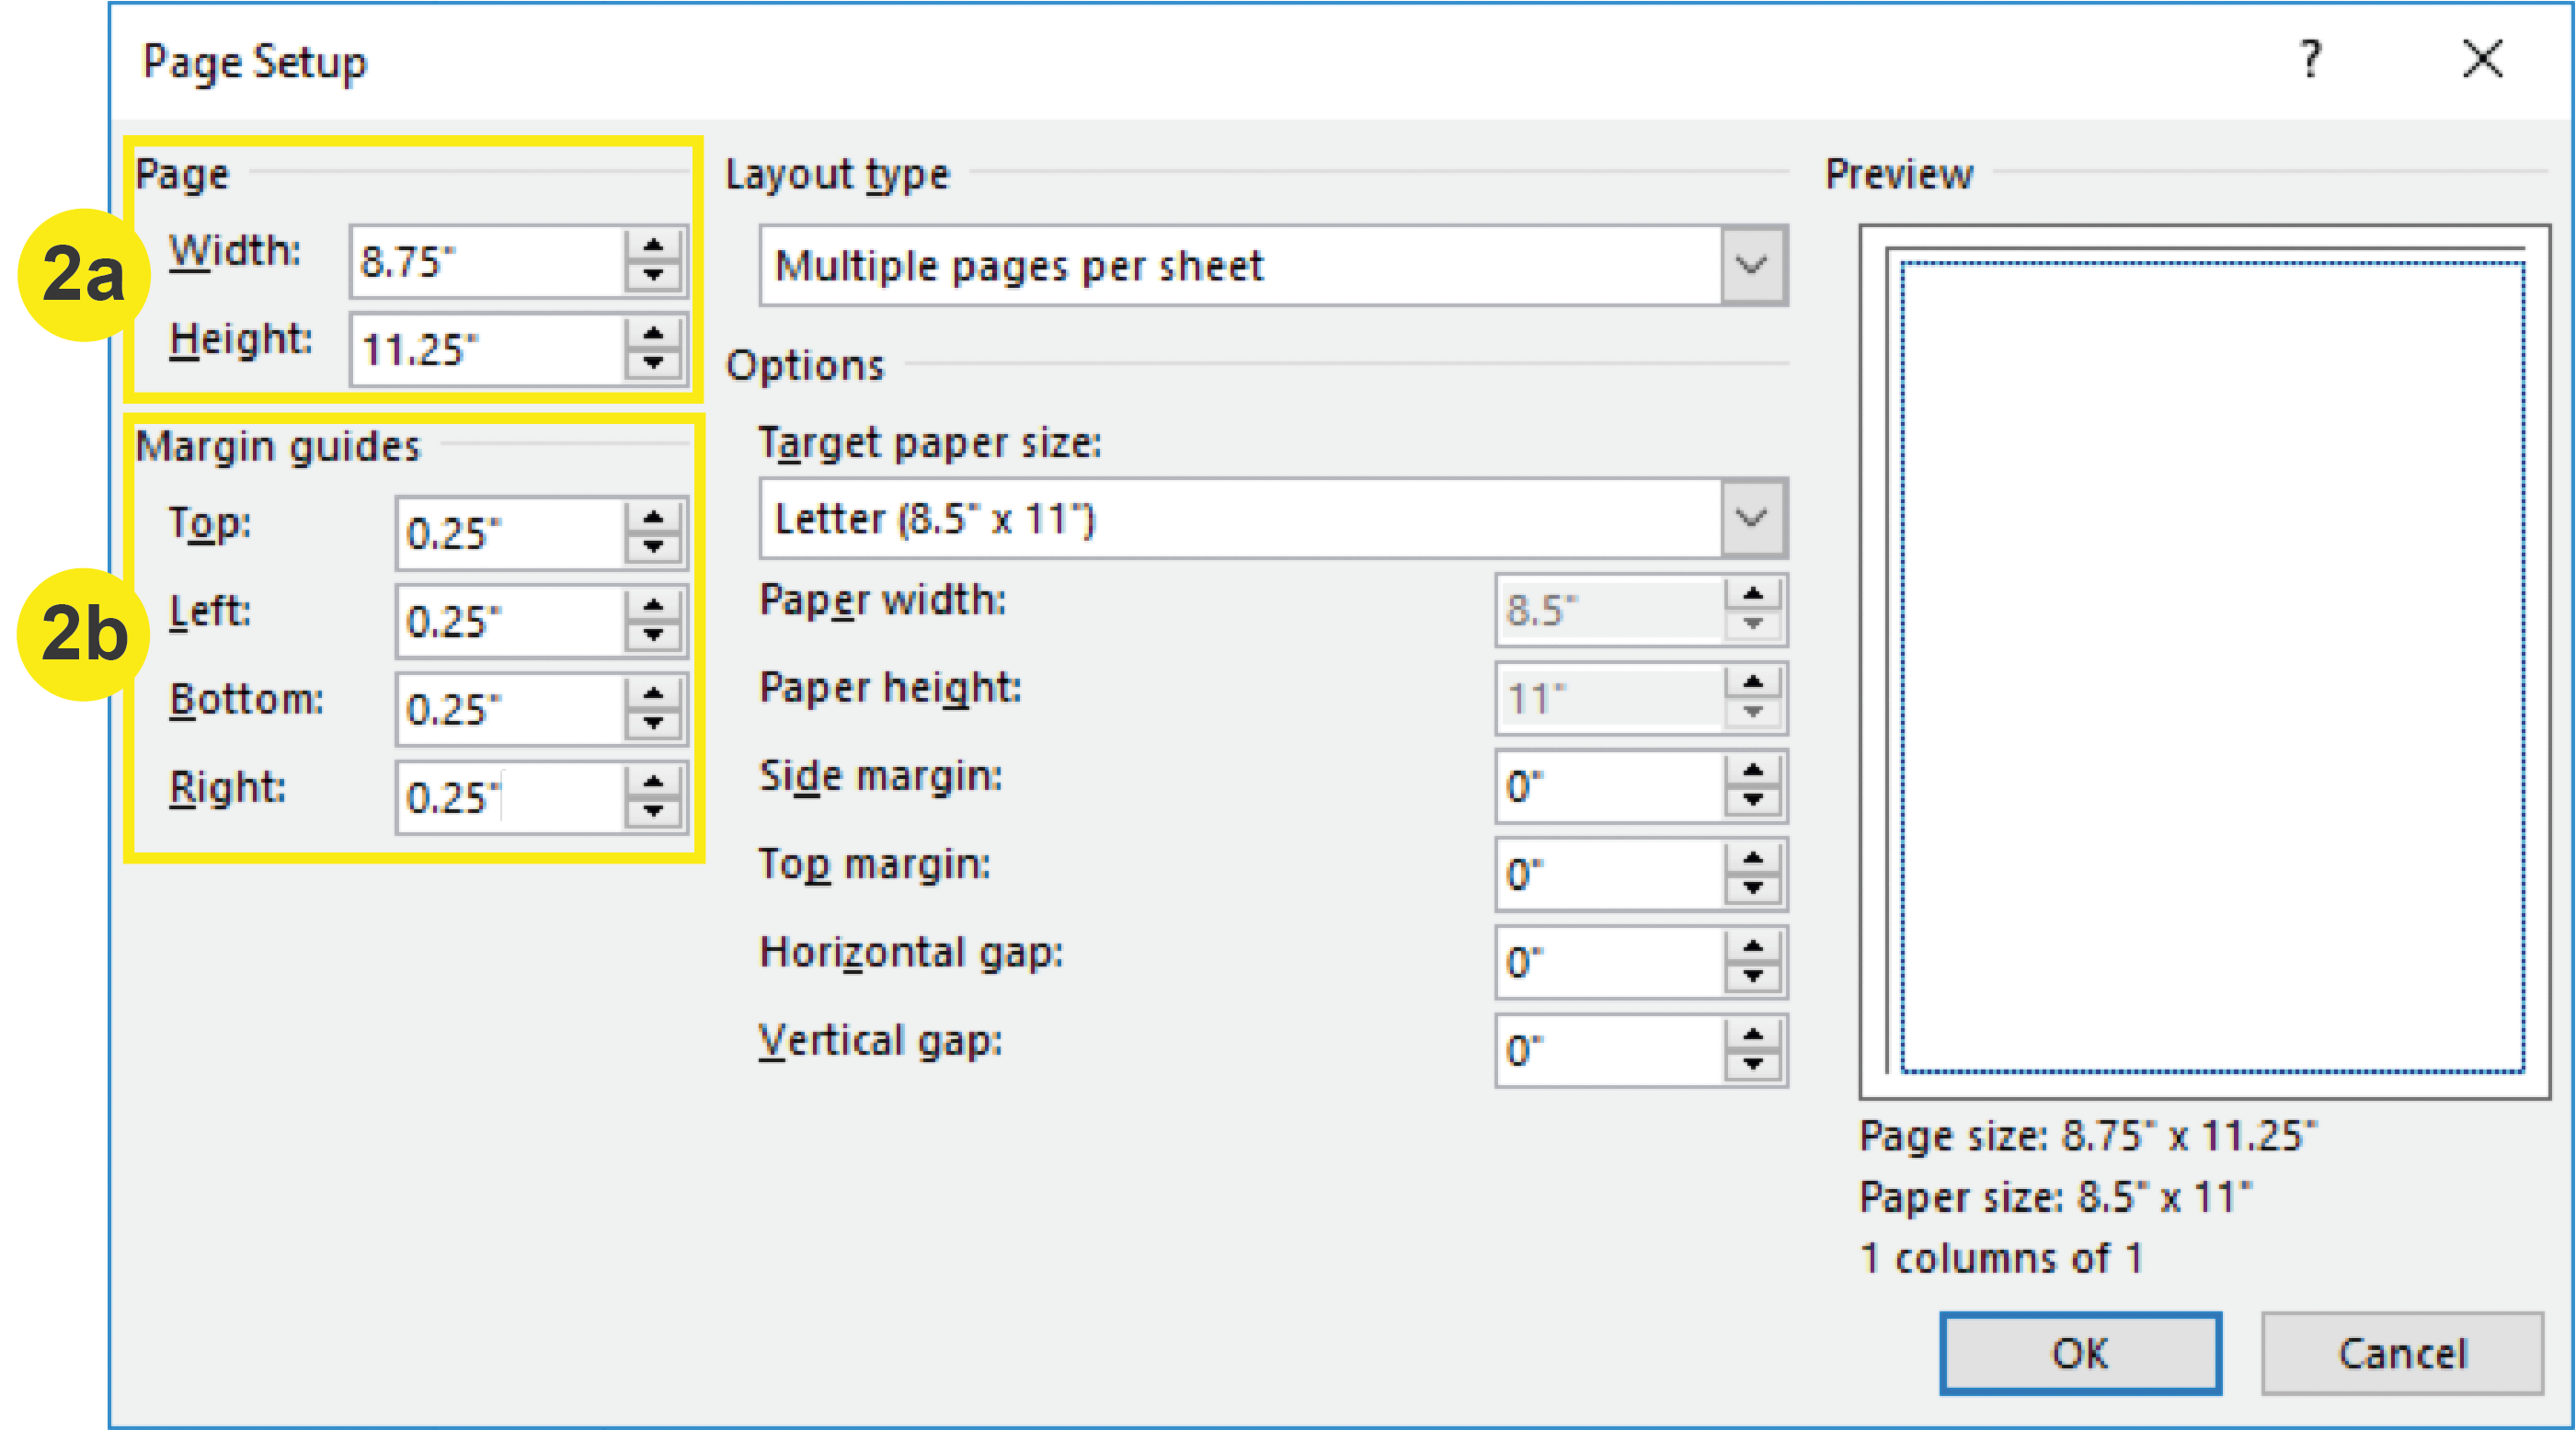
a. In the “Page” section, input the bleed size of your document. To determine the bleed size, add .25 inches to both the width and height. For Example: An 8.5” x 11” Letterhead plus bleed would be 8.75” x 11.25”
b. In the “Margin guides” section, change the value to .25 inches for each side (top, left, bottom, right). Click OK. Note: Note that your Target Paper Size (Final Trim Size) remains 8.5” x 11”
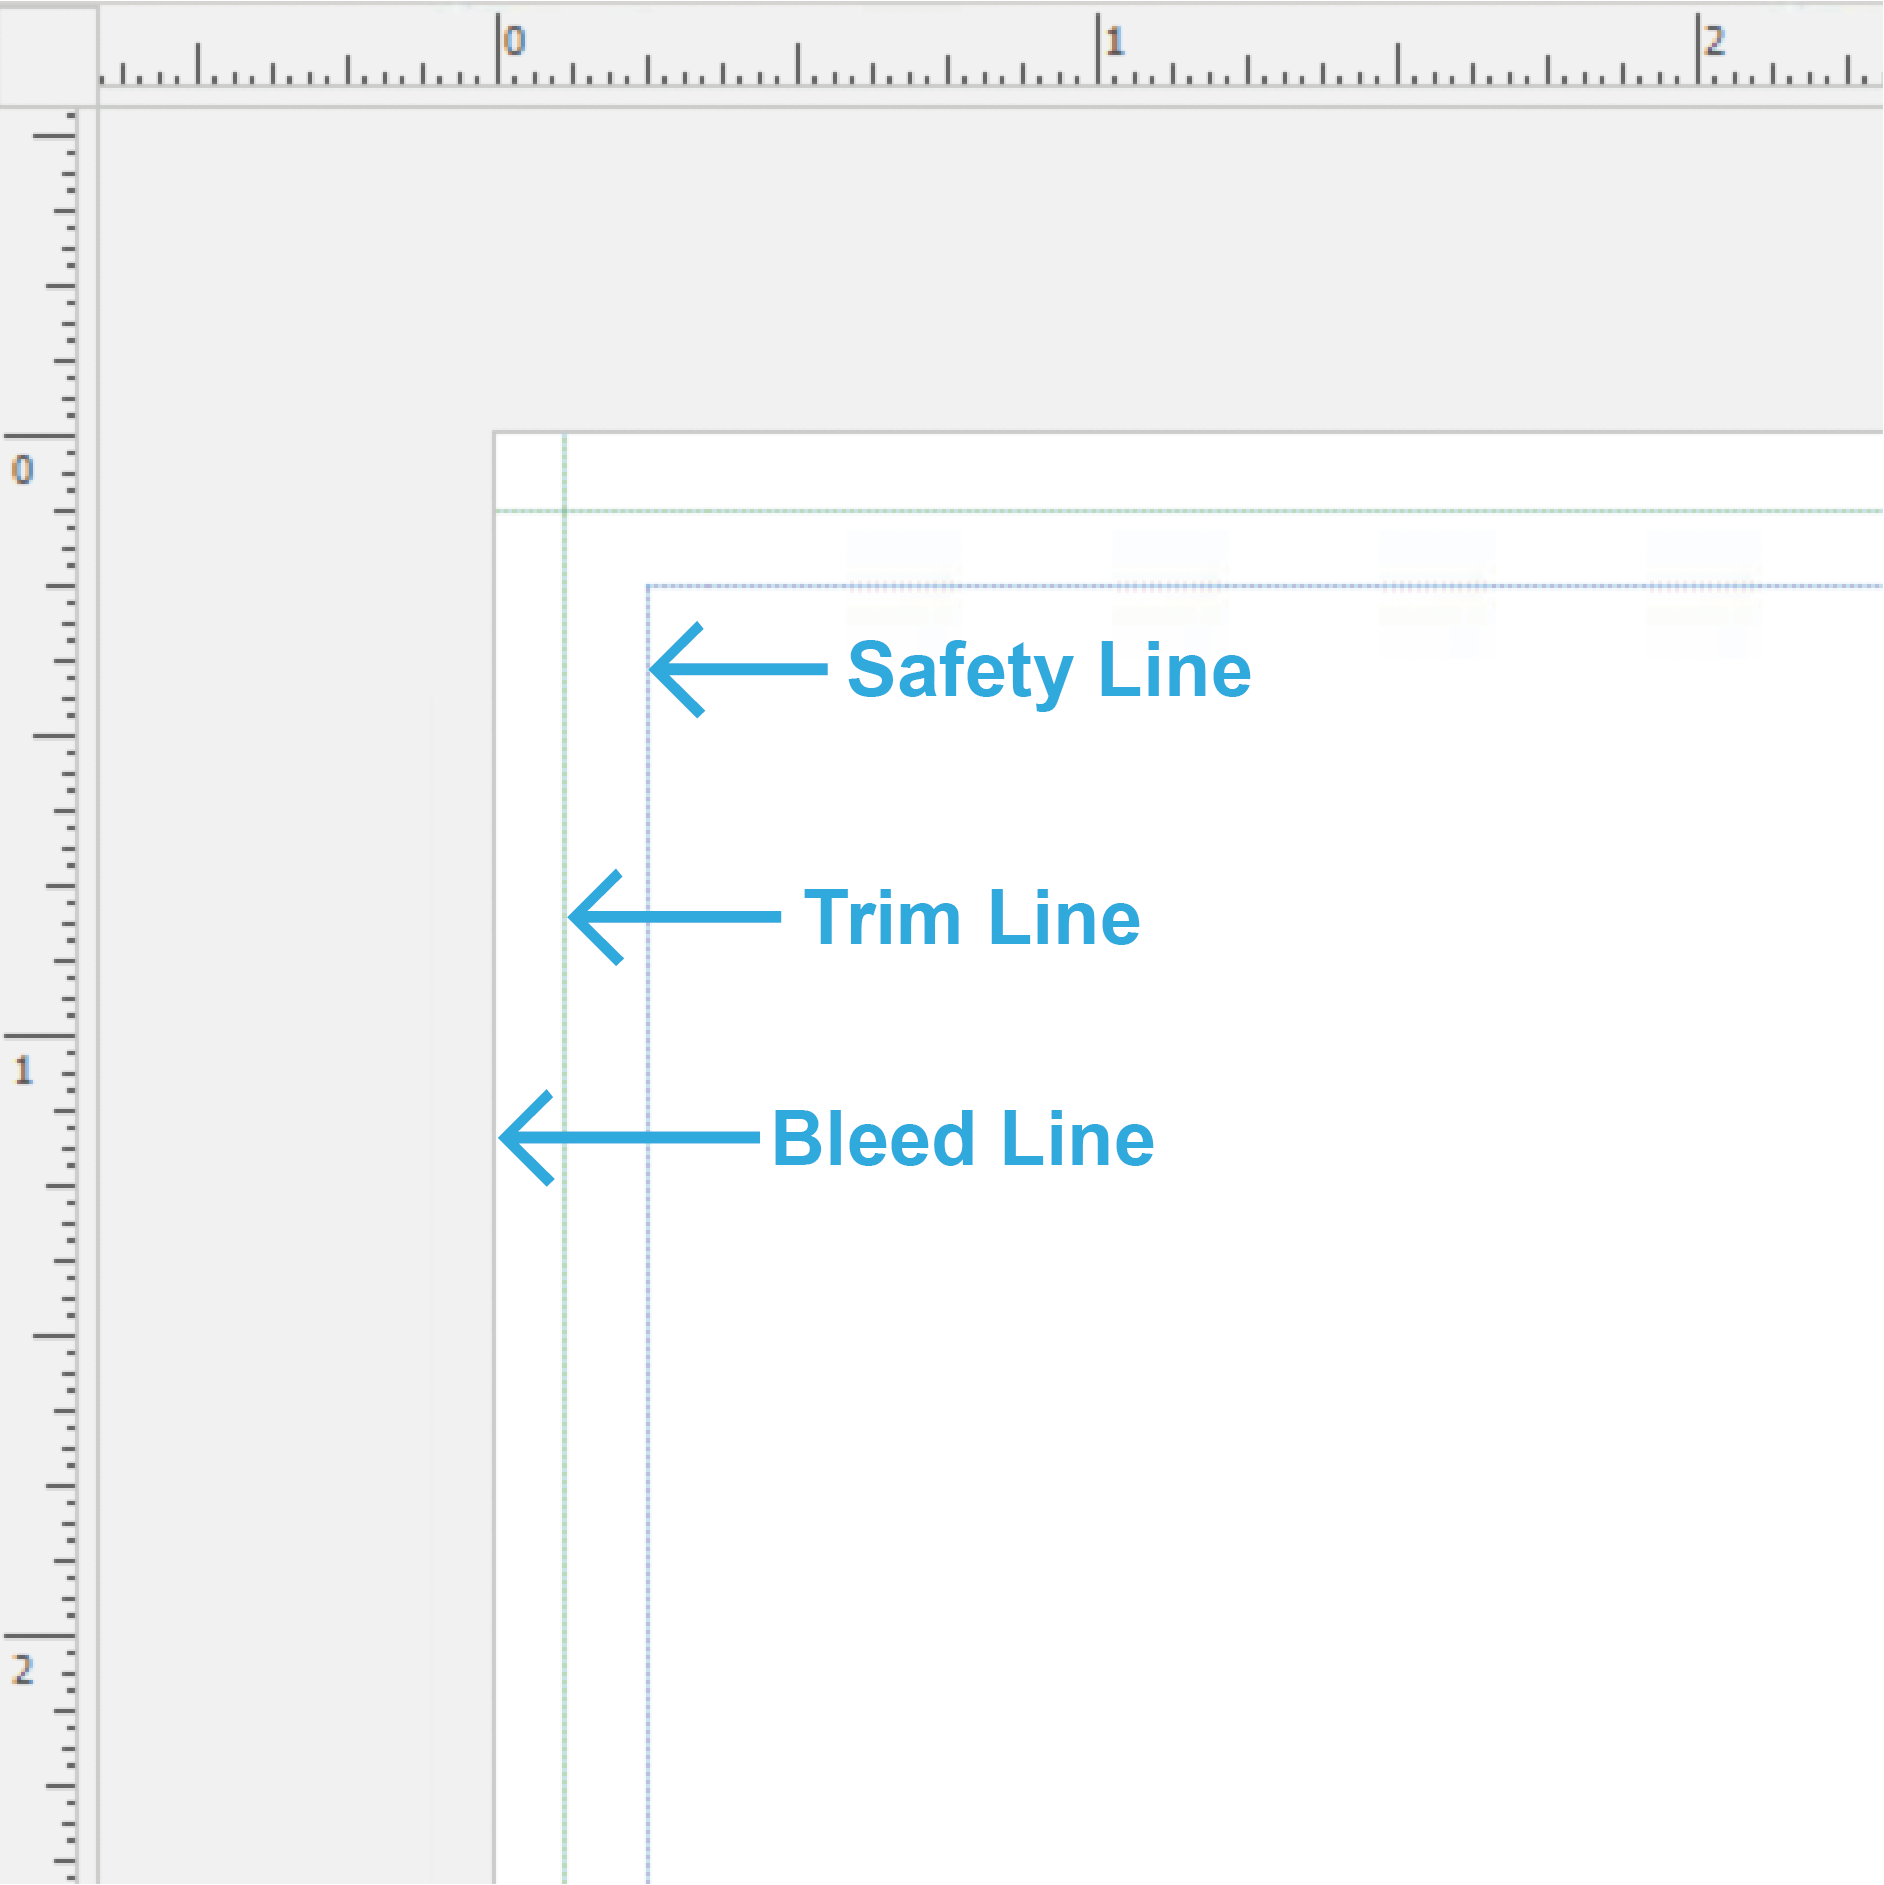
3. Use Rulers to Create a Trim Guide
After adding bleed to and margins (safety lines) to your document, you still will not be able to see where your trim line will be. To add a Trim Guide to your document, Click + Drag your mouse from the rulers to create a .125 inch guide within the document. This should fall directly between the edge of the document and the innermost margins (safety lines).
4. Utilizing the Bleed Line
To utilize your bleeds when designing, extend your graphics and/or images (that you want to print up to the edge) beyond the edge of the page to the bleed line. Note: Your images when bleeding to the edge will cover up all of your Guides.
5. Utilizing the Margins (Safety Lines)
Place your important information (Page numbers, logos, text, etc.) within the safety line to ensure that you don’t lose any of it during the trimming process.
In your design, click “File” at the top left side of the screen.
Click “View settings” and ensure the following options have a checkmark next to them: “Show rulers and guides”, and “Show print bleed”.
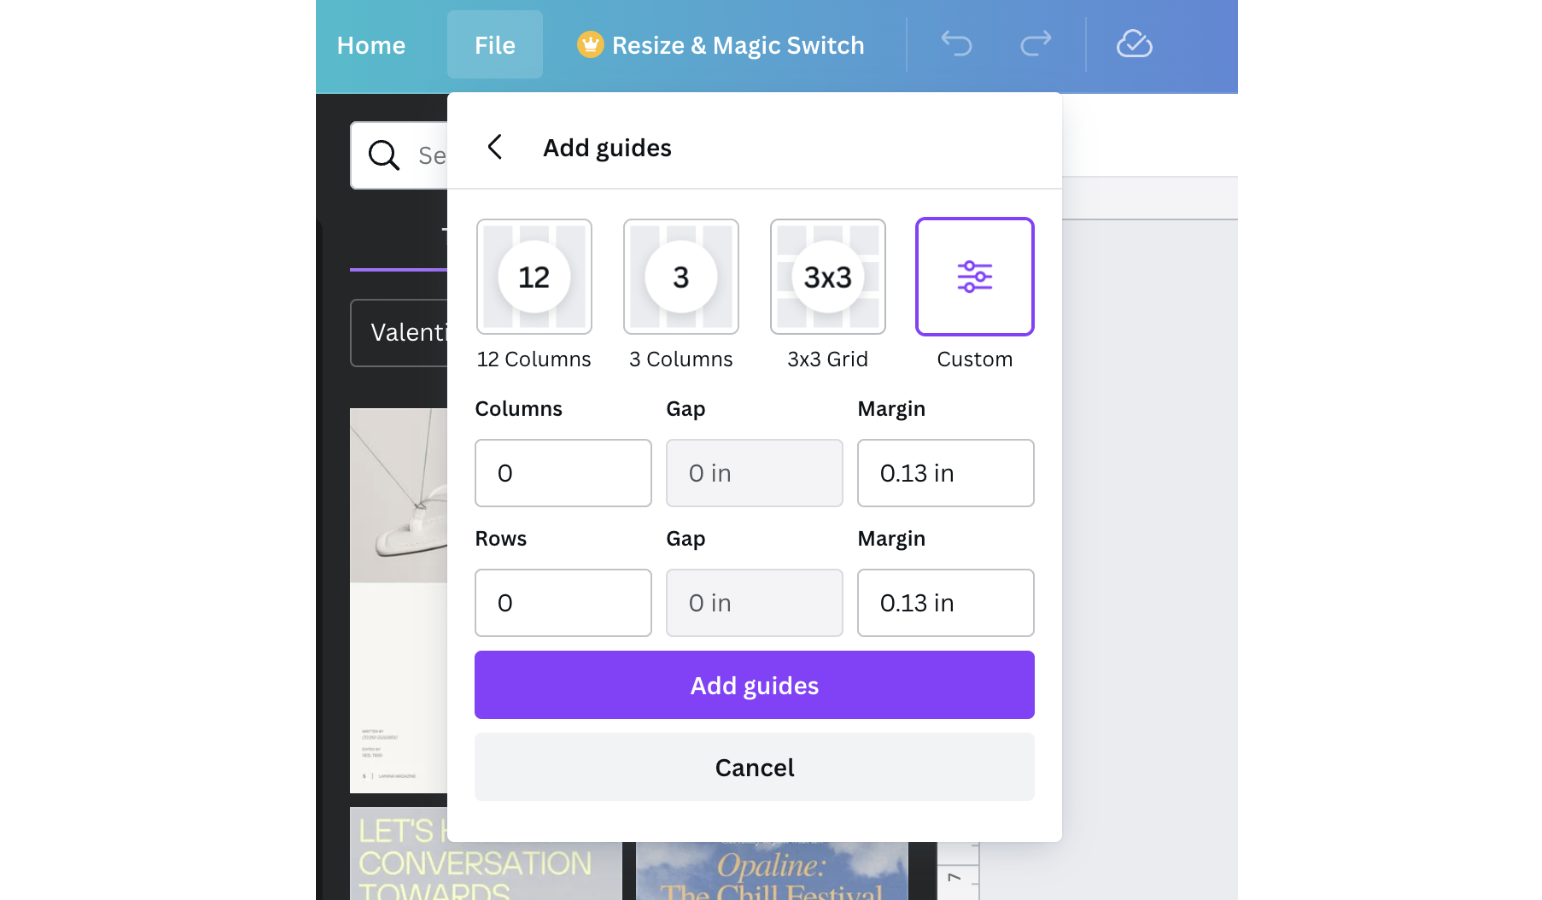
After this, Go to File > View Settings > Add guides. Choose the “Custom” option.
Under the “Margin” boxes, enter “0.13” for both boxes. Make sure the “Columns”, “Rows” and “Gap” are all set to 0. Click “Add guides”.
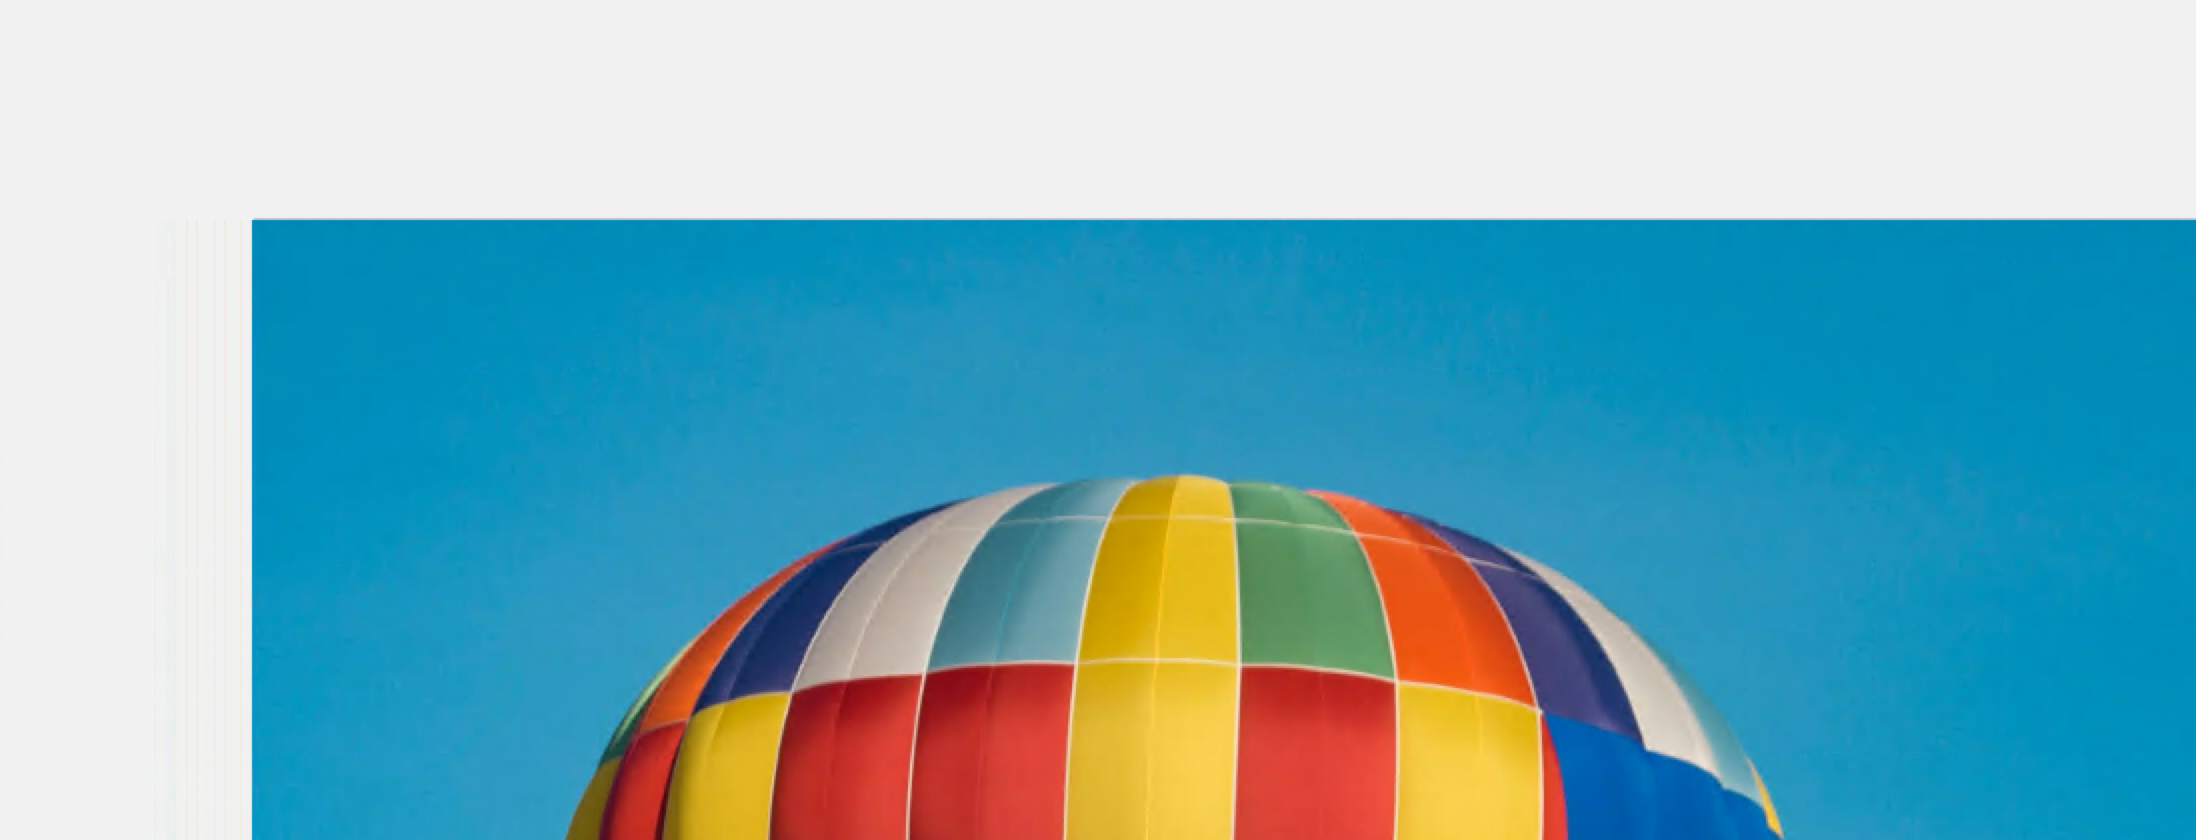
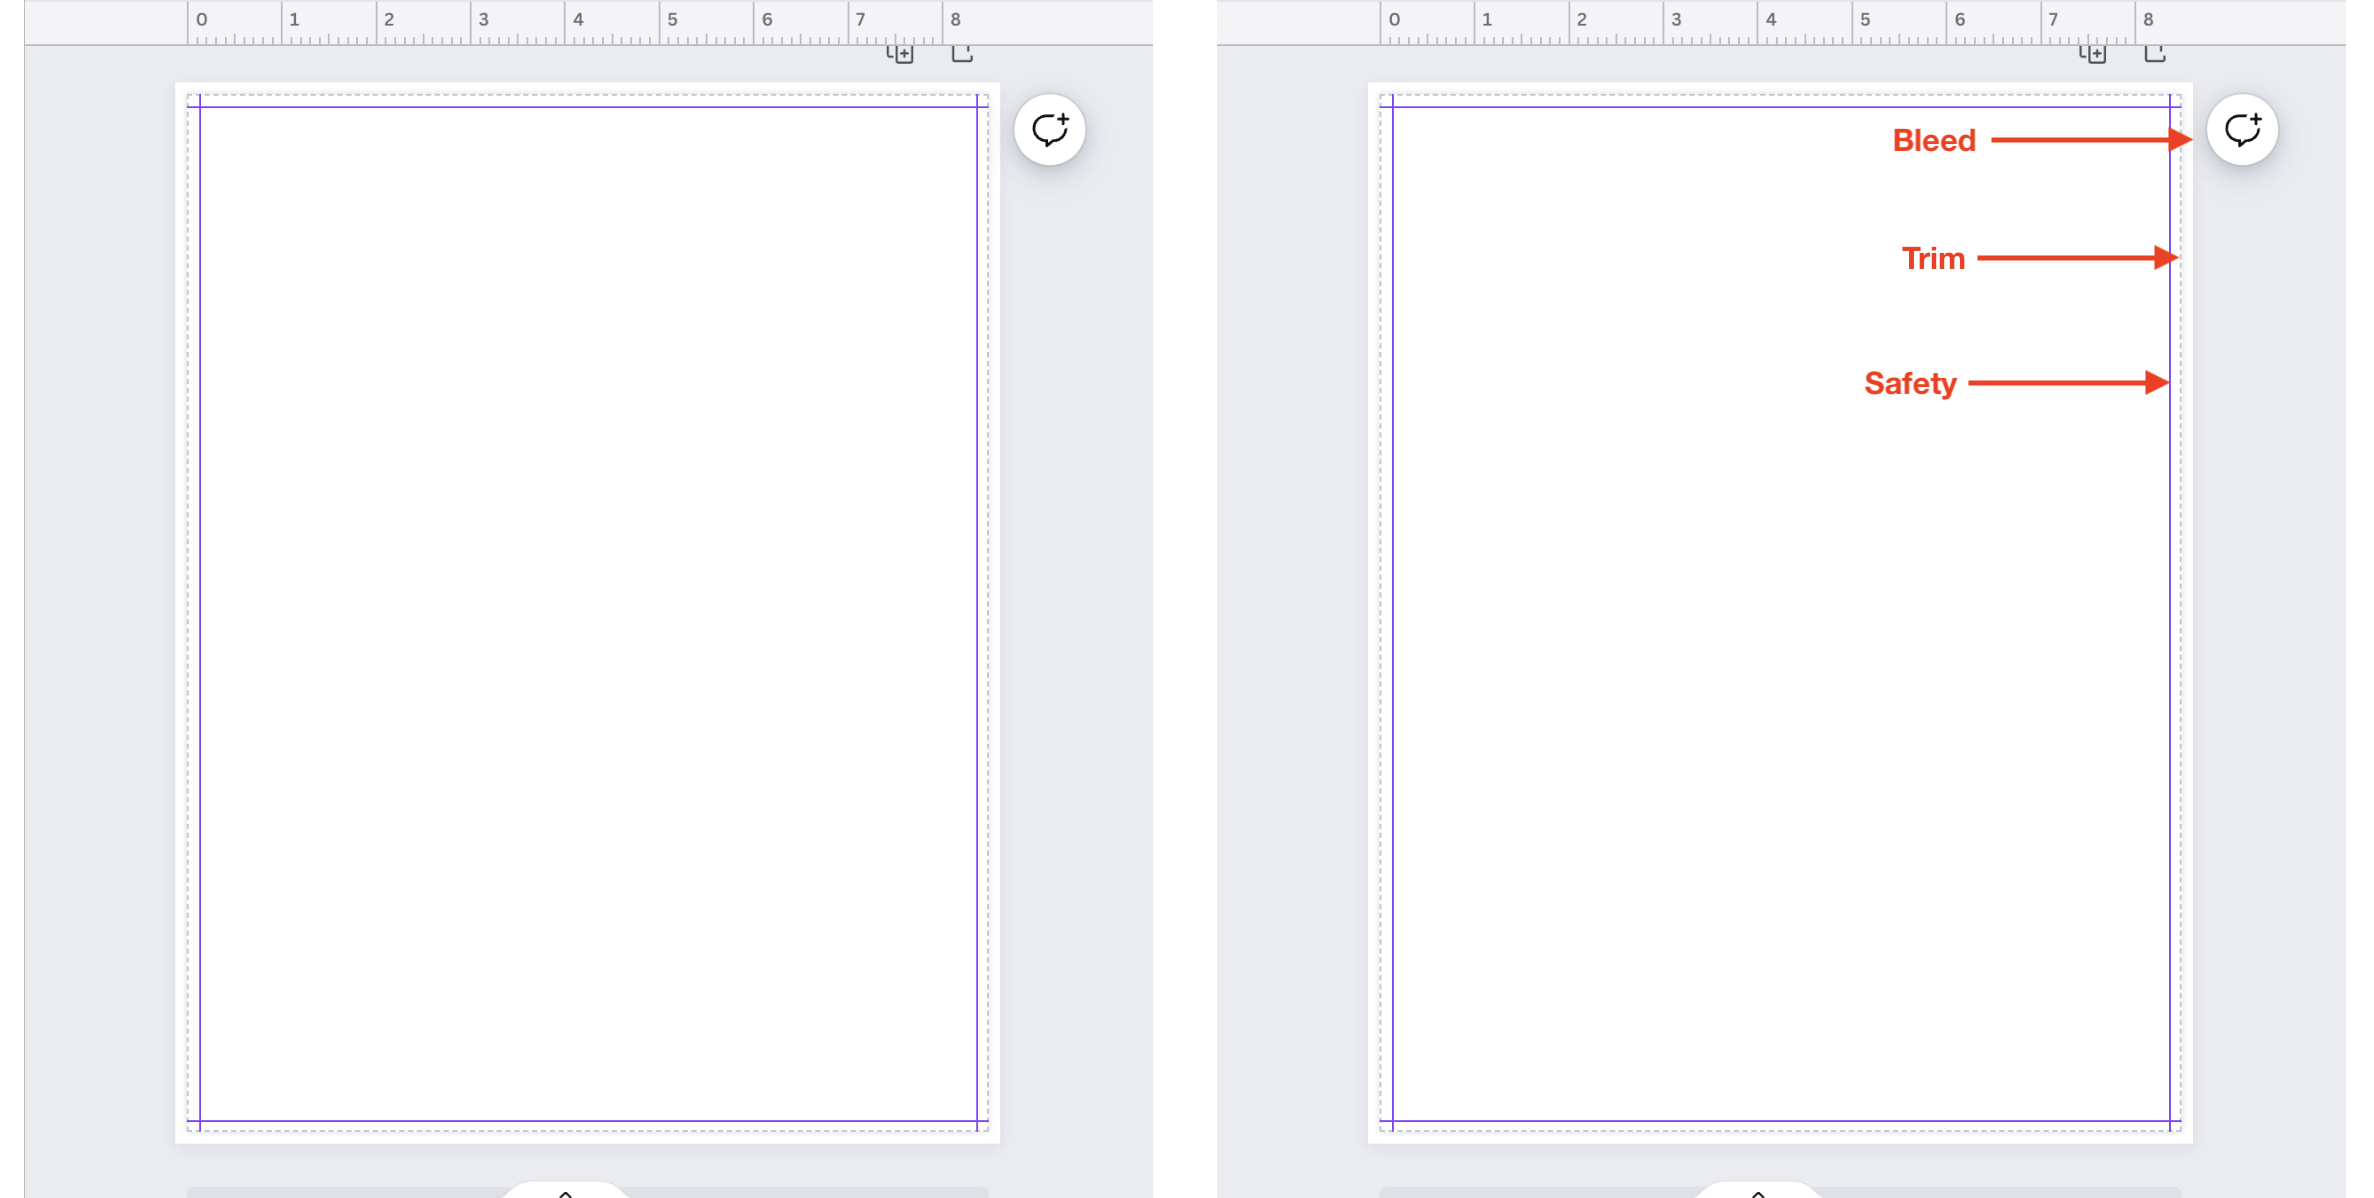
2. Your page should look similar to this:
3. Utilizing the Safety Line
Ensure all important elements are within the Safety and make sure your page goes fully out to the bleed lines to ensure no white slivers appear on your final product.
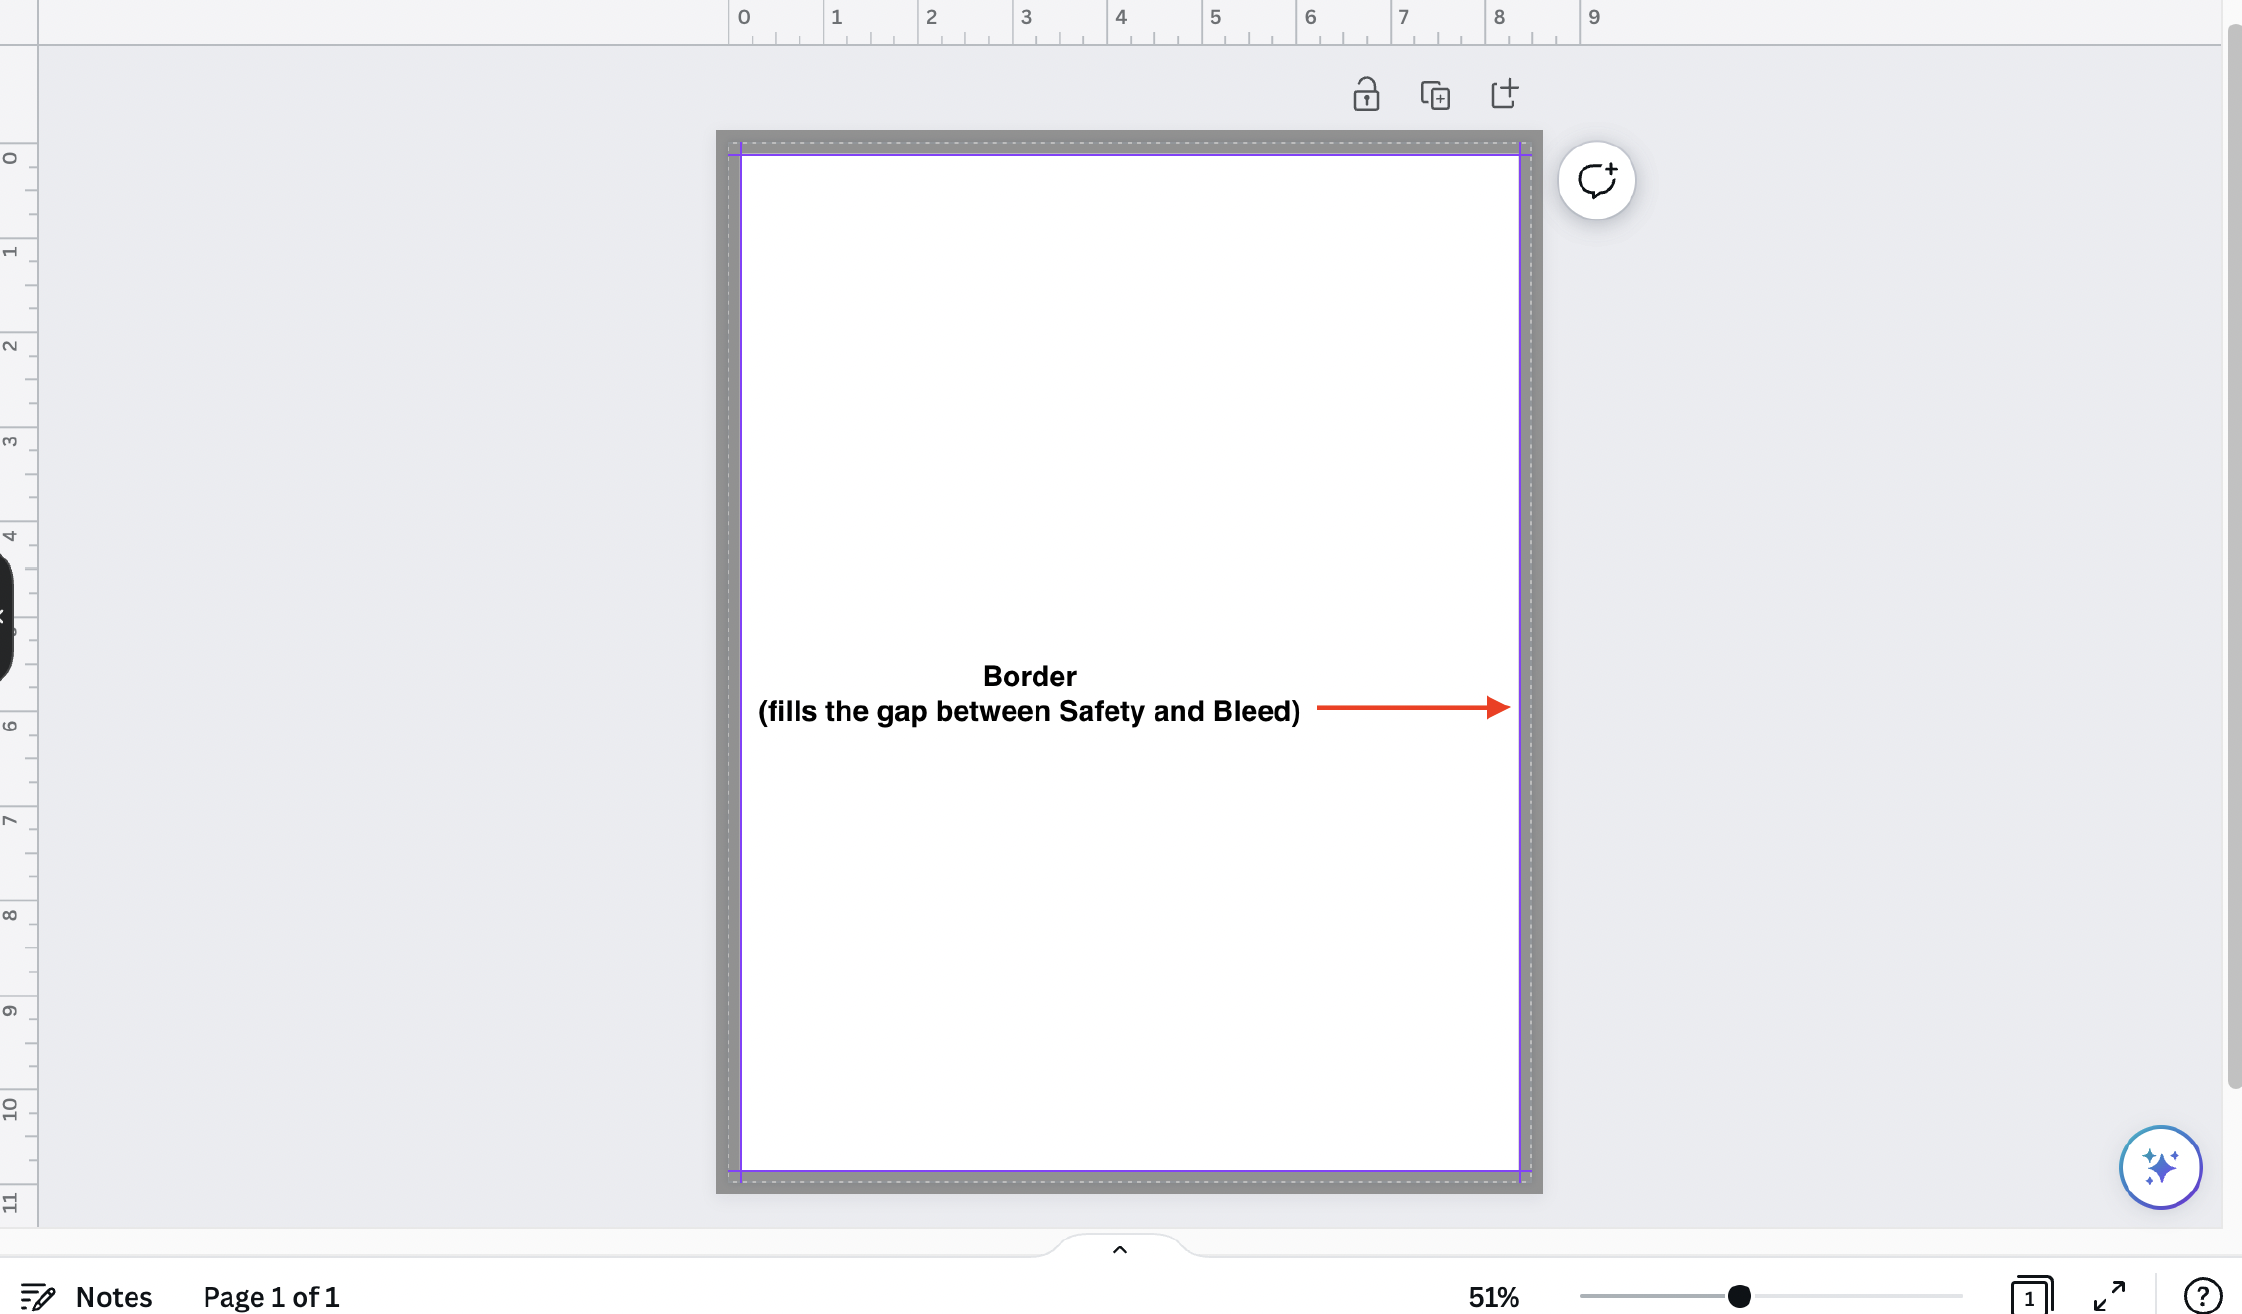
Trim line: You will want to ensure that none of your images/graphics line up with the trim line. This will create uneven cuts in your final product.
Borders: If you desire to have a border around your page, ensure that the border extends at least to the safe area line. (If you want a thicker border, you can adjust it to fill further into the safe area)