InDesign
Print-Ready File Creation: InDesign
Checklist
1. File > New > Document
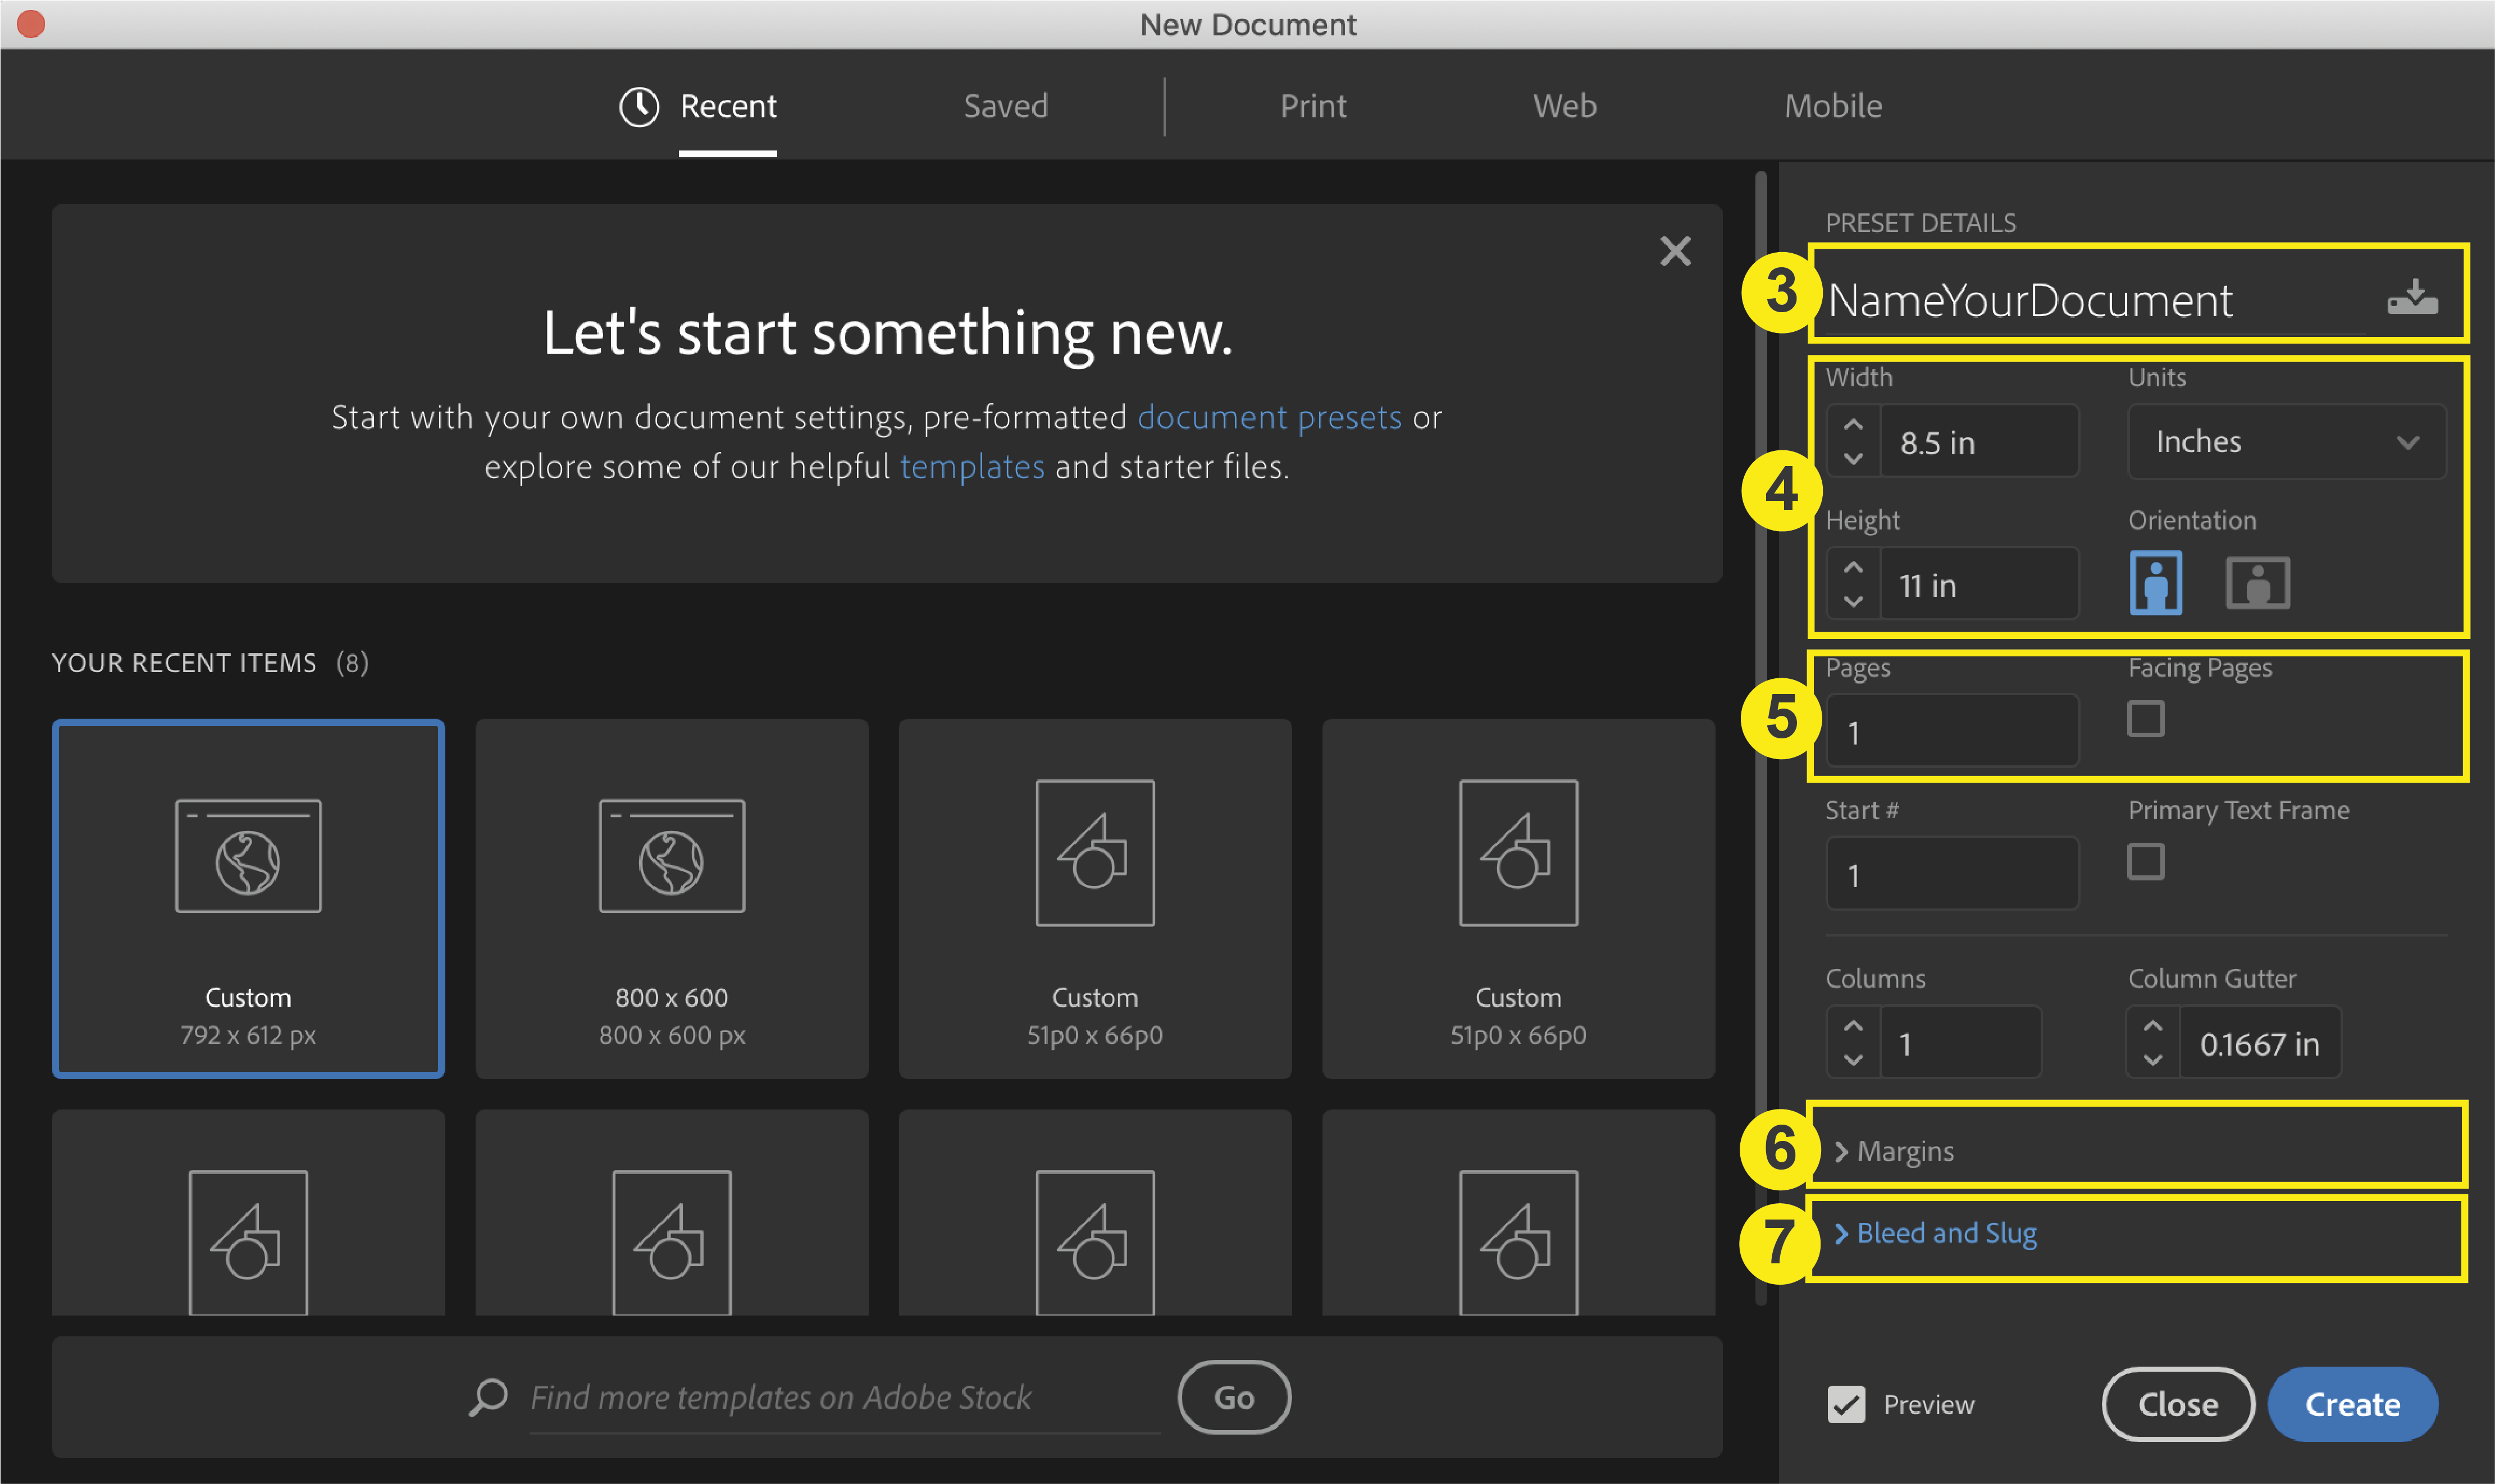
2. Name
3. Size
4. Pages
5. Margins (Safety Lines)
6. Bleed
1. Download & Install PrintingCenterUSA Color Profile
First, download our color profile and PDF Preset here. You will be downloading a .zip folder. Double click the file to unzip the folder.
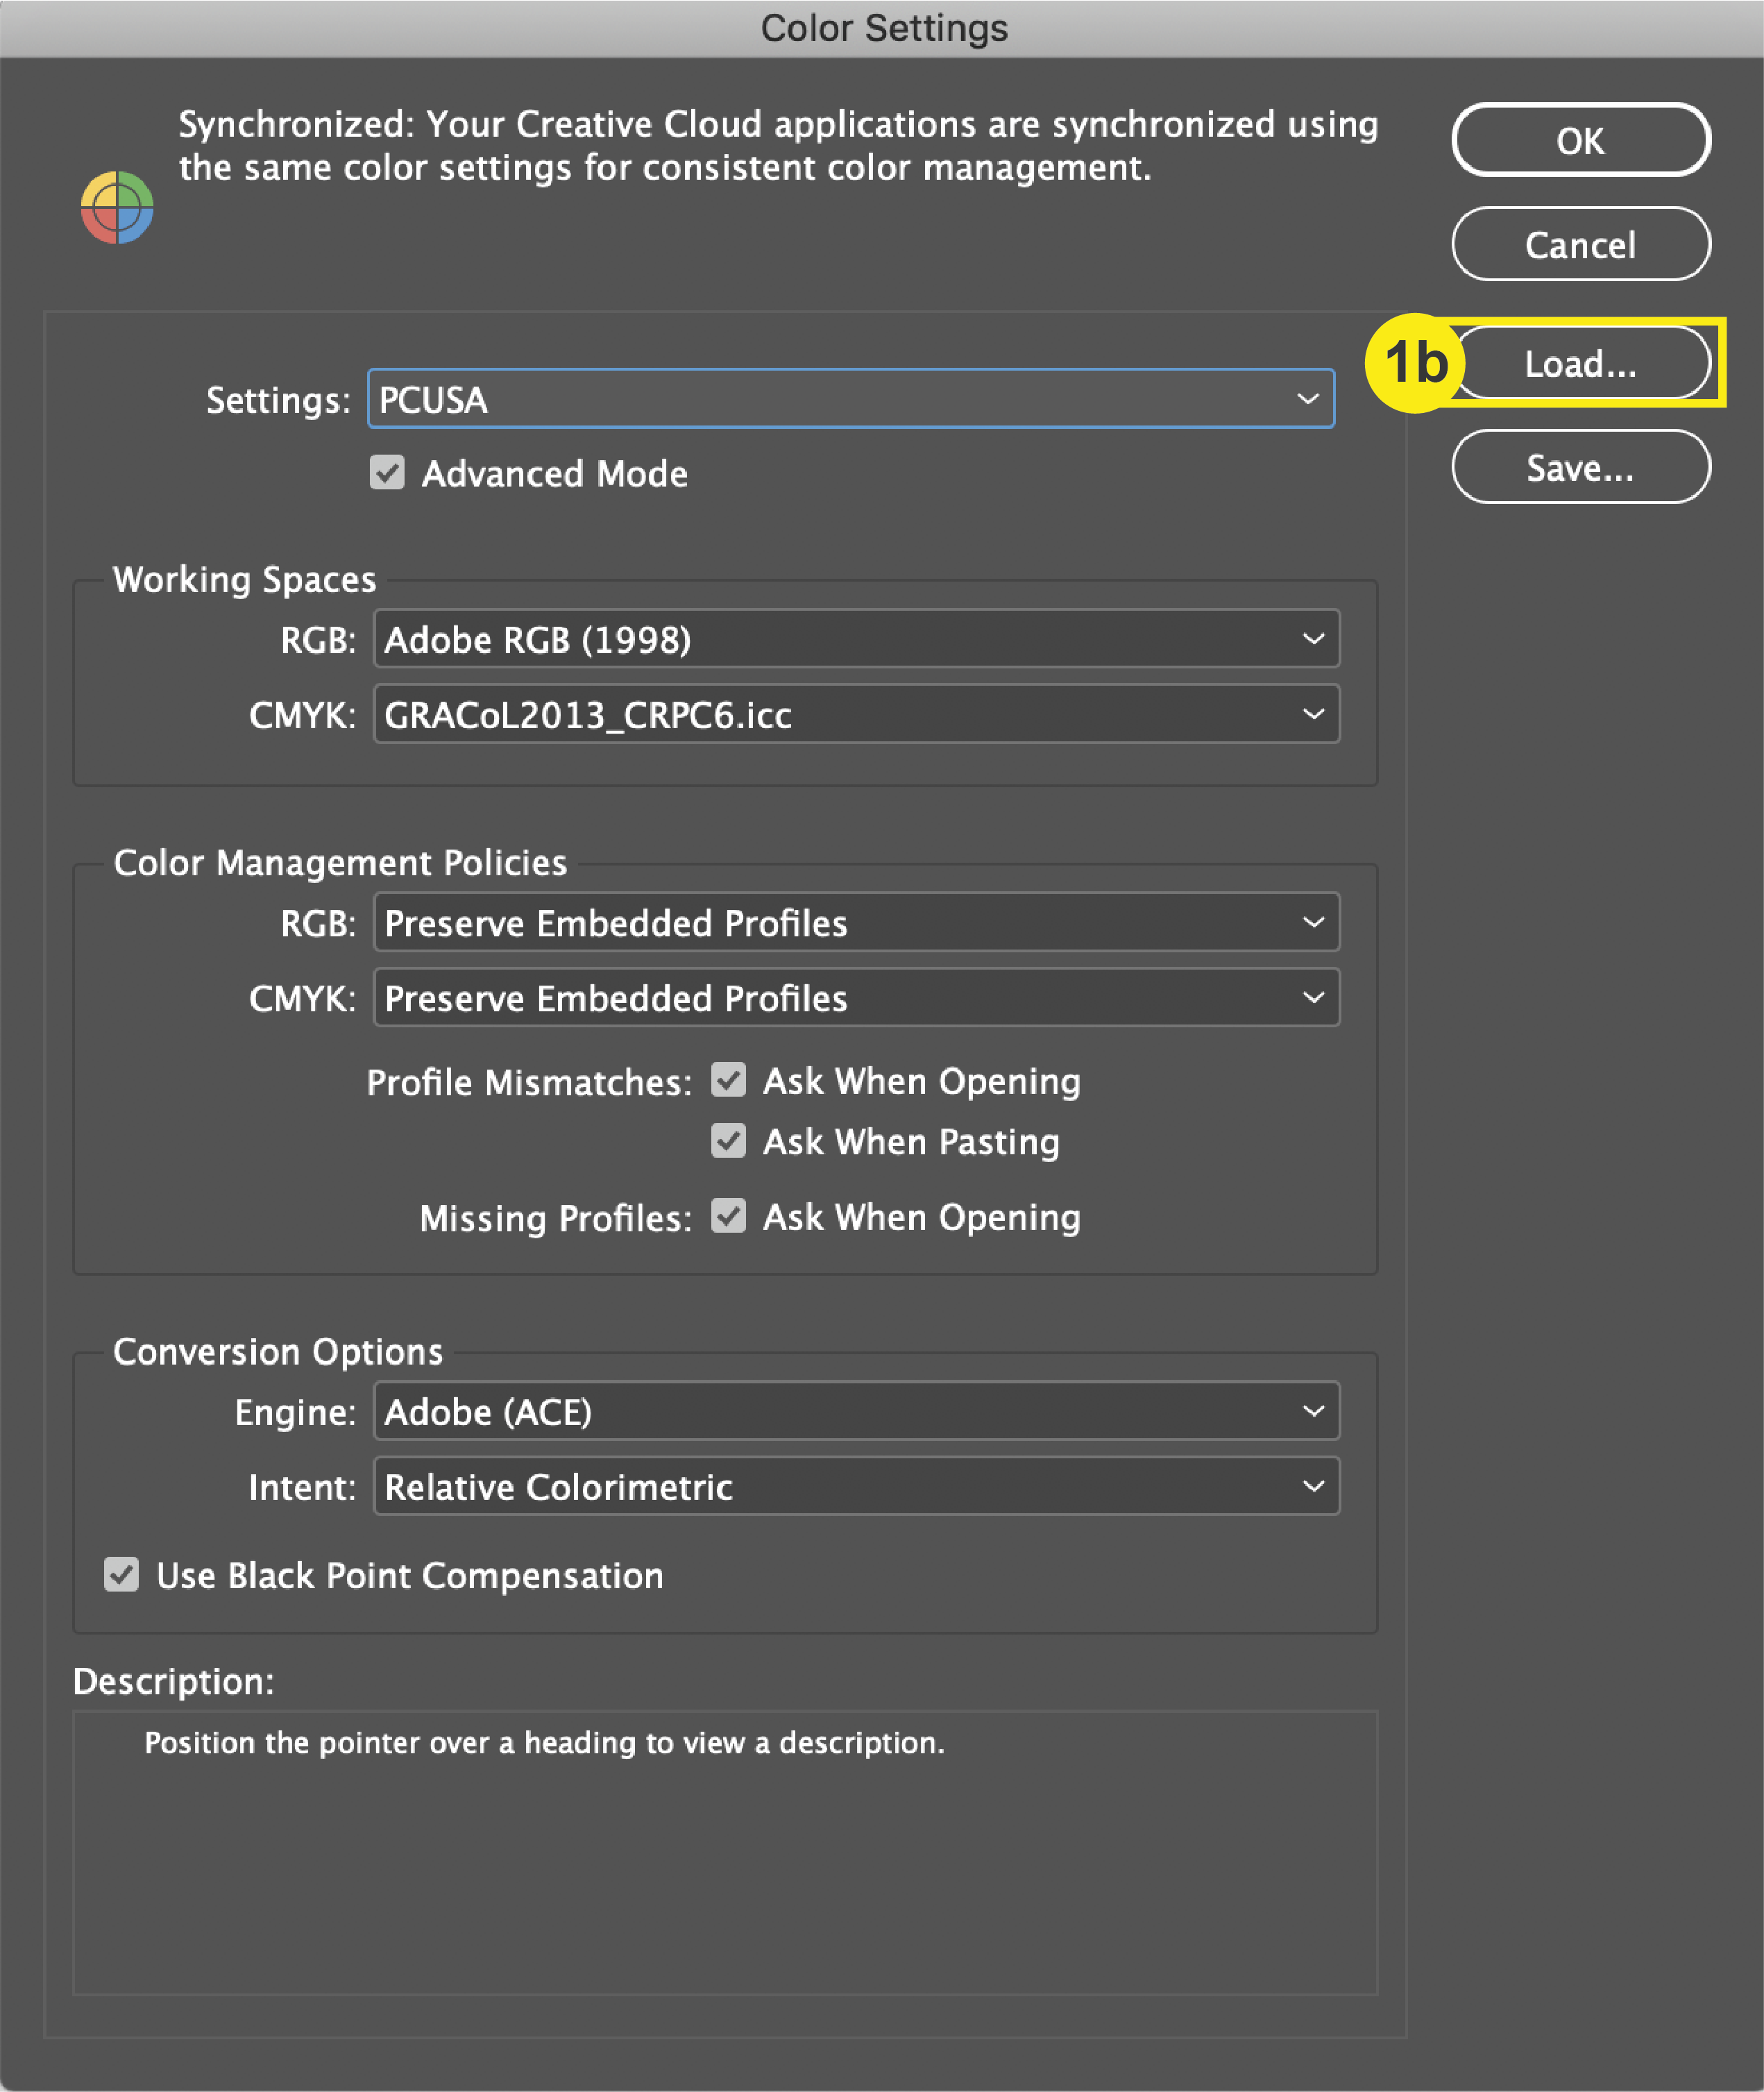
a. In InDesign, go to Edit > Color Settings
b. In the Color Settings window, select “Load” and choose “PCUSA-load into color settings.csf” Click Save.
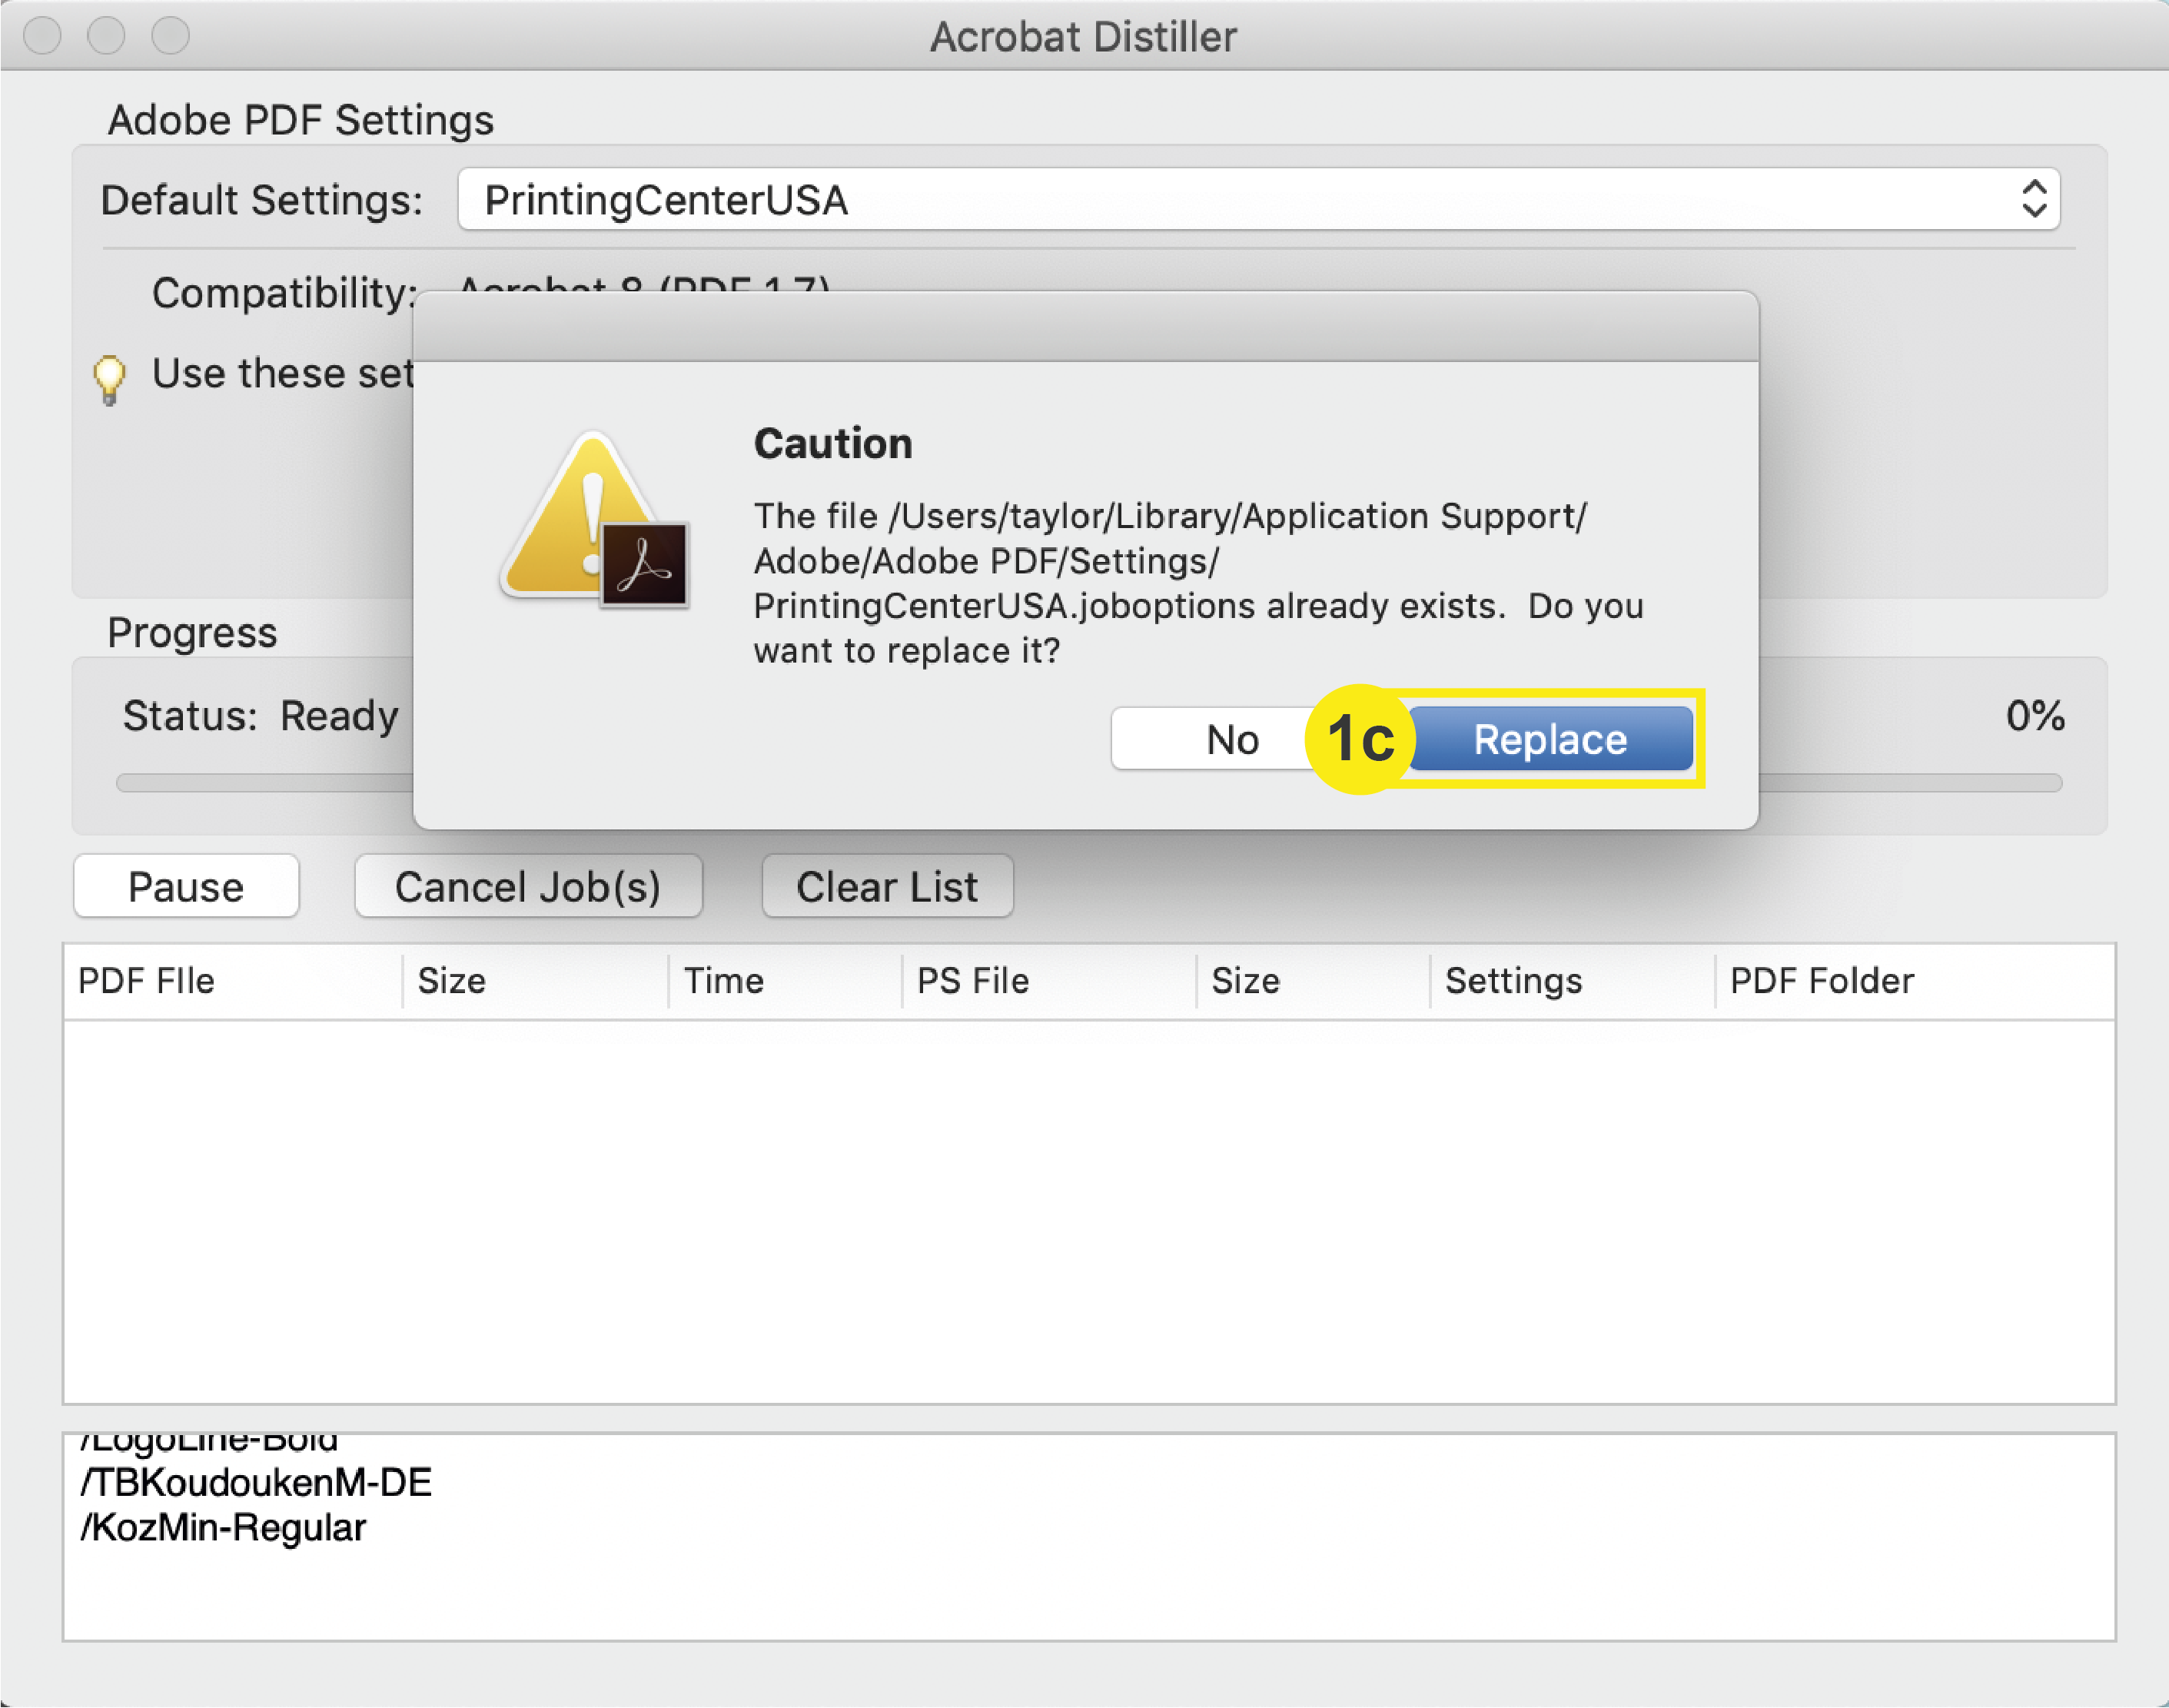
c. In the zip folder, double click PrintingCenterUSA.joboptions. Click “replace” if a caution window comes up. Click exit.
Note: To learn how to load PrintingCenterUSA’s PDF Preset for file saving, click here.

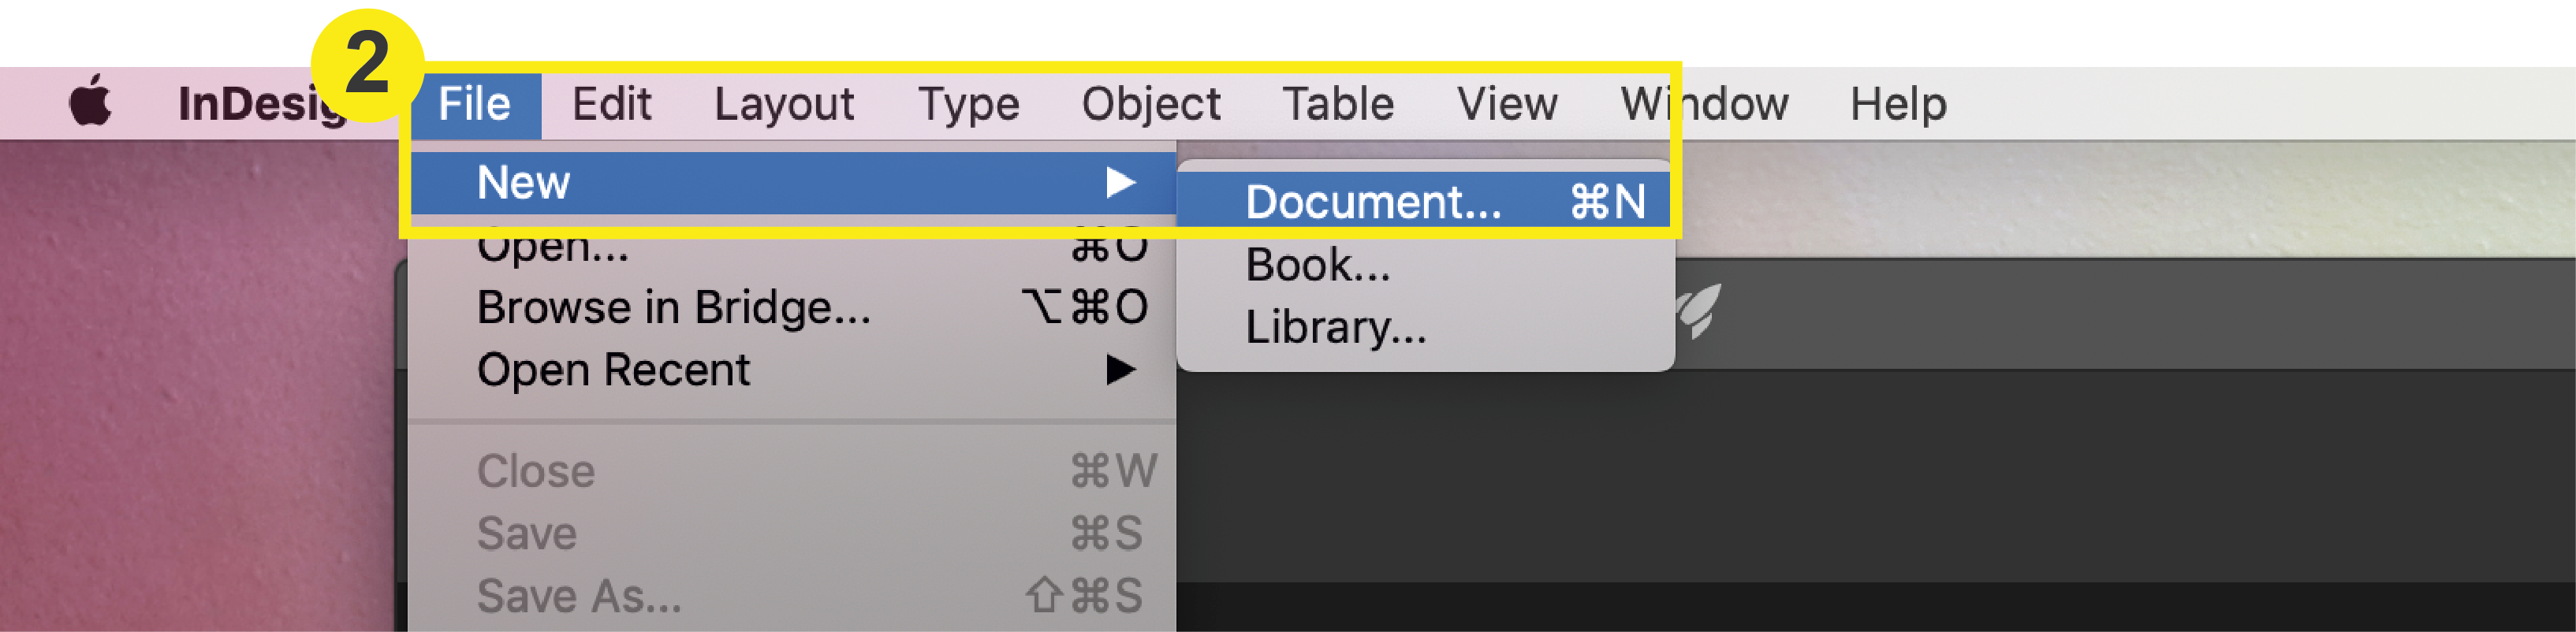
2. File > New > Document
Once you have opened InDesign, go to the top menu to select File > New > Document. This will prompt a “New Document” window to open where you will define your document settings.
3. Name
First, you should always name your project in the name field.
4. Size
Input the size of your document (the final trim size) in inches.
5. Pages
Input the number of pages for your project. Click here to learn more about counting your pages correctly.
Note: If creating a booklet, check the “Facing Pages” box.
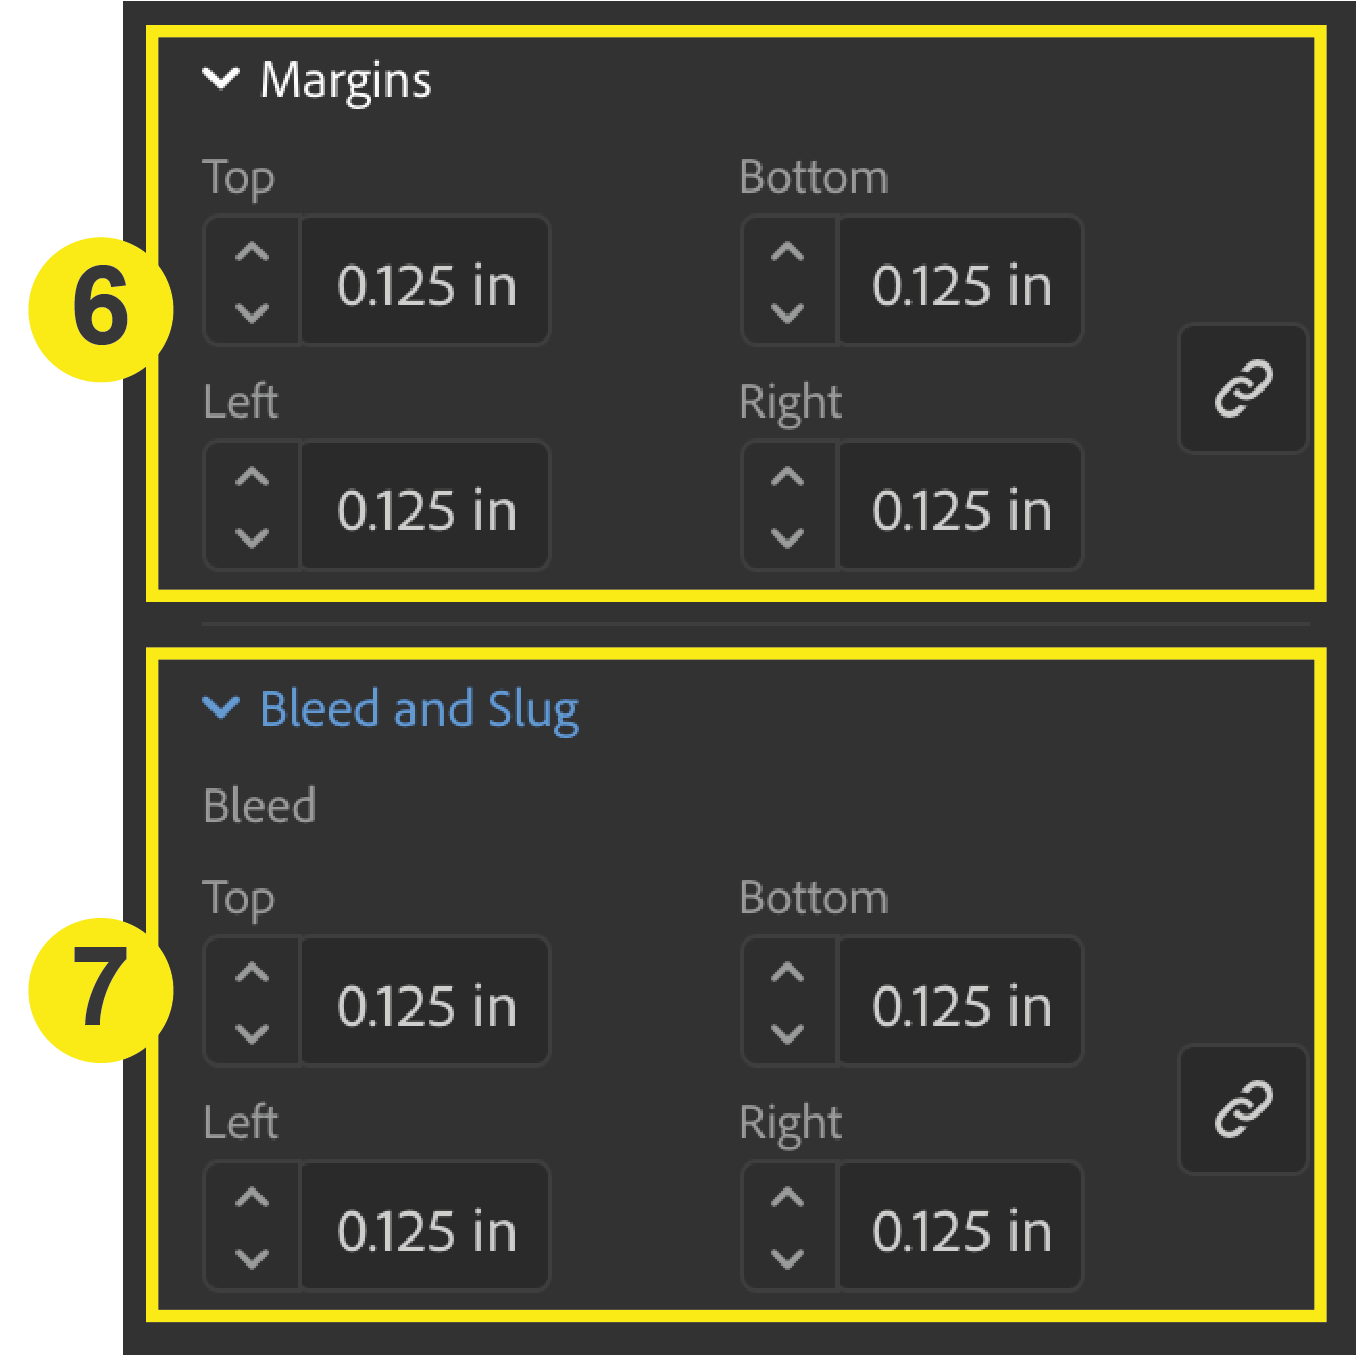
6. Margins (Safety Line)
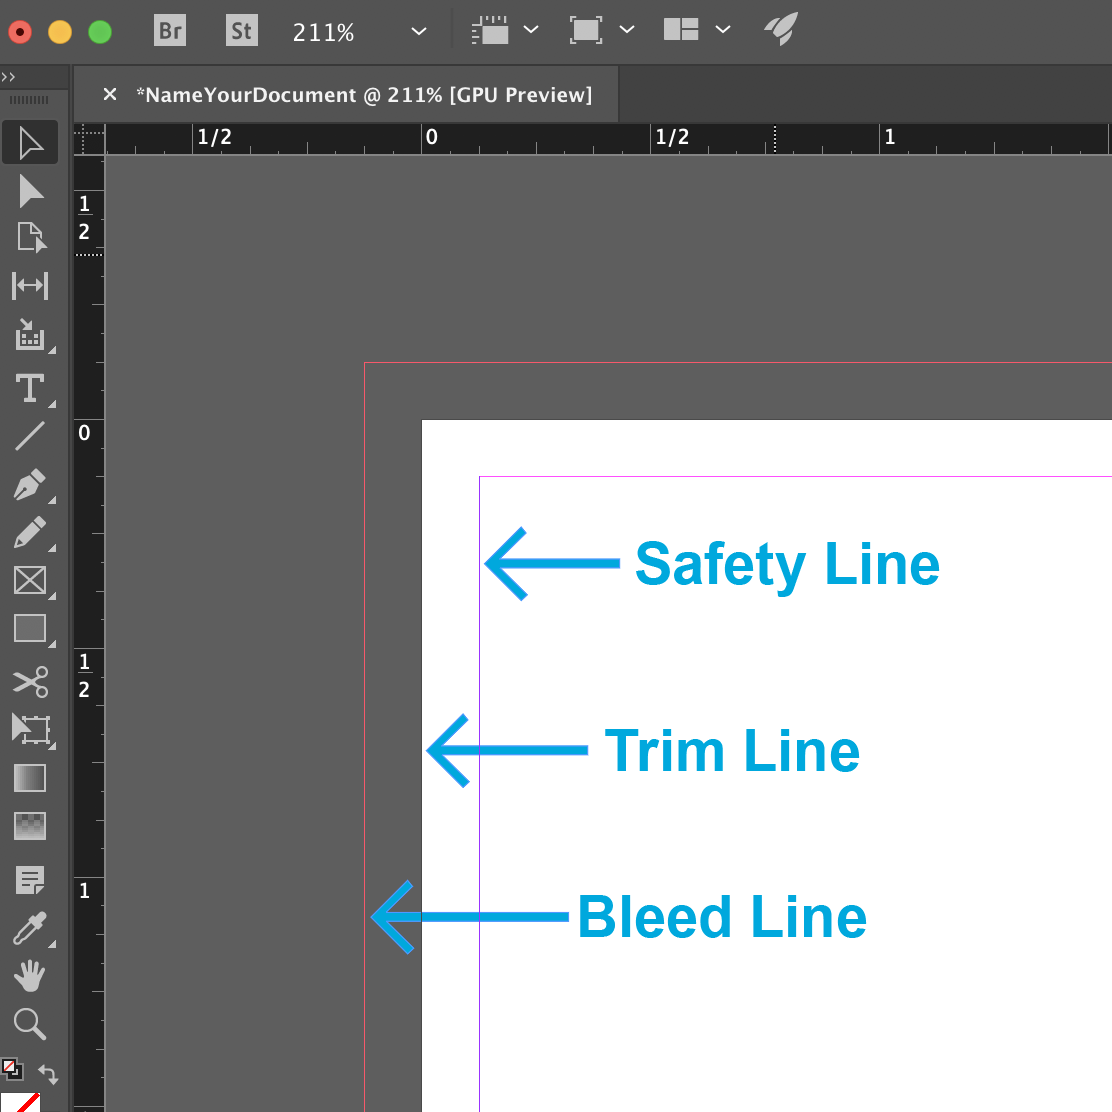
Expand the Margins section in the Document Setup window, and set them to 0.125 in. on each side (top, bottom, left, right) of your document. This will set up safety lines within your document.
7. Bleeds
Expand the Bleed and Slug section in the Document Setup window, and set the bleeds to 0.125 in. on each side (top, bottom, left, right) of your document. Once you are done with steps 2-7, click Create.
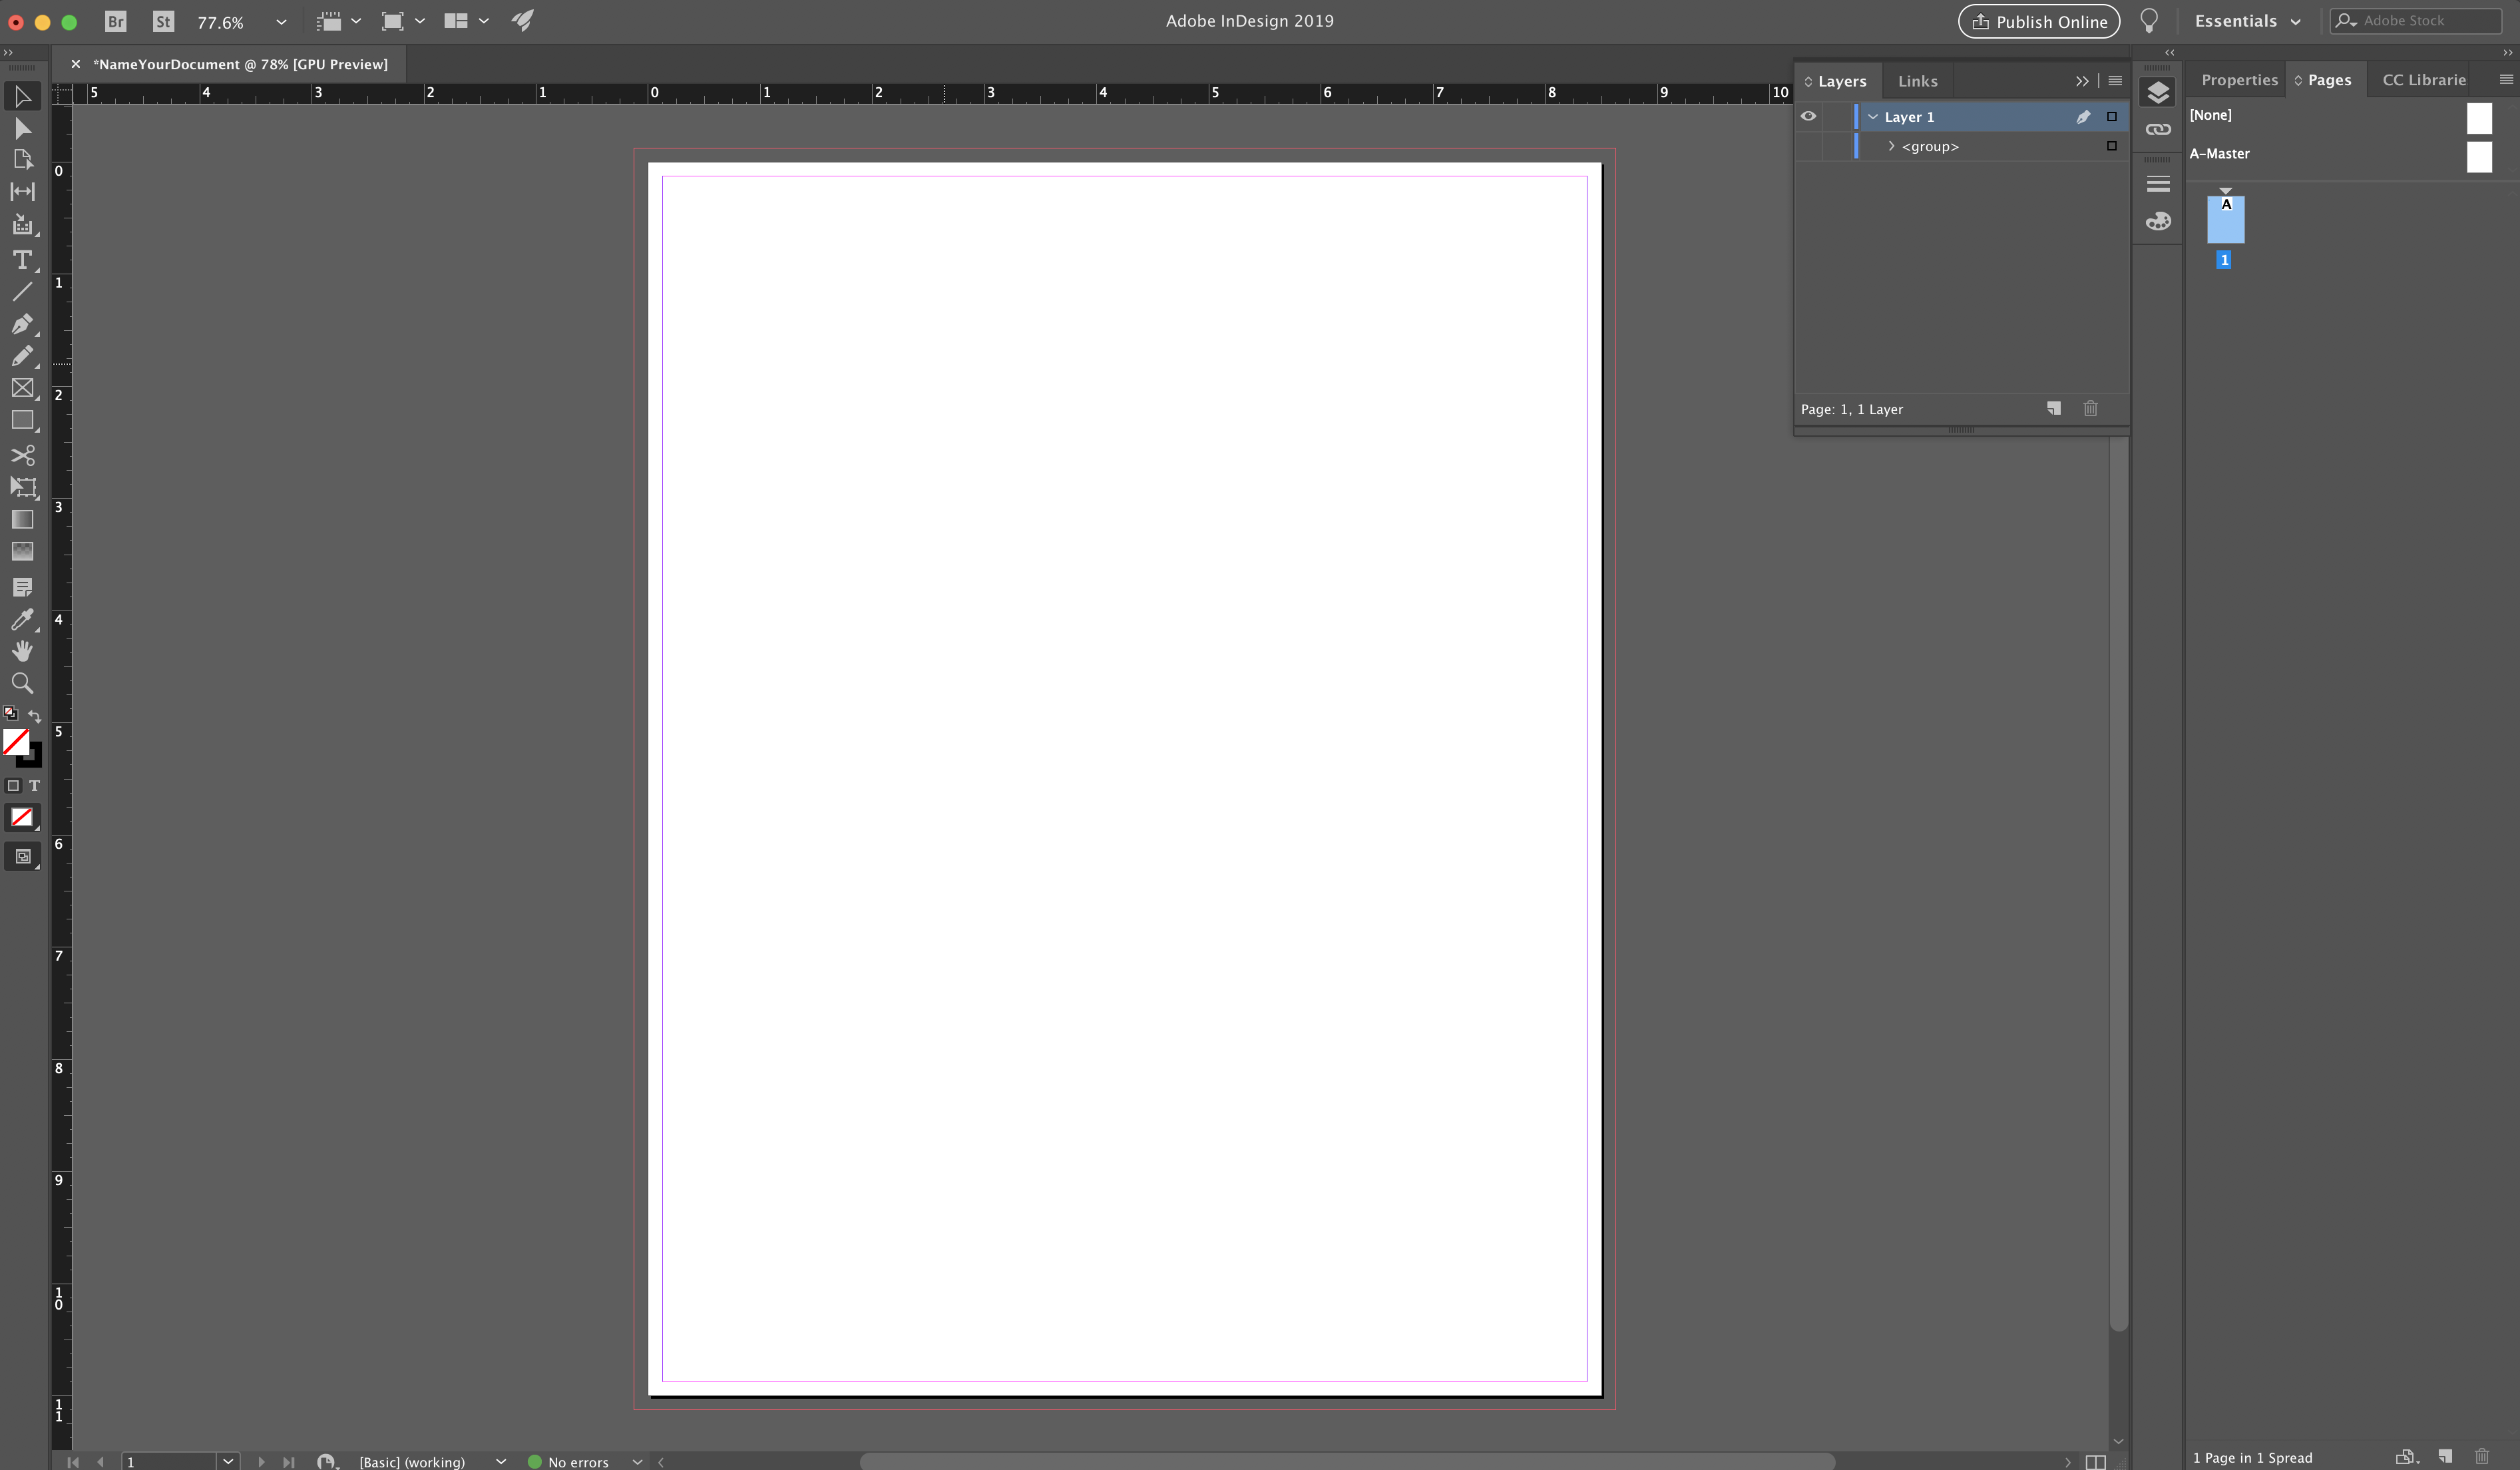
After clicking “Create,” your document with bleeds and your safety line set up will appear.
Now you’re ready to begin designing your product for print in InDesign!
Please refer to our File Saving Section for a tutorial on saving your project once you are done.