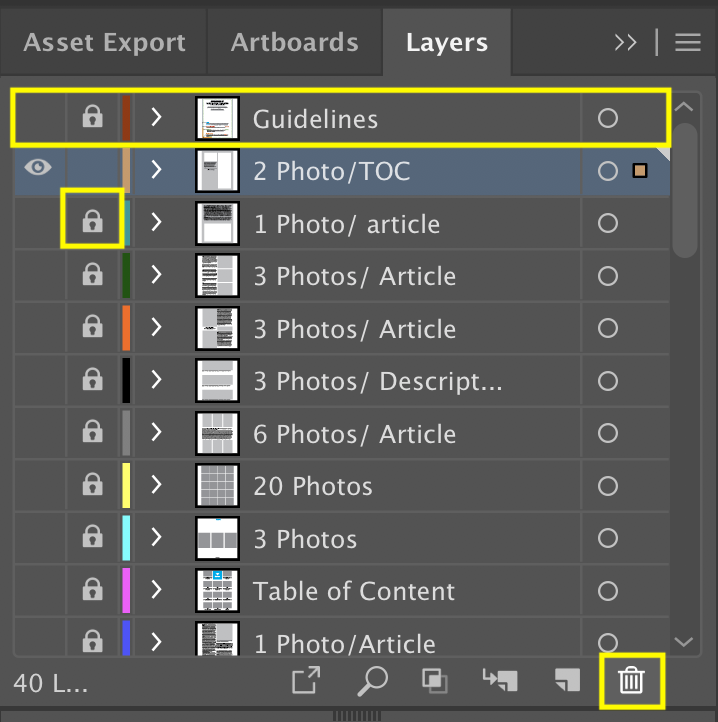
To delete a layer on a template, simply select the layer in the layers panel then delete using the trashcan on the bottom of the layers panel. If the layer is locked, click the Lock icon for that layer. You cannot delete layers on a Acrobat PDF Template. Be sure to delete the “Guidelines Layer” before saving your PDF.
Uncategorized
You might notice that the colors on the printed piece may not exactly match the colors you see on your monitor. The age and or calibration of your monitor can affect the colors in comparison to the printed product. Try not to rely on monitor color as a predictor for your final product.
If you find an error in one of our free downloadable templates, please let us know by calling at 800-995-1555 or emailing at support@printingcenterusa.com. We will make updates to the templates and work with you on correcting your files. However, PrintingCenterUSA is providing these free templates as a courtesy to our customers and we do not guarantee accuracy.
Please refer to our Terms and Conditions for more information.
At PrintingCenterUSA, we provide free downloadable templates for Adobe InDesign, Illustrator, Photoshop, and Acrobat. These templates are editable and come with some basic instructions embedded in the working file. The template downloads also come with the PrintingCenterUSA PDF Preset and Color Profile. Utilizing PrintingCenterUSA’s templates will help you provide us with print-ready PDFS. Having a print-ready PDF will ensure that your turnaround time begins as quickly as possible. Please refer to our Template Overview section for more information.
Yes! You can find a list of our available templates in our “All Products” navigation dropdown or click here.
Drag & drop your photo into the area you want it in > Click BACKGROUND in the popup menu for that photo box
To undo this feature, click MINIMIZE.

After placing a photo into a photo box, click on the photo > Click PAN/ZOOM > Now you can drag the image around within that photo box. To zoom back out, click TRANSFORM.

If you have placed an image into a photo box and try to adjust the photo’s height or width and it’s not working, try adjusting the image size by clicking and dragging one of the 4 corners. After making it larger, you will be able to adjust the height and/or width down to the size you need it to be.

Click on the photo box you want to delete > If you have an image placed inside, click EMPTY > Click DELETE (trash can icon).