Skip to content Skip to main navigation Skip to footer

Tag: tutorials-body

File Preparation | File Saving | InDesign

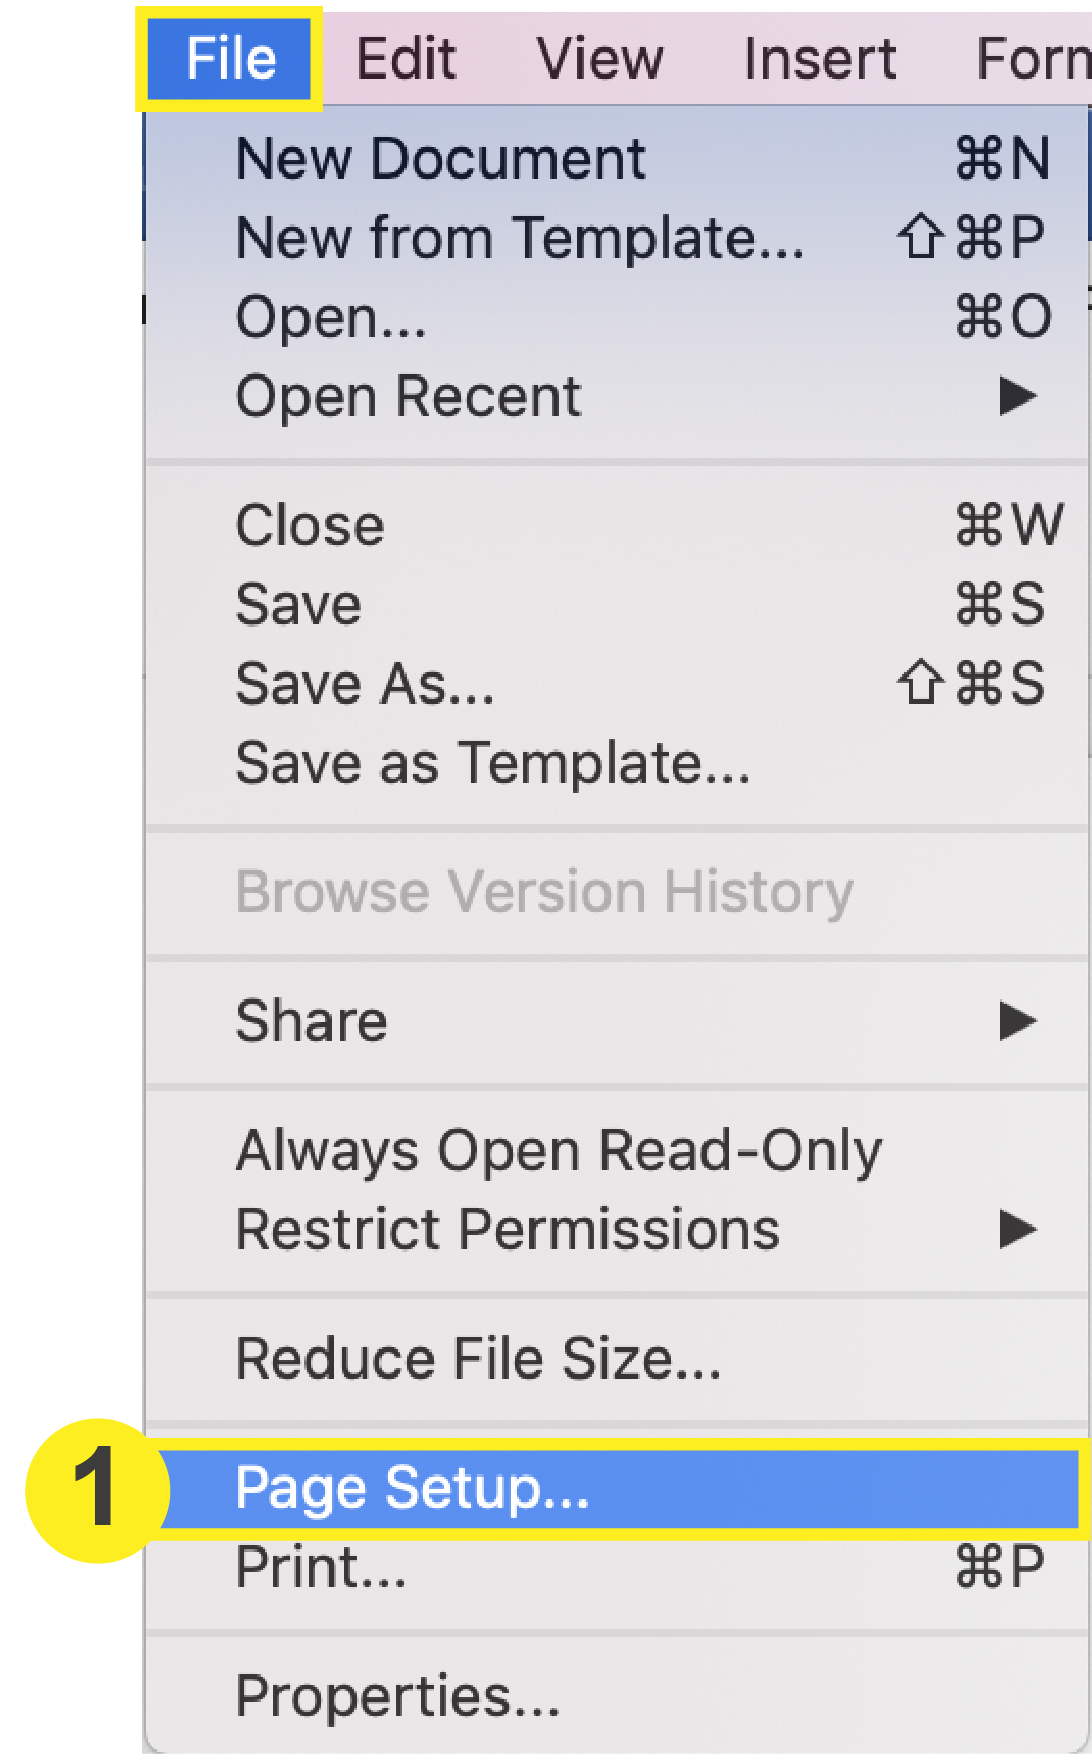
File Saving: InDesign

Checklist

  1. Download & Install PrintingCenterUSA’s Adobe PDF Preset
  2. Save PDF

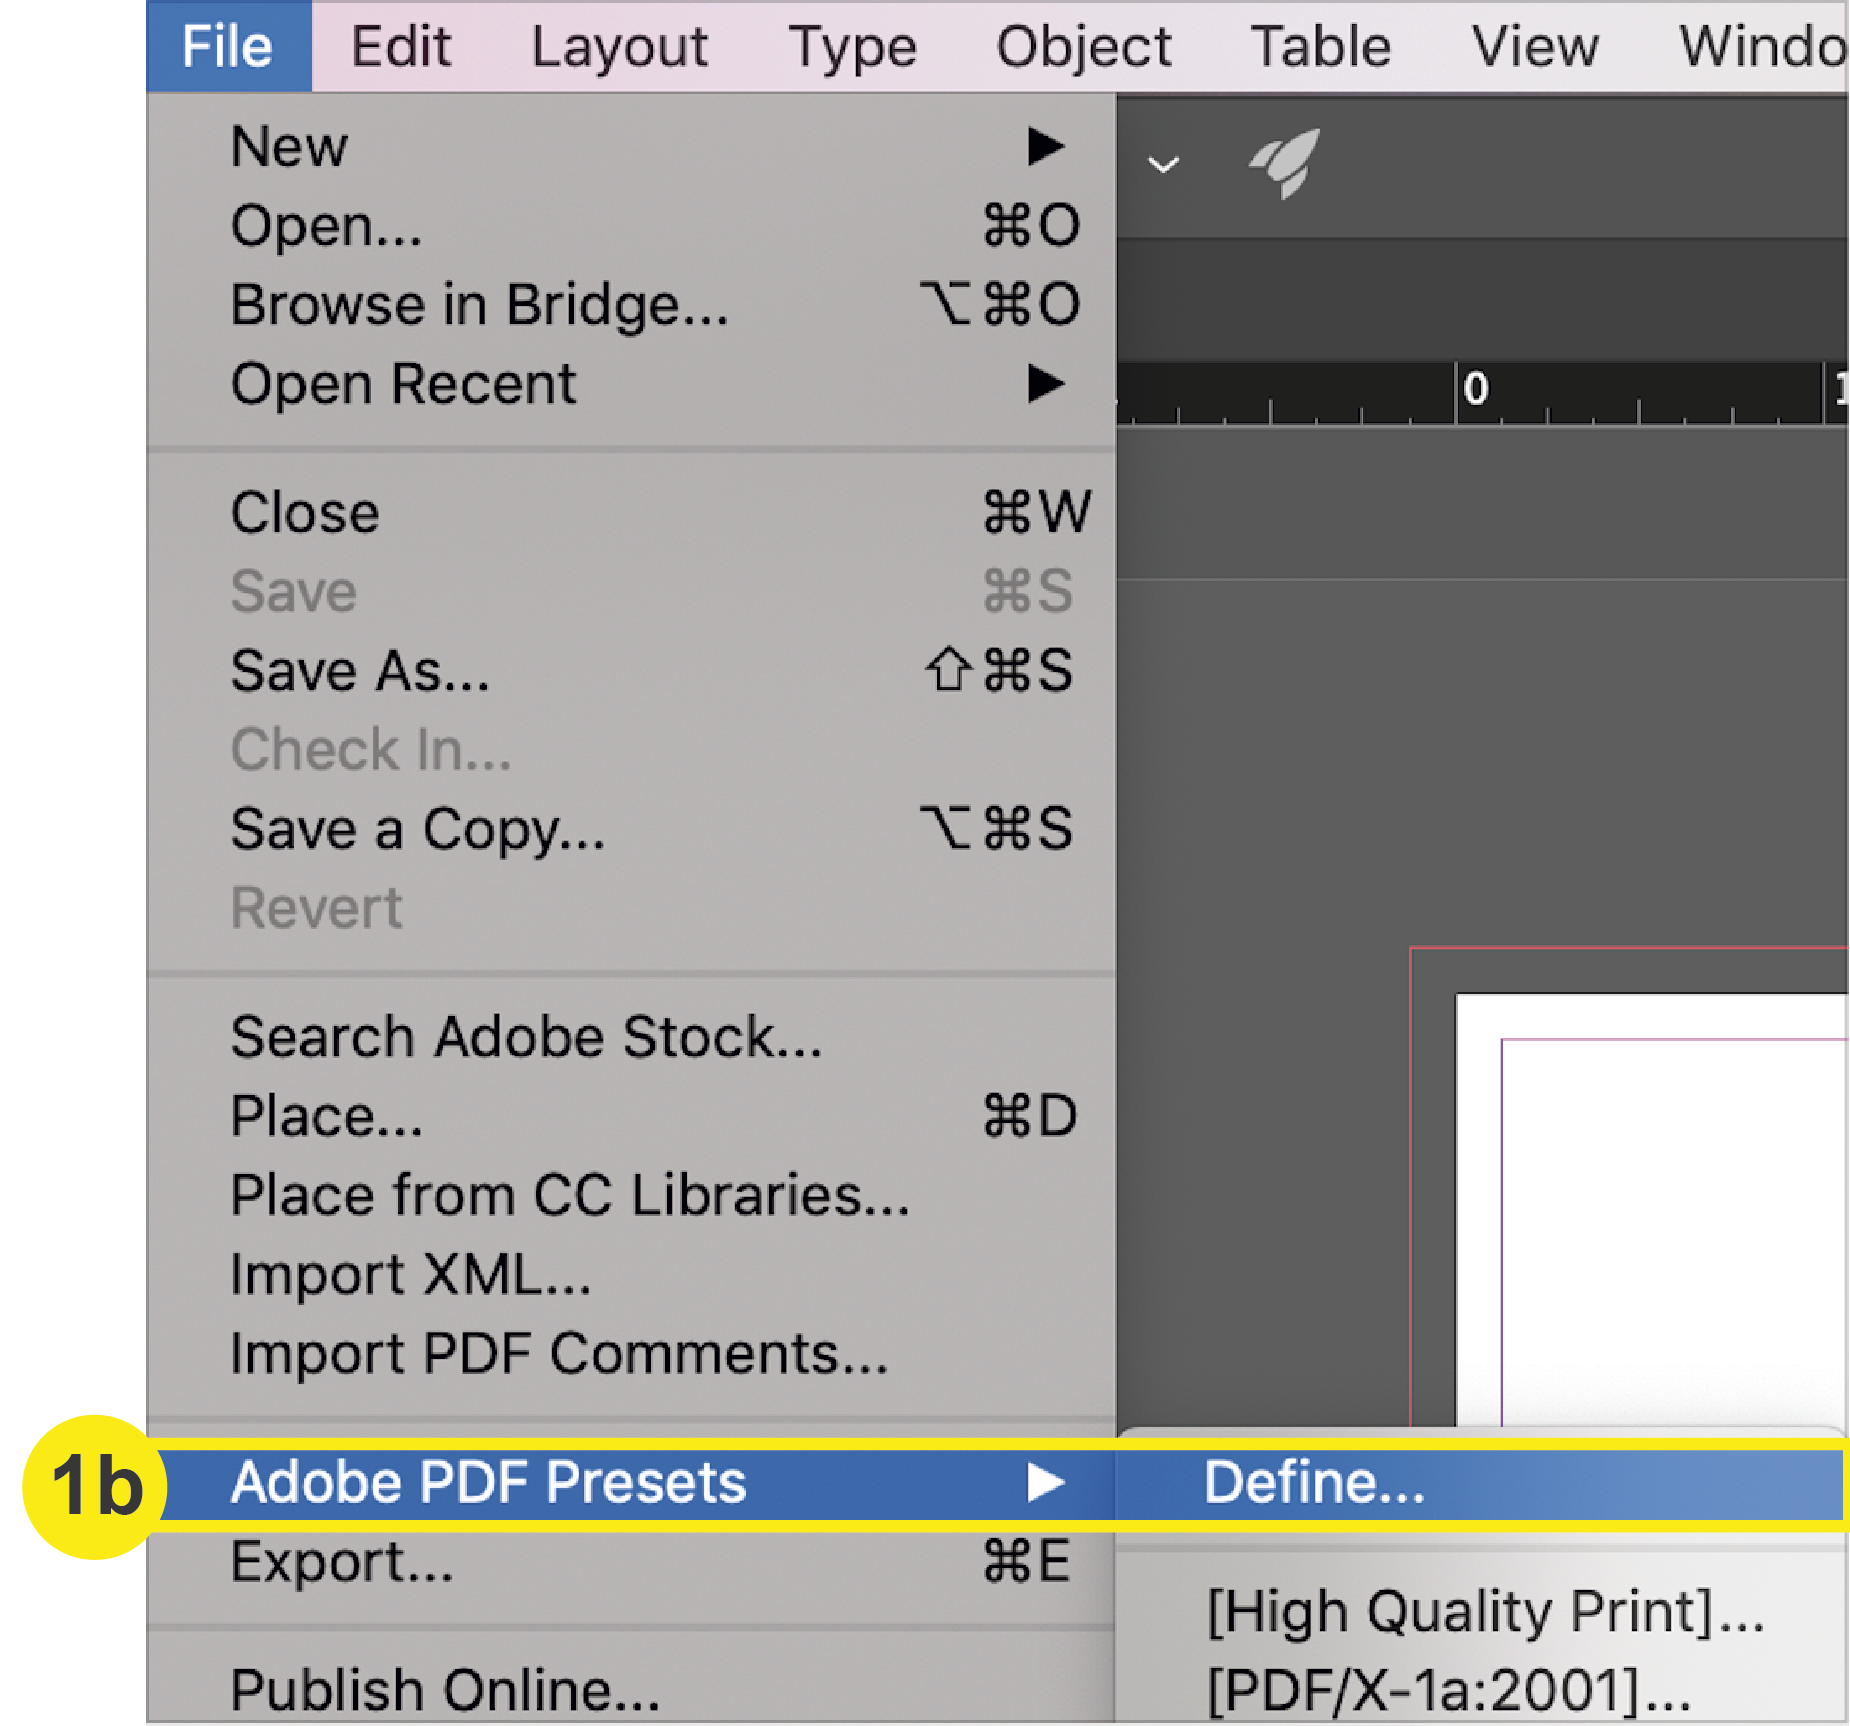
1. Download & Install PrintingCenterUSA’s PDF Preset

a. Click here to download our settings.
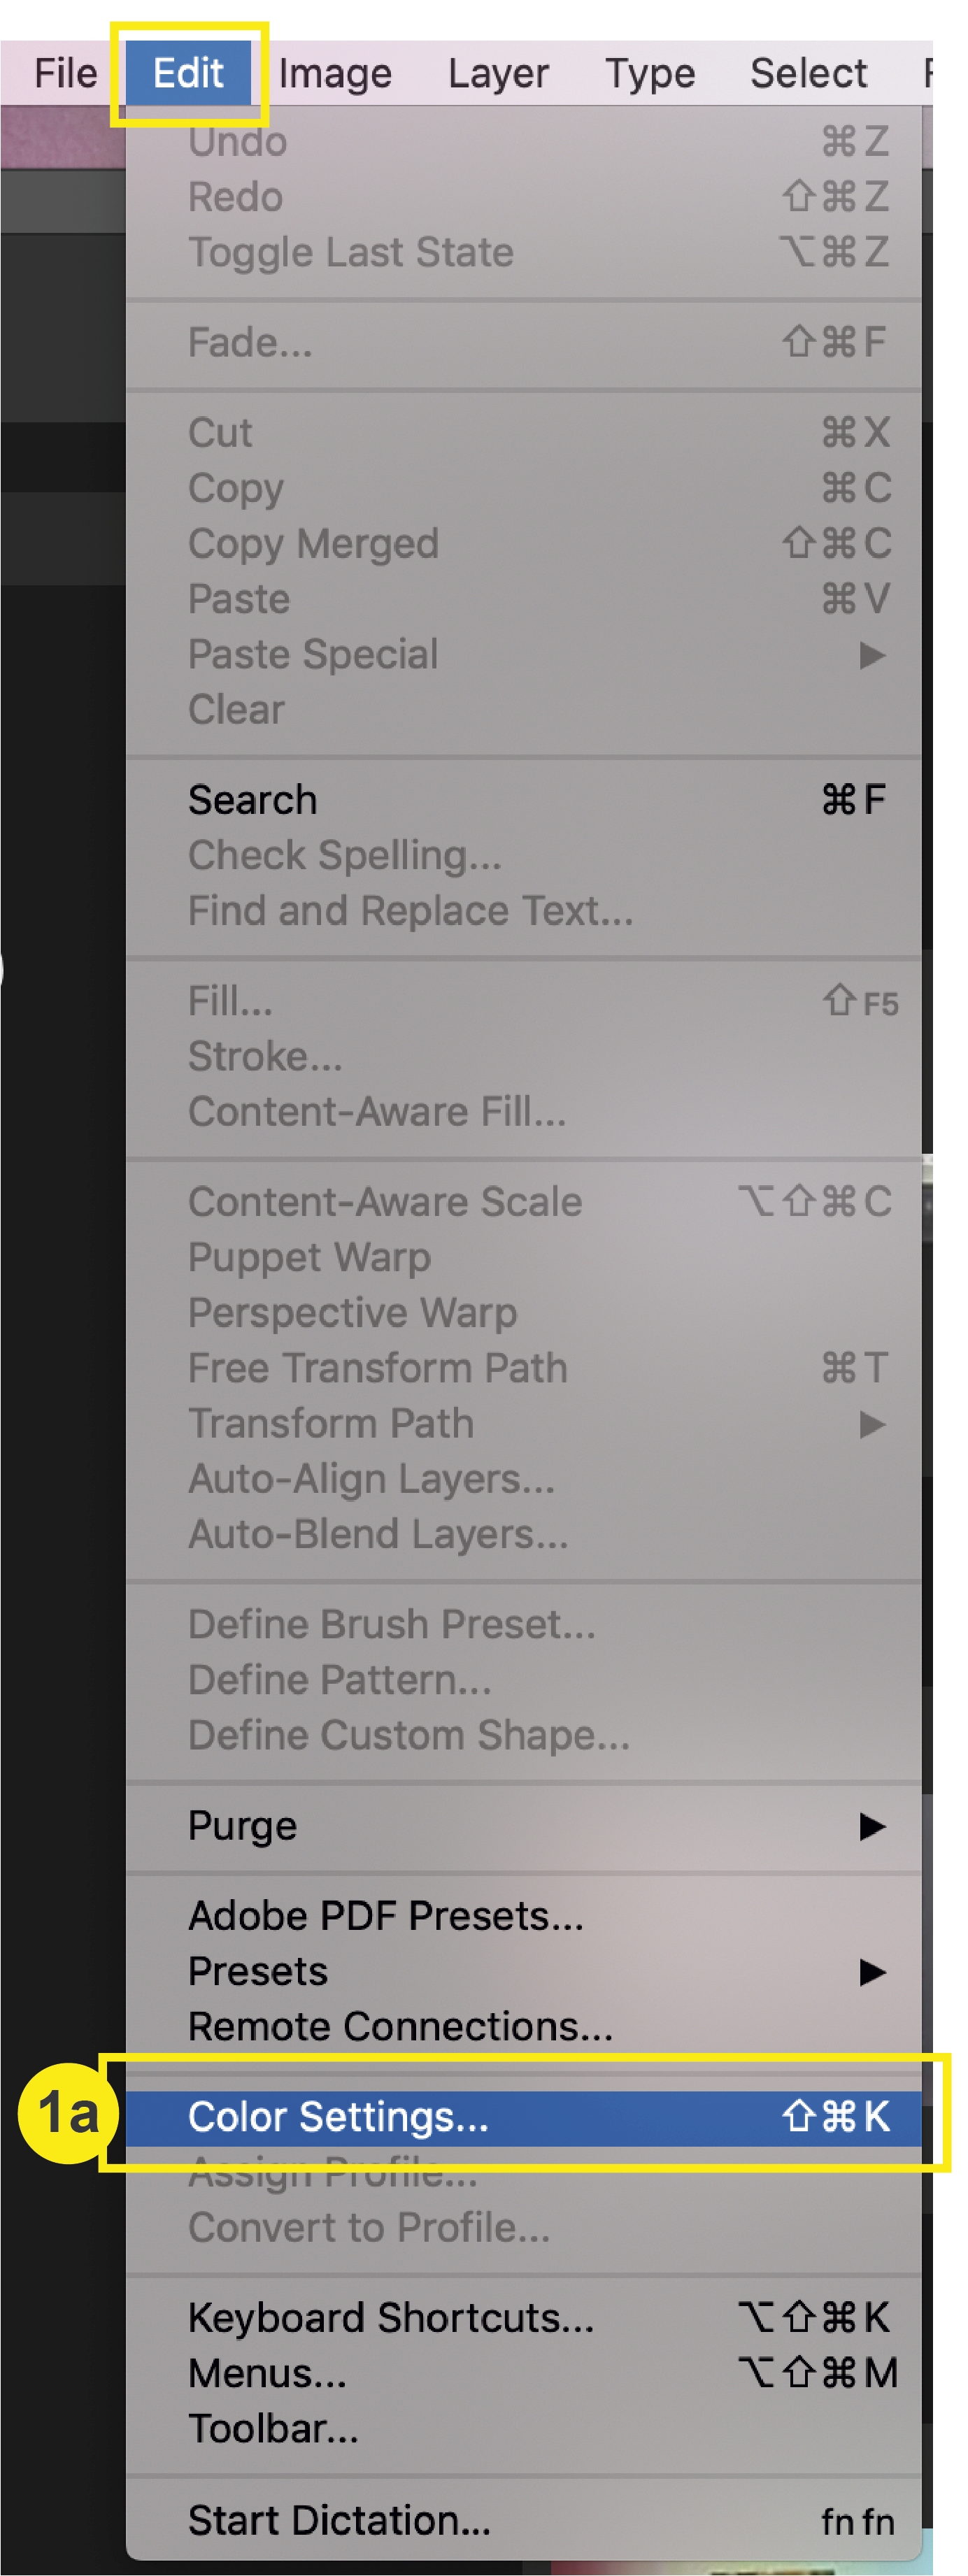
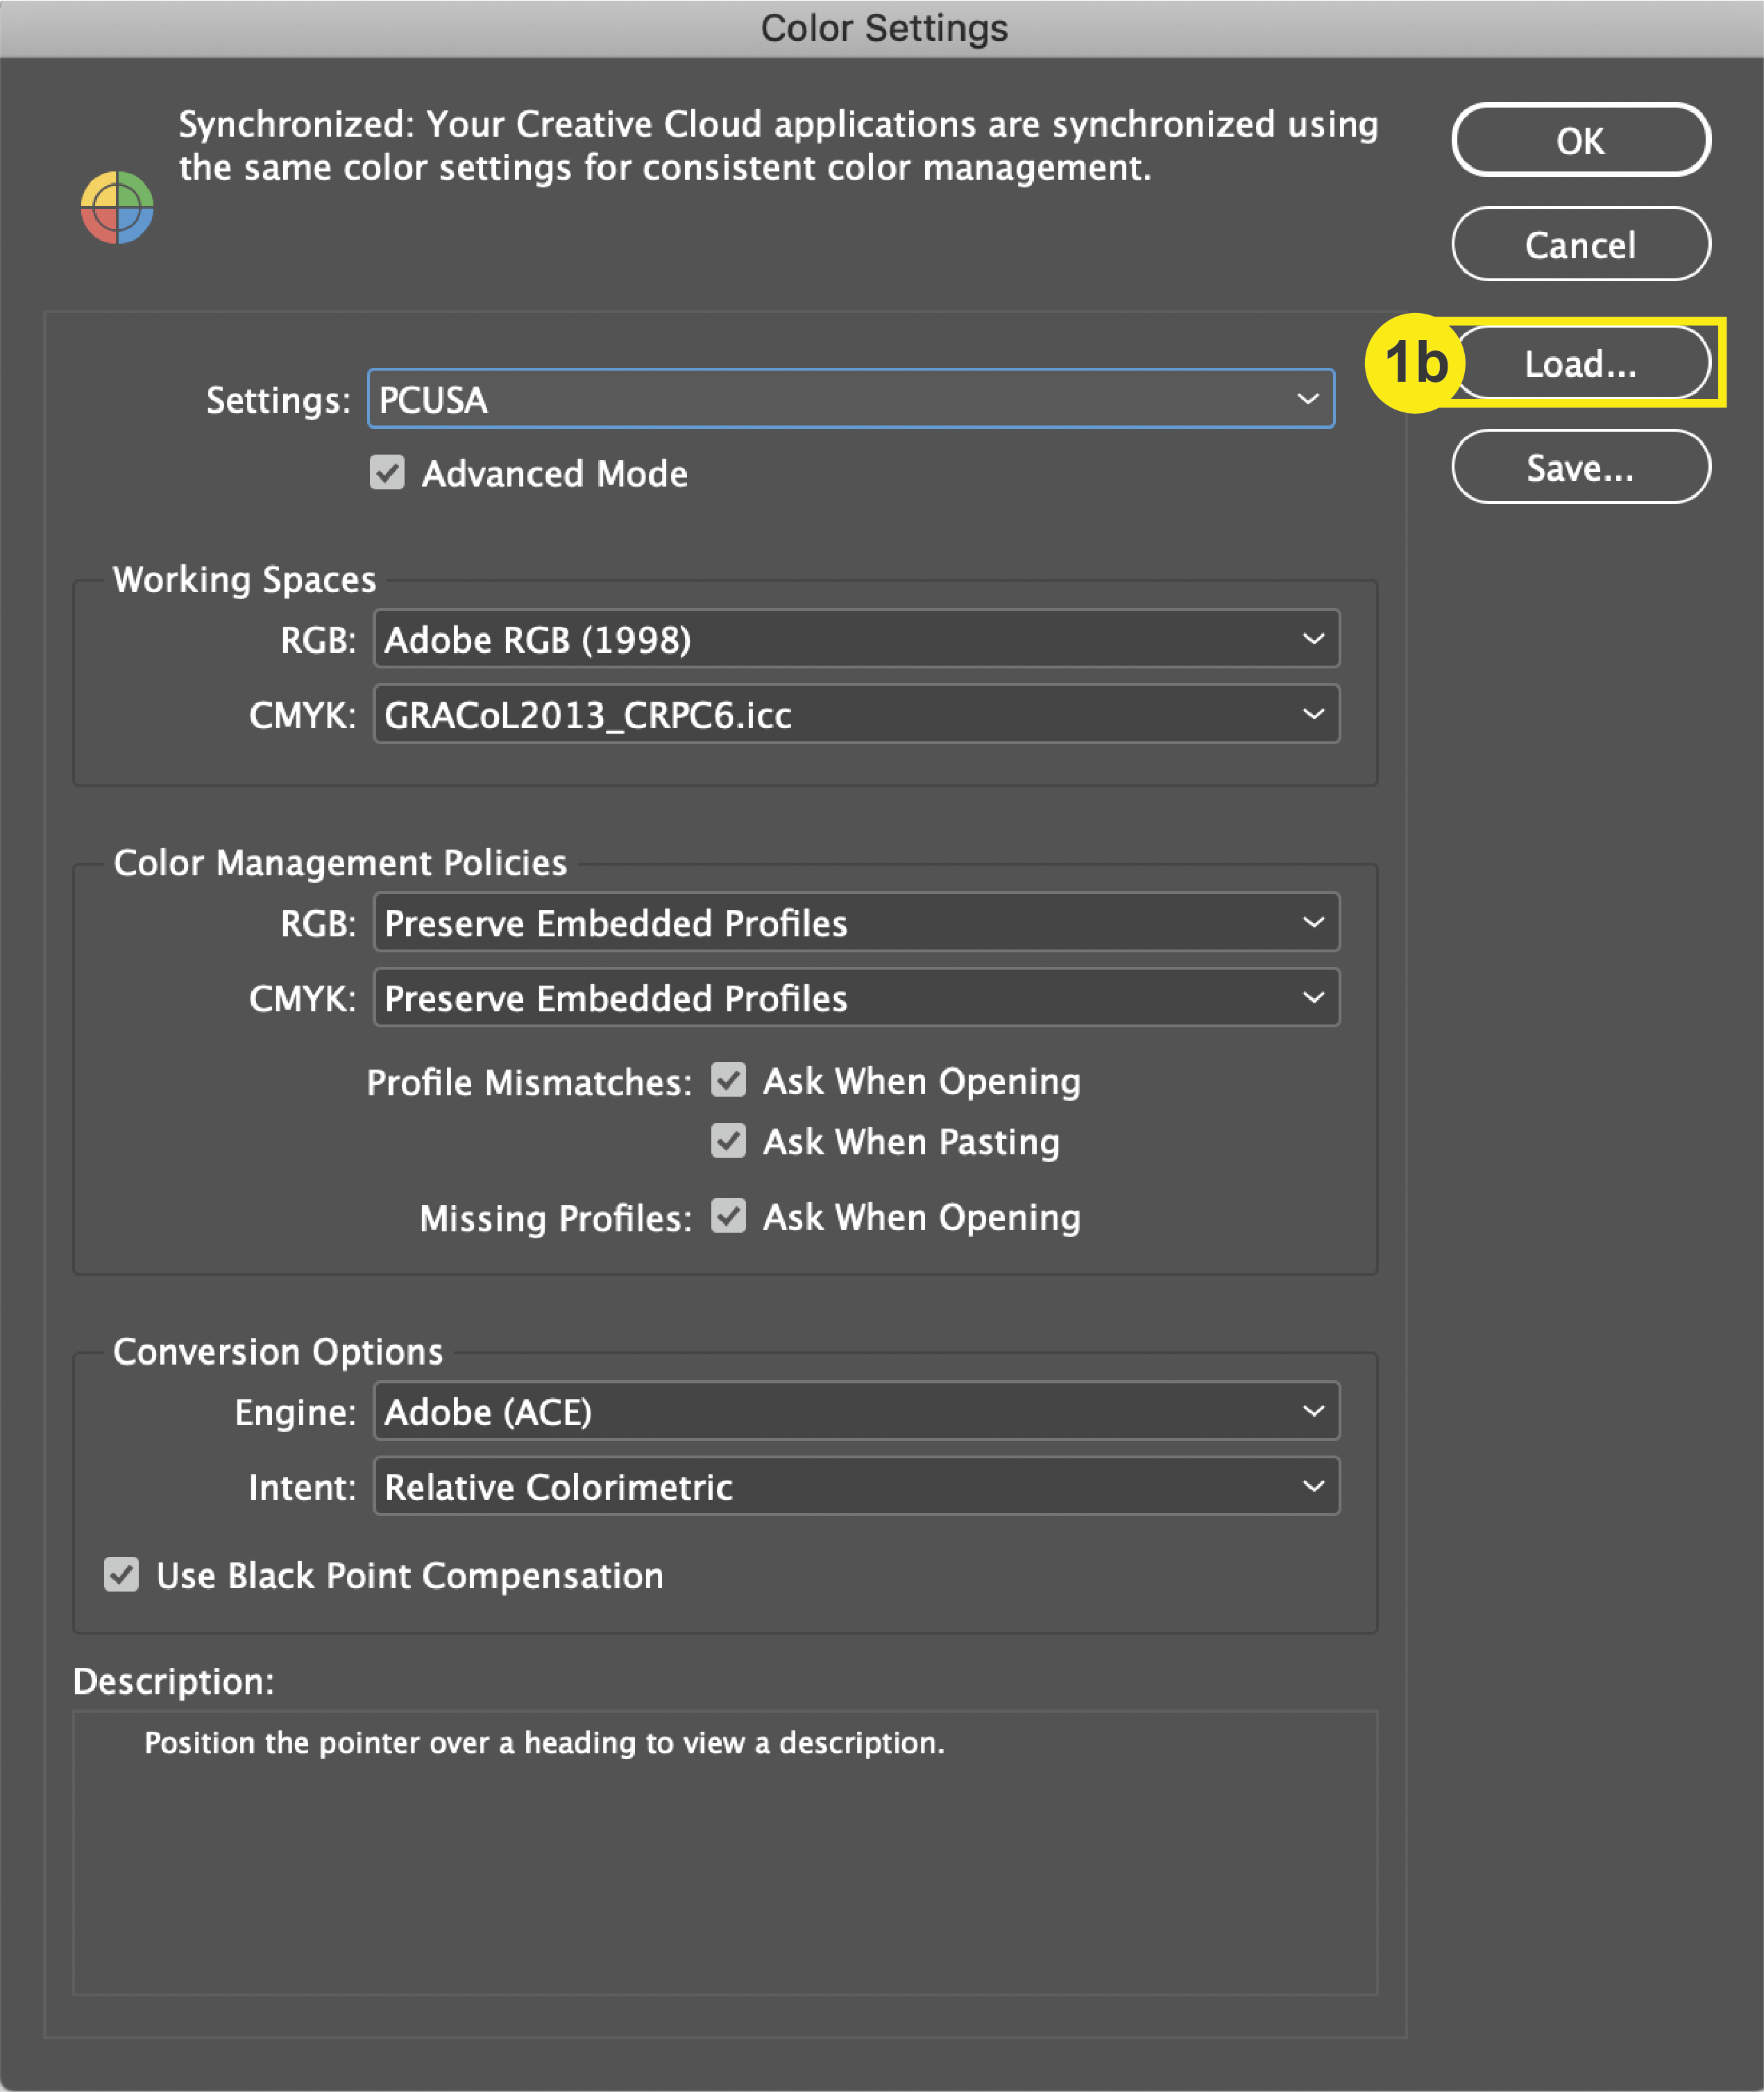
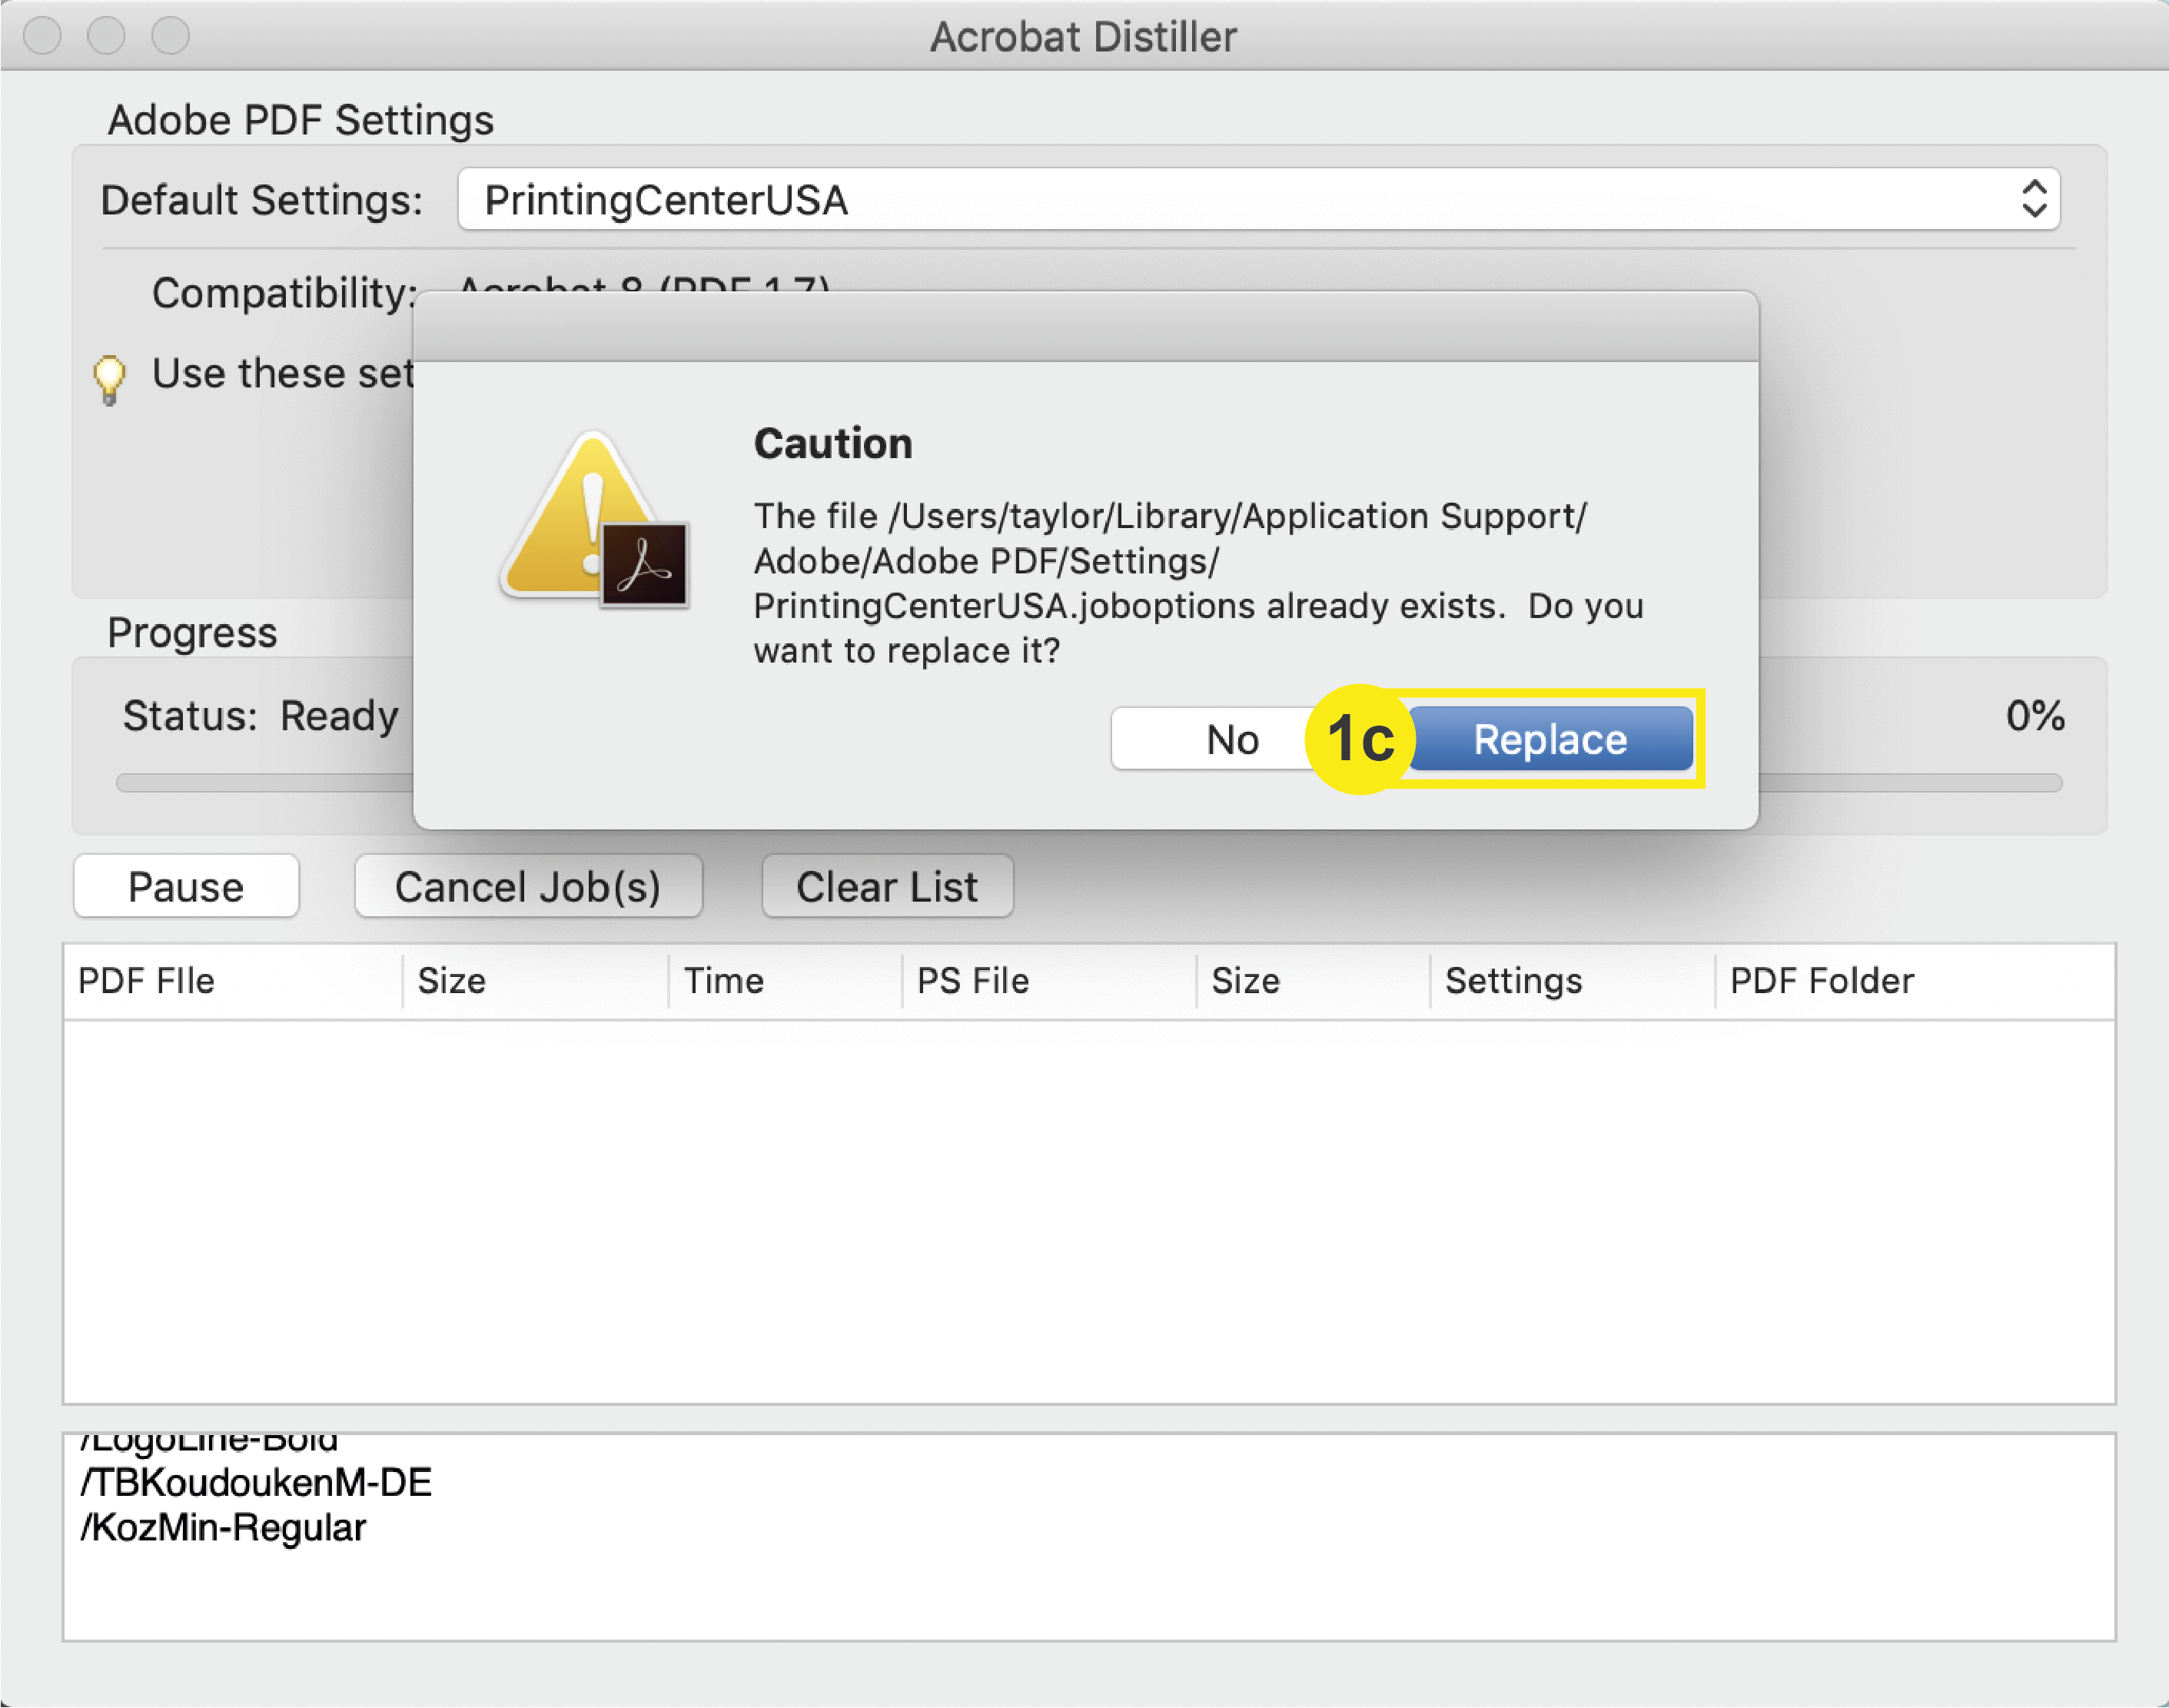
b. In the top navigation of InDesign, click: File > Adobe PDF Presets > Define
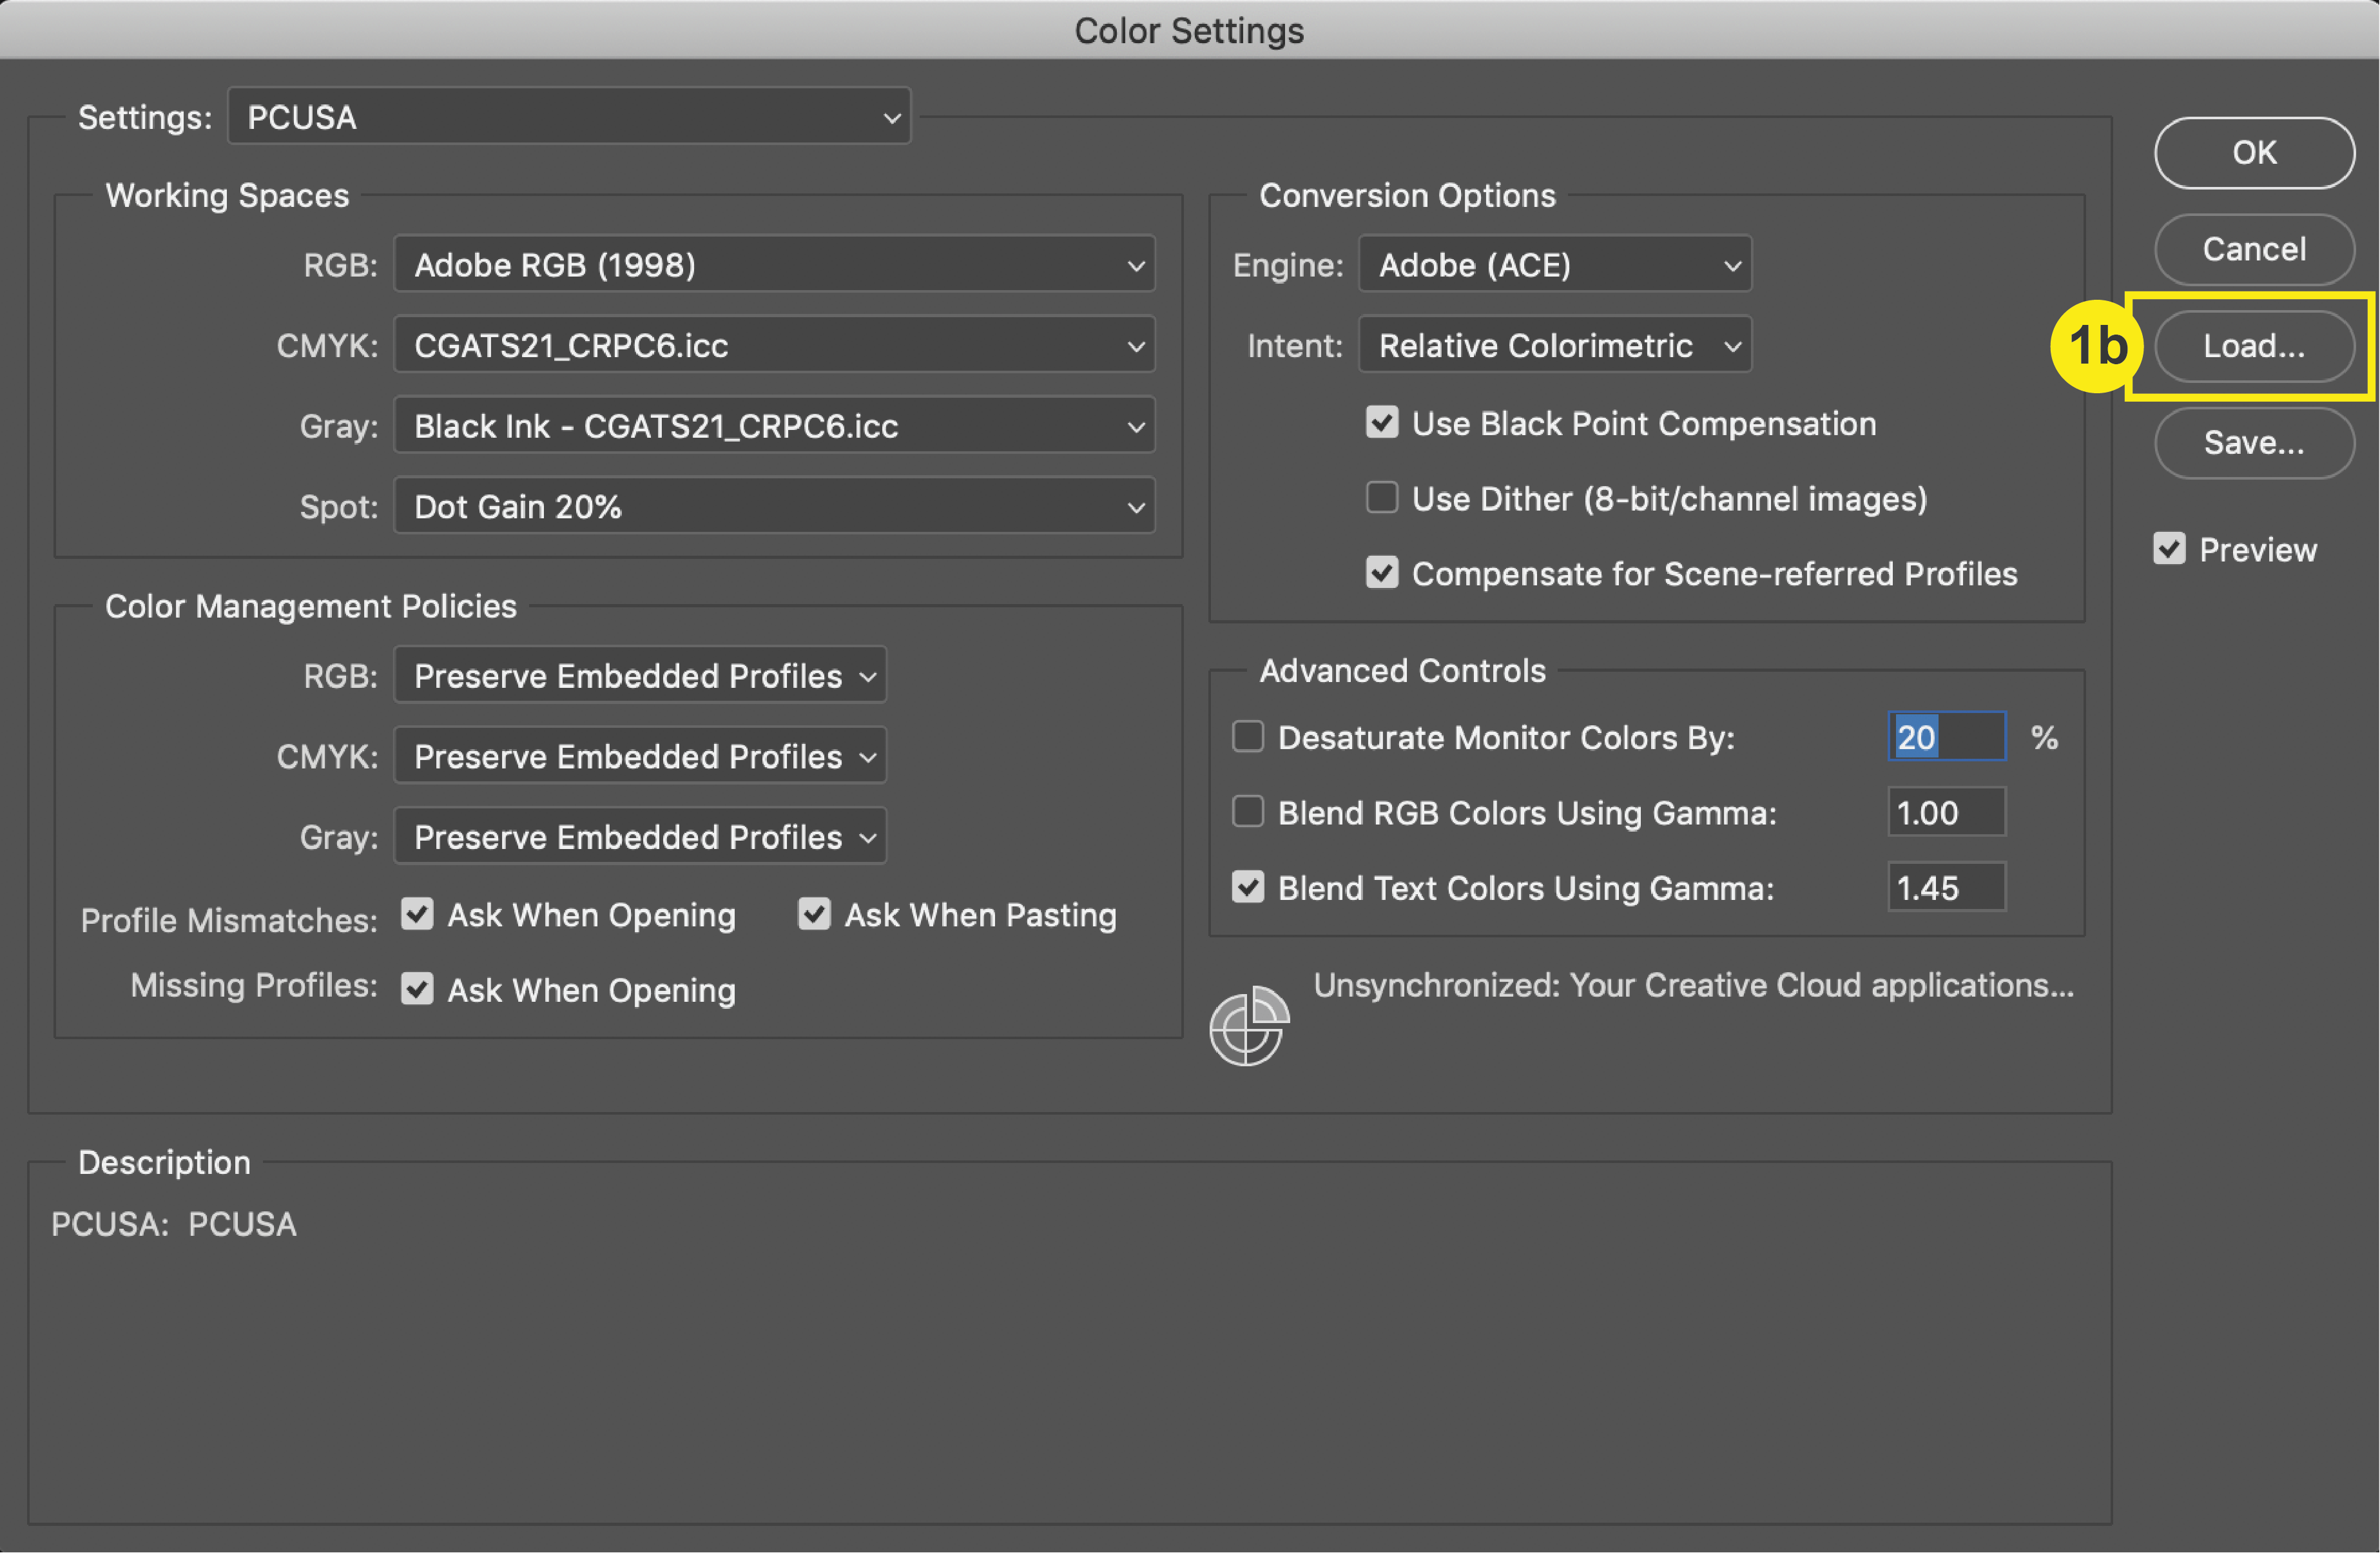
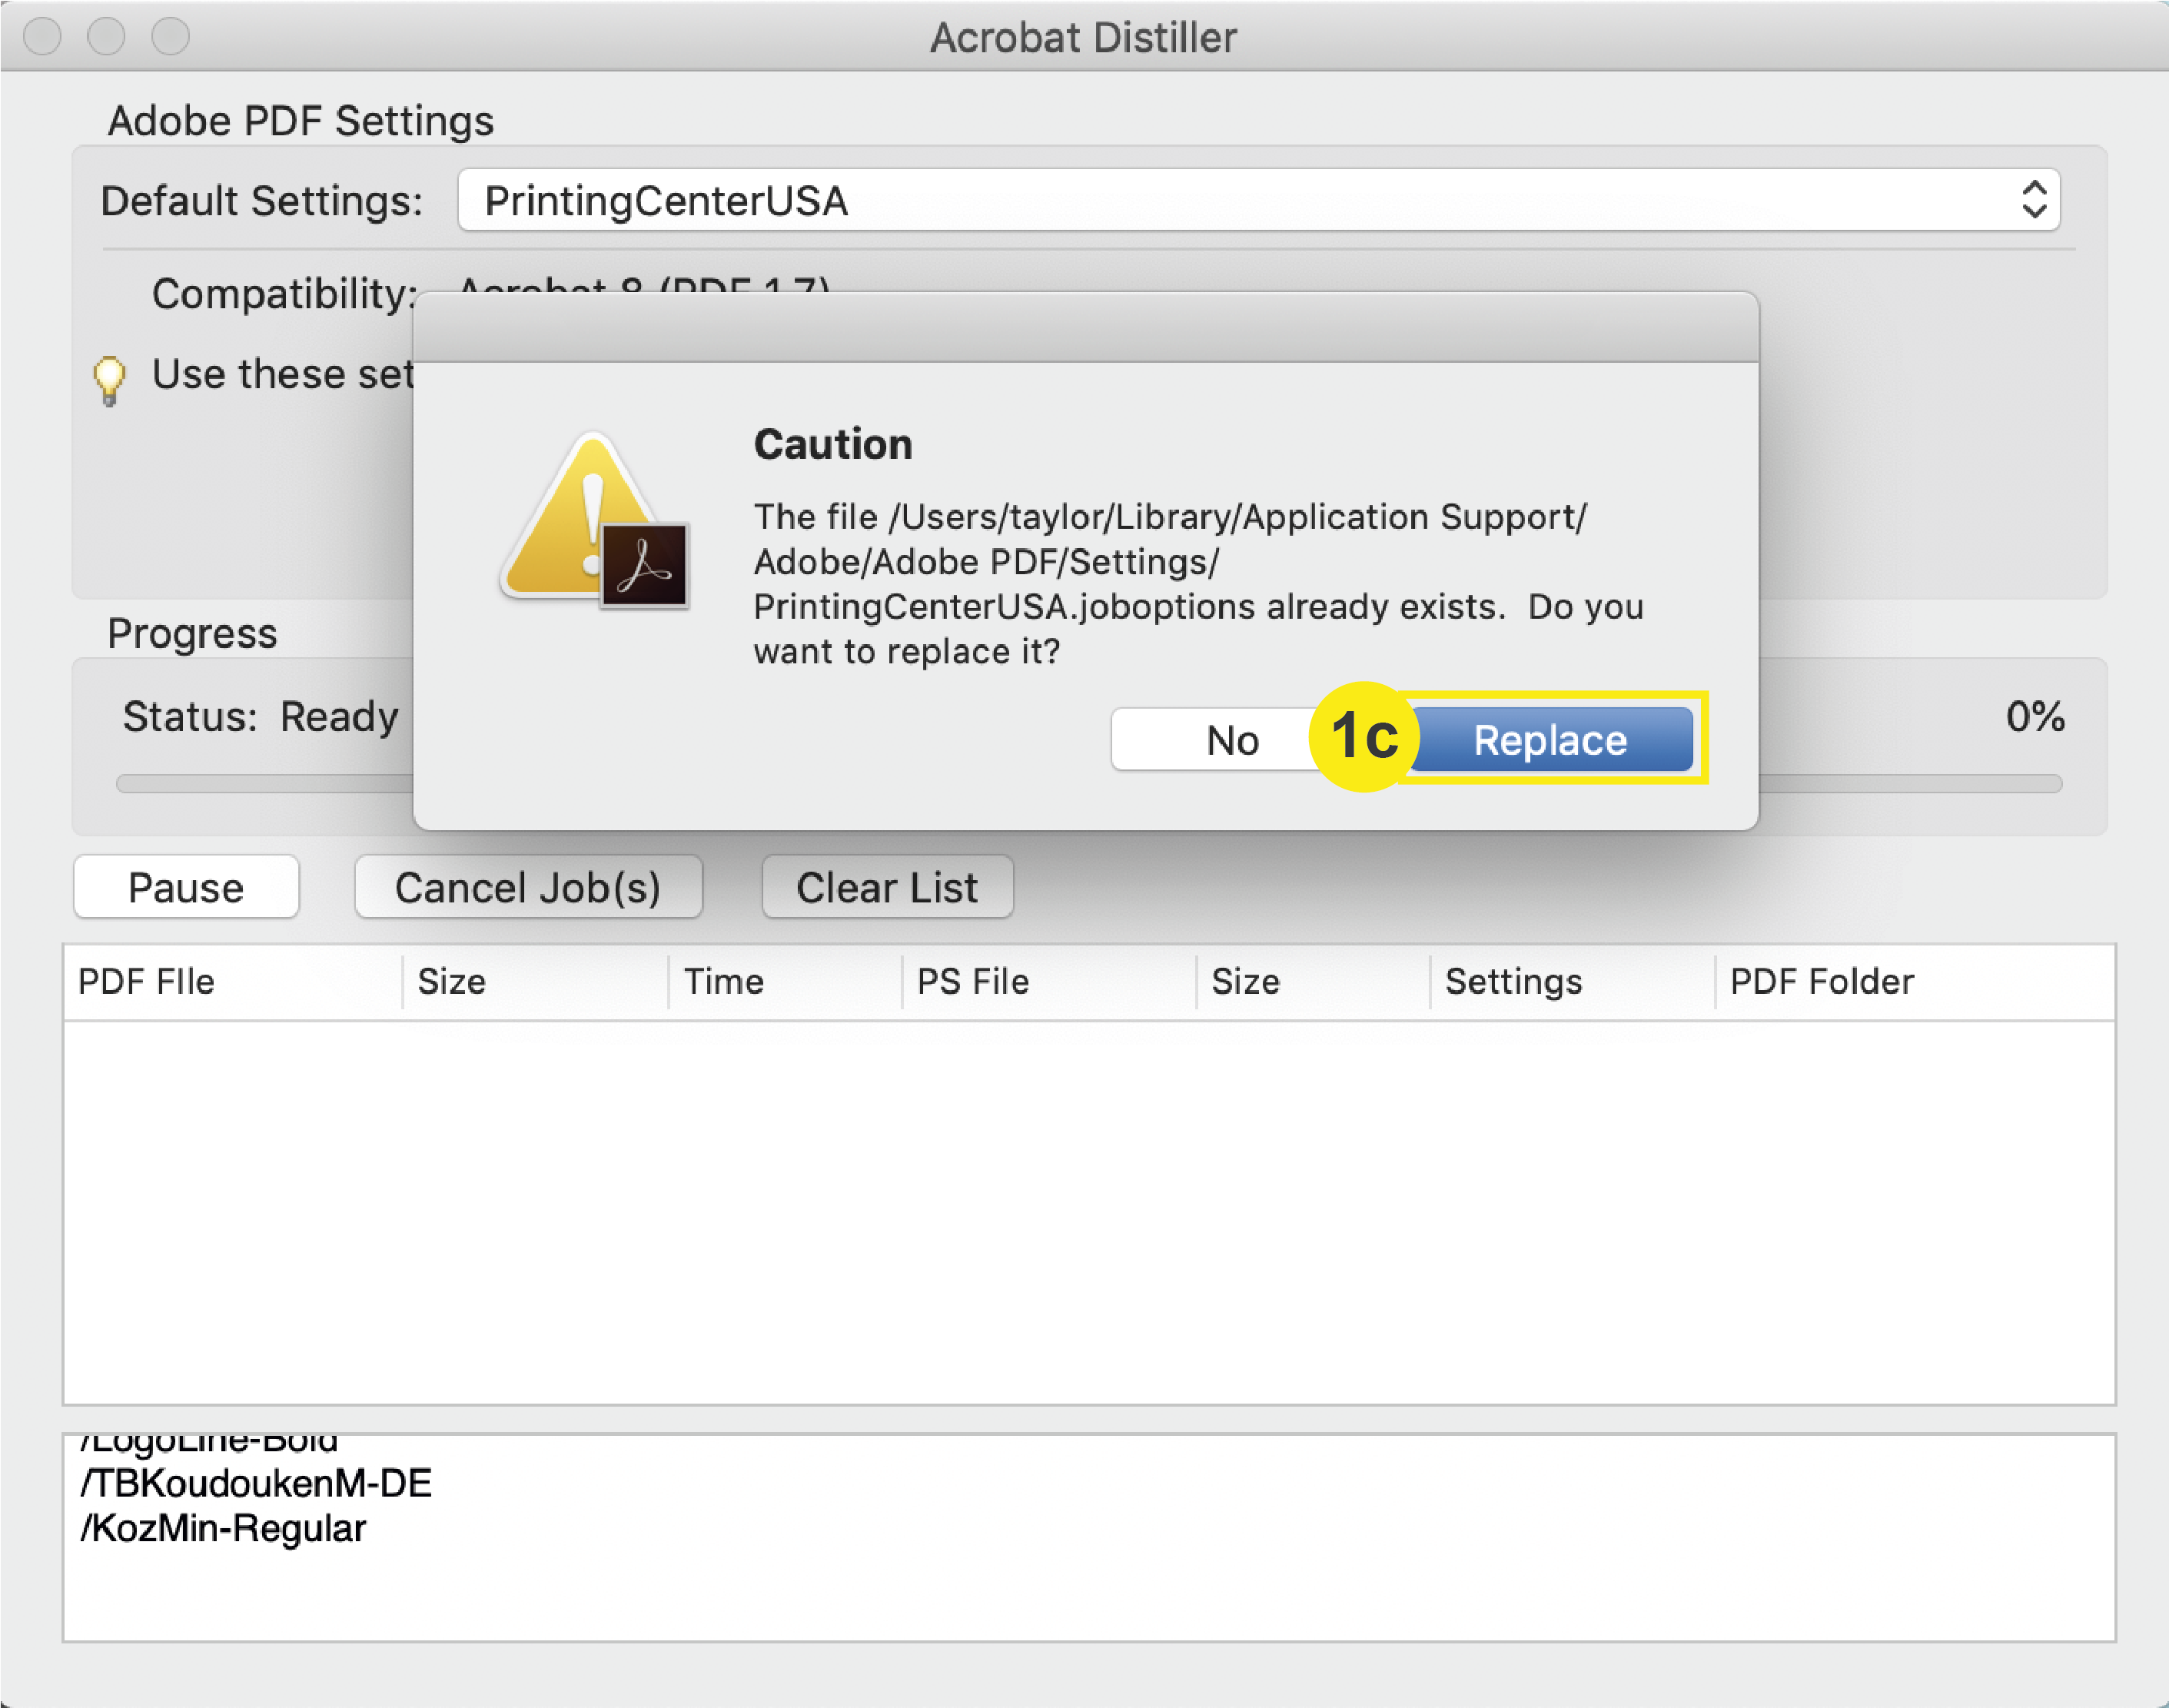
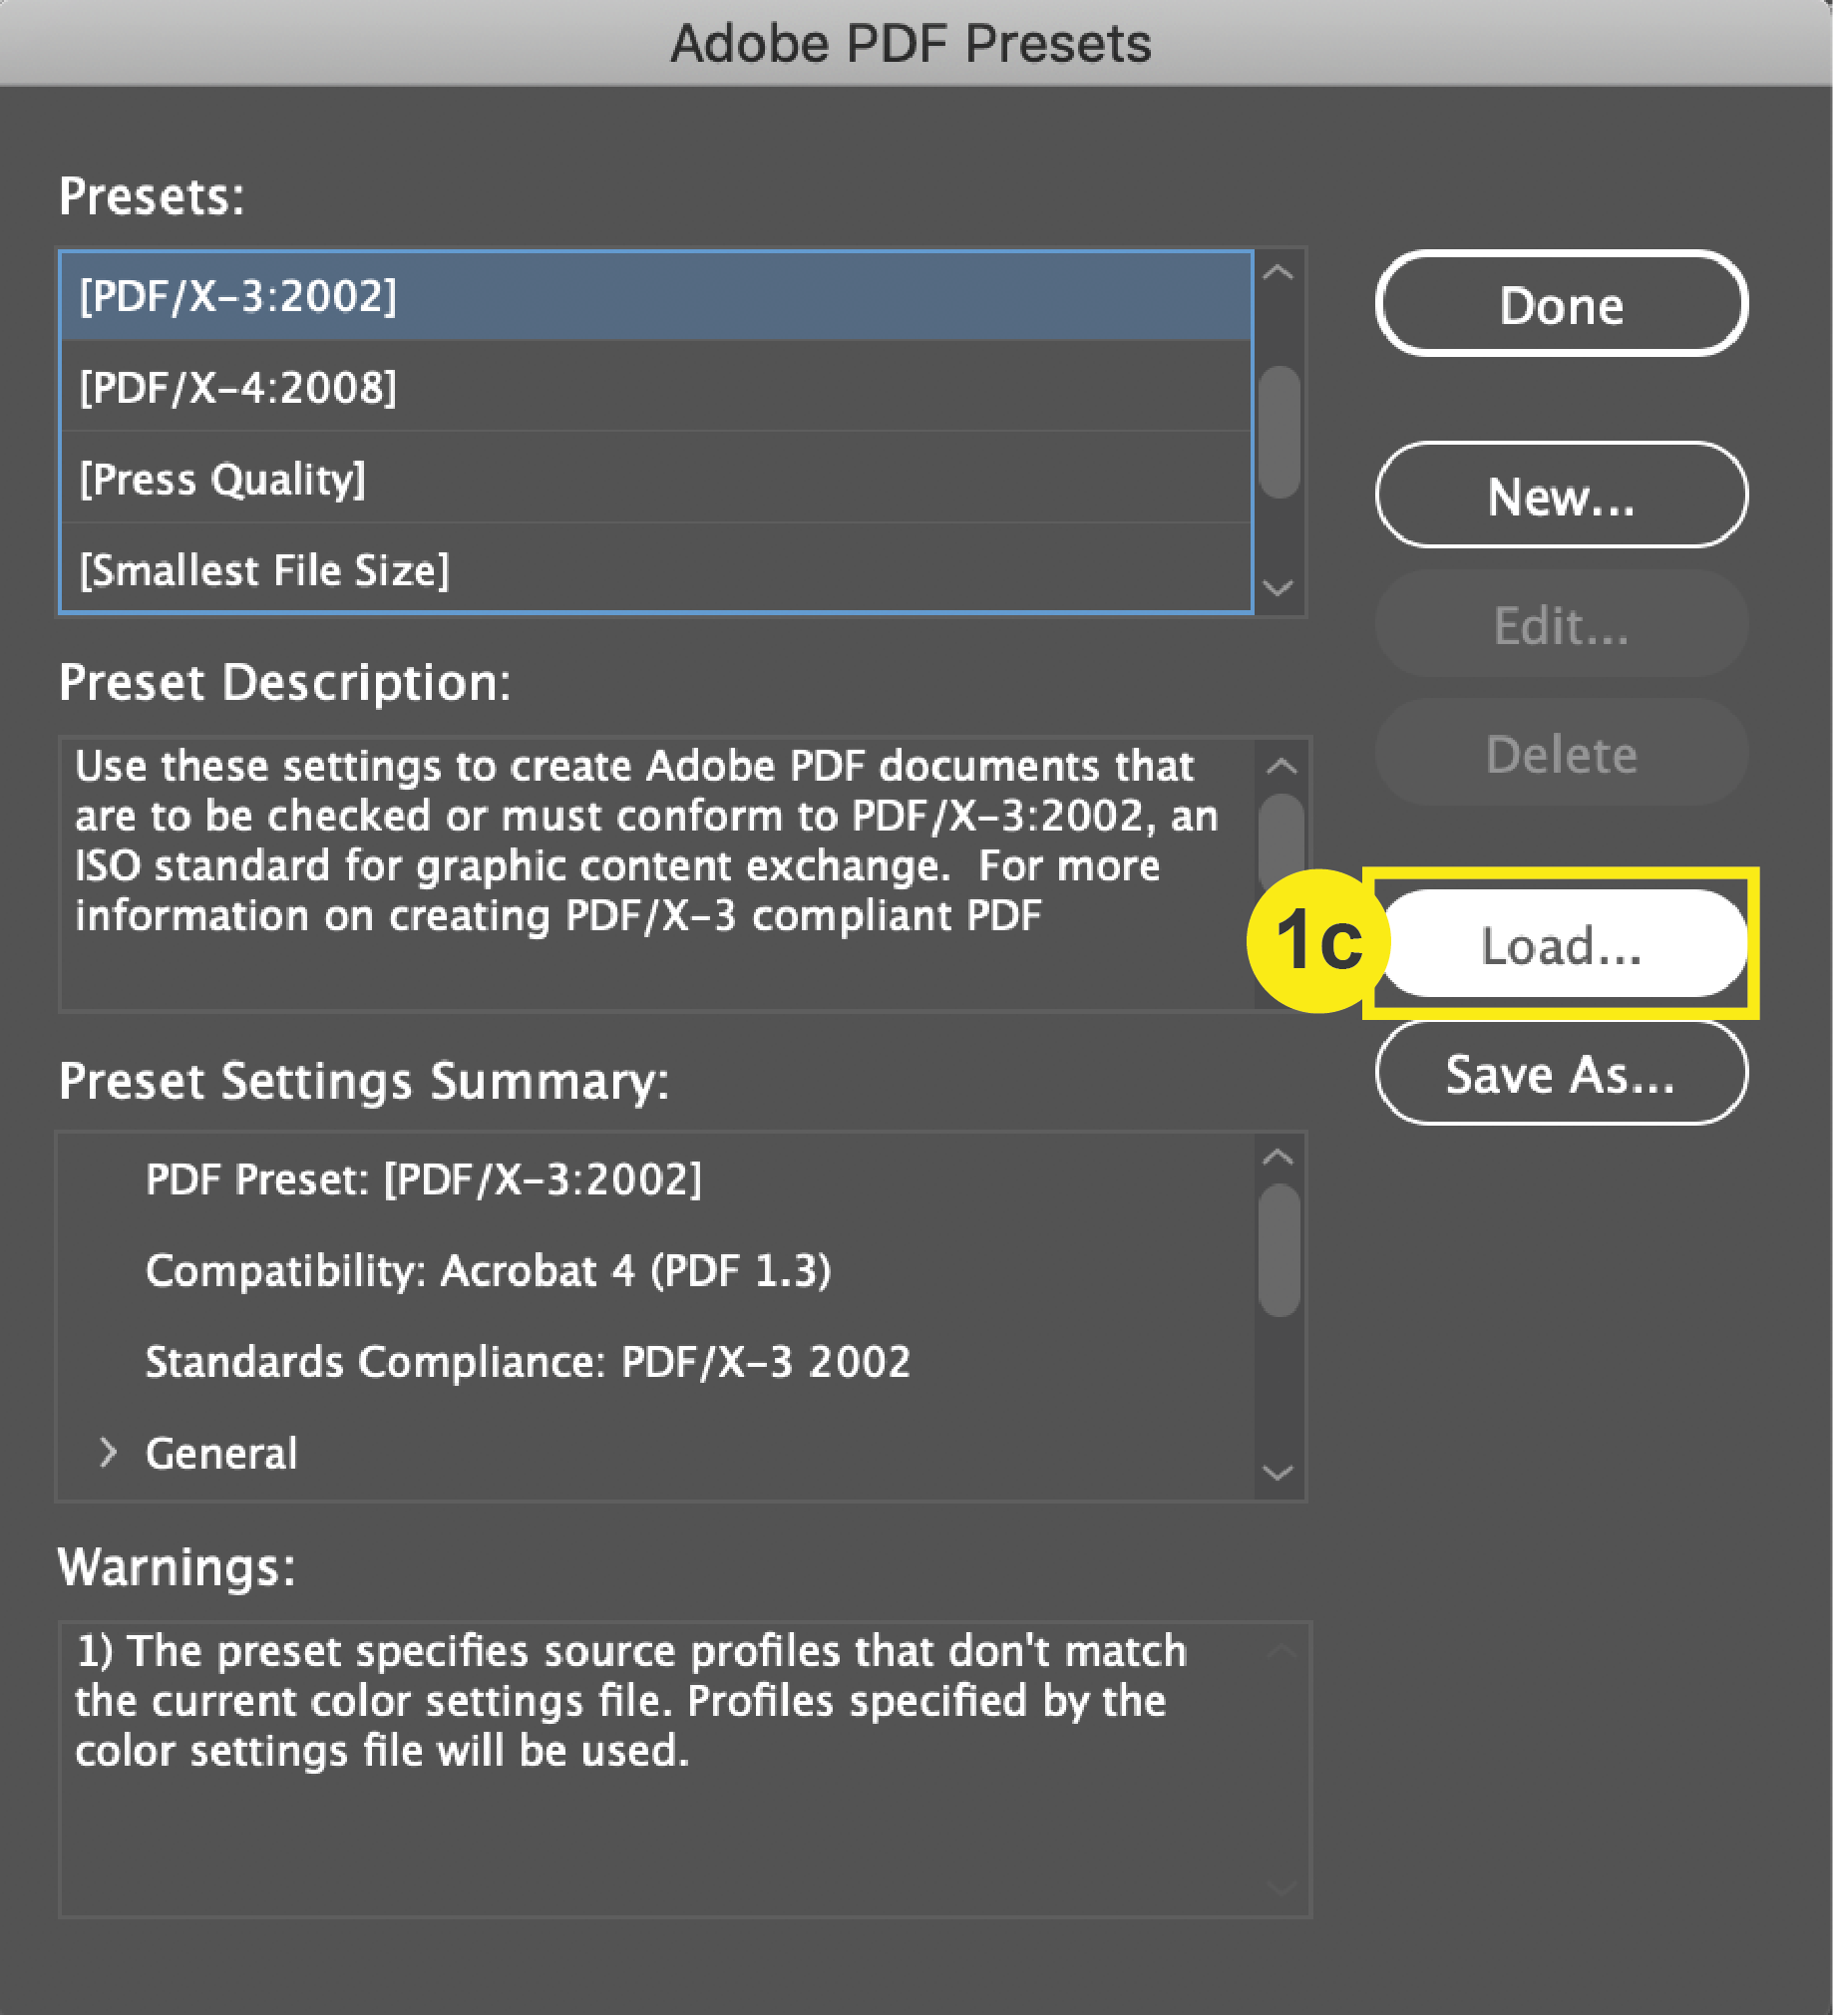
c. Click Load, then select the PrintingCenterUSA.joboptions file. Open.

Snow
Forest

2. Save PDF

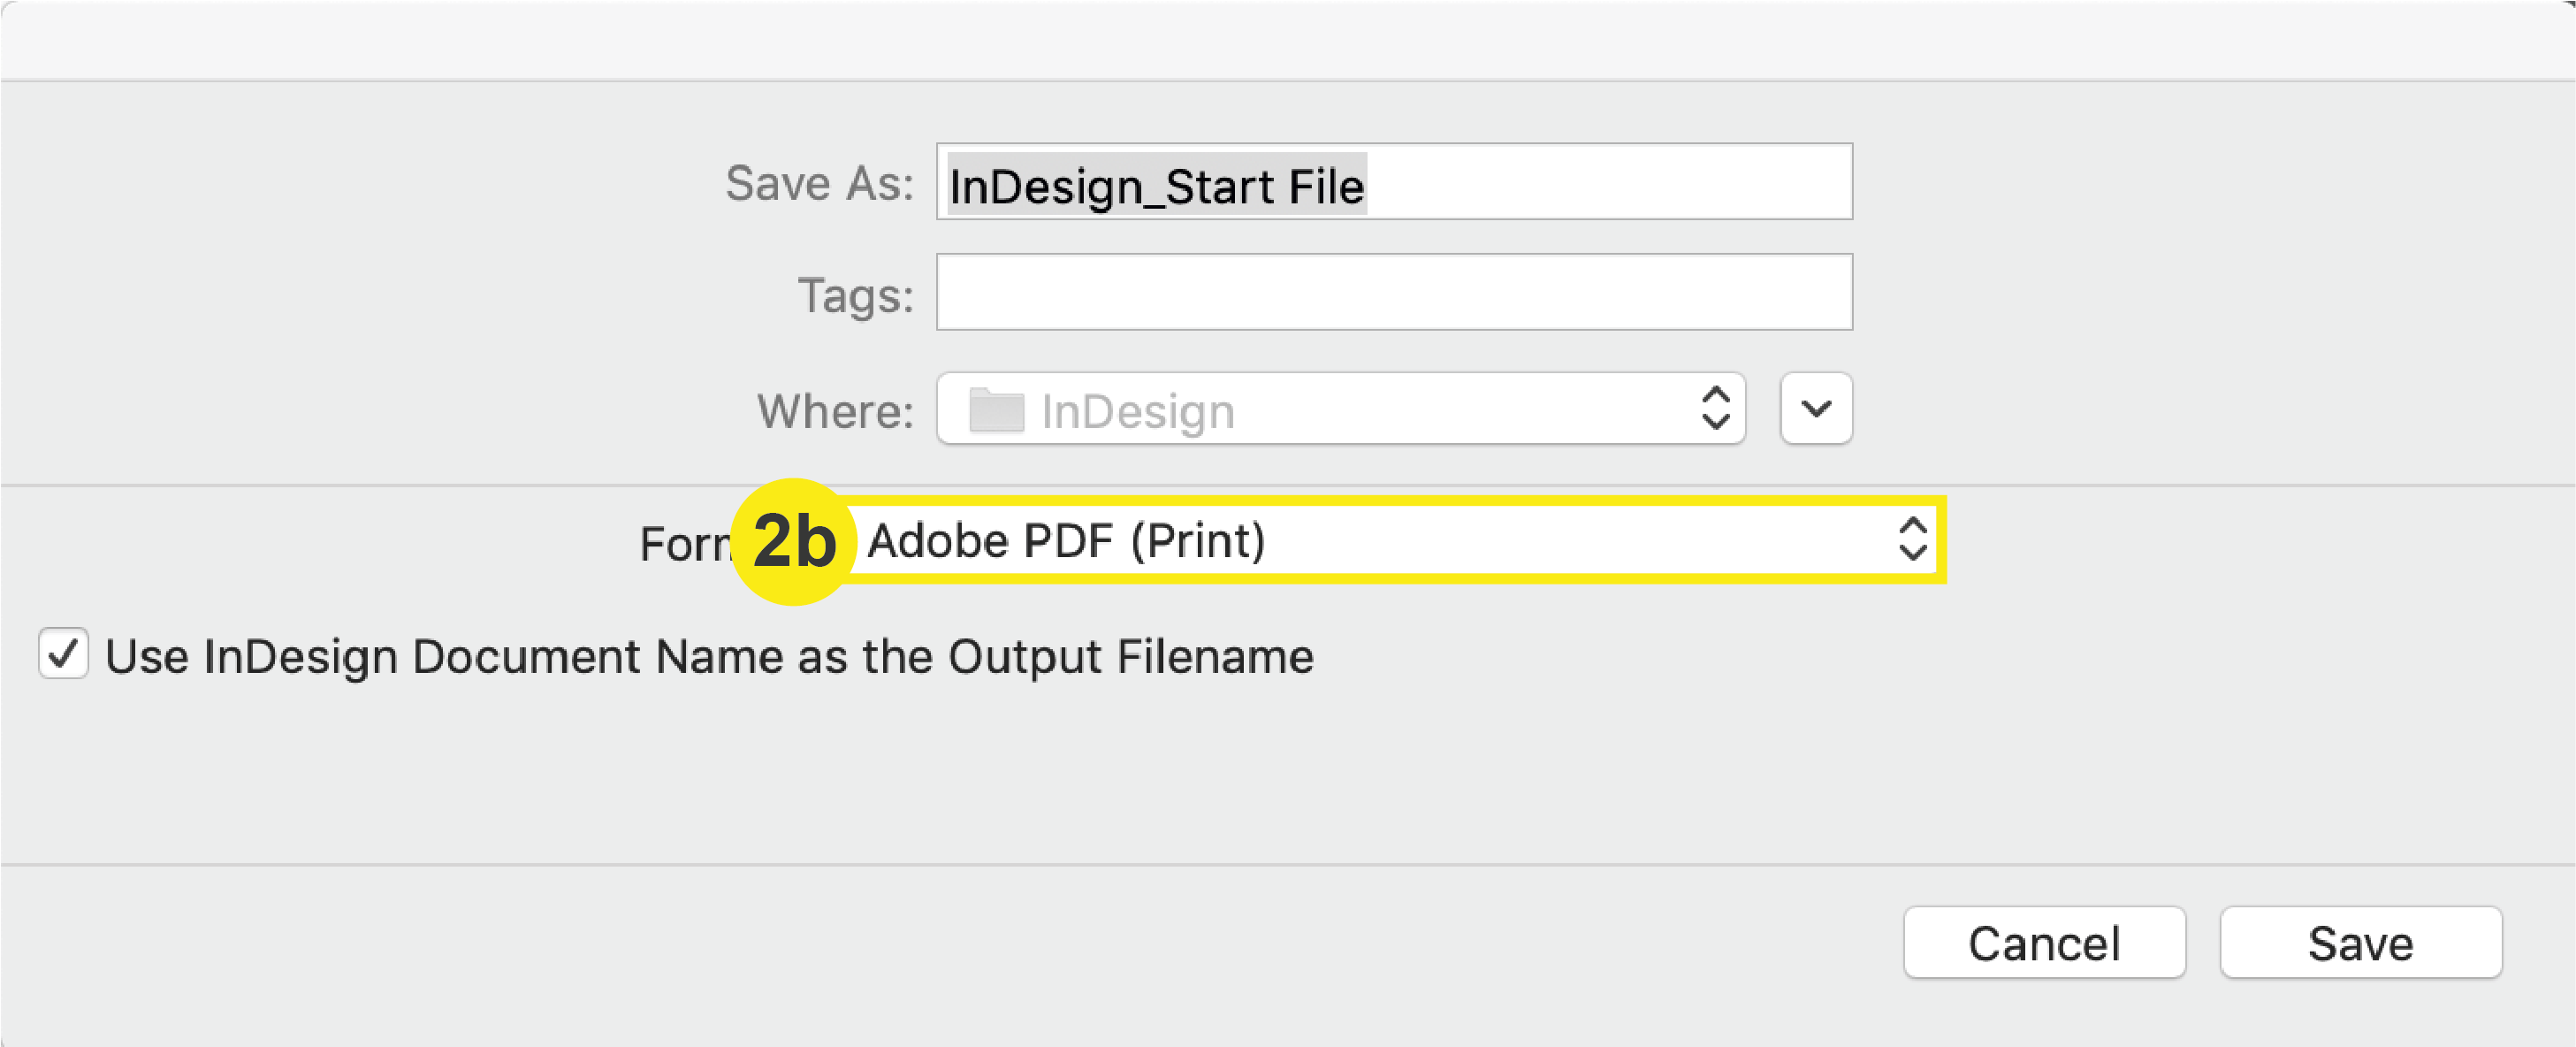
a. In the top menu Click: File > Export
b. In the Format section, select Adobe PDF (Print). This will prompt your Export Adobe PDF window to open.

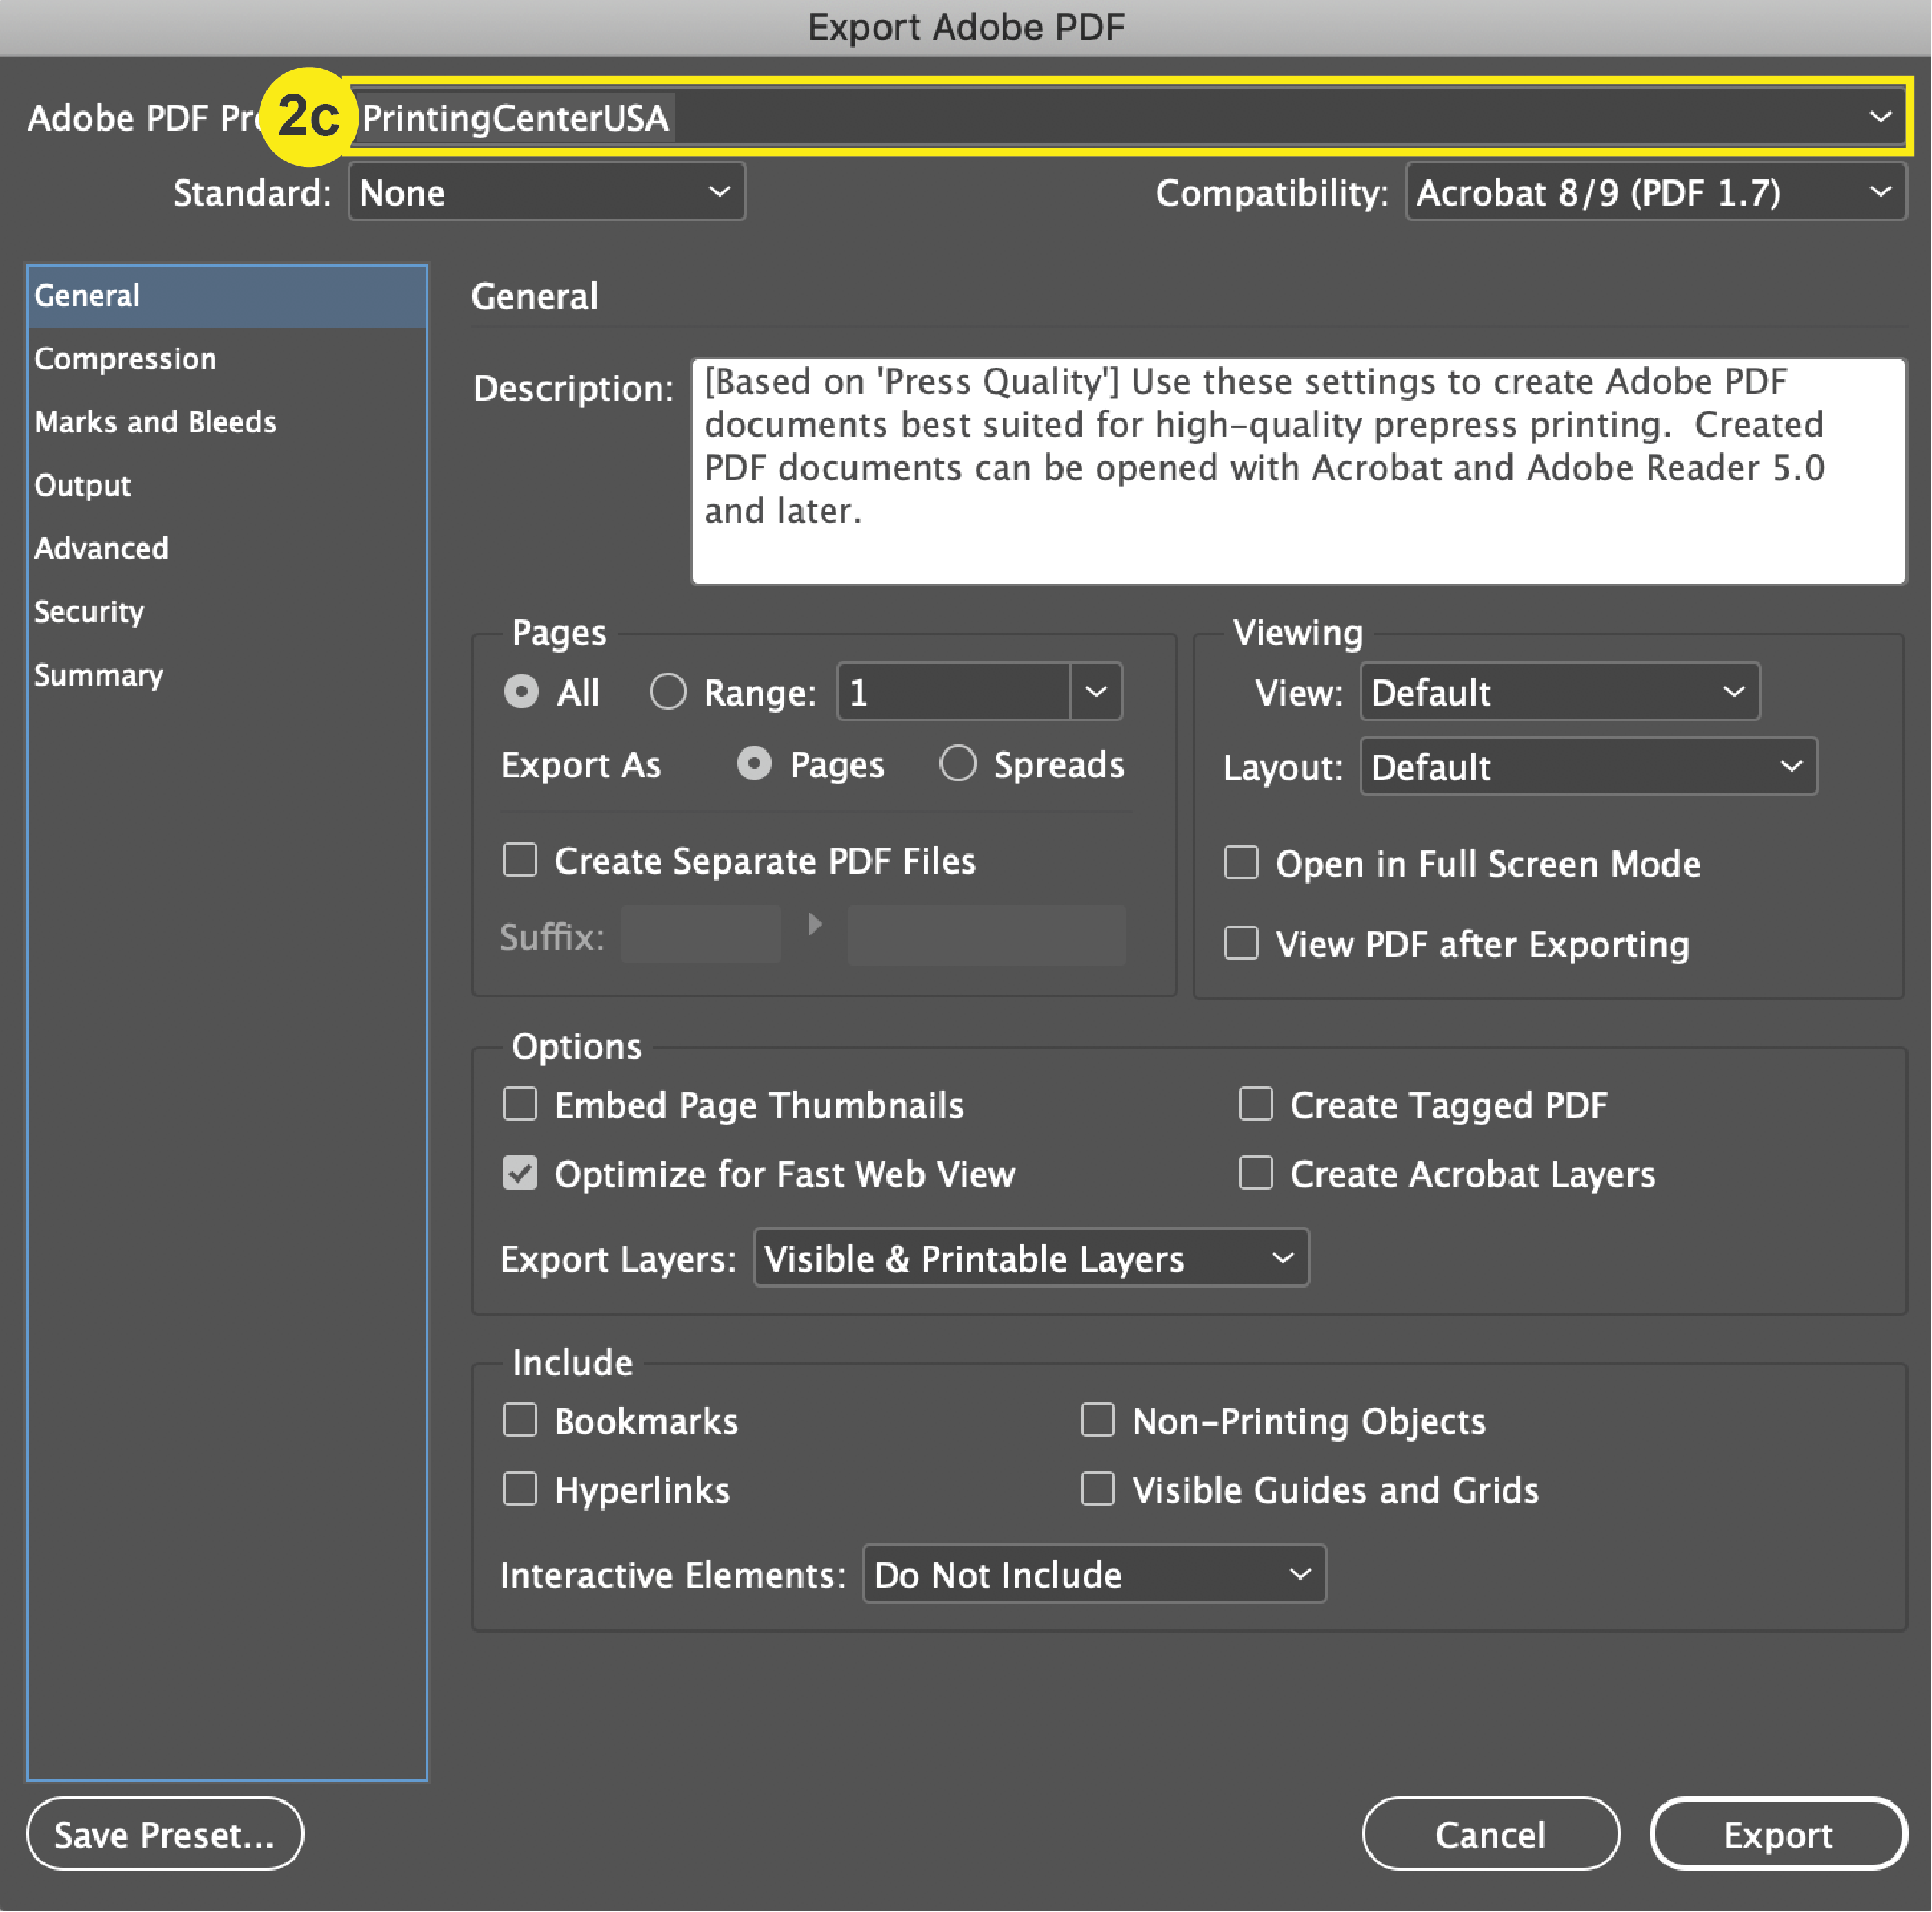
c. In the Export Adobe PDF window, select the “PrintingCenterUSA” Adobe PDF Preset that you uploaded in step 1.

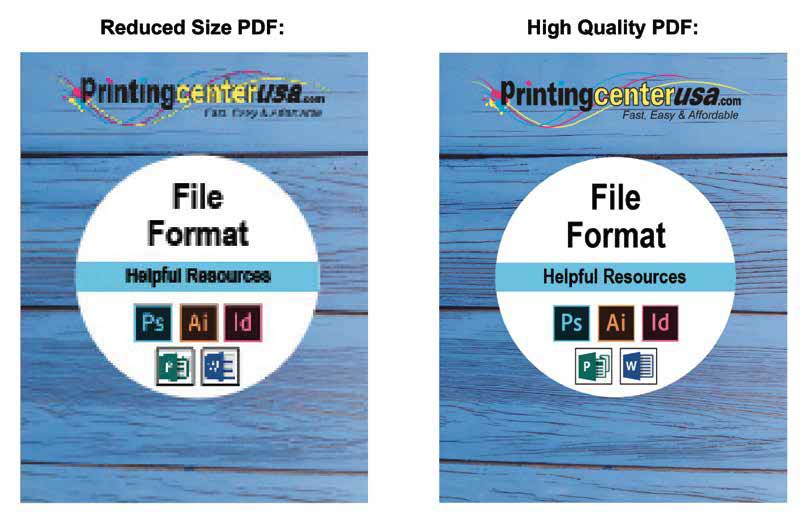
Note: Do not save your file with any printer’s marks, including crop marks and color registration bars.

File Packaging: InDesign

PrintingCenterUSA requires a PDF file to be submitted for printing. However, if there are issues with fonts or images loading, our prepress department may ask you to send a packaged file. If that is the case, then follow the steps below to package your files properly.

Checklist

  1. Open Package Dialogue Box
  2. Select Package Options

1. Open Package Dialogue Box

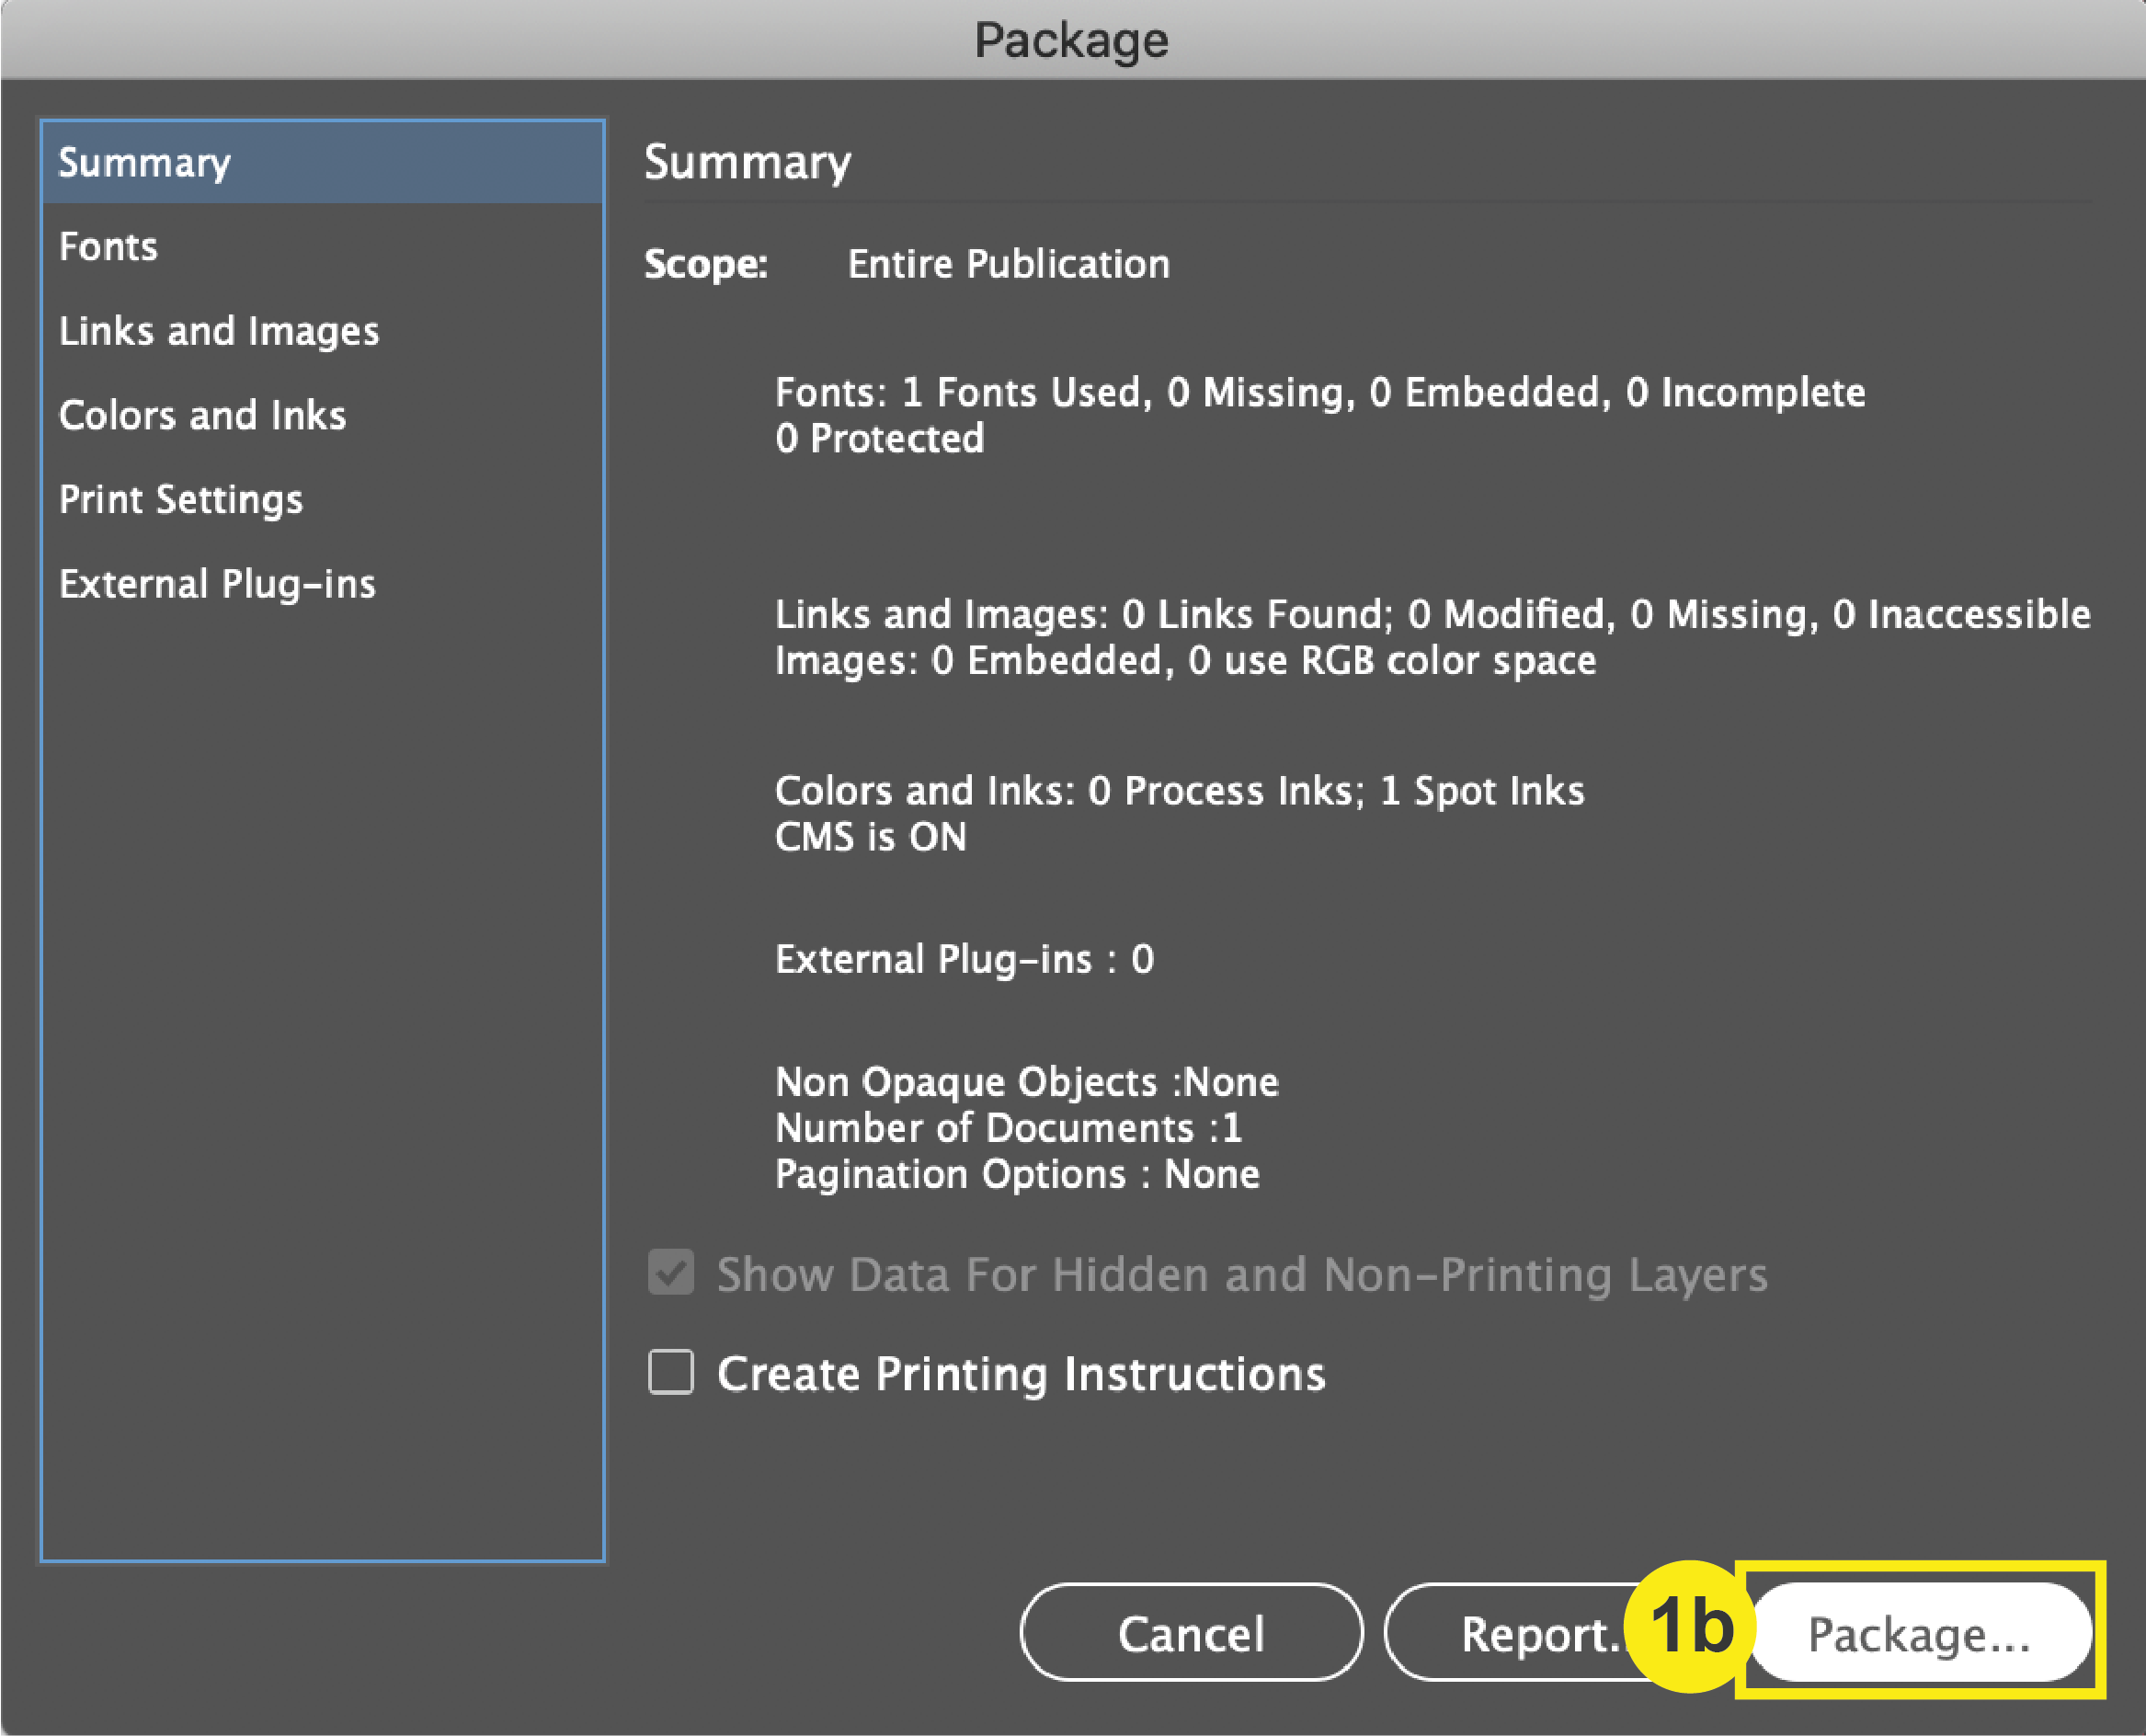
a. From the top menu, click: File > Package
b. In the Package Dialogue Box, click Package.

2. Select Package Options

In the Create Package Folder dialogue box, mark the following checkboxes:

a. Copy Fonts
b. Copy Linked Graphics
c. Include Fonts and Links from Hidden and Non-Printing Content
d. Include IDML
e. Include PDF (Print)

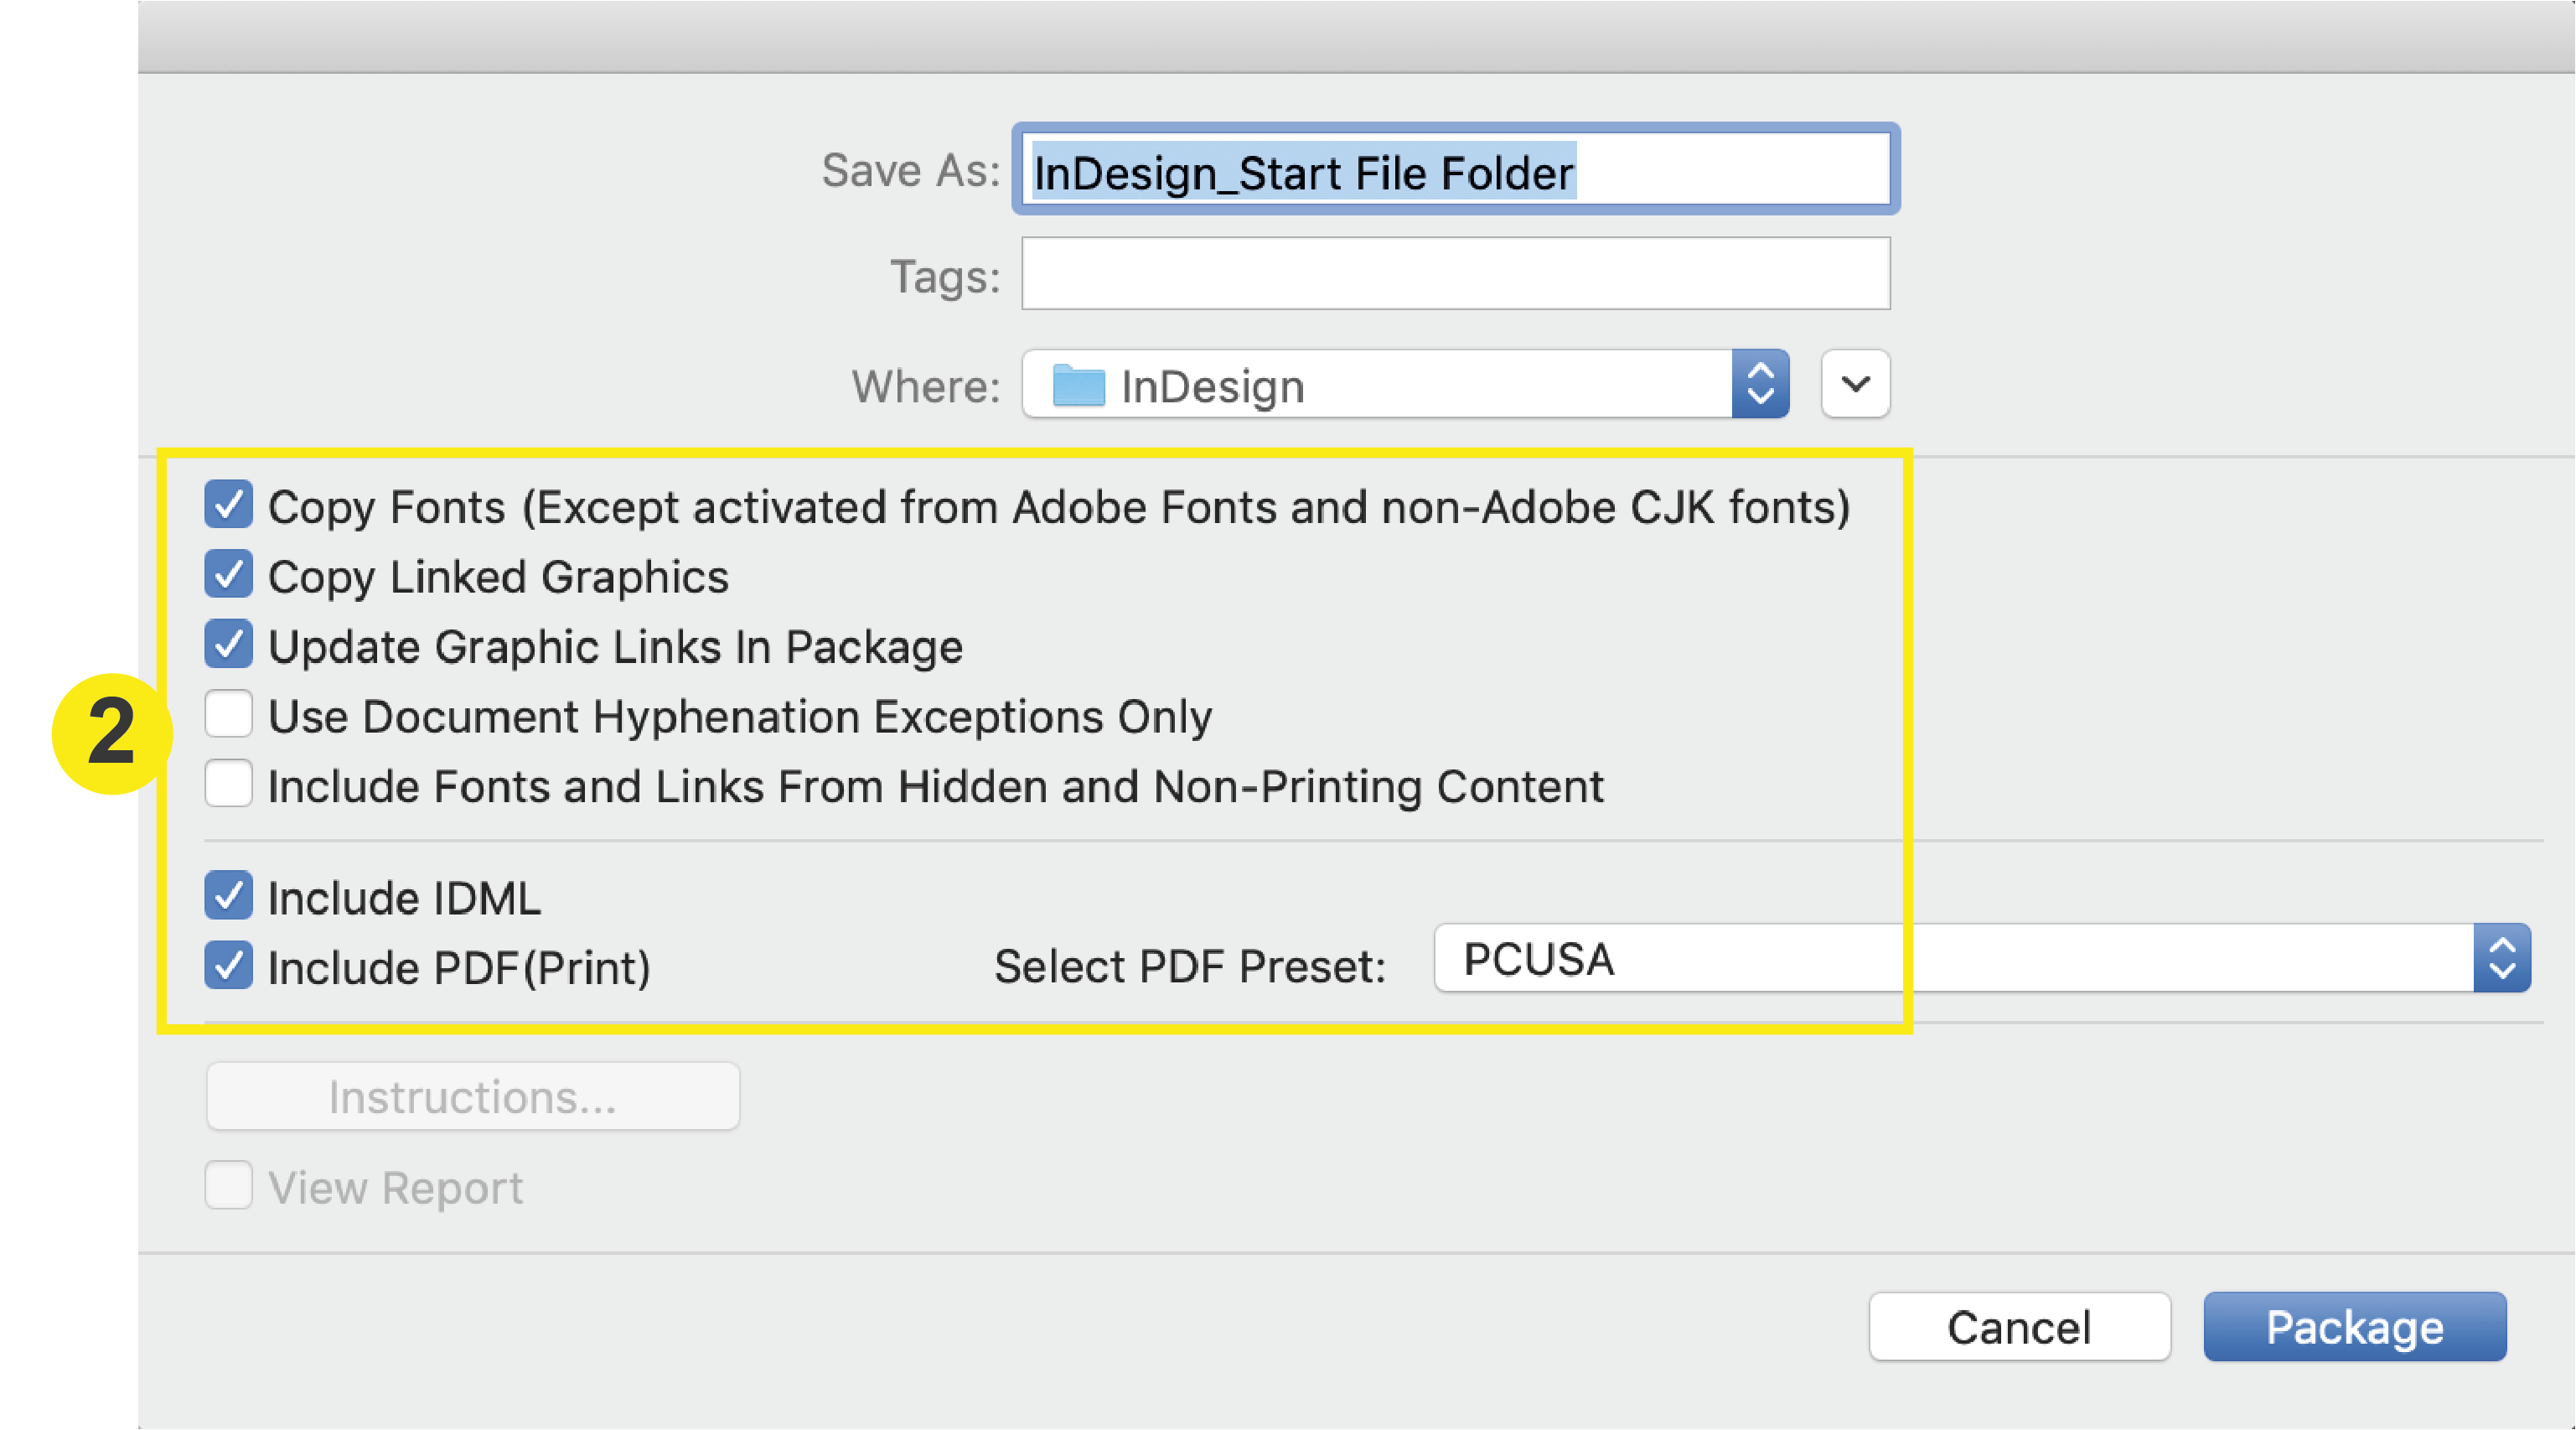
Click “Package” to finish.

File Preparation | File Saving | Overview

File Saving: Overview

PrintingCenterUSA requires that you submit your art as a Print-Ready PDF. Click here to download and install our PrintingCenterUSA PDF Preset (for Adobe® programs only). You will be downloading a .zip folder. Double click the file to unzip the folder.

Select your program for a step by step tutorial on how to load our preset and/or save as a PDF: InDesign, Illustrator, Photoshop, Canva, Publisher, and Word.

Accepted File Types for Online Printing

Note: Do not reduce the size of your PDFs. Big file sizes are OK. We need the highest resolution to ensure that your files get printed with the best quality.

For a step-by-step tutorial on file saving, select from one of the following programs:
InDesign, Illustrator, Photoshop, Canva, Publisher, and Word.

Have more questions? Check our File Saving FAQ.

File Preparation | Color Quality | Canva

Color Quality: Canva

By default, Canva will save your design in RGB color. We print in CMYK, which can cause some color shift in your final product. If you own Canva Pro, you can save your design in CMYK, which we recommend for best final results.

You will find the option for saving in RGB or CMYK under “File”>”Download”. In the menu, select the File type as “PDF Print”, select “Crop marks and bleed”, select “All pages”. The final option will be “Color Profile”, and will be set as “RGB (best for digital use)” by default. If you have Canva Pro, you can click on the dropdown and select “CMYK (best for professional printing)

Once finished selecting these options (insert image), click “Download” for your pdf file.

File Preparation | Color Quality | Photoshop

Color Quality: Photoshop

To ensure your price quote and design accuracy, it is crucial that the color you order matches the color of your PDF. Follow the steps below to check the color of your document in Photoshop.

Checklist

  1. Download & Install Color Profile
  2. Check that your Images are in CMYK
  3. Check that your Document Color Mode is in CMYK

1. Download & Install PrintingCenterUSA Color Profile

First, Download our color profile here. You will be downloading a .zip folder. Double click the file to unzip the folder.

a. In Photoshop, go to Edit > Color Settings
b. In the Color Settings window, select “Load” and choose “PCUSA-load into color settings.csf” Click Save.

Snow
Forest

c. In the zip folder, double click PrintingCenterUSA.joboptions. Click “replace” if a caution window comes up. Click exit.

2. Check that your Image Mode is in CMYK

a. To check if your images are in CMYK, in the top menu bar Click: Window > Info.
b. Click on the image you are checking. If your image is in CMYK, it will say so. If it is in RGB, then you will need to replace the image (or the colors will print different than expected).

File Preparation | Color Quality | Illustrator

Color Quality: Illustrator

To ensure your price quote and design accuracy, it is crucial that the color you order matches the color of your PDF. Follow the steps below to check the color of your document in Illustrator.

Checklist

  1. Download & Install Color Profile
  2. Check that your Images are in CMYK
  3. Check that your Document Color Mode is in CMYK

1. Download & Install PrintingCenterUSA Color Profile

First, Download our color profile here. You will be downloading a .zip folder. Double click the file to unzip the folder.

a. In Illustrator, go to Edit > Color Settings
b. In the Color Settings window, select “Load” and choose “PCUSA-load into color settings.csf” Click Save.

Snow
Forest

c. In the zip folder, double click PrintingCenterUSA.joboptions. Click “replace” if a caution window comes up. Click exit.

2. Check that your Images are in CMYK

To check your images in your document, simply click on the image you are wanting to check. In the top navigation of Illustrator, your image’s name, dimension, and file size will appear. If your image is not in CMYK, this will need to be changed.

3. Check that your Document Color Mode is in CMYK

If you installed the PCUSA color settings in Step 1, then your documents color mode should already be in CMYK.

File Preparation | Color Quality | InDesign

Color Quality: InDesign

To ensure your price quote and design accuracy, it is crucial that the color you order matches the color of your PDF. Follow the steps below to check the color of your document in InDesign.

Checklist

  1. Download & Install Color Profile
  2. Check that your Images are in CMYK
  3. Check that your Document Color Mode is in CMYK

1. Download & Install PrintingCenterUSA Color Profile

First, Download our color profile here. You will be downloading a .zip folder. Double click the file to unzip the folder.

a. In InDesign, go to Edit > Color Settings
b. In the Color Settings window, select “Load” and choose “PCUSA-load into color settings.csf” Click Save.

Snow
Forest

c. In the zip folder, double click PrintingCenterUSA.joboptions. Click “replace” if a caution window comes up. Click exit.

2. Check that your Images are in CMYK

a. To check if your images are in CMYK, in the top menu bar click: Window > Info.
b. Click on the image you are checking. If your image is in CMYK, it will say so. If it is in RGB, then you will need to replace the image (or the colors will print different than expected).

3. Check that your Document Color Mode is in CMYK

If you installed the PCUSA color settings in Step 1, then your documents color mode should already be in CMYK. Regardless, CMYK is the default for InDesign.

File Preparation | Color Quality | Overview

Color Quality: Overview

Your product should be designed in the CMYK color mode whenever possible. CMYK stands for Cyan, Magenta, Yellow and Key (Black). If you do not save your product in CMYK, PrintingCenterUSA will automatically convert your design from RGB (red, green and blue; this is what you see on your monitor) to CMYK. For more information about setting up your document in CMYK, click here.

When ordering on PrintingCenterUSA’s Pricing Tool, you will be asked to select your Ink options (Inside Ink and Cover Ink for multi-page products). These options will appear as:

  • 4/4 Full Color Both Sides
  • 4/1 Full Color Front / Black Back
  • 4/0 Full Color Front / Empty Back or
  • 1/1 Black Front / Black Back

For example, a Postcard may have a Full Color Front (4) with only Black (1) on the back. The appropriate Ink selection for this postcard would be 4/1 Full Color Front / Black Back.

Full color vs. Black vs. No Printing

Color Printing is also known as 4-color printing, full color printing, process printing, and CMYK printing. Color involves the separation of all colors into 4 different color values (Cyan, Magenta, Yellow and Black).

Full color vs. Black vs. No Printing

For a step-by-step tutorial on color, select from one of the following programs:
InDesign, Illustrator, Photoshop, Canva, Publisher, and Word

Have more questions? Check our Color Quality FAQ.

File Preparation | Size | Word

Size: Word

To ensure your price quote and design accuracy, it is crucial that the size you order matches the size of your PDF. Follow the steps below to check the size of your design in Word.

Checklist

  1. Open Page Setup
  2. Check the Dimensions of your Document
  3. Compare to Chosen Size in Pricing Tool

1. Open Page Setup

Open your document in Word. In the top menu, click: File > Page Setup. This will prompt the Page Setup window to open where you will check the dimensions of your document.

2. Check the Dimensions of your Document

a. In the Page Setup Window, Select “Manage Custom Sizes” in in the “Paper Size” dropdown.

b. Once in the Manage Custom Sizes window, select your custom size on the left. Then check the dimensions of the page. Your Paper size should be .25 inches (width and height) larger than your final trim size (the size you will select to order in the pricing tool).
For example: If your Letterhead is 8.5” x 11” then your paper size here would be 8.75” x 11.25.” This extra .25 inches accommodates for the bleed.

3. Compare to Chosen Size in Pricing Tool

Once you have checked the size of your document, compare it to your chosen size on PrintingCenterUSA’s pricing tool. The page size in Word should be .25 inches larger (for width and height) than the price shown in the pricing tool. If your sizes are the same, then you probably just need to adjust your document size/design to accommodate for bleed.

Note: Changing the size of your product on the pricing tool may affect the price.