Skip to content Skip to main navigation Skip to footer

Tag: tutorials-body

Binding | Saddle Stitch

Binding: Saddle Stitch

What is Saddle Stitch Printing?

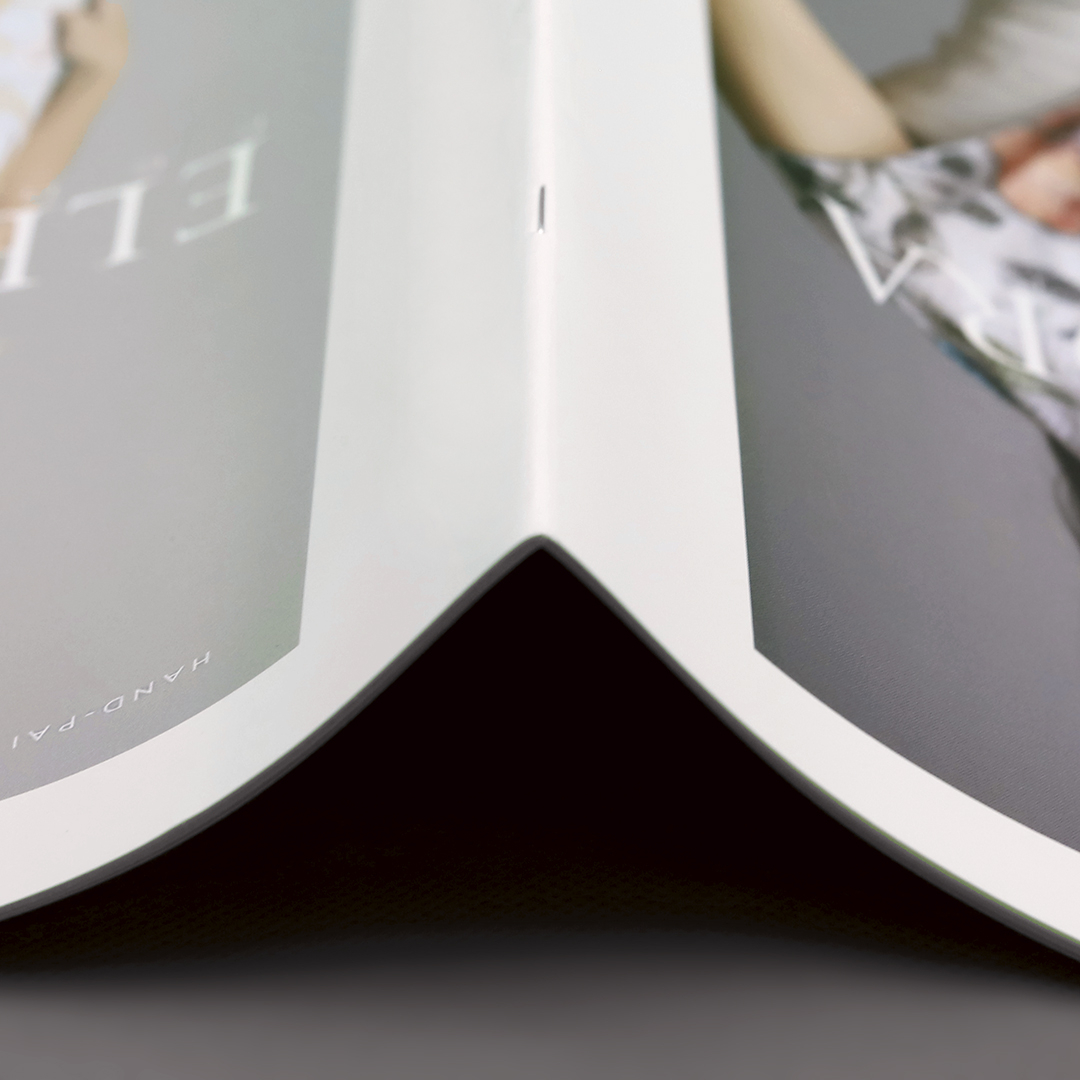
Saddle stitched books are, simply put, folded and stapled together. This is most commonly used for booklets, catalogs, photo books, magazines and calendars.

Products can be saddle stitched along the left edge or top edge, depending on how the project is planned out.

This binding type is the most popular, inexpensive, simple and professional form of binding, which allows us to save you money. A benefit of choosing saddle stitch is that the pages can lay flat and stay open while you are flipping through the pages.

Snow
Forest

Page Count

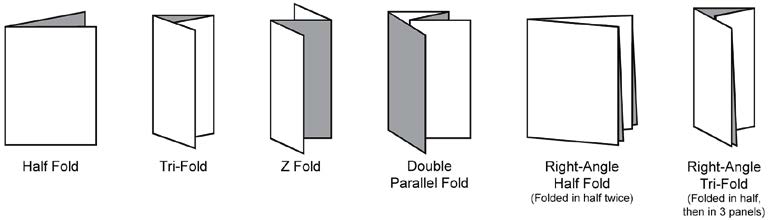
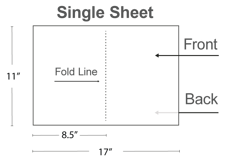
With the saddle stitch method, the pages of the booklet are printed on large sheets of paper and then folded in half, which is why you must have a page count that is evenly divisible by 4. Each sheet of paper will contain 4 of the booklet’s pages.

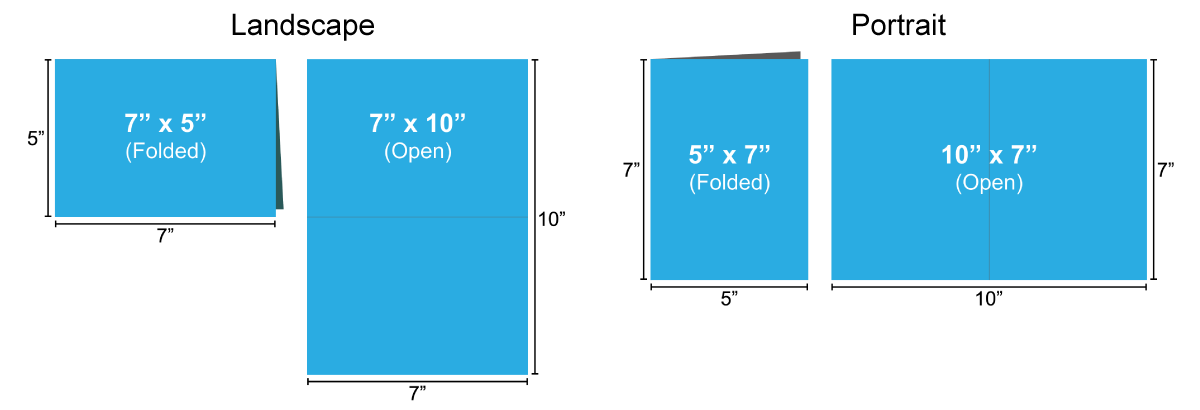
For example, if you are printing an 8.5” x 11” saddle stitch book, it’s pages and cover would be made from 11” x 17” sheets that are folded in half to the size of 8.5” x 11.”

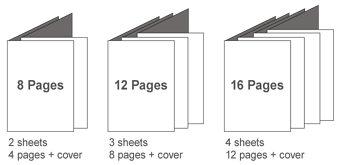
We can print saddle stitch orders that are 8 – 92 pages. In other words, your document (counting the front and back cover) should be one of the following page counts:
8 | 12 | 16 | 20 | 24 | 28 | 32 | 36 40 | 44 | 48 | 52 | 56 | 60 | 64 | 68 | 72 | 76 | 80 | 84 | 88 | 92

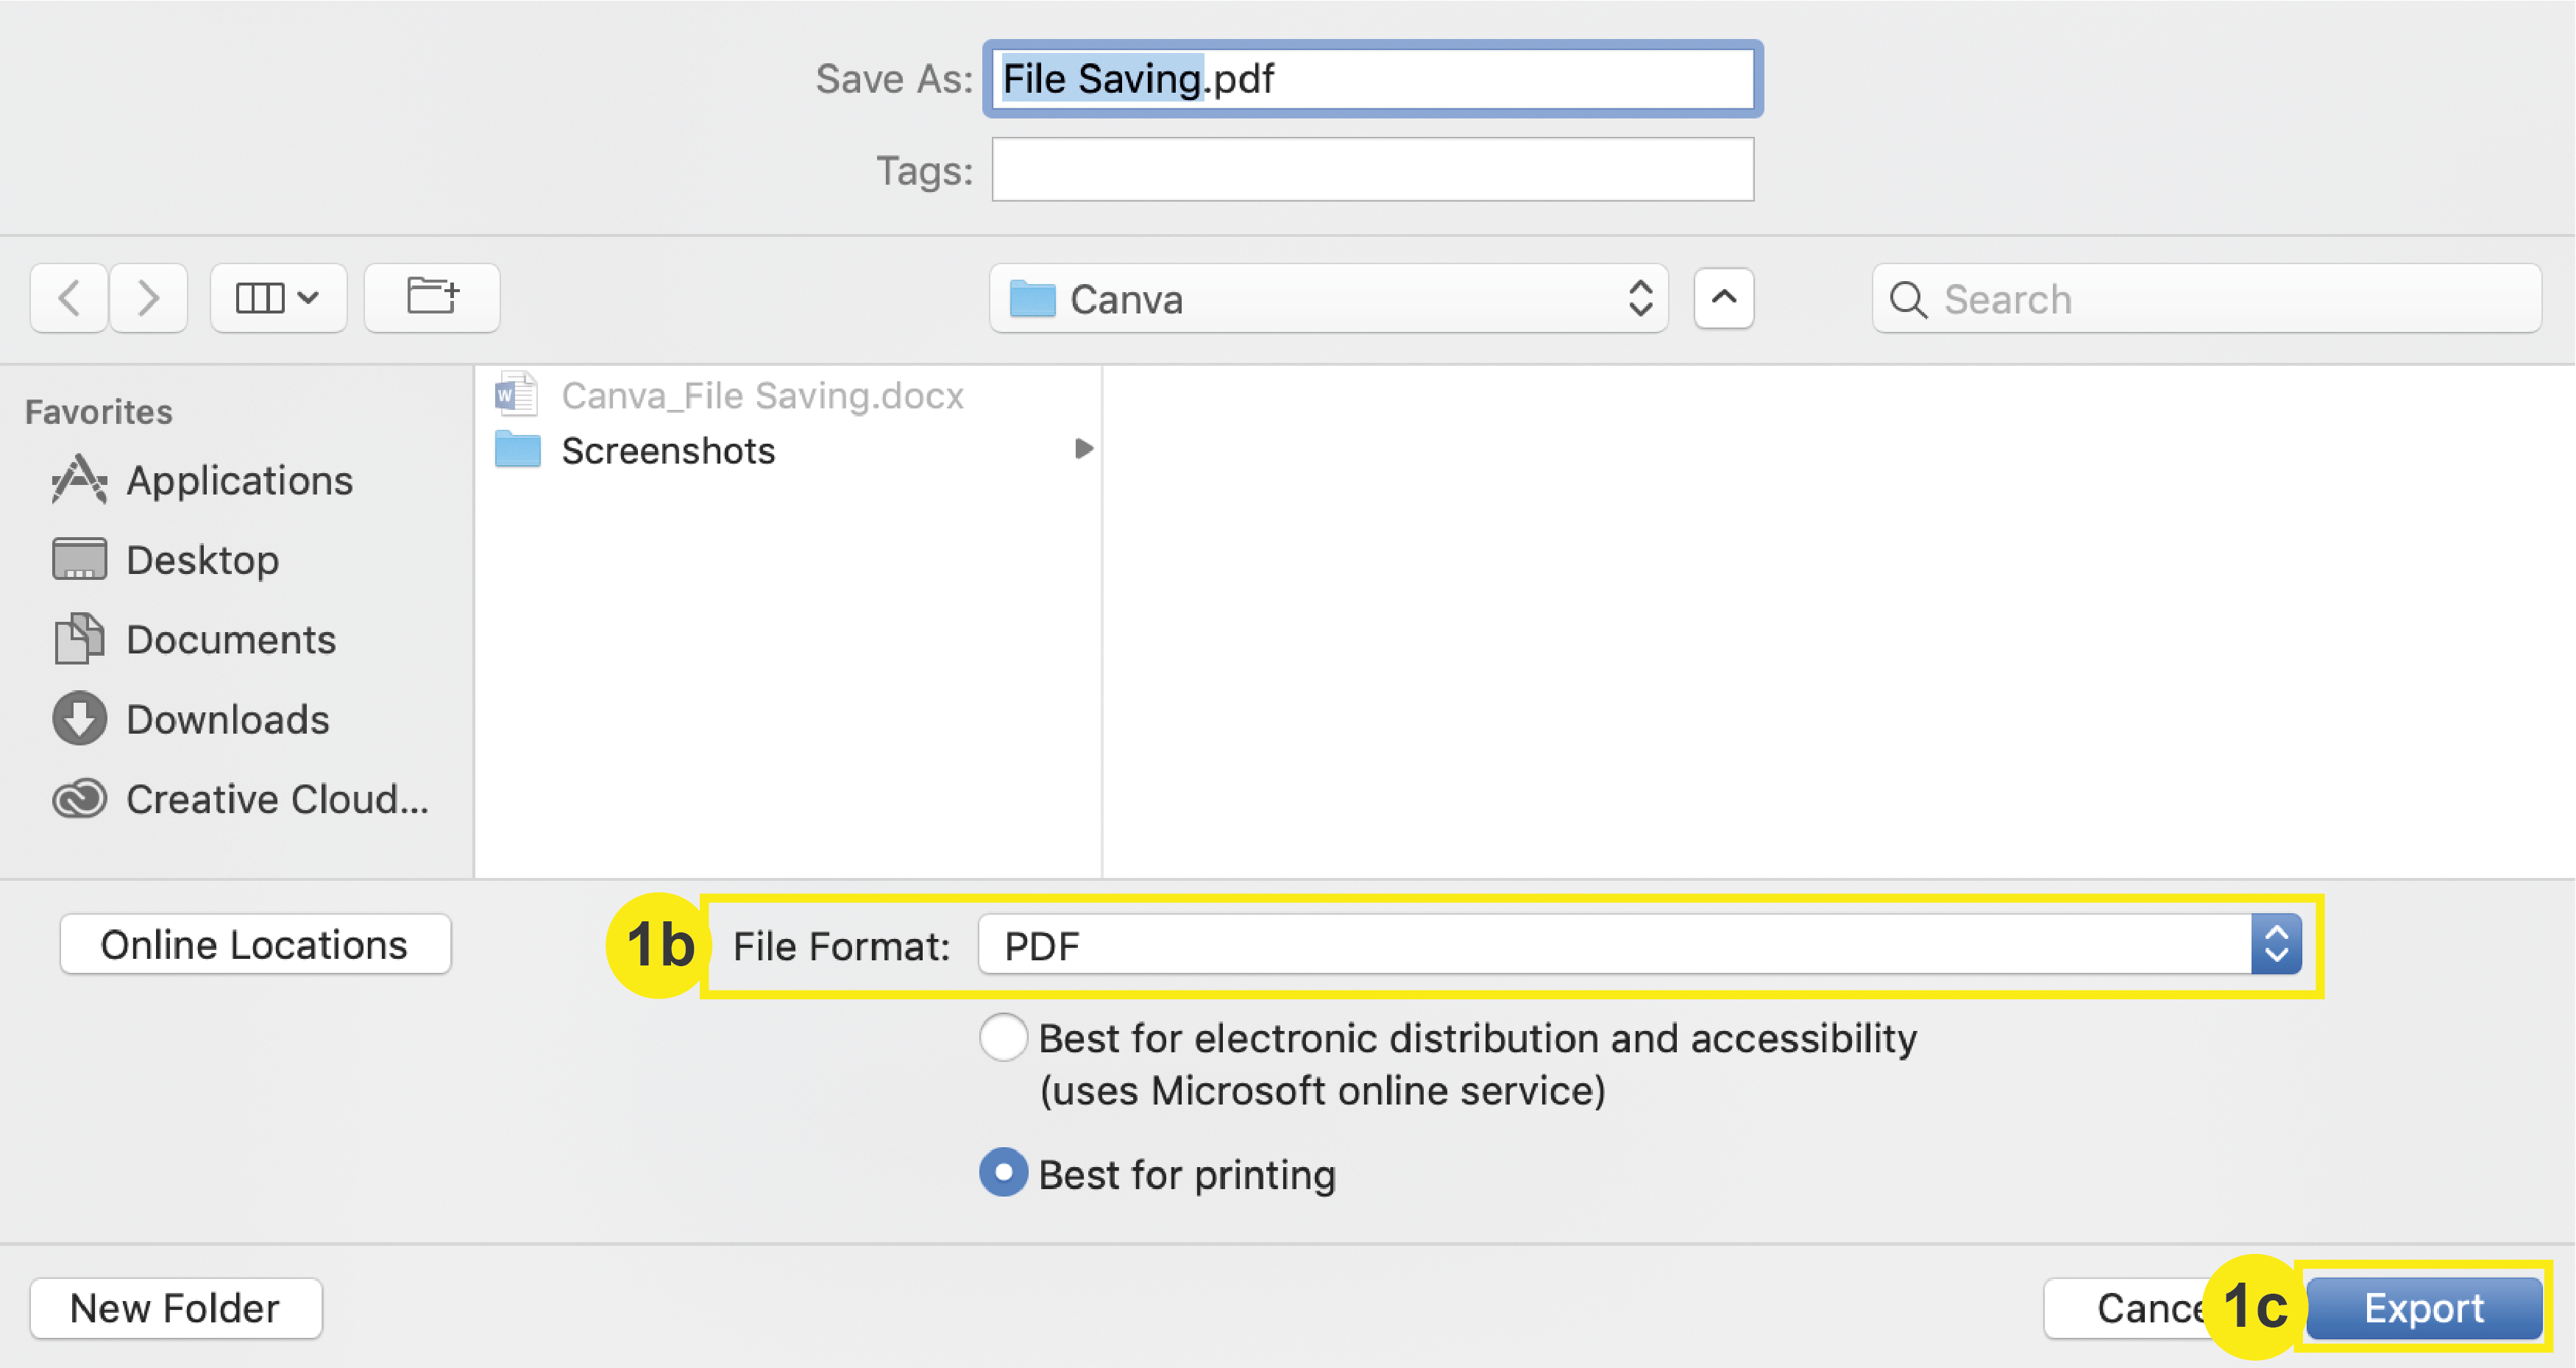
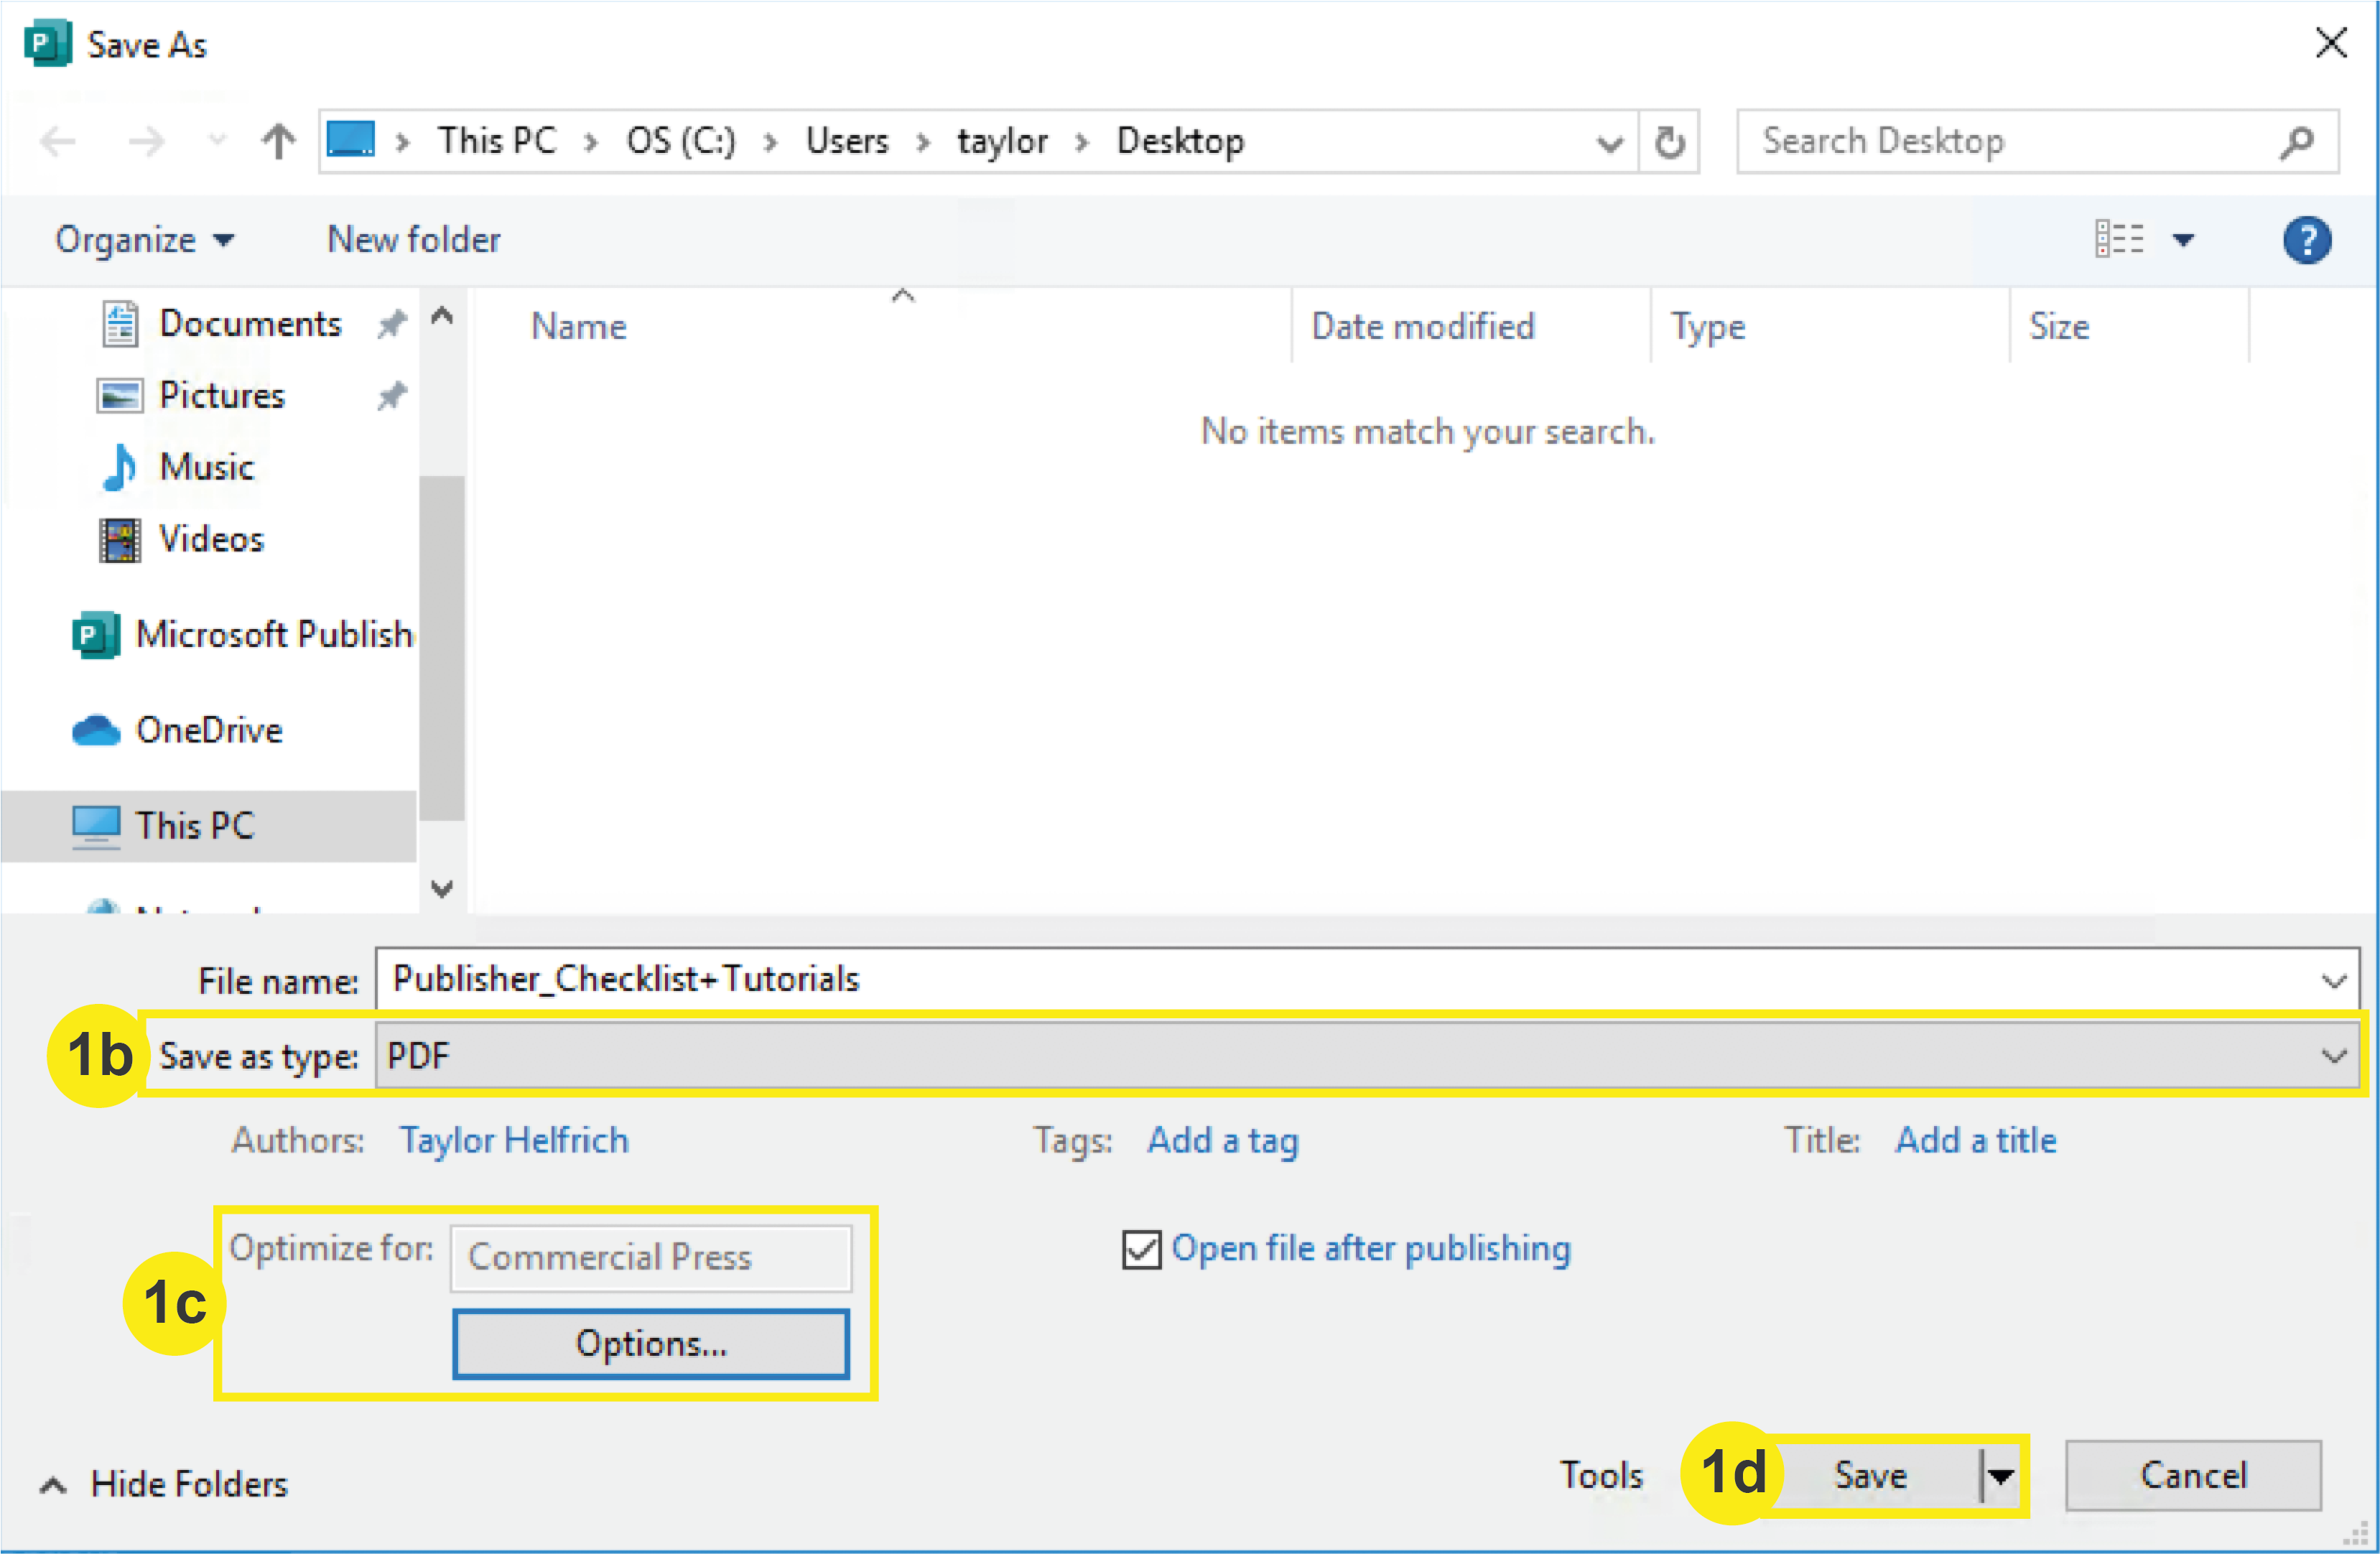
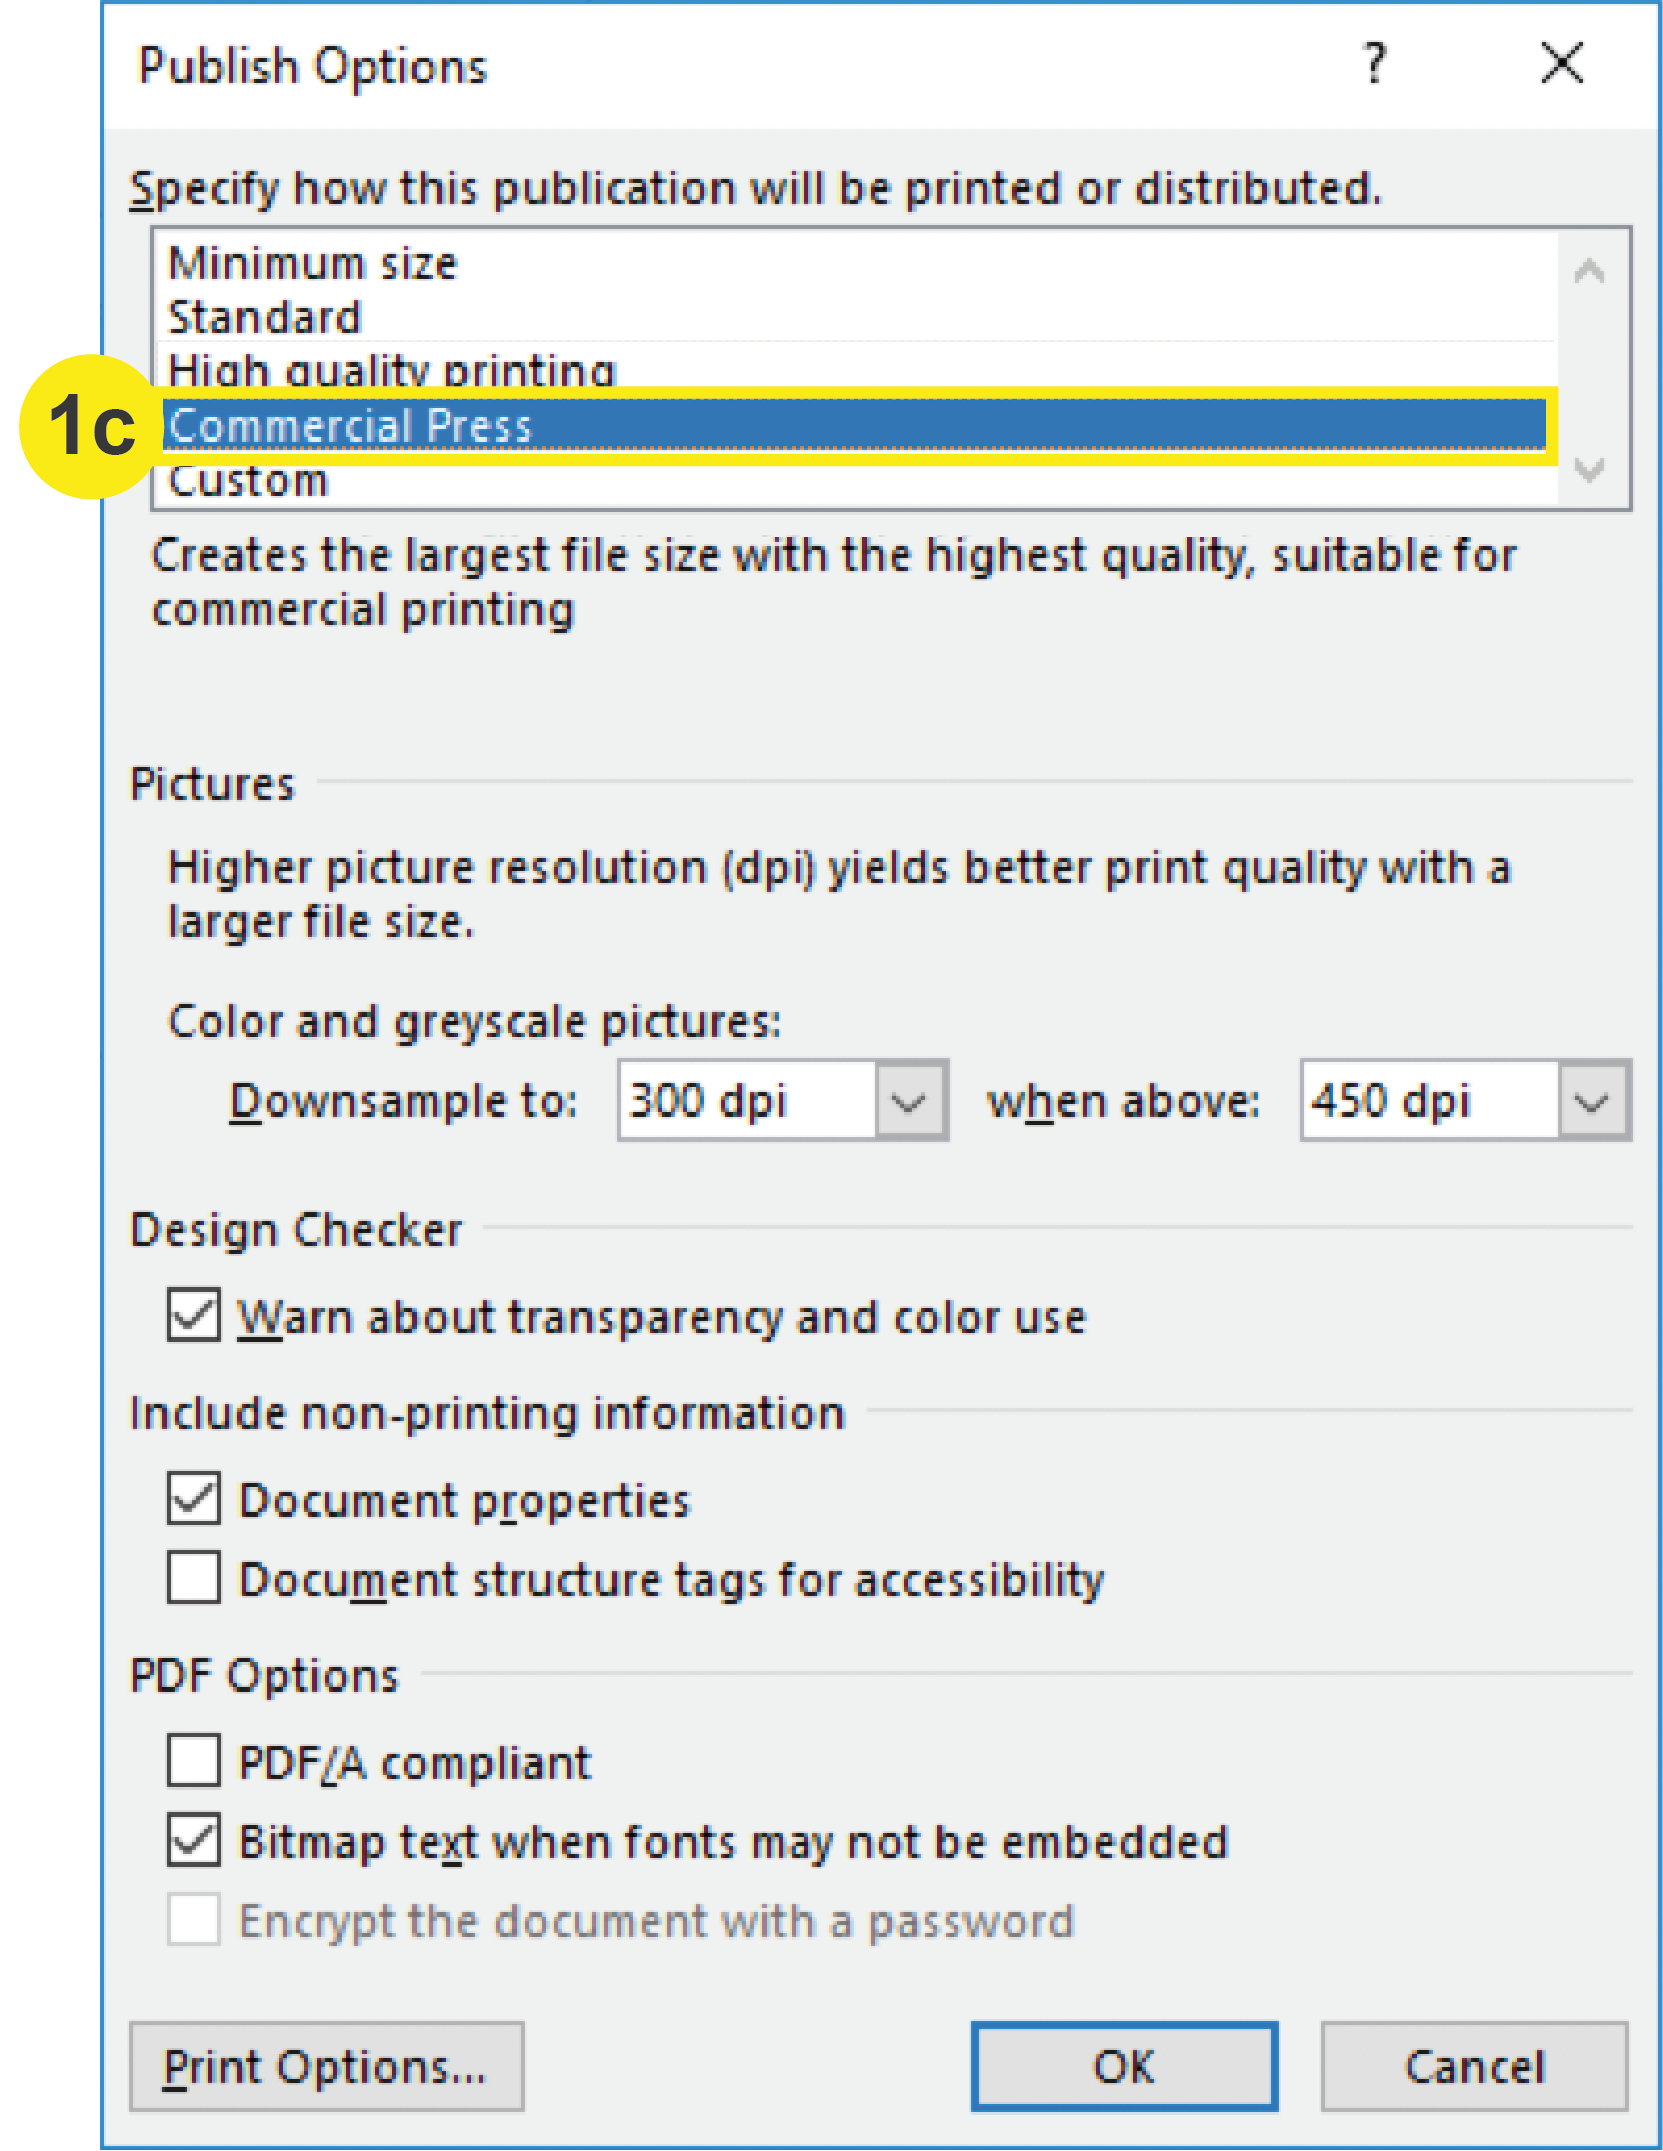
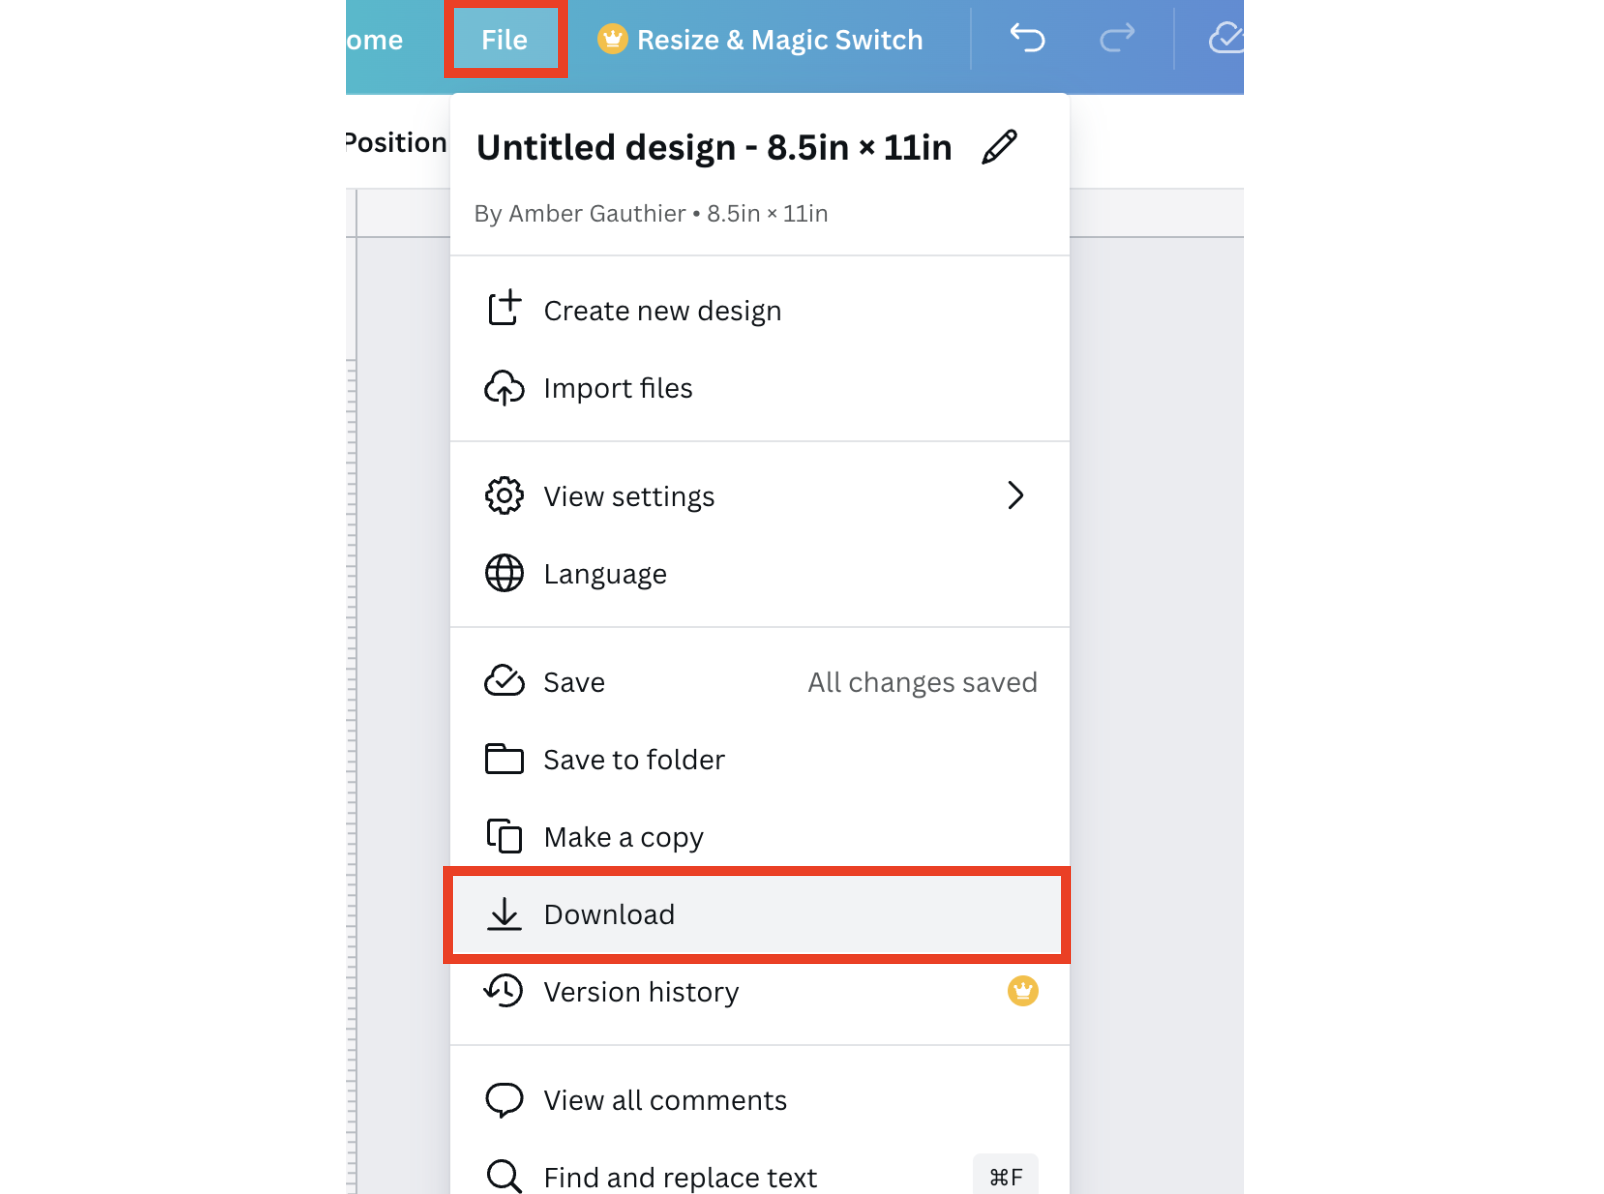
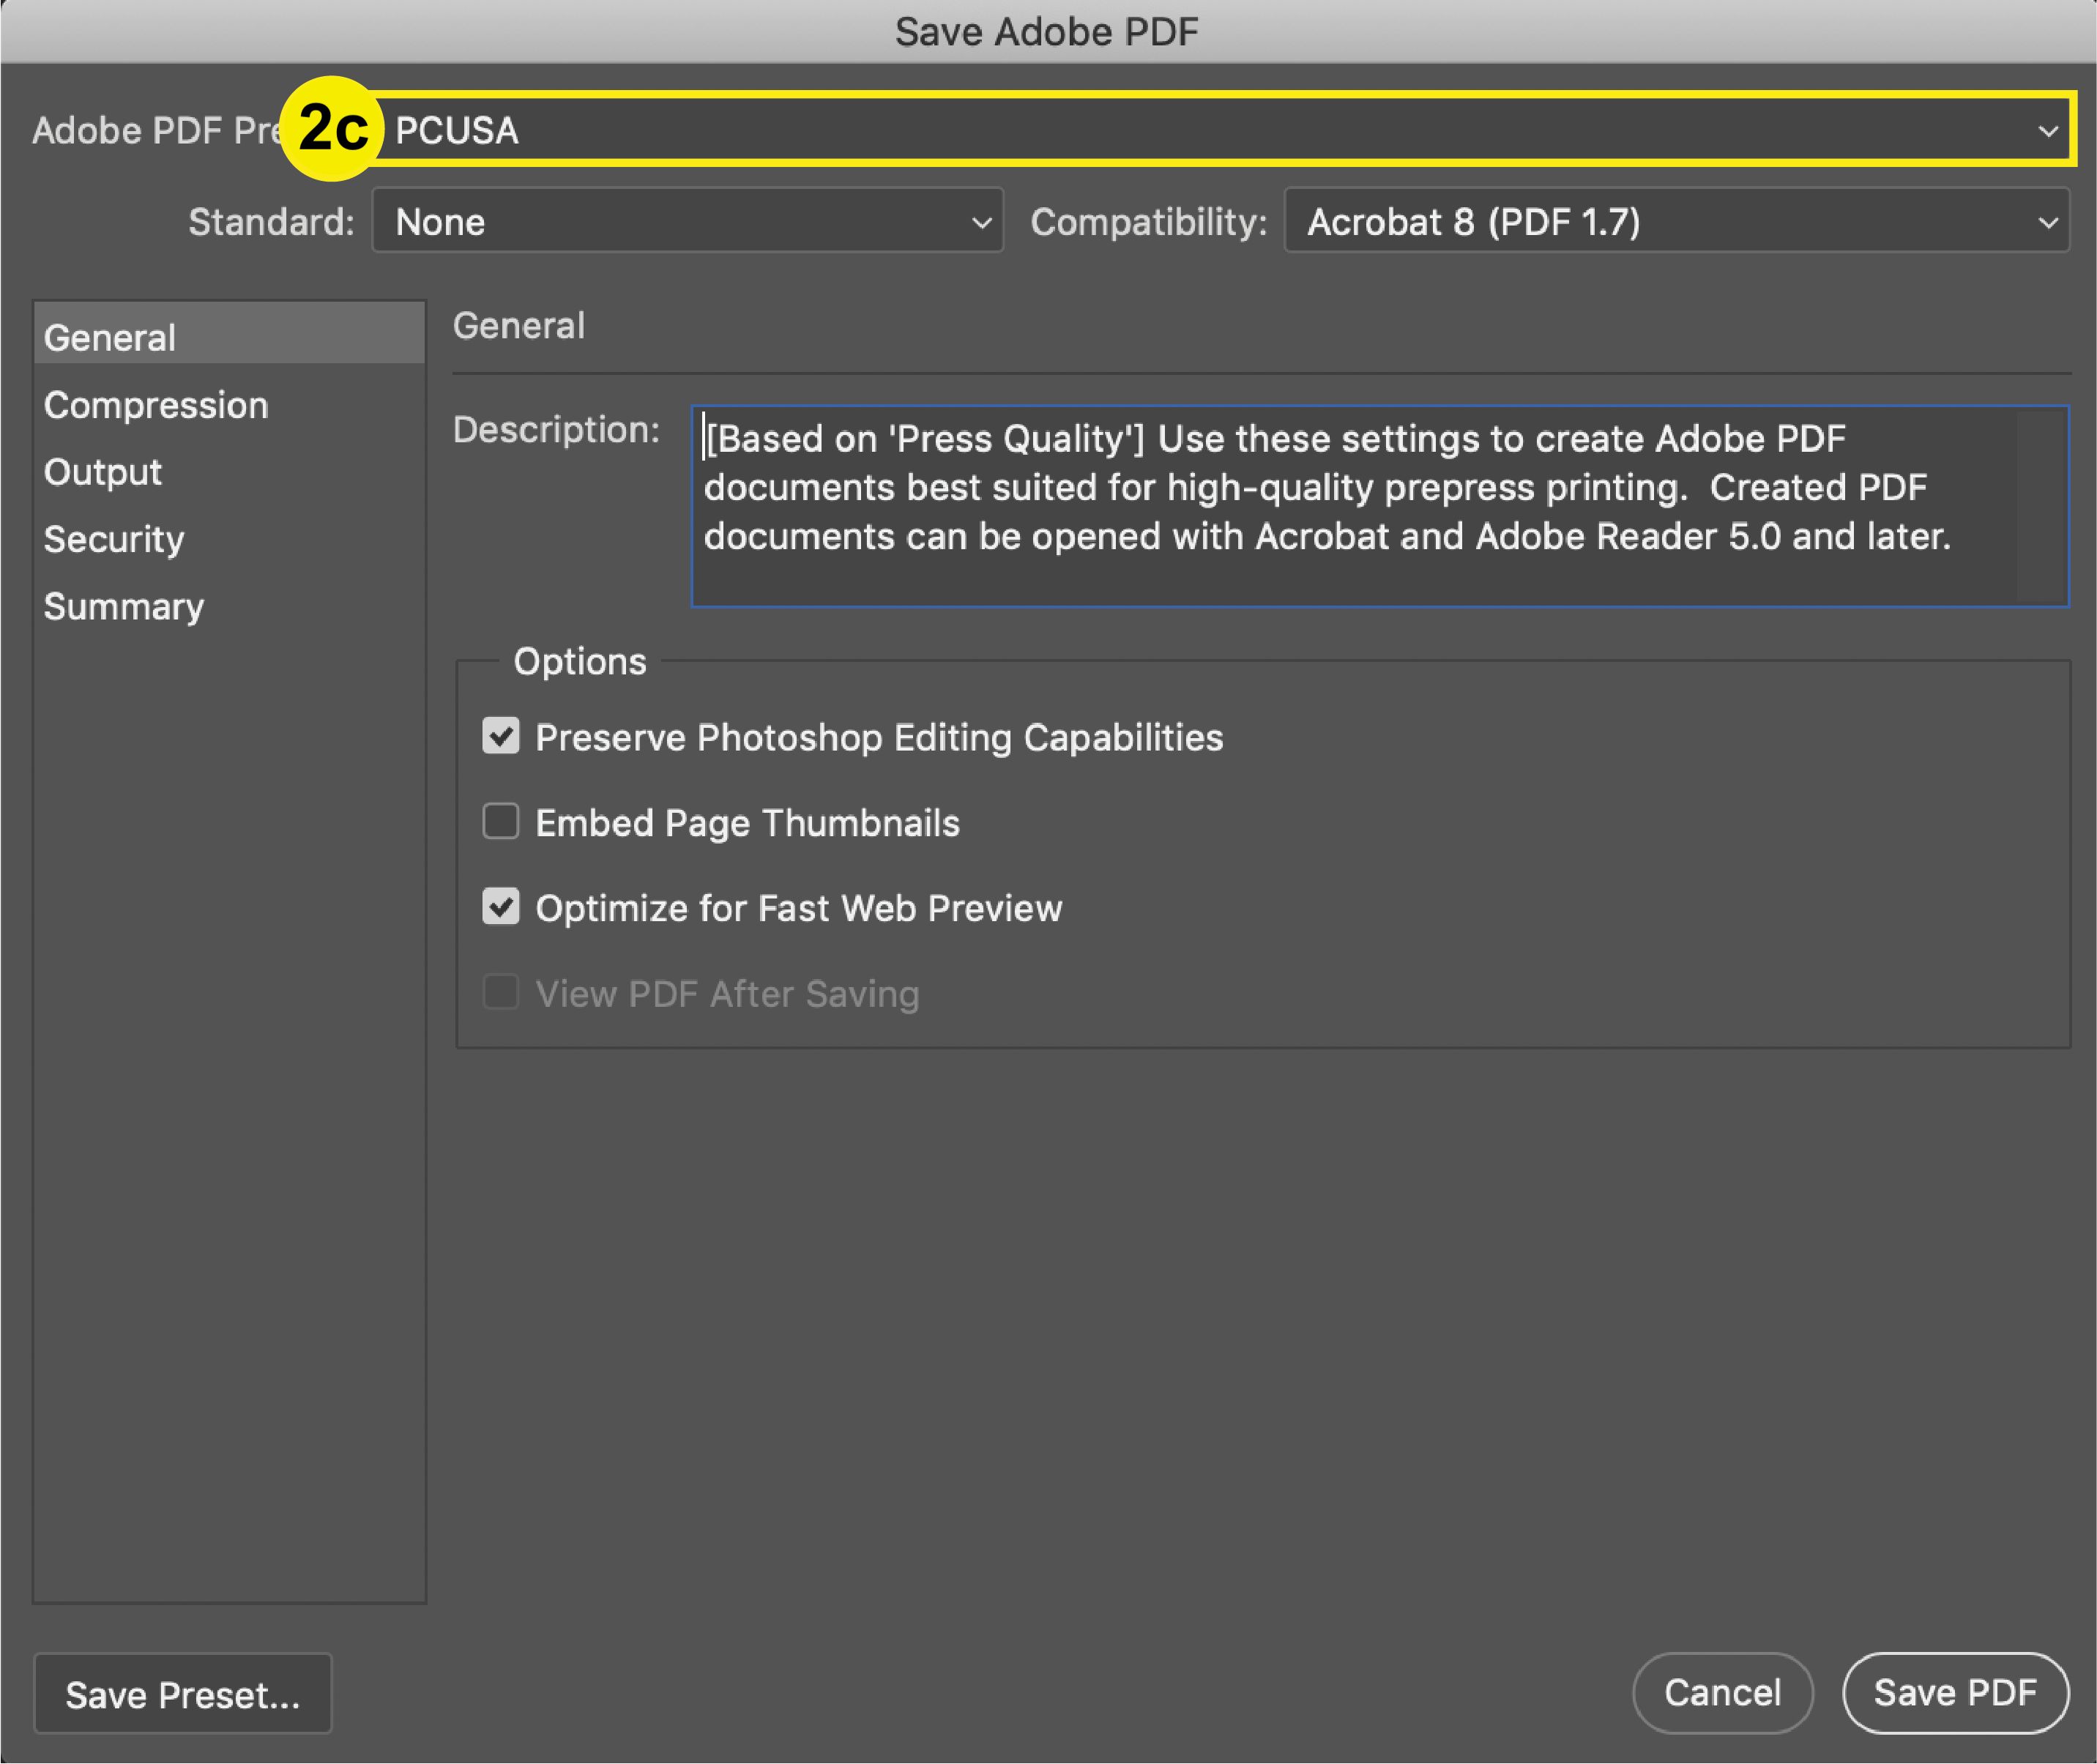
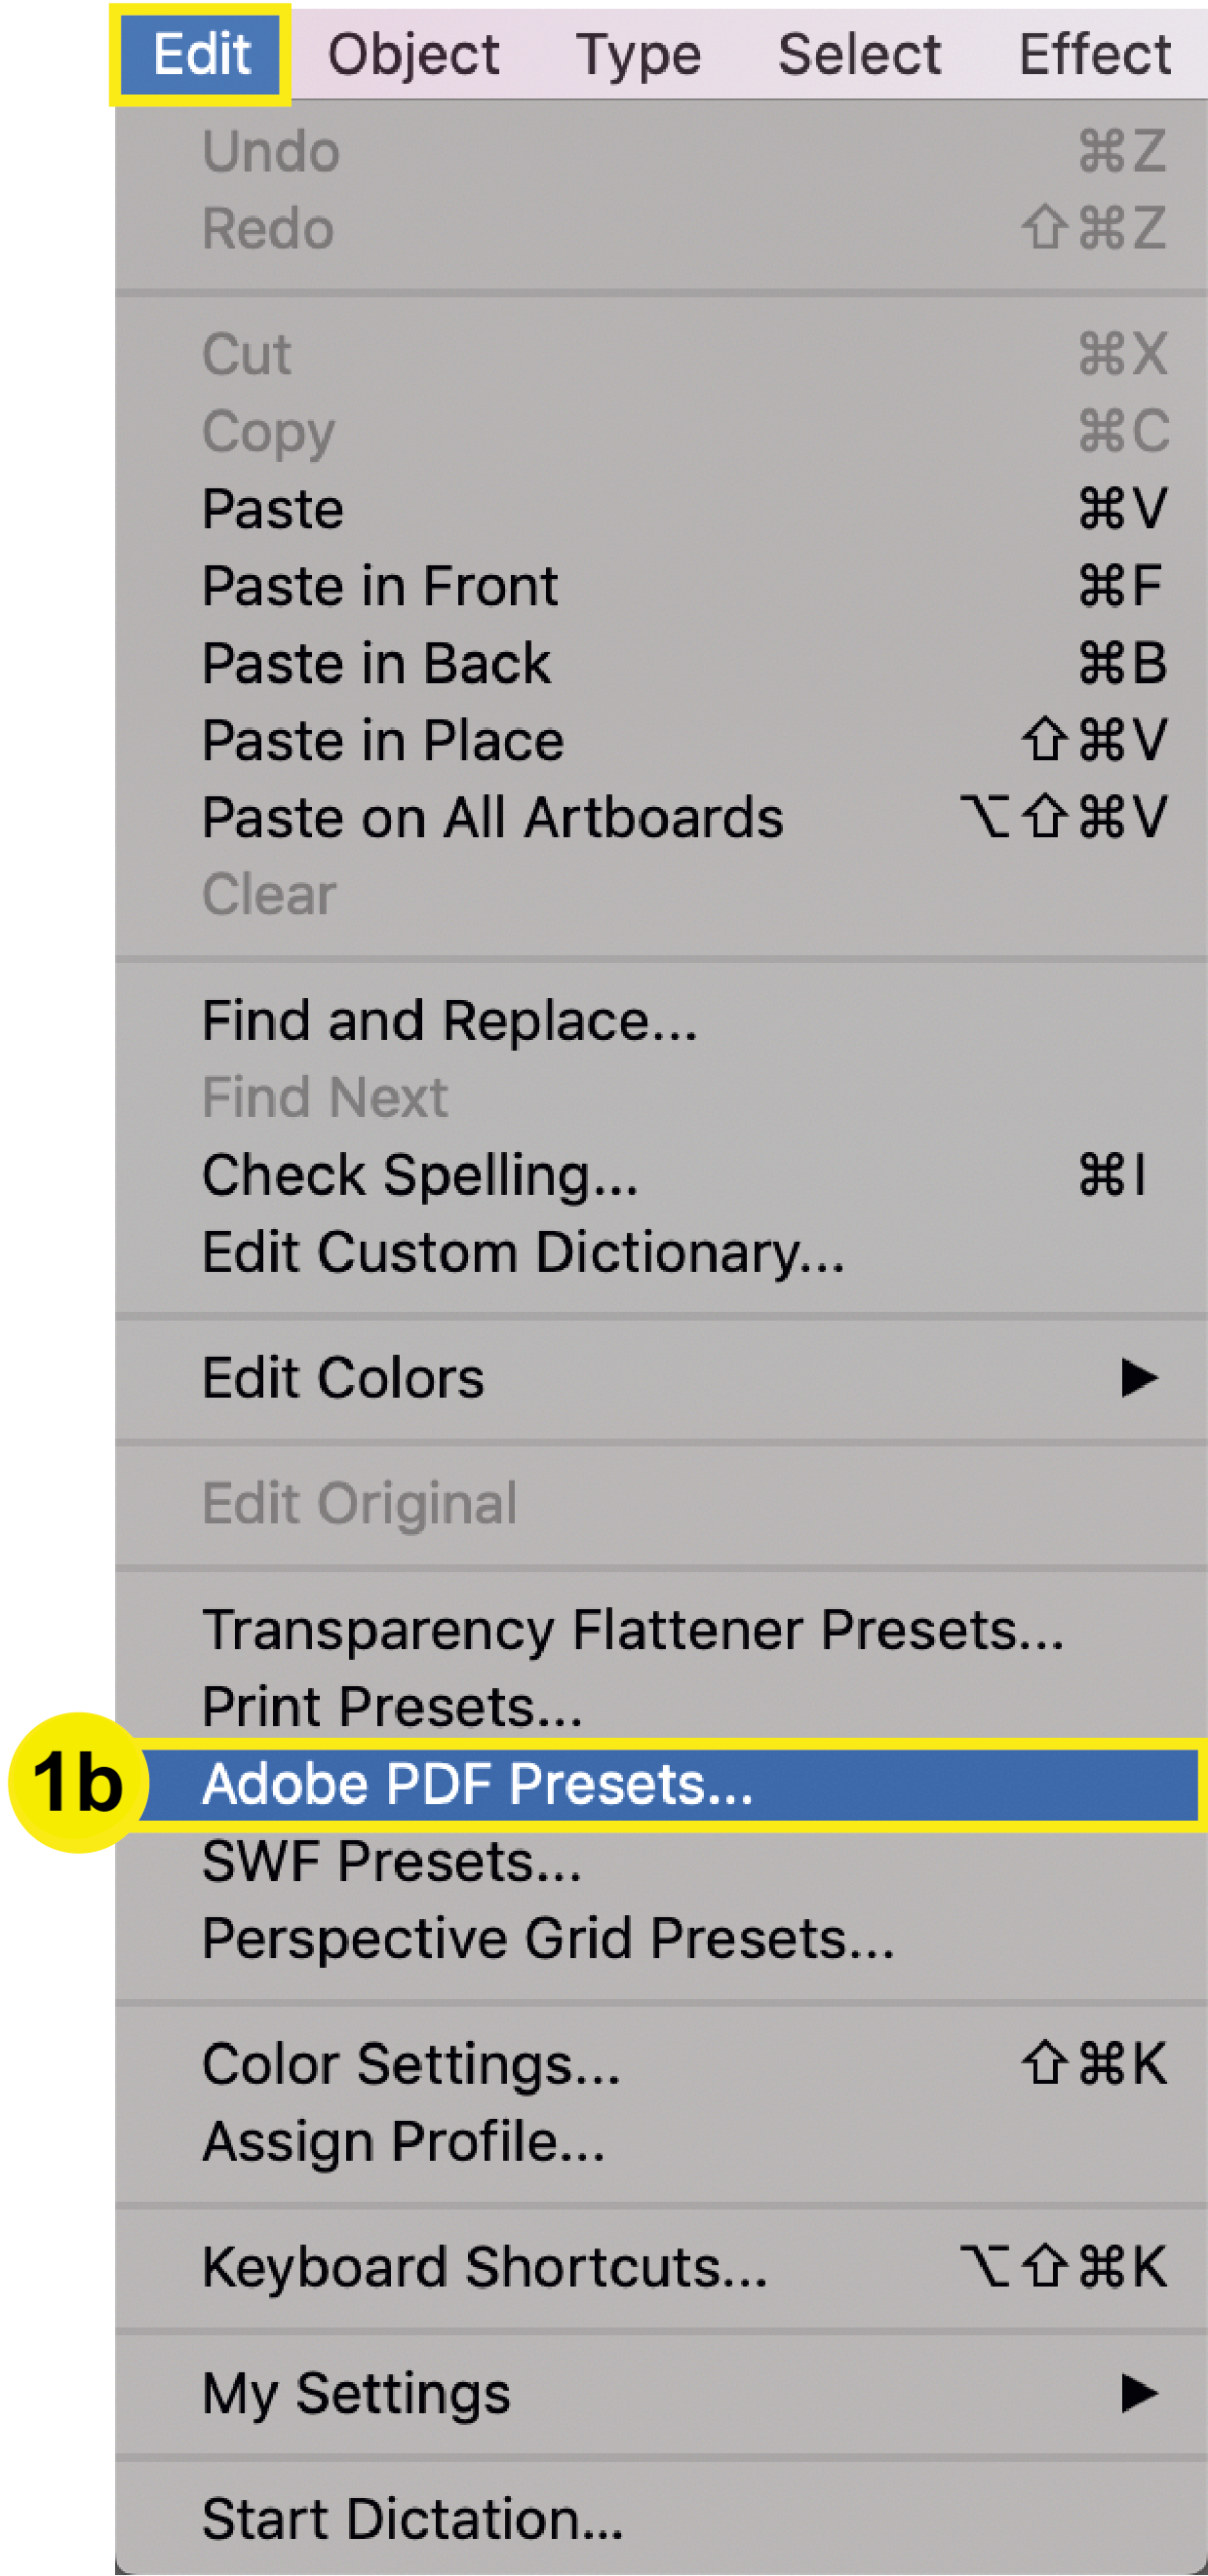
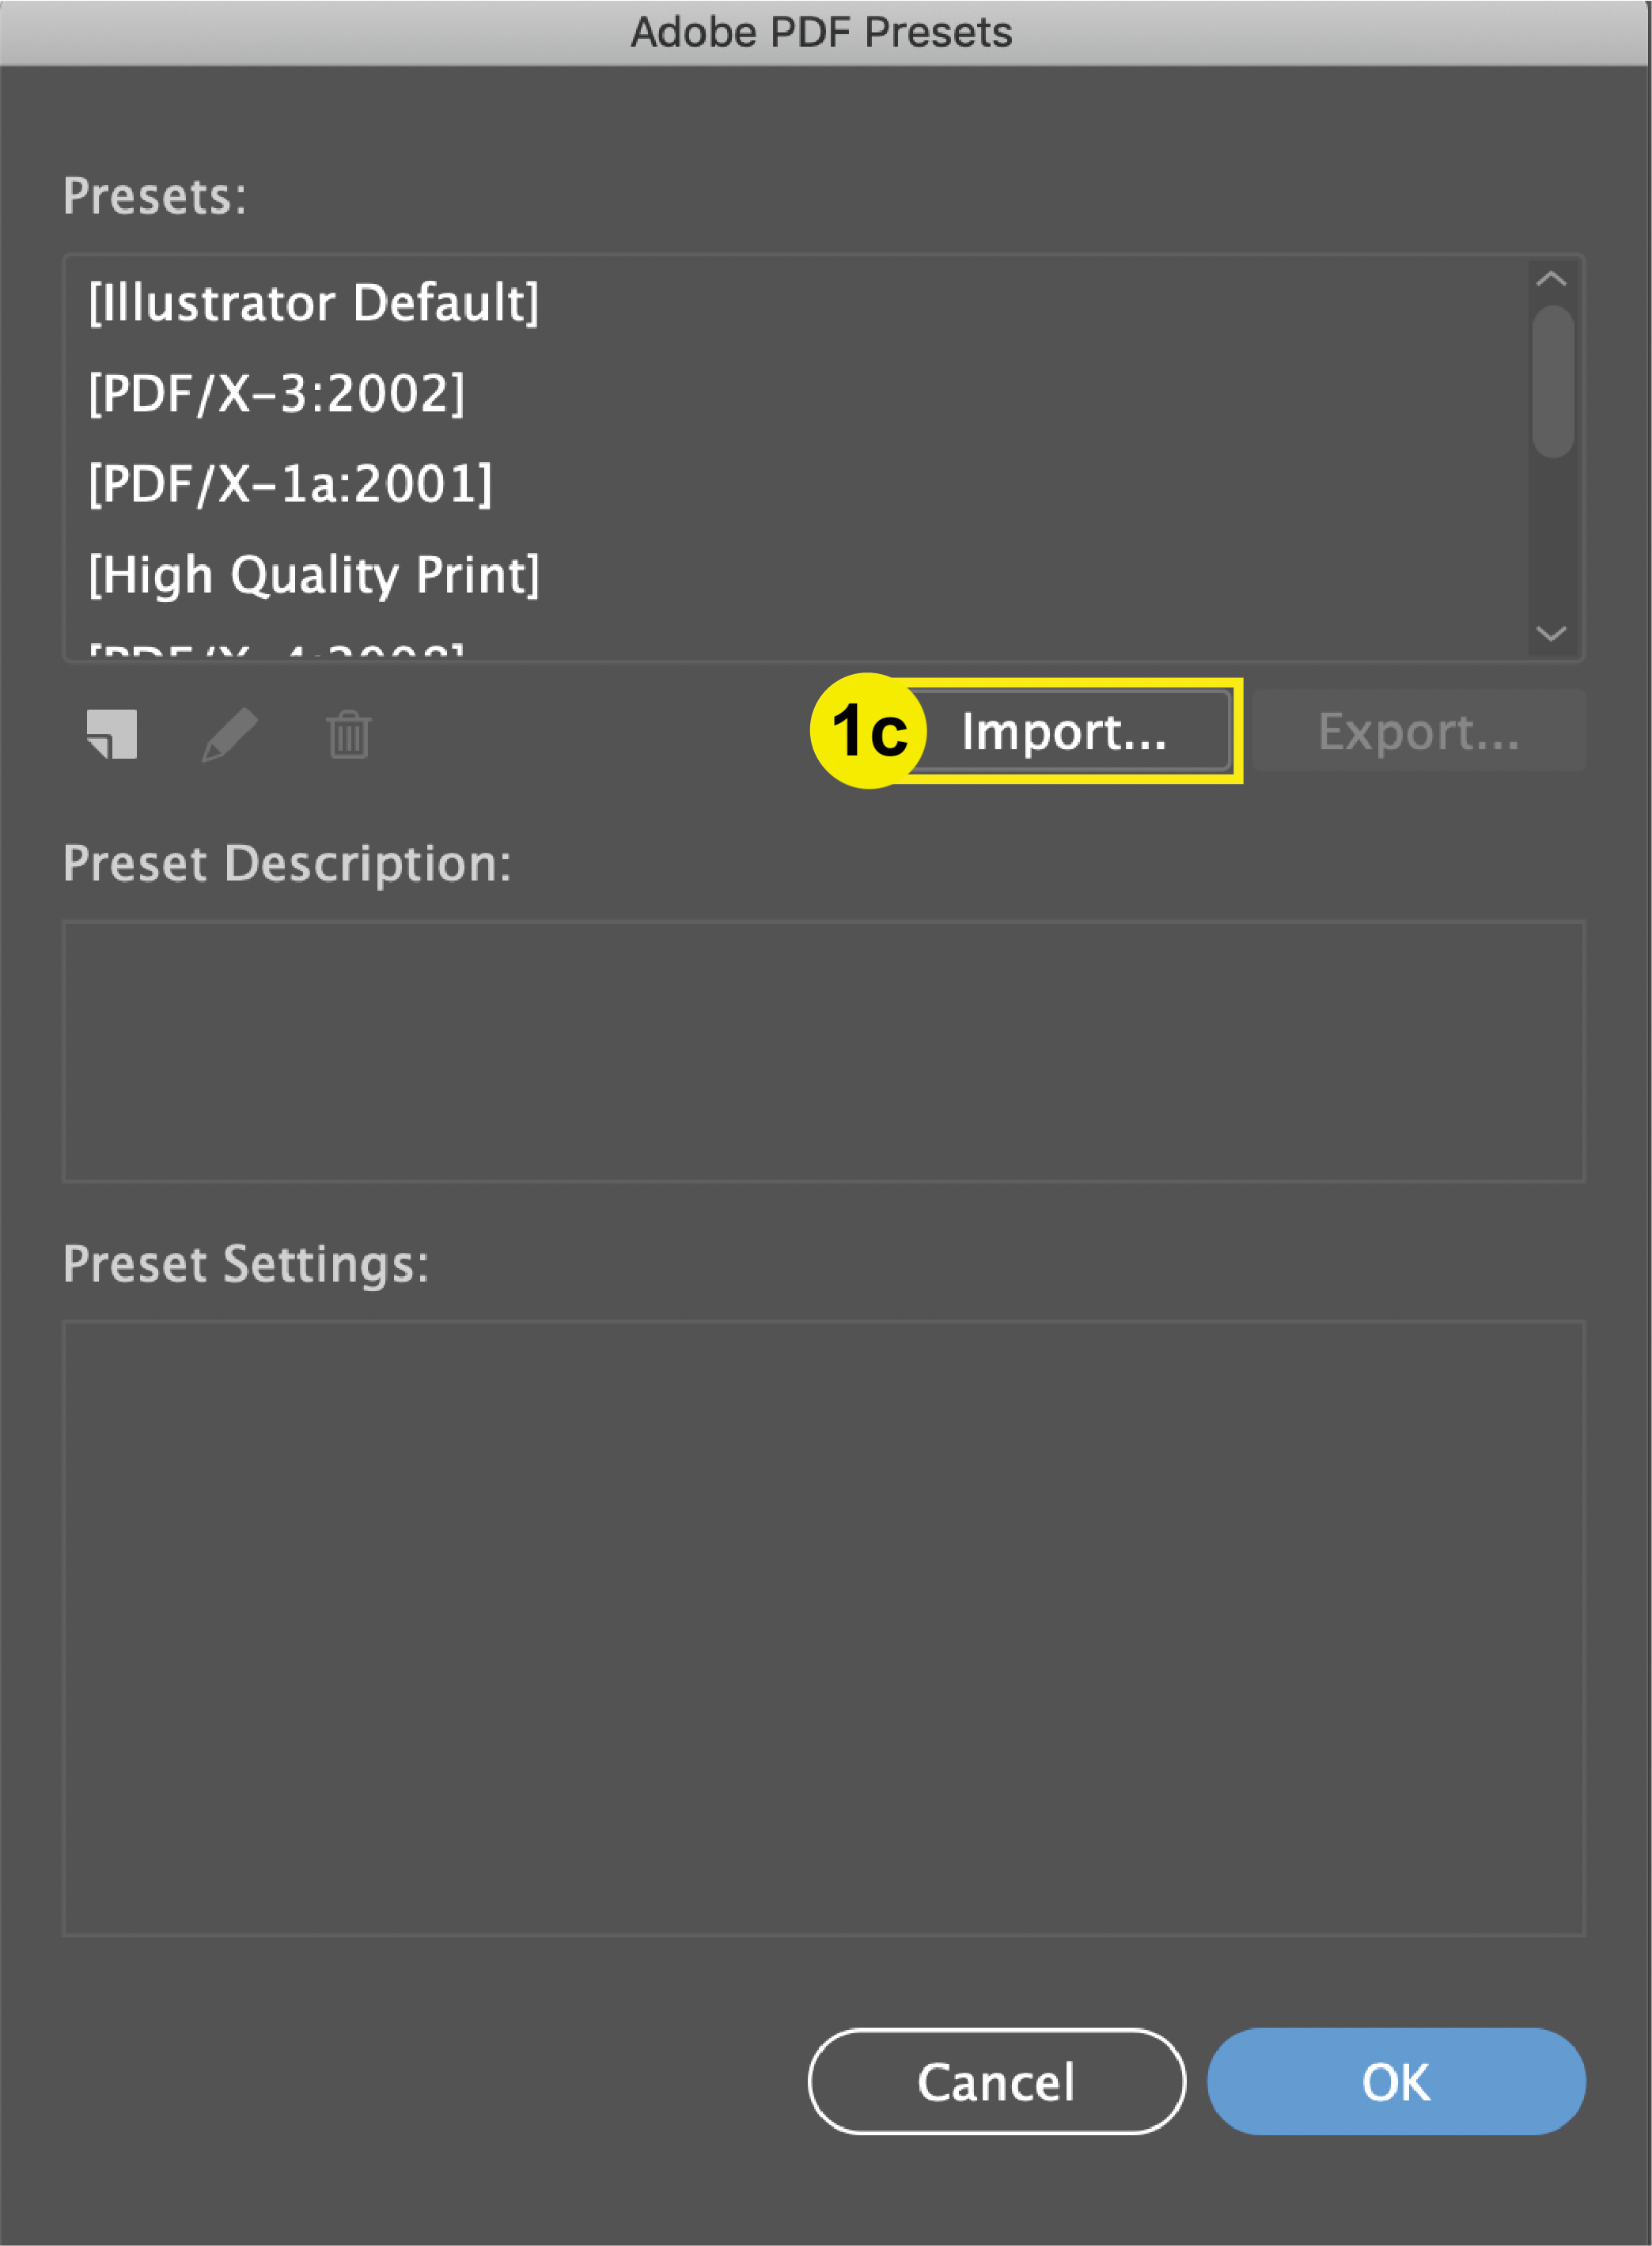
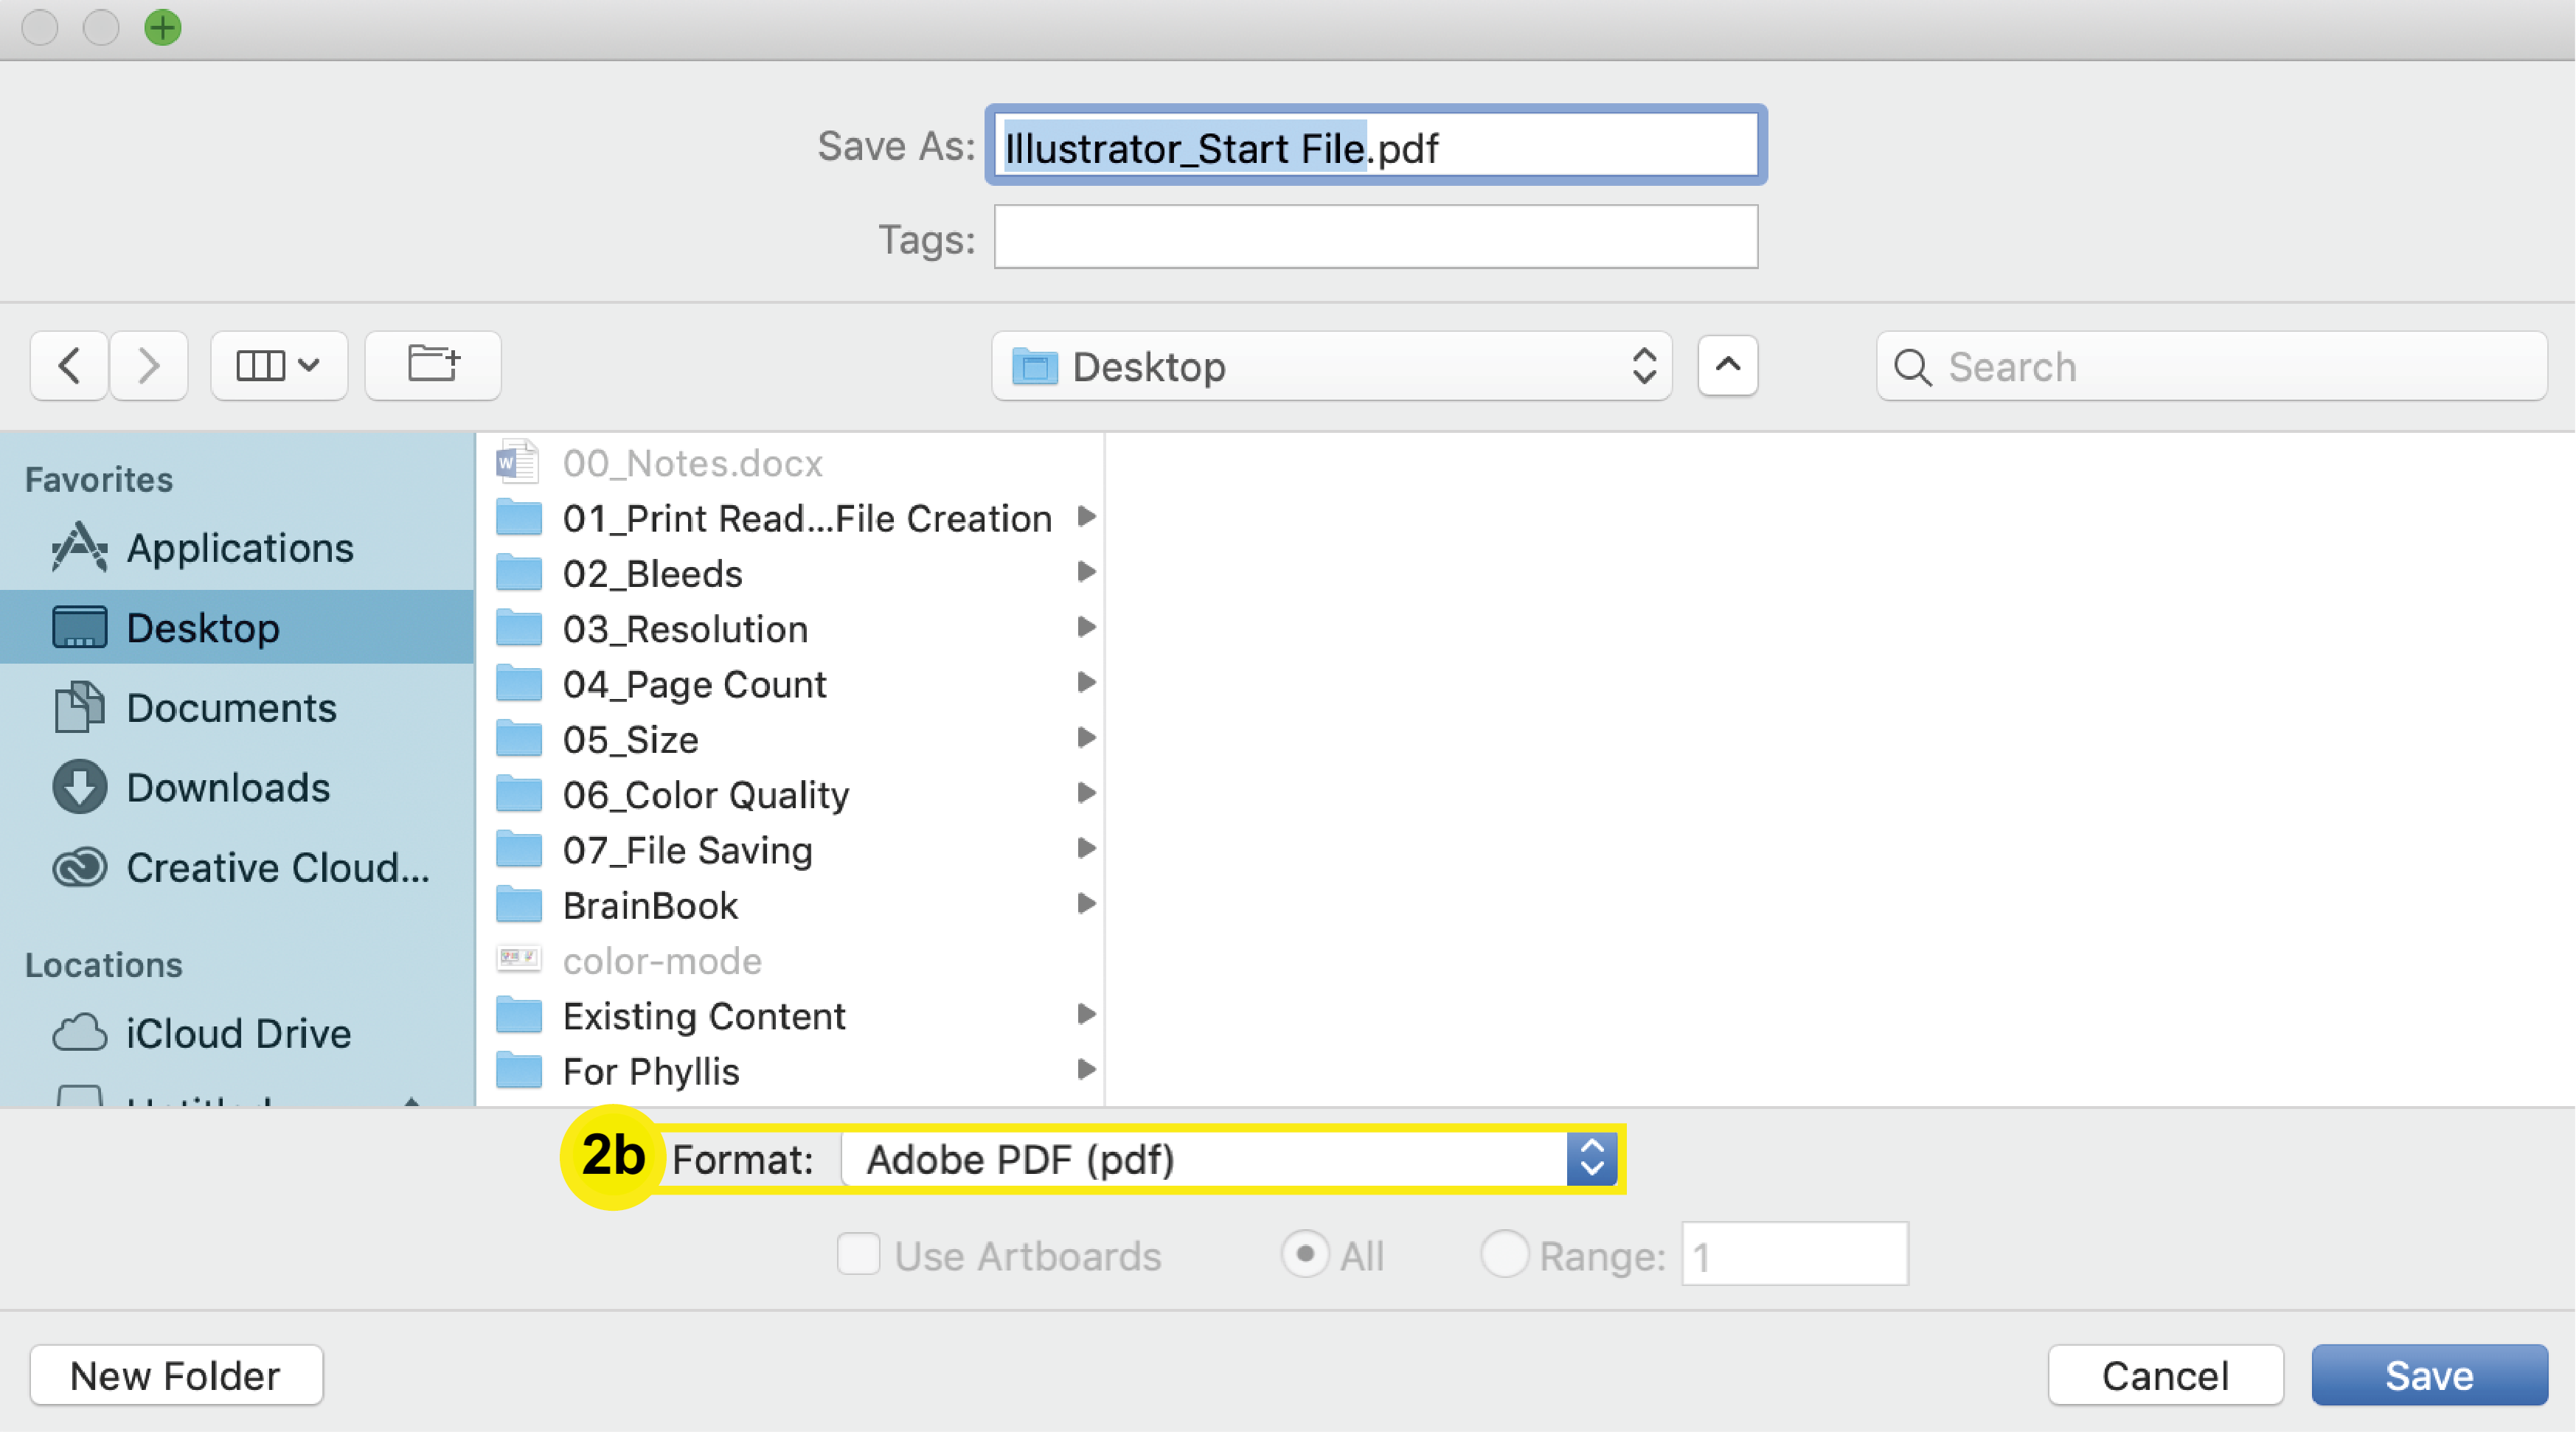
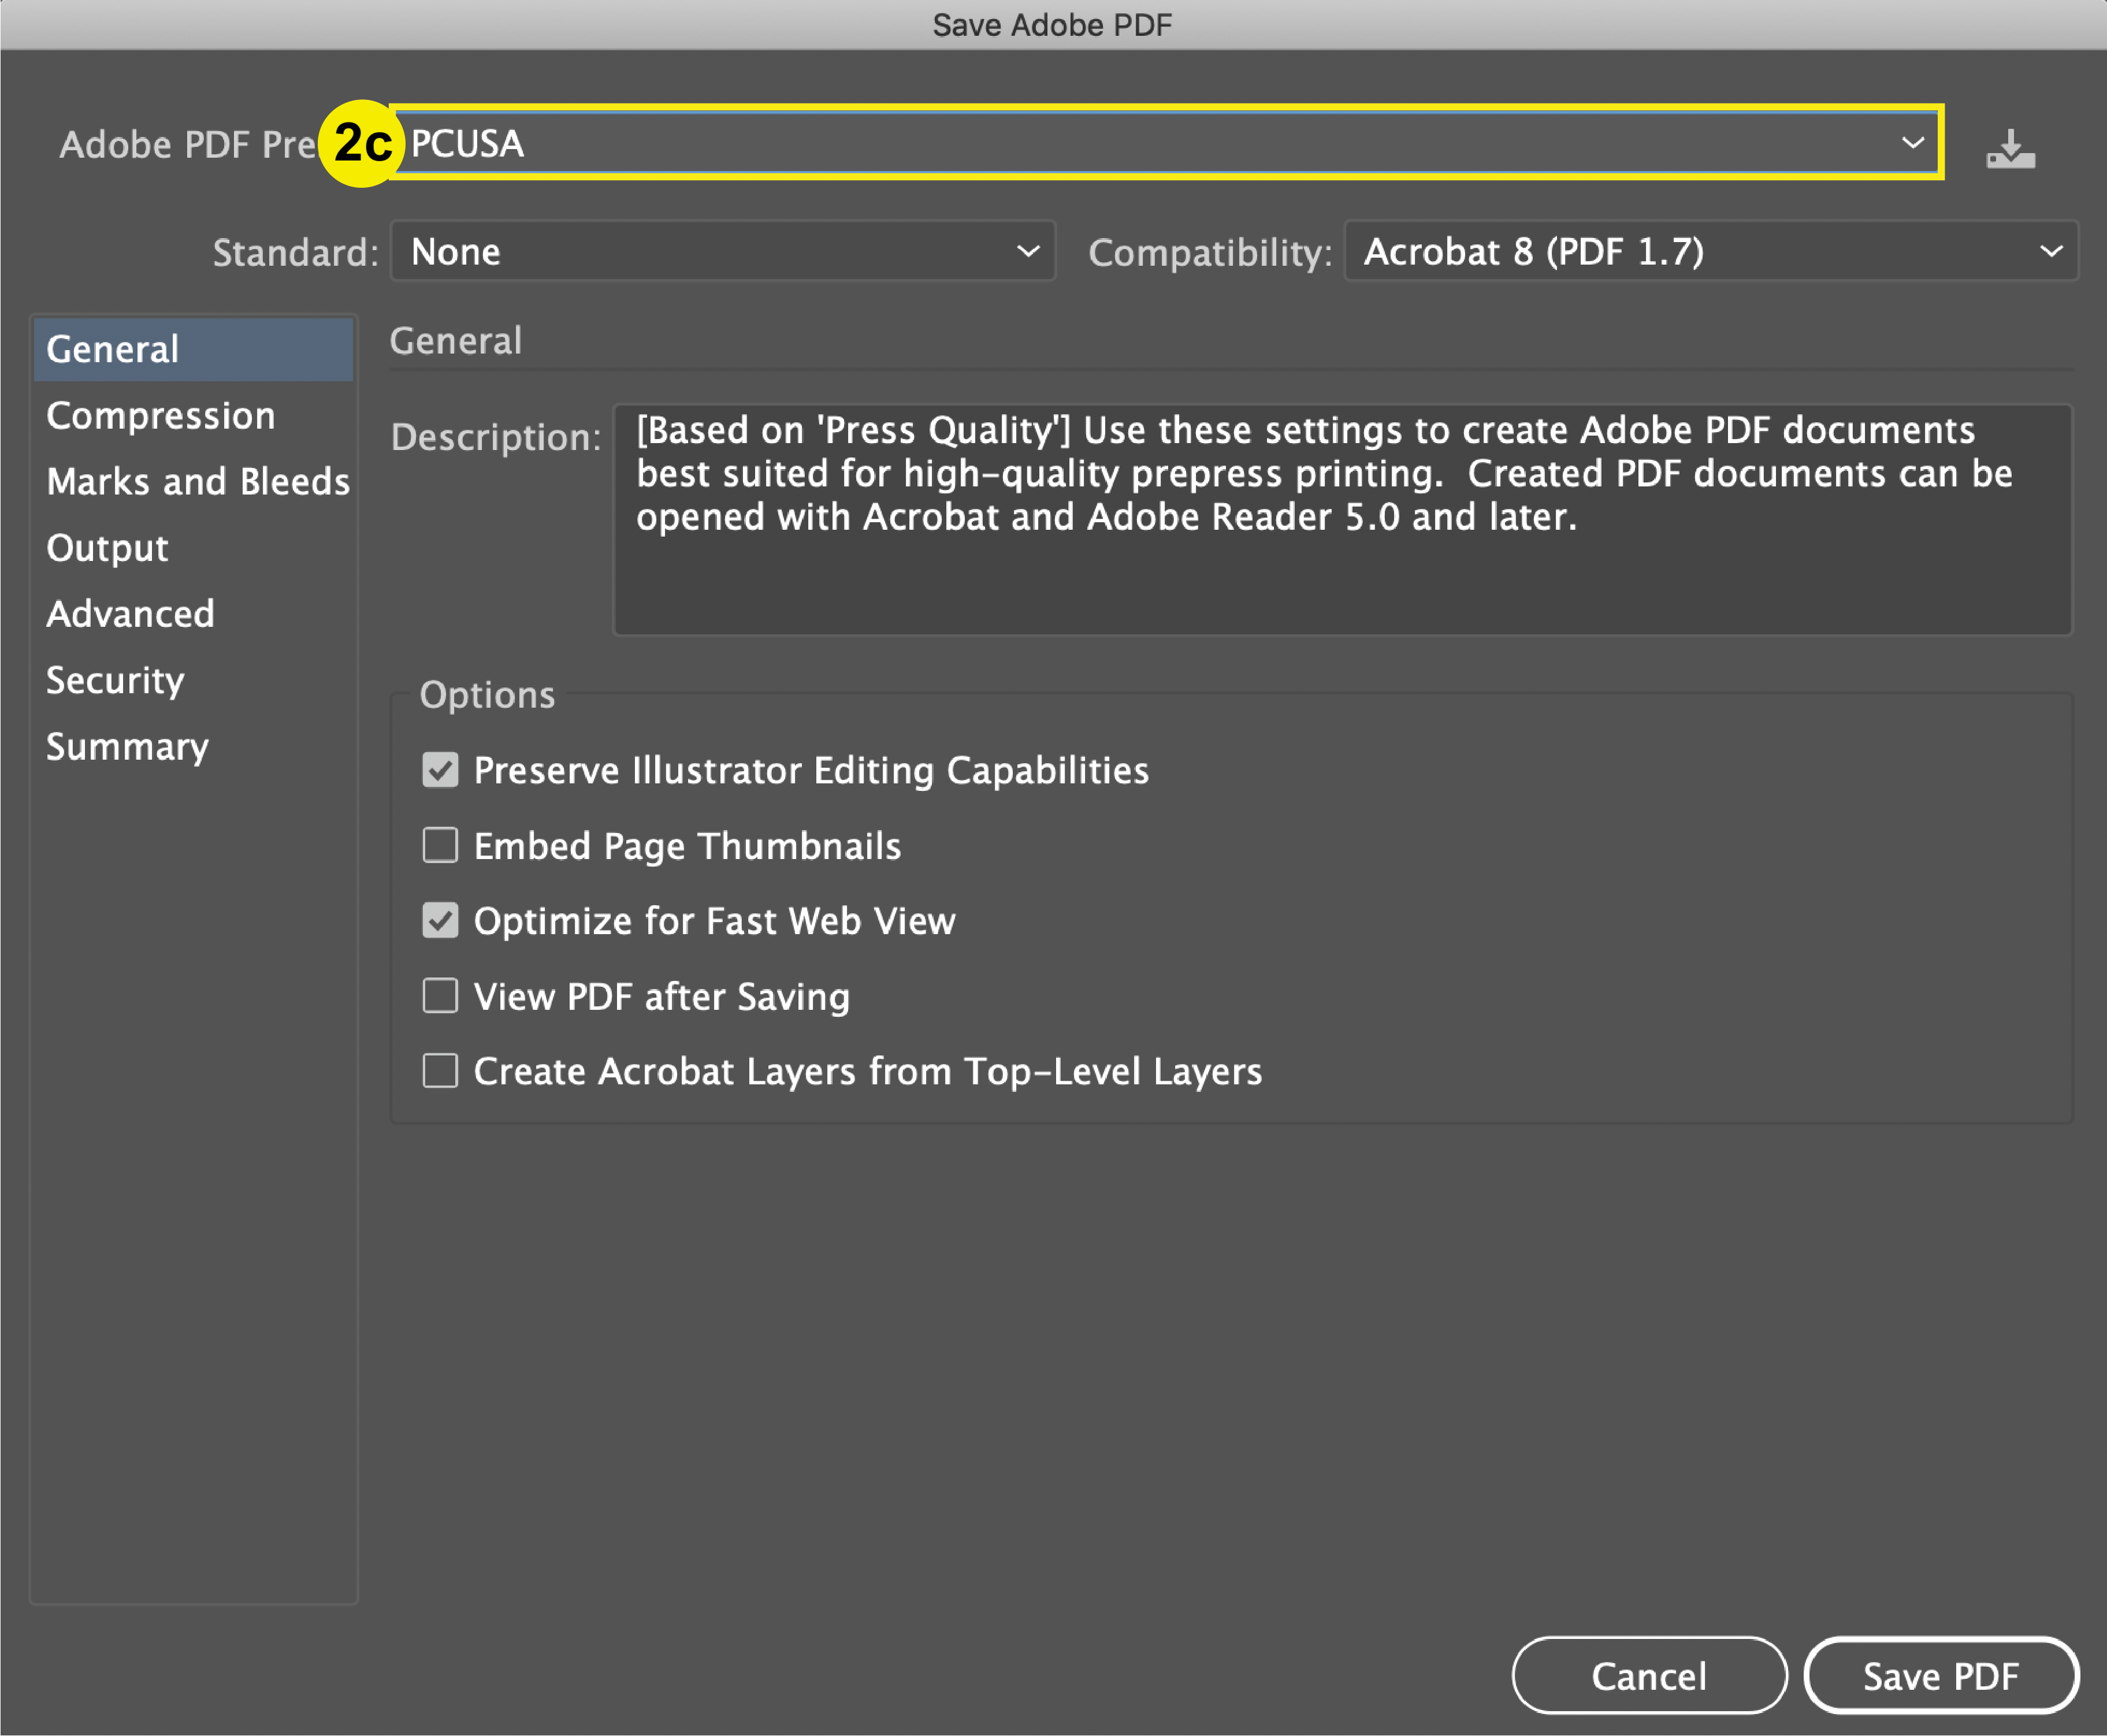
When saving your print-ready PDF file, please save one single PDF file which contains your individual pages, including front and back cover, consecutively ordered. For example:

Page Creep

When saddle stitching, there is a term called “page creep,” which refers to the inner-most pages being pushed out further than the pages closer to the outside of the booklet. This is most noticeable when there is a large number of pages or thicker paper. Generally, booklets under 40 pages total will not require adjustments for creep.

Diagram A below shows how the pages stick out (creep) from the book and Diagram B shows how the pages are trimmed after being stitched. PrintingCenterUSA makes every effort to adjust for creep when necessary.
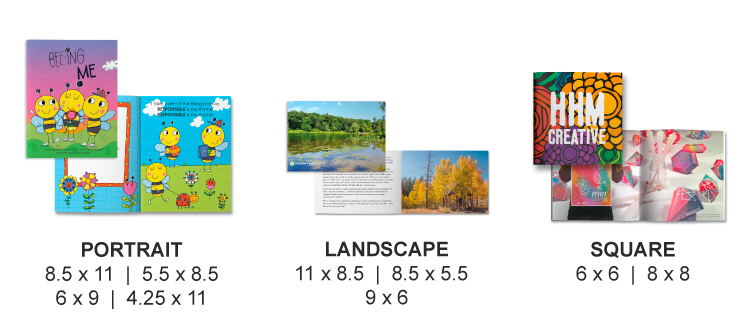
Available Sizes

Binding | Overview

Binding: Overview

When printing your multi-page products such as books, booklets, calendars, programs, coloring books, catalogs, magazines, etc, it is important to select the binding option that best fits your project. Do the pages need to be able to wrap all the way around? Does the booklet need to be able to lay flat? Whatever your requirements may be, PrintingCenterUSA has the perfect binding option for you.

PrintingCenterUSA offers Saddle Stitch, Perfect Bound, Spiral, and Wire-O binding. We also offer specialized options such as three-hole drilling and stapling.

Click the links below to learn more about binding:
Saddle Stitch, Perfect Binding, Spiral, Wire-O, and additional processes.

Templates

Templates: Overview

At PrintingCenterUSA, we try to make it as easy as possible for our customers to provide us with Print-Ready PDFs. We provide free downloadable templates for the majority of our products for the following programs: InDesign, Illustrator, Photoshop, and Acrobat.

We offer Blank and Predesigned templates that include guides for bleed, trim lines, safety margins, fold lines, and mailing. Designing is easy with easy-to-navigate predesigned template options. Each template is also preloaded with PrintingCenterUSA’s Adobe PDF Preset and Color Profile. If you utilize one of our templates, you will be able to easily provide us with a Print-Ready PDF. Doing so will save you time and money!

Predesigned Template Options and Examples

Available Templates

Booklets
Bookmarks
Brochures
Business Cards
Calendars
Catalogs
Coloring Books
Comic Books
Door Hangers
DVD Covers
Envelopes
Flyers
Funeral Programs
Greeting Cards
Letterhead
Lookbooks
Magazines
Manual
Newsletters
Note Cards
Notepads
Photo Books
Postcards
Posters
Presentation Folders
Programs
Rack Brochures
Rack Cards
Rip Cards
Rip Card Hangers
Saddle-Stitched Books
Sell Sheets
Spiral/Wire-O
Yearbooks

Mailing Services

Mailing Services: Overview

If you have ordered Mailing Services, it is crucial to the success of your mailing to have your files in order. PrintingCenterUSA provides extra information and free downloadable mailing templates to help ensure your mailing products get where they need to be. Before submitting your order, check your files with the following checklist:

Checklist:

  1. Do you have enough space for an Indicia?
  2. Is your Indicia in the correct place?
  3. Do you have enough space for the Intelligent-Mail Barcode?
  4. Is your Mailing List organized correctly?
  5. Have you submitted all necessary information (Non-Profit Authorization).
  6. Are your folds oriented in the proper direction?

To learn more about mailing, check out our Mailing FAQ.

File Preparation | Folds, Creases, Die Cutting

Folds, Creases, Die Cutting: Overview

PrintingCenterUSA provides free downloadable templates for our products. To ensure you appropriately plan for folds, creases, and die cutting, it is best that you utilize this resource.

Our folding products are professionally creased, making an even fold that doesn’t crack the ink at the edges.

Greeting Card and Notecard Folds:

Greeting Card Folds

Brochure, Newsletter, Sell Sheet & Flyer Folds:

Brochure Folds

Die Cut Products:

PrintingCenterUSA offers Rip Cards and Rip Door Hangers, which are a perforated die cut. We also offer die cut Presentation Folders and Envelopes. Click your product for free downloadable templates that include the fold lines and die cut lines for reference during design.

Have more questions? Check our Folds, Creases, and Die Cutting FAQ

File Preparation | File Saving | Word

File Saving: Word

Checklist

  1. Save as PDF
  2. Warnings

1. Save as PDF

a. File > Save As
b. Change Format Type to PDF
c. Export

Note: Take note of any warnings that pop up during saving (i.e. Transparency and Color Use). Try to resolve these on your own. If you cannot, then let your CSR or TSR know.

2. Warnings

  • You cannot load PrintingCenterUSA’s PDF Preset into Word.
  • You cannot save your PDF in CMYK in Word
  • You cannot bleed images all the way to the edge in Word.

File Preparation | File Saving | Publisher

File Saving: Publisher

Checklist

  1. Save as PDF
  2. Warnings

1. Save as PDF

a. File > Save As
b. Change Format Type to PDF
c. Optimize for Commercial Press
d. Save PDF

Note: Take note of any warnings that pop up during saving (i.e. Transparency and Color Use). Try to resolve these on your own. If you cannot, then let your CSR or TSR know.

2. Warnings

  • You cannot load PrintingCenterUSA’s PDF Preset into Publisher
  • You cannot save your PDF in CMYK in Publisher

File Preparation | File Saving | Canva

File Saving: Canva

To save your final design for printing, take the following steps. Click on “File”, then “Download”.

In the menu that opens, select the File type as “PDF print”. Ensure “Crop marks and bleed” has a checkmark next to it. Do NOT select “Flatten PDF” or “Include Notes”. By default, “All pages” will be selected for download.

Under “Color Profile”, if you have the free version of Canva, your only option will be “RGB (best for digital use)”. We convert all of our files to CMYK for printing if they are not already saved as CMYK, so this can cause some color shift in your final product. If you own Canva Pro, we recommend selecting “CMYK (best for professional printing)” to have the best color accuracy.

Once the above is completed, click “Download” to receive your pdf. You can now upload this pdf to your account for printing.

File Preparation | File Saving | Photoshop

File Saving: Photoshop

Checklist

  1. Download & Install PrintingCenterUSA’s Adobe PDF Preset
  2. Save PDF

1. Download & Install PrintingCenterUSA’s PDF Preset

a. Click here to download the PrintingCenterUSA preset.
b. In Photoshop, click: Edit > Adobe PDF Presets
c. Click Load, then select the PrintingCenterUSA.joboptions file. Click Open.

Snow
Forest

2. Save PDF

a. In the top menu Click: File > Save As
b. Change Format to “Photoshop PDF.” Click Save.

c. In the Save Adobe PDF window, change the Adobe PDF Preset to PrintingCenterUSA. If you do not see this option, repeat steps 1-2.

File Packaging: Photoshop

PrintingCenterUSA requires a PDF file to be submitted for printing. However, if there are issues with fonts or images loading, our prepress department may ask you to send a packaged file. If that is the case, then follow the steps below to package your files properly.

Checklist

  1. Rasterize Text
  2. Follow Steps 1-3 in File Saving: Photoshop (above)

1. Rasterize Text

In the Layers panel of your Photoshop document, right click all text layers > Rasterize Type.

2. Follow steps 1-3 in File Saving: Photoshop (above)

File Preparation | File Saving | Illustrator

File Saving: Illustrator

Checklist

  1. Download & Install PrintingCenterUSA’s Adobe PDF Settings
  2. Save PDF

1. Download & Install PrintingCenterUSA’s PDF Preset

a. Click here to download the PrintingCenterUSA preset.
b. In Illustrator, click: Edit > Adobe PDF Presets
c. Click Import, then select the PrintingCenterUSA.joboptions file. Click Open.

Snow
Forest

2. Save PDF

a. In the top menu, click: File > Save As
b. In the Format dropdown, select Adobe PDF (pdf). Click Save

c. In the Save Adobe PDF window, change the Adobe PDF Preset dropdown to the PrintingCenterUSA preset you downloaded in step 1. Save.

File Packaging: Illustrator

PrintingCenterUSA requires a PDF file to be submitted for printing. However, if there are issues with fonts or images loading, our prepress department may ask you to send a packaged file. If that is the case, then follow the steps below to package your files properly.

Checklist

  1. Convert Fonts to Outlines
  2. Embed Links
  3. Select Package Options

1. Convert Fonts to Outlines

Use the selection tool to select all of your text by clicking it. Then Click: Type > Create Outlines.

Select your linked image so the “Linked File” bar will show up above the toolbar. Click Embed.

3. Select Package Options

From the top menu, click: File > Package. Check the following options:

a. Copy Links
b. Collect links in separate folder
c. Relink linked files to document
d. Copy fonts used in document

Click “Package” to finish.